
Joomla provides you with a powerful and safe way to override your site's default HTML layouts.
Why does it matter to you? Making changes to Joomla's core files is often necessary.
The wrong way is to directly edit Joomla's files. If you do, you'll lose all your changes when you next update your site.
The right way is to use an override. You can place copies of any layout file into your /templates/ folder. Joomla checks this folder first before loading the original files and if it finds these files present, it uses them instead of the core files. If you're new to using overrides, check out OSTraining which has 13 great tutorials on using template overrides.
Overrides, sub-templates and Joomla extensions
So overrides work for the Joomla core, but what about extensions like K2?
K2 can be used for dozens of different scenarios. This is one reason why it is so popular. Think of K2 as Joomla! articles with additional fields for video and audio files, image galleries, attachments, comments, tagging and much more.
With this kind of power, it is inevitable that you will need more than one layout for your website. For example, let's say your site is using 3 different categories in K2. You have one for regular articles, one for your blog and one for your upcoming sales. What if you want to have different styles for each of these categories?
Creating an override will get you only part way there. It is allowing you to duplicate and edit the original K2 template but this template is applied to ALL K2 pages. This is where sub-templating comes in.
K2 added a way to utilize sub-templates, within the templating capabilities of Joomla!. We know that we need to override K2's default views. To create sub-templates for K2, we can make as many copies of the “default” template as we want and style each a different way.
Here is the process.
Step #1: Copy Files
Copy the contents of the folder /components/com_k2/templates/ and paste it into /templates/your_joomla_template/html/com_k2/.
Looking at the first folder path, it's clear that K2 does not use Joomla!'s file structure logic. K2 stores their files differently but the destination path is the same: the "templates" folder contains the "default" folder, generic.php, generic_search.php, profile.php and register.php.
All you need to do is copy and rename the default folder. In my example below, I created a new template for the sales category. I copied the default folder, renamed it "sales" and voilà, a new template is available.

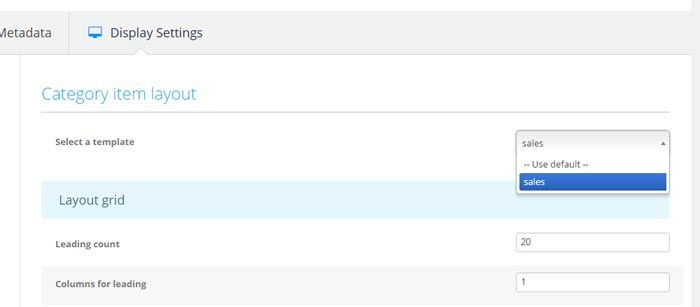
This template can be selected in the K2 admin. Under the category settings (for the category you wish to use a different template), you select “Display Settings” and select your new template from the dropdown.
So now we have a new template and we can add/edit/re-arrange the code however we want. K2 uses a lot of clearing divs in its original code which makes it nearly impossible to restyle things with just CSS alone. Now you can remove those divs, add new ones or arrange the page however you see fit.
Step #2: Create CSS
The next issue to deal with is the CSS. How do we create custom CSS for each layout? This seems like a miss on the part of K2. K2 used to provide a CSS plugin, but no longer does. The template folders do not contain any CSS files so we need to create our own for each template to override the original K2 CSS.
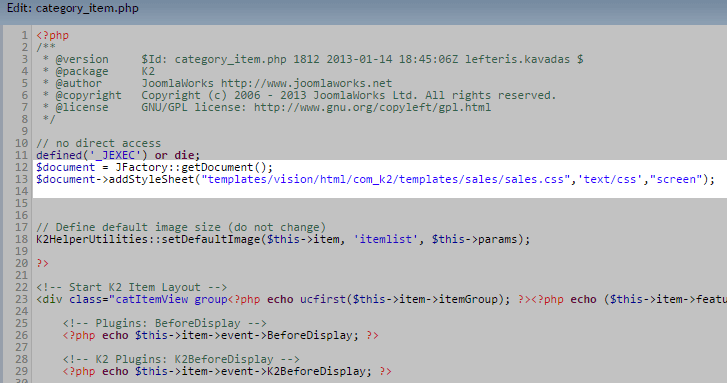
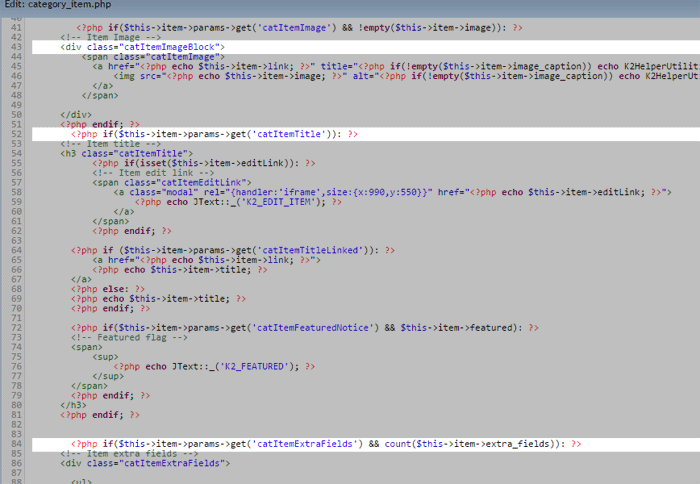
To accomplish this, we need to complete 2 steps. First, we create our CSS file in the template root directory. In this case, I named it the same as the template style, sales.css.
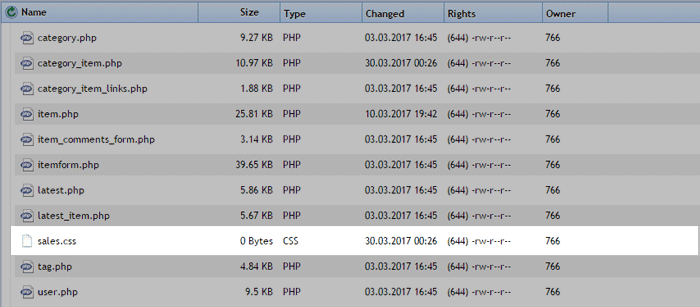
Next, we need to add some code to our PHP files to call our new CSS file. You can add the code directly below the “defined or die” line in each file you need to add the CSS. In our case, we only needed to add it to the category_item.php and item.php pages.
$document = JFactory::getDocument();
$document->addStyleSheet("/templates/your_joomla_template/html/com_k2/templates/your_template_name/your_template_name.css",'text/css',"screen");
Step #3: Edit files to create the desired look
Now that we have all our elements in place, we can set out to create a new look. Here is the before and after of our Sales template compared to the standard K2 template. I will walk you through the process below:
Default K2 Template
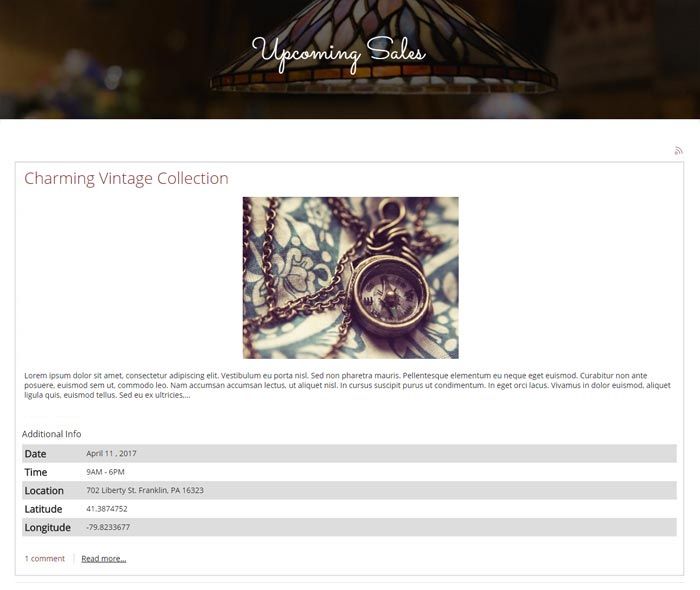
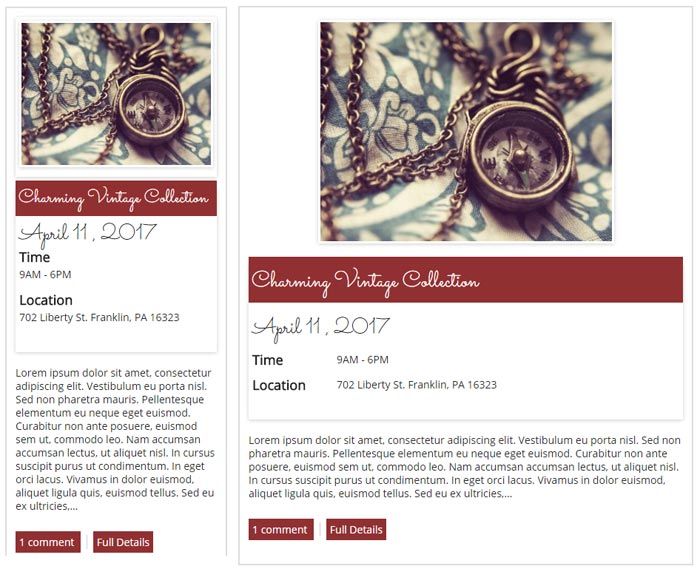
Sales Template

Please Note: The K2 Google Maps plugin which I used in this example, uses a latitude and longitude extra field that we did not want display in the front end. I used some conditional PHP and CSS to hide these in my final output. This code is commented in the category_item.php page in the K2 sales template.
To achieve the above transformation I started by removing clearing divs and grouping the K2 content blocks (title, image, intro text, extra fields, read more) I needed together.
Removing the clearing divs allowed me to float my other divs and achieve my desired look. The CSS for the “clr” class in the K2 CSS clears both sides of the div only allowing for stacked layouts. I also used the K2 extra fields to display the sale date, time and location as well as a Google map of the location.
The map displays only in the item page display (as per the plugin settings), but the plugin uses latitude and longitude extra fields to display the map so we hid these on both the category and item view. We also used some CSS media queries in our sales.css file to adjust the view for tablets and phones. This code re-arranges our content a bit to have a cleaner display on smaller screens.
Mobile and tablet view of our category_item.php page
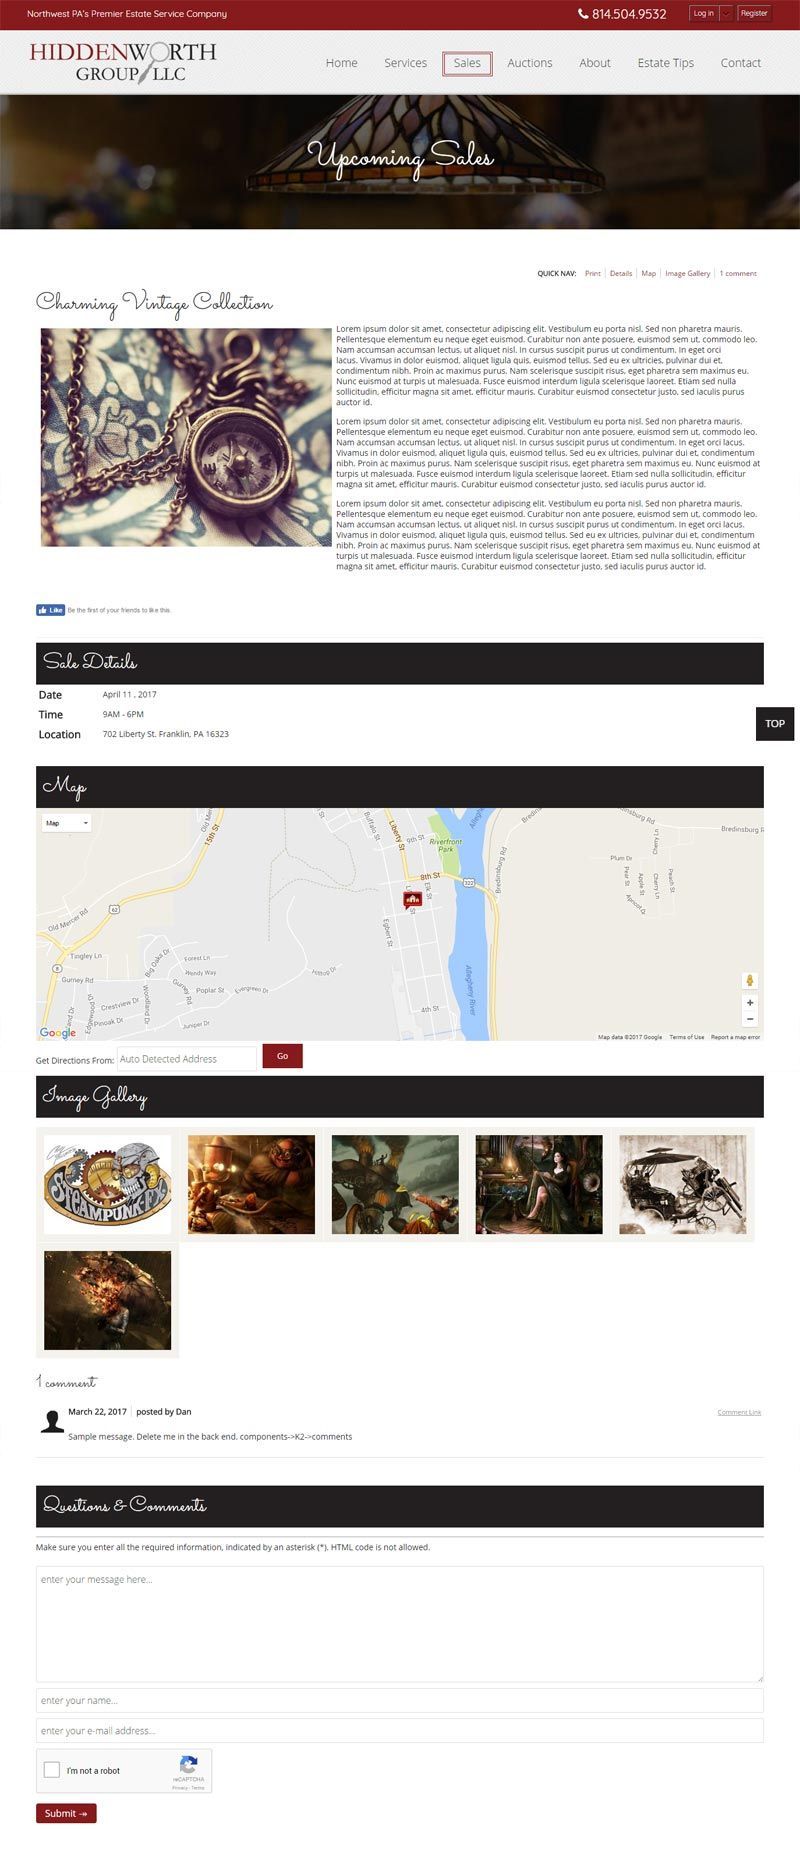
Next, I completed the same process to adjust the item.php page. I added the code to call the CSS file and continued to edit the item.php file to my liking. I have the following blocks on my main K2 page. Toolbar, Item title, Item image, Text block, Socials (we turned off Twitter and Google), Extra Fields (this includes the map), image gallery and comments. I moved the Socials section below the text block and created a “Quick Nav” using the toolbar section.
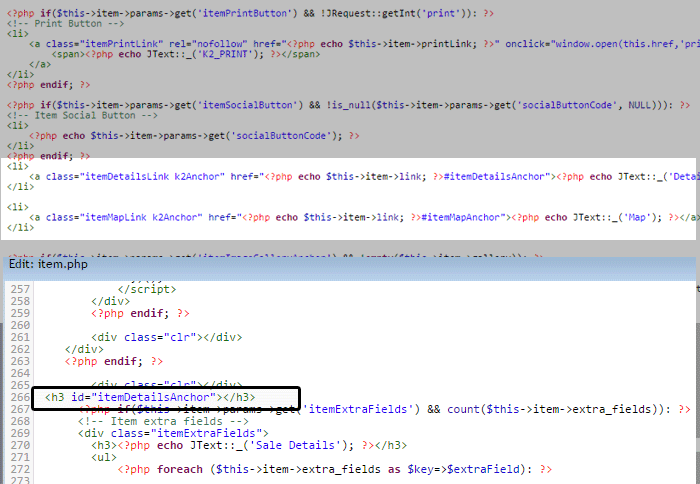
To accomplish this, I added anchors to the Heading 3 of each of the sections that needed it. The image gallery and comments links are already part of the toolbar, so I used these as a model to create my new links. I added the additional code to the Toolbar section to create these links to the Details and Map sections.
Now I can have a smooth scrolling effect to each section of the page. If we combine this with a smooth scrolling “To Top” plugin, such as Skyline Scroll to Top, our users never have to scroll to move around the page. Please note that many templates come with a “to top” parameter so make sure to check this first and only install an additional plugin if needed.
Ready to give it a try?
You can download the exact files used to create the above layout and try it for yourself. Click here to download the files.
To see a live sample, visit this page.
About the author