In this tutorial, you will learn how to use Shack Forms to create a sign-up form for your FreshMail email lists.
Creating a Freshmail sign-up form using Shack Forms gives you a few benefits.
- Your sign-up form will have all of the cool effects and themes offered by Shack Forms!
- You will be able to further direct the form sender to any page on your site.
- You will be able to automatically store submitted data in your Google Sheets document.
- You will be able to track your sign-up form performance and analyze it in Google Analytics.
In this tutorial, you will use Shack Forms to create a Freshmail sign-up form with three fields:
- Name.
- Email.
The form will be displayed in a lightbox. It will be displayed when a Homepage visitor tries to exit the page.
Note: for the purpose of this tutorial, I assume you already have an account with Freshmail. I also assume you created your email lists in Freshmail.
Let's get started.
Step #1. Connect Shack Forms to your FreshMail account
A Shack Form integration with FreshMail starts from connecting your form with your Freshmail account.
You do this by setting your FreshMail's API key and Secret Key in your Shack Form.
- Log to your FreshMail account.
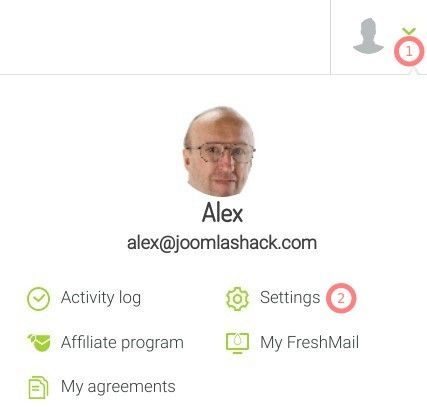
- In the top right corner, click on the little down error and then click "Settings":
- On the next screen, click the burger icon (1), then click "Plugin and API, and then click "Integrations:
![]()
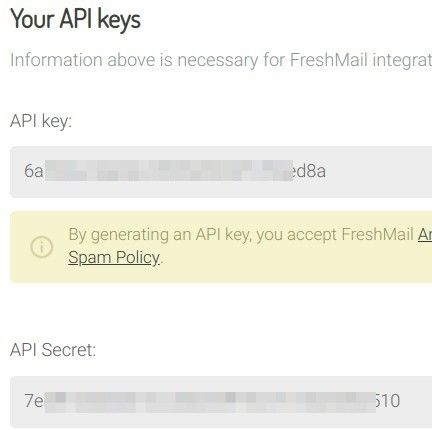
- You will be taken to "Your API keys" screen. Copy the "API key" and the "API Secret":
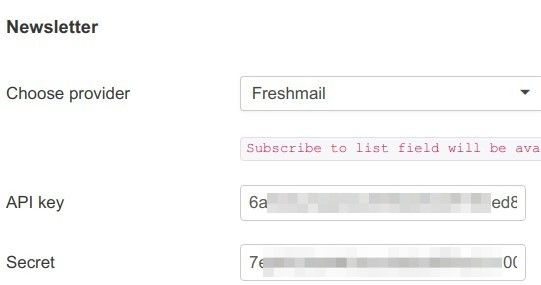
- In your Shack Form, click on the Integrations tab.
- Select Freshmail from the Choose provider field.
- Copy your FreshMail API key and API Secret into their respective fields and click Save:
- Click inside the Subscribe to lists field. You will see a drop-down with the lists you created in your FreshMail account:
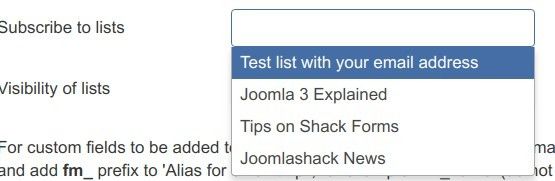
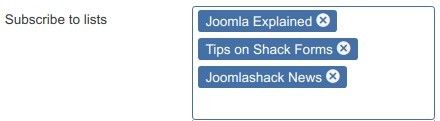
- Click on the list(s) you would like your site visitors to be able to subscribe to. You will see your audiences appearing inside the Subscribe to lists box with a cross icon next to them. You can click on a list cross icon to deselect the list:
- Click Yes for the Double Opt-in parameter:

- Click Visible on front and unchecked for the Visibility of lists setting. This will allow your subscribers to select what list to subscribe to:
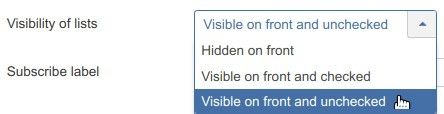
- Enter some text into the Subscribe label box. This text will be displayed on your Shack Forms sign-up form next to each audience/list. For my tutorial, I entered Subscribe to our newsletters:

- Click Save:
Good job! Your Shack Form is now connected to your FreshMail account.
You can now use your FreshMail sign-up form fields in your Shack Form.
Step #2. Configure the display of your sign-up form
In this last step, you will define on what page(s) and how your Shack Form/FreshMail sign-up form will be displayed.
For the purpose of this tutorial, your form will be displayed on the Home page, in a lightbox, and when a visitor attempts to exit the Home page.
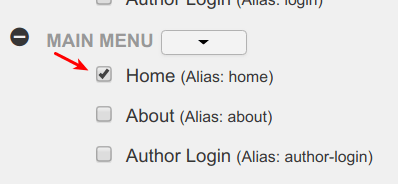
- In your Shack Form, click the Menu Assignment tab.
- Assign the form to the Home menu item:
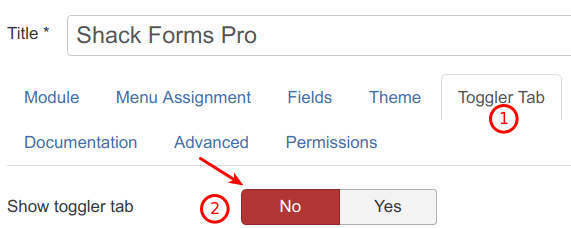
Next, let's simplify the form's lightbox and hide the toggler tab:
- Click on the Toggler Tab.
- Click No for the Show toggler tab parameter.
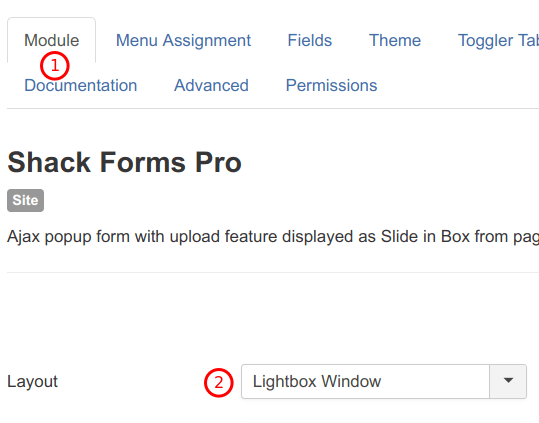
Well done! In conclusion, you will set this form to display as a lightbox. You will set it to be shown to the Home page visitor attempting to exit it.
- Click the Module tab.
- Select the Lightbox Window for the Layout setting:
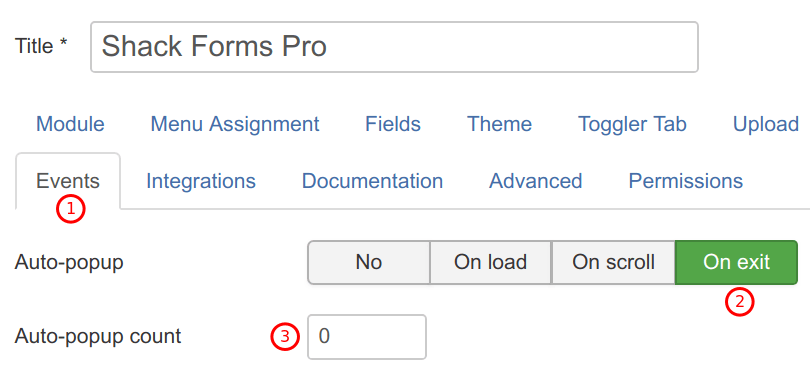
- Click the Events tab.
- Set the Auto-popup parameter to On exit.
- Make sure the Auto-popup count is set to 0 (zero):
- Click Save or Save & Close.
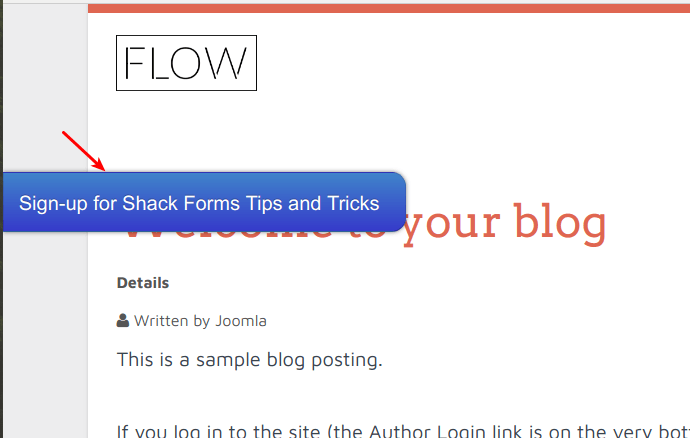
Now go to your site frontend. Refresh the browser and point your mouse cursor away from the browser.
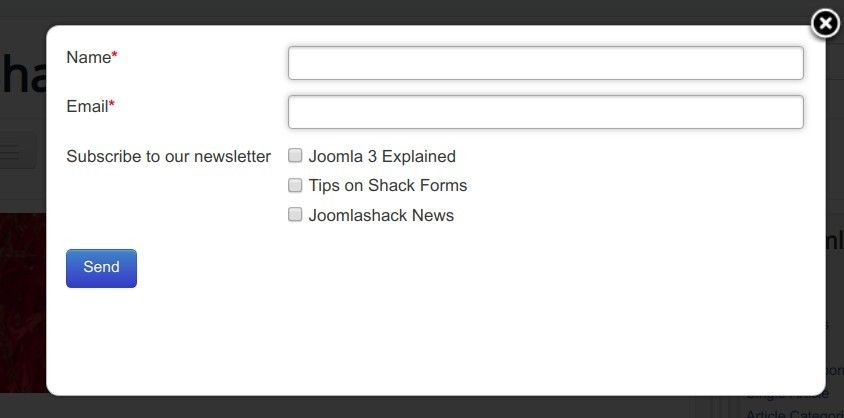
You should see your FreshMail sign-up form displayed in a Shack Form lightbox:
Step #3. Test your FreshMail sign-up form
- Fill in the Name field with a dummy name.
- Enter one of your actual email addresses into the Email Address field.
- Click within the Subscribe to our newsletter checkboxes.
- Send the form.
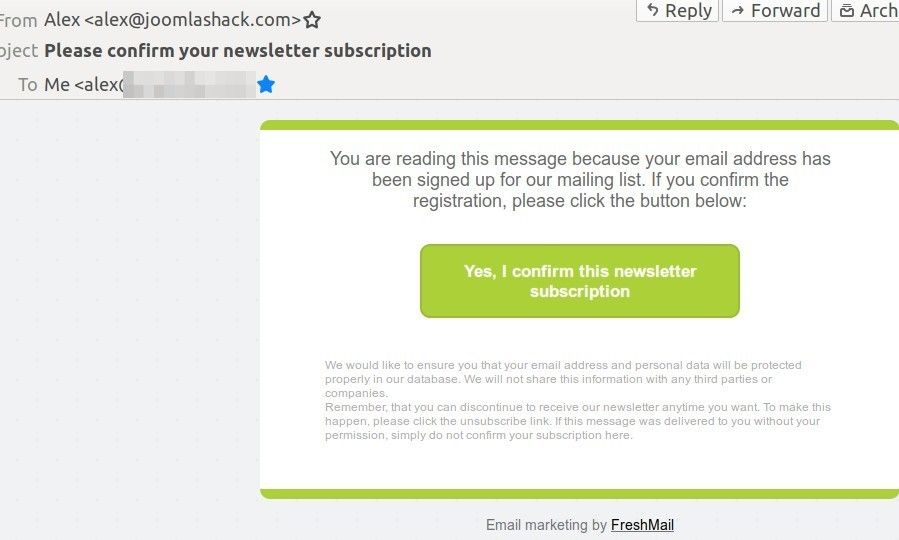
- Check the inbox. In a few seconds, you should see the emails with the "Please confirm your newsletter subscription" subject:

- Open one of the email and click on the "Yes, I confirm this newsletter subscription" green botton:
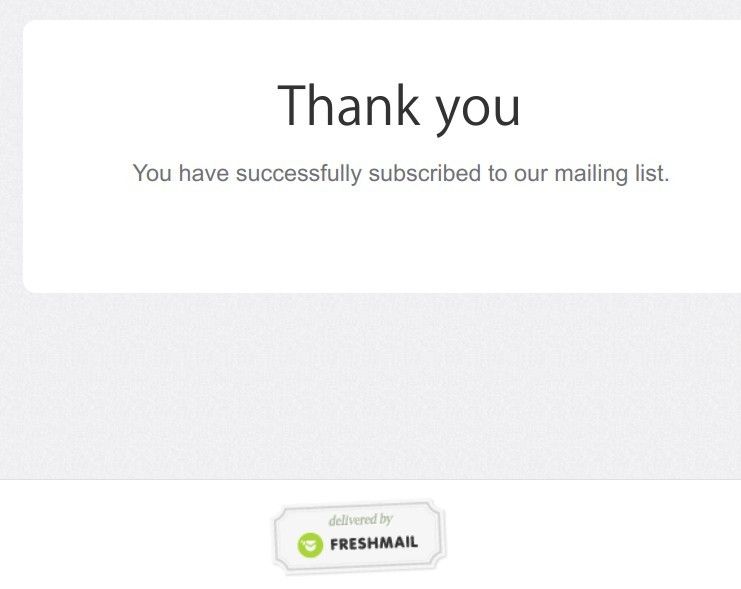
- You will see the "Thank You" webpage:
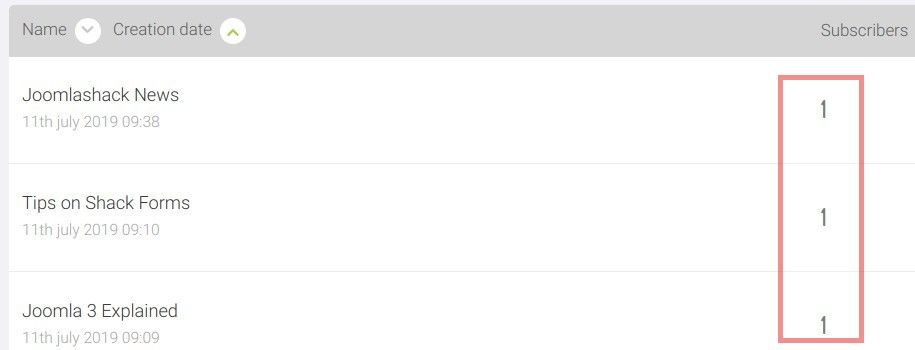
- Now visit your FreshMail email lists. You will see your new test subscribers listed: