 As websites add more information, Mega Menus are increasingly popular with designers.
Mega Menus are dropdown menus that allow for the inclusion of content as well as links.
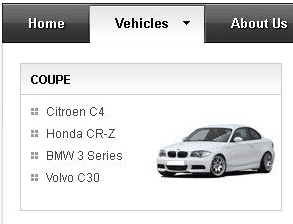
In the example on the right you see not only links to various cars, but also a photo.
What is a Mega Menu?
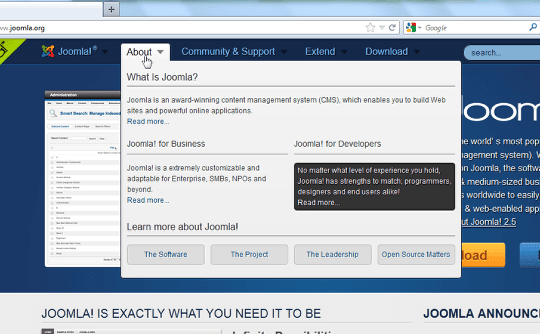
Mega Menus contain images and videos rather than simply links. They are often used on large sites that need to present a lot of information. Here's an example from Cisco:

Some Notes on Mega Menus in Joomla
- A commercial extension called Dropdown Mega Menu.
- A default Joomla install with the sample data installed.
- The RocketTheme Tachyon template (this tutorial will also work with Rockettheme's Fusion menu module).
If you want to experiment with this without purchasing an extension, you can download the Joomlart.com JA-T3 template system, which comes with a blank template that includes a Mega Menu module.
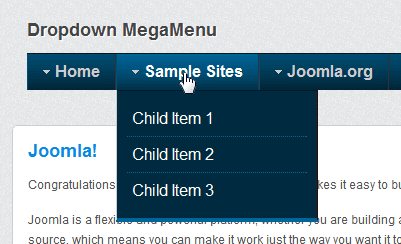
Step 1: Create child menu items
- Go to Menus and find the menu that you're going to use.
- Find the menu item that you want to use as the parent.
- Create three child items underneath that one parent item.
- When you visit the front of your site, your menu should act like this:
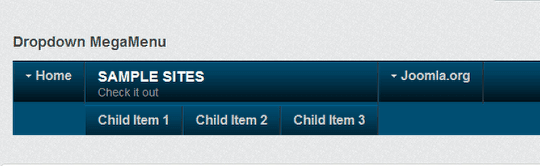
Step 2: Put the items in 3 column instead of just one
- Go to Menus and find the parent menu link that you used in Step 1.
- Expand Parameters (Megamenu Extended).
- Change Columns to 3.
- Optional: Add a description. Whatever is added here will appear as a subtext line on the menu.

- Save and check your work. Mouse over the parent menu item and you should see the children items in three columns.
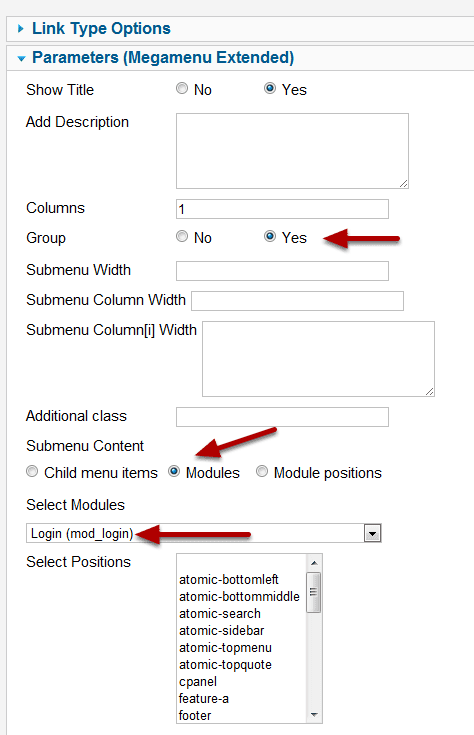
Step 3: Add a standard module to Child Item 1
- Go to Menus > Top > Child Item 1.
- Open the menu item parameters.
- Expand Parameters (Megamenu Extended)
- Check Group - Yes
- Select the Modules radio button
- Choose Login from the Select Modules dropdown.
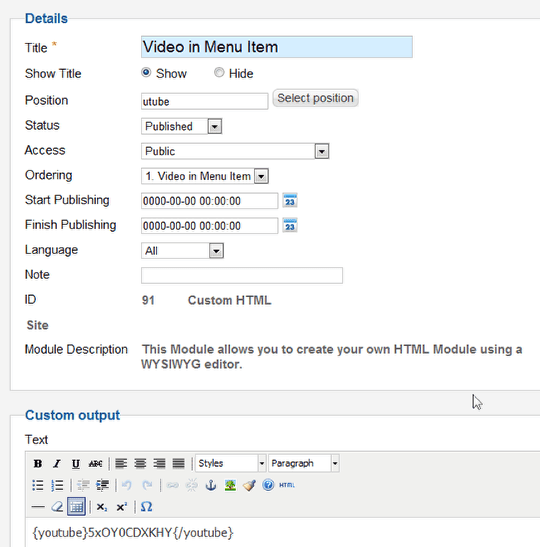
Step 4: Add a Custom HTML module with a video to Child Item 2
Now let's add a custom HTML module to Child Item 2, with a slightly different method.
- Go to Extensions > Module Manager > New
- Create a Custom HTML module. In my example I used AllVideos plugin to insert a YouTube video. (see one of our AllVideos Tutorials if you need help.)
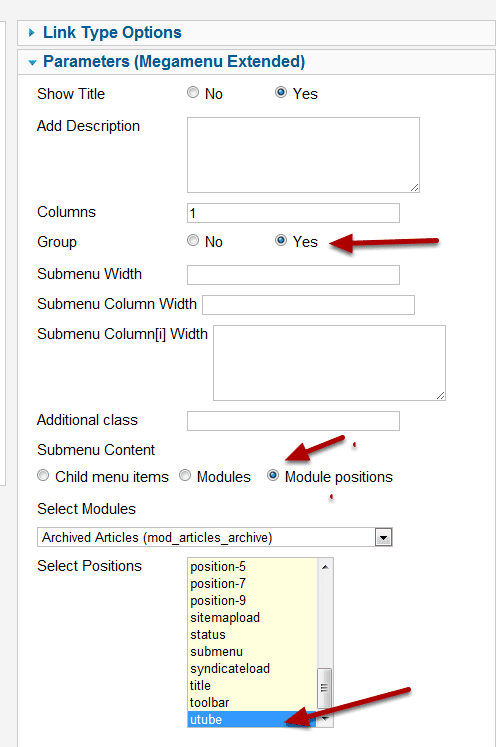
- Create a position for it instead of choosing one from the dropdown. I called mine utube.
- Add the content. In this case you see the code used by the AllVideos plugin. I've set the size for the output in the AllVideos plugin parameters so it would fit a small space.
- Save this and let's go back to the menu item.
- Go to Menus > Top > Sample Sites > Child Item 1.
- Open the menu item parameters.
- Expand Paarmeters (Megamenu Extended).
- Check Group - Yes.
- Select the Module Postions radio button.
- Select the module position from the selection window.
- Save.
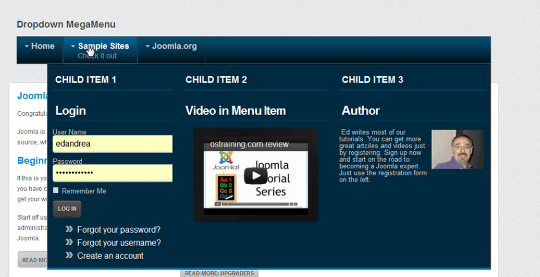
Step 5: Using an existing custom module
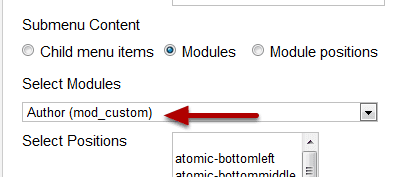
Now let's use the a similar method to add an existing module that's published elsewhere on the site.
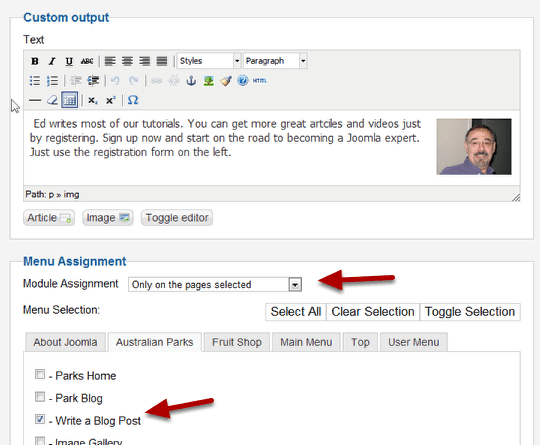
- Create a custom HTML module, or choose any module that is already in a published postition.
- If it's assigned to every page, it will appear on the menu and on every page.
- If it's assigned only to certain pages, I will appear on the menu on every page, but only on the module positions on the assigned pages.
- Follow the exact same procedure as in the first two examples.
- Choose the name of the custom module from the Select Modules dropdown.
- Check your work and here's what you will see. Not exactly right yet. Let's adjust the column widths.
- Return to Menus > Top > Sample Sites (the top level menu item.
- Open it for editing the parameters.

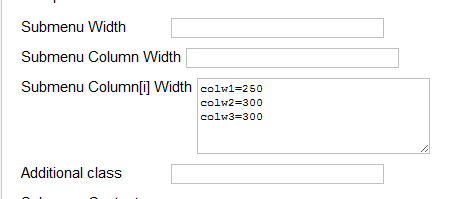
In the Submenu Column[i] Width area, add these lines. These lines will define a custom width for each column.
colw1=250
colw2=300
colw3=300