 In this tutorial, we're going show you how to update from Joomla 2.5 to Joomla 3.
The update process from Joomla 2.5 to 3 does work and in this tutorial, we're going to show you how to use it.
Joomlashack also has Joomla migration tutorials available. Watch those videos, and you should be ready to migrate. If you need help, click here to talk with the Joomlashack migration experts.1) Create a backup
- Make sure you create a full backup of your site. You can use our How to Backup a Joomla 2.5 Site tutorial if you need help with creating a backup.
2) Make sure everything is up-to-date
- Go to Exetensions > Extension Manager
- Make sure that all your extensions are up-to-date
- Make sure you're running the latest version of Joomla 2.5. At the time of this writing, it's Joomla 2.5.8.
3) Check your system for Joomla 3 compatibility

At the time of this writing, Joomla does not have a pre-upgrade check yet, however it's an upcoming feature that will be added soon. Until then, you must check things manually.
- Go to Site, then System Information.
- Check all your settings from within this tab and compare them to the required/recommended settings at https://www.joomla.org/technical-requirements.html
- If your site meets all the requirements, you are ready to update.

4) Check your extensions for Joomla 3 compatibility
There will also be a custom extension check in the new pre-upgrade check; However, until then, you need to check with your extension developers' sites, documentation, and/or support as to whether the extensions are Joomla 3 compatible. This step includes your template(s) as well.
5) Create a test site
Once you're sure that all your extensions are compatible, create another backup and a test site on the same server in a subfolder (be sure to create a copy of the database and not use the same one). You can use our Create a Joomla Test Site Using Akeeba Backup tutorial for that part.
6) Test the upgrade in the test site
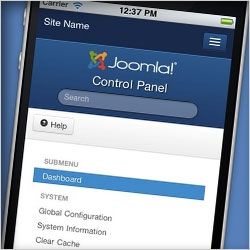
- Go to Components, then Joomla! Update
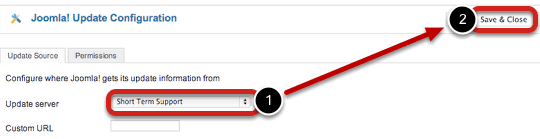
- Click the Options button

- Change the Update Server to Short Term Support
- Click Save & Close
- Finally, on the test site, click the "Install the update". If all goes well, then you can do the same steps on the live site.
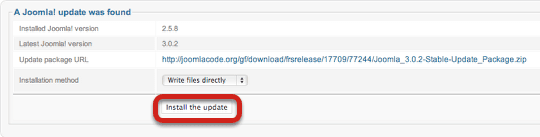
- Note: if the "Install the update" doesn't appear right away, you may need to go to Extensions (top menu) >> Extension Manager (sub menu) >> Update (tab) >> Purge Cache (button - far right).
- Note: after upgrading, check in Extensions (top menu) >> Extension Manager (sub menu) >> Database (side menu) and make sure there are no errors. If there are some, click on fix button.
Enjoy your new Joomla 3 site!