About a year ago we wrote a tutorial which showed how to build multi-lingual sites in Joomla.
This tutorial proved to be one of the most popular we've ever written. However, Joomla has made some updates since last year, and so this is our update to that tutorial. We also now have a complete training class on multi-lingual sites for our members.
This tutorial covers how to build a multi-lingual site with only the Joomla core. This doesn't replace other multi-lingual content extensions such as Falang or Joomfish.
What you can do is activate the language switcher module and let visitors switch the joomla core labels and headings to their preferred language. You will need to download and install specific language packs for each language you want to use. You can find the language packs in the JED.

Step 1: Activate the plugin
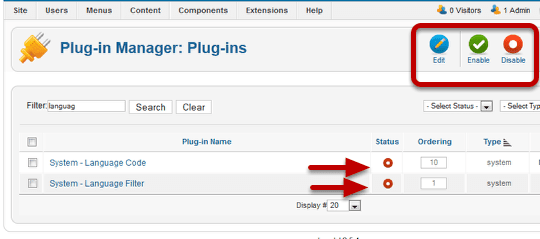
- Go to Extensions > Plugin Manager.
- Use the Filter to search for language plugins.
- Activate the plugins by clicking the red circles. Alternately you can put a check in the boxes and click the green Enable icon on the toolbar.
- When the plugins are enabled, the red circles will change to green with a check mark.
- Click the name System - Language Filter in the Plugin Name column to open the options page.
Step 2: Set the basic plugin options
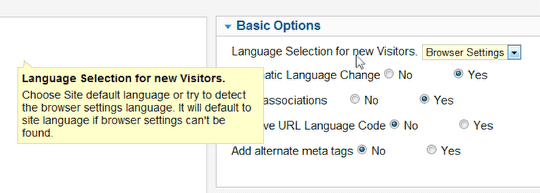
- You can set the language selection for viewers to always show the default language, or you can have Joomla try to detect the country from the browser settings and open with the correct language.
Step 3: Add the content language
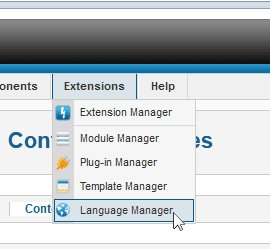
- Go to Extensions > Language Manager on the admin menu.
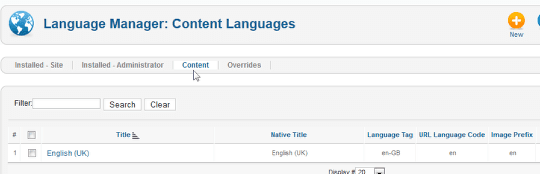
- Click the Content tab.
- Click the English (UK) Title to see an example of the default set up.
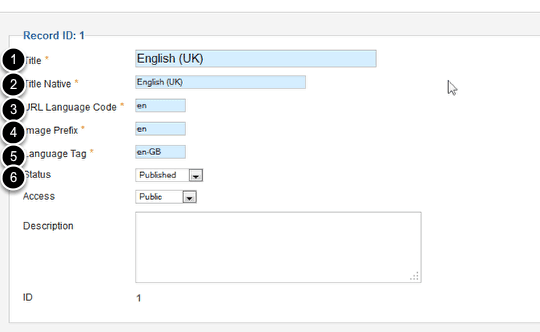
- Title = The name of the language as it will appear in the dropdown lists when assigning the language to an item. This Title will also be used by the langswitcher module in front-end when flags are not used.
- Title Native = A title in any language desired by the admin to be displayed in the Content Language list.
- URL Language Code = This Language Code will be appended to the site url. When SEF is enabled, one will get https://mysite.com/en/. If SEF is disabled the suffix &lang=en will be appended at the end of the URL. Note the Language Code must be unique among all the languages.
- Image Prefix = Prefix of the image file for this language when using the "Use image flags" Language Switcher basic option. Example: if 'en' is chosen, then the image shall be en.gif. Images and CSS for this module are in media/mod_languages/ Users can add any image/flag there with any prefix. Example: pt_br for the Brazilian flag.
- Language Tag = Enter here the language tag example: en-GB for English (UK). This should be the exact prefix used for the language installed or to be installed.
- Status = Whether this content language is published or not. If published, it will display as a choice in the Language Switcher module in frontend.
- Metadata (Pictured below) These metadata definitions will override Global Configuration Metadata in Multilanguage configuration for each language used.
- Site Name (Pictured below) = The translated name of the site if you choose to use one.
Notes: Flag Images and CSS for this module are in media/mod_languages/.Users can add any image/flag there with any prefix. Example: pt for the Brazilian Portuguese flag, for example, and pg for the Portuguese flag.
At this point, you don't need the language pack installed. We'll cover that below. But, you can prepare contents in a specific Content Language without even installing the language concerned. You can complete this process and install the language packs when you need to.
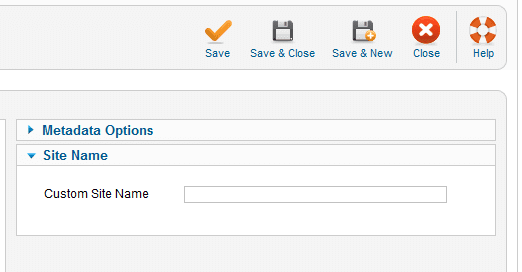
- You can leave this blank for the base language. It will get the Site Name from the Global Configuration.
Here's an example using French:
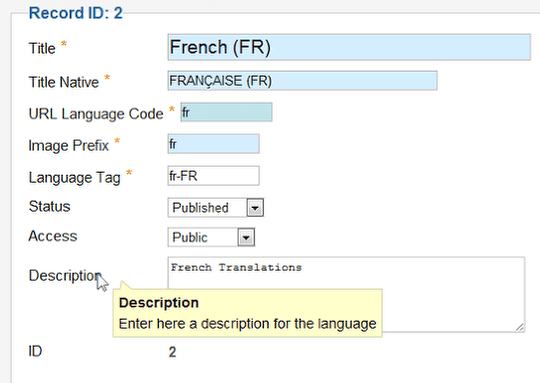
- Here is a picture of what I have filled out for the French version.
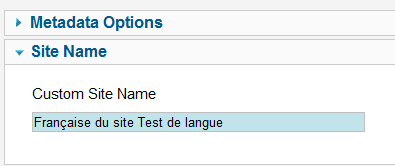
- The alternate site name for this language.
- After completing the form. Save and close.
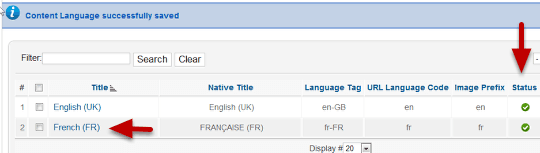
- Your content tab will now show the added language in the list. Be sure the Status has a green check.
Step 4: Install the language pack
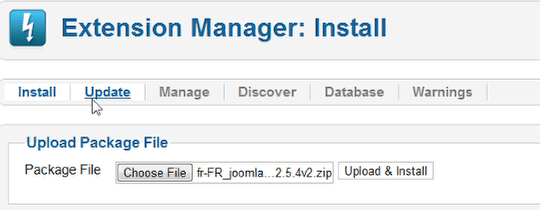
- You can get language packs for the specific language you want from the Joomla Extension directory. https://extensions.joomla.org/search?q=language+packs
- You install it using the extension Manager as you would any other Joomla Extension. You can install the pack before you start or at any phase of the process. But you won't be able to see the results in the Language Manager module until it is installed.
- Don't get confused. A language pack is different than a foreign language distribution. A language pack only supplies translations for Joomla's main labels. So buttons names, commands and messages will be translated.
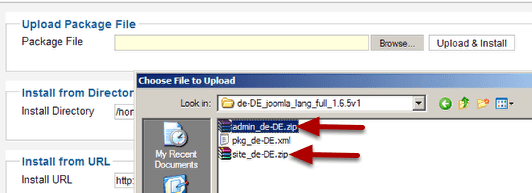
You may be asked to unzip first before installation. and it's possible you will see two two files to upload - one for admin and one for site. Sometimes the complete language distribution is included.. Just be sure to carefully check the download pages to make sure you get the right one. Be careful not to confuse the language pack with the full foreign language distribution, which is a fully translated Joomla installation, not just an add on language.
The default Joomla installation comes with the English language. So that is the base language, and the language packs can be added. It is also possible to get a complete distribution in another language, French or German for instance. That would make that the base language, and you would then need to get a language pack for English if you wanted to make English the second language on the site.
Step 5: Create a category structure for languages
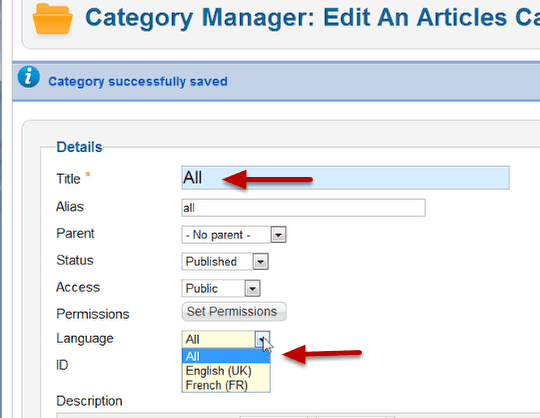
- Create a root category for each language.
- Choose the language to match the category.
- Put subcategories and contents for each language below then in a normal hierarchy.
Category root ALL
Contents ALL
Category root Lang1
Contents Lang1
Category root Lang2
Contents Lang2
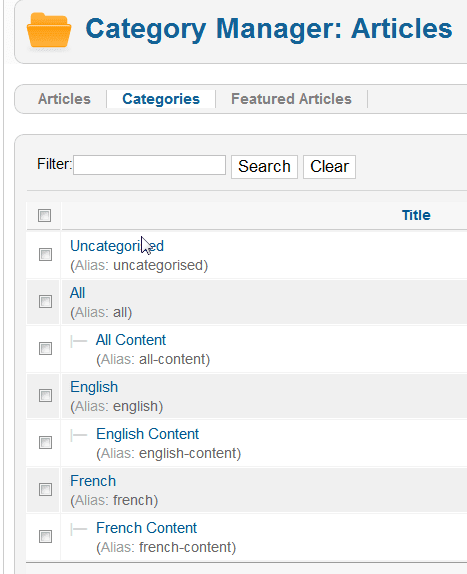
- Once you've created at least the root categories, you can then create menus and menu items for each language.
- At this point you don't need the sub-categories to complete the setup of the language plugin.
Step 6: Set the language for your home page

- Go to Menus > Main Menu.
- Click the Home menu item.
- Make sure it is the Default Page.
- Double check that All is selected as the language.
Step 7: Create individual menus, menu items for each language
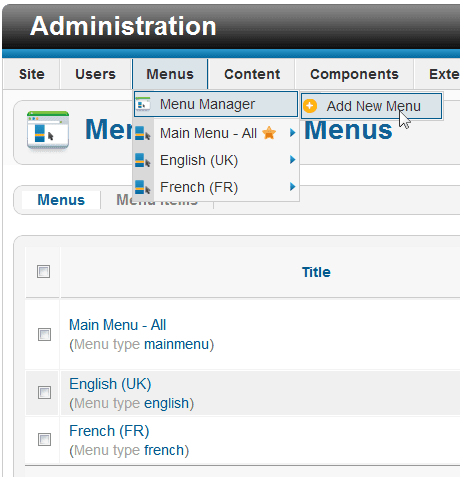
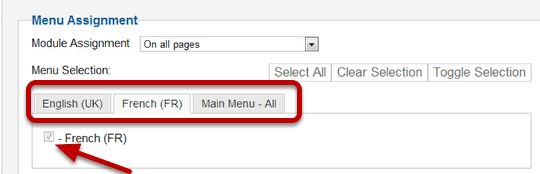
- Go to Menus > Menu Manager > Add New Menu.
- Create a new menu for each language.
- Notice that I renamed the Main Menu to "Main Menu - All" to help me remember what it's for. Create one for English (the base language) and any additional languages.
- For the purposes of a multi-lingual site, Joomla treats All as a language, so it has to have it's own menu and a home page set with the language set to "All".
Step 7: Create individual home menu items on each menu
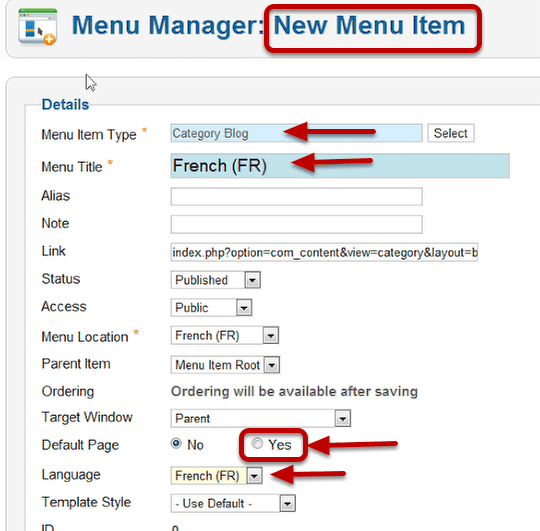
- After you've created menus (In this case one was renamed, and I created an English and French menu).
- Open the menu for the base language (English in this example)
- Create a menu item that links to the correct language root category.
- Choose YES for to make this the default page for this language.
- Repeat this for any other languages you add. Each one needs it's own menu and menu item.
- Any pages you create in this language should have a menu item on this menu, and the Language for the menu item should also be chosen as French.
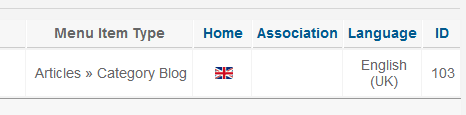
- When you return to the menu item manager the flag for the language will show this as the designated home page. If you see a star here, click the star and it will change to a flag to show that this is the home page for this language.
- Also make sure it is published. Look for the green check in the "Status" column (not shown in the picture above). If it's a red circle click it to publish the menu item.
Step 8: Enable the Language Switcher Module
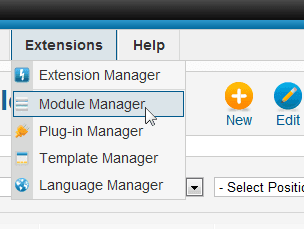
Go to Extensions > Module Manager.
Click New.

- Select the Language Switcher.
- You must place this in postilion that is visible on your template.
- After you've added it, open the options for the module.
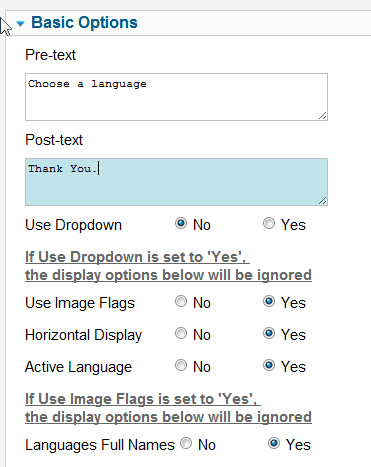
- You have the options of using a drop down menu for the display or the flag icons. Choose how you want the switcher to look on the site.
- Assign the Language Switcher module to each Specific Default Language Content Home page and associated menu items pages and choose the display it to use flags or text..
- Assign the Language Switcher module to each Specific Default Language Content Home page and associated menu items pages.
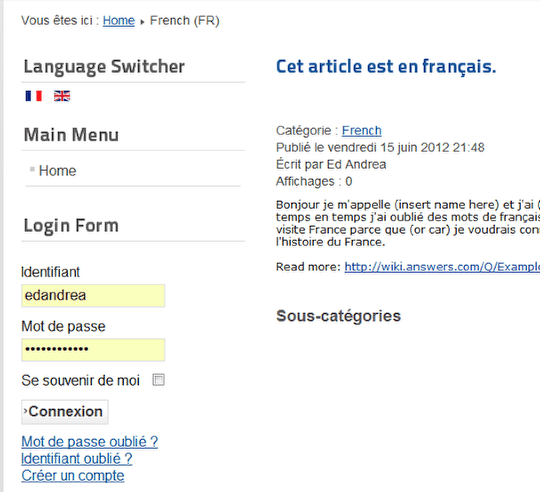
Example
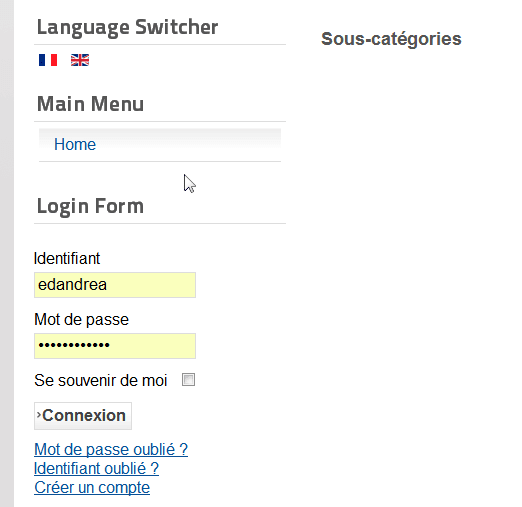
- At this point, the language switcher should show the various flags or dropdown for the language. The standard language strings should be translated into a new language. Clicking the flags will switch between translations.
Step 9: Creating articles
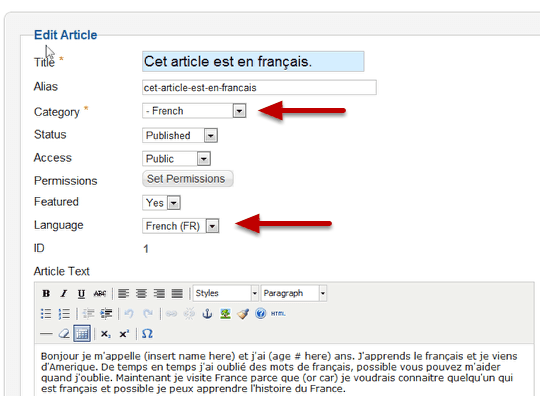
- If you want to create an article in two languages, you need to create two articles. For example: one in French and one in English.
- This process can be greatly simplified by using Falang, Joomfish or one of the other extensions from the JED. You'll be able to see both translations on the same page which makes creation and changes much easier.
- Choose the correct category and set the language to match.
- When you click the flags in the switcher, you'll be directed to the correct page.
- Notice what is translated and what is not. If you want the words "Language Switcher" and "Main Menu" to be translated, You will need to create duplicate modules with translated titles and assign them to the correct pages.