![]() VirtueMart is absolutely huge. By some counts, it stands second in popularity amongst all eCommerce platforms.
VirtueMart is absolutely huge. By some counts, it stands second in popularity amongst all eCommerce platforms.
Right now the VirtueMart team is getting ready to launch VirtueMart Version 2.0 for Joomla 1.7. So this is a great opportunity to give you an introductory tutorial.
VirtueMart comes with a lot of flexibility and there are also many additional extensions available. Get started with the following tutorial. Afterwards you can move on to more advanced features and extensions with confidence.
Getting Started with Virtuemart
VirtueMart comes with some sample data. One of the best ways to get a quick start on using VirtueMart is to set up a development site with the sample data, and start modifying it. In the process of making changes you will learn how to maneuver through the admin, and set up shop. In addition to installation, we'll cover:
- An overview of the default setup
- Using the Administration section
- Modifying the store front
- Modifying the standard currency
- Modifying product prices and display
- Enabling PayPal as the payment method
- Enabling basic shipping methods
VirtueMart is full of details and options. This will give you a good foundation of skills you need. Since VM 2.0 is so new, there are still many features that need to be developed, and will be available in the coming months. If you learn these basics you'll be able to take advantage of the full power of VM 2.0 as it's released.
Step 1. ACTION: Download, uncompress
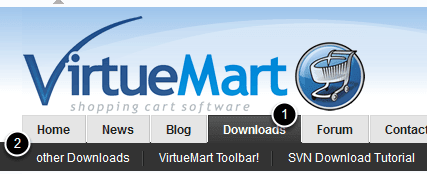
To find this version from https://virtuemart.net go to Downloads > other downloads or go directly to this URL https://dev.virtuemart.net/projects/virtuemart/files.
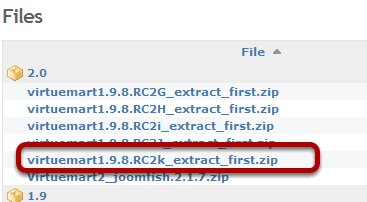
Be sure to download the newest version which is at the bottom of the list. They are alphabetical so the order is determined by the last letter in the version name. If there is a newer version when you read this, it will be there. If 2.0 is officially released you will be able to download it from the main URL https://virtuemart.net.
You can find extensions on the the Virtuemart site https://virtuemart.net/news/virtuemart-extensions, or visit the JED for over 200 extensions already suitable for VirtueMart 2.0.
Notice in the name of the VirtueMart download that it says _extract_first - after you download it you will need to uncompress the file on your local computer or your server. You will see two more zipped directories.

After you uncompress the original file, upload and install com_virtuemart.1.9.8k.zip.
Repeat the procedure for com_virtuemart_ext_aio,1.9.8k.zip
The first one is the Virtuemart shopping cart itself, the second is a bundle of extensions and modules to enhance it. The aio in the name stands for All In One Installer (AIO).
Step 2. ACTION: Install
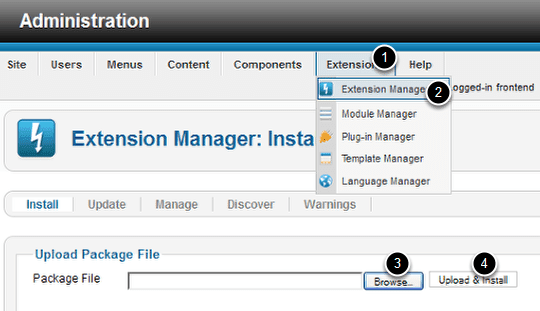
Go to Extensions > Extension Manager > Browse for the file > Click Upload & Install
When you get to the confirmation page, it will ask if you want to install Sample Data. Install the Sample Data.
Repeat the process and upload the AIO
2a. RESULT: The installed modules
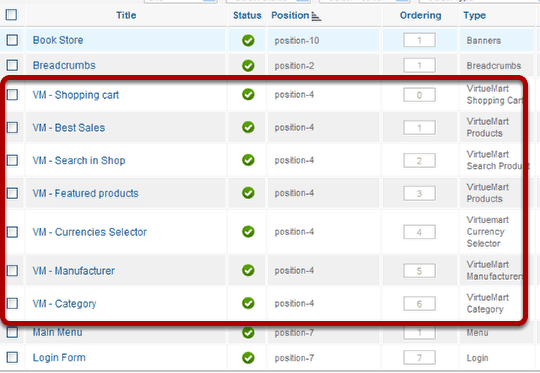
You will see these modules automatically installed and enabled in your Modules Manager.
2b. RESULT: The installed plugins
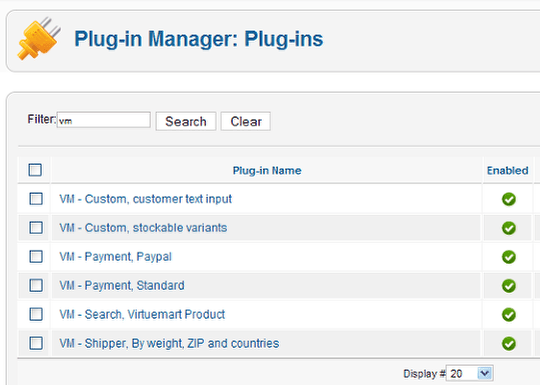
These plug-ins will be automatically installed and enabled. You don't have to go to the Module Manager unless you want to change the position of a module, configure it or disable it. You don't need to visit the plug-in manager unless you need to disable it. There are no configurable parameters for any of the plug-ins.
Step 3. ACTION: Create a Menu Item
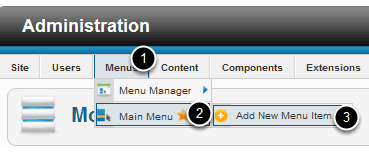
Go to Menus > Main Menu > Add New Menu Item.
Your front page will show you a warning that you must create a menu item before the cart will be accessible. So do this first.
3a. CONFIGURE: Name and Select

- Give it a Title (Like Store or Shop. I'm going to use Virtue Mart Storefront)
- Click Select
3b. CONFIGURE: Complete Selection
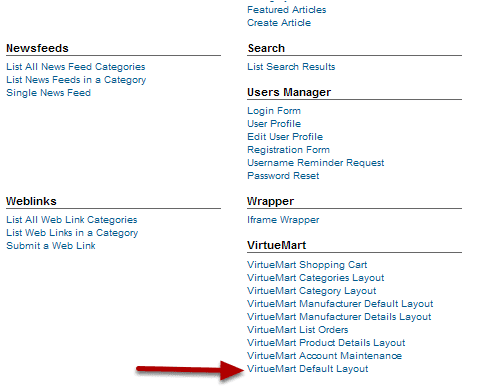
Under Virtue Mart click VirtueMart Default Layout.
You could pick Categories Layout or Category Layout if it suits you or you are creating a specific link. The default layout will create a "Store Front".
3c. RESULT: The store front with sample data installed.
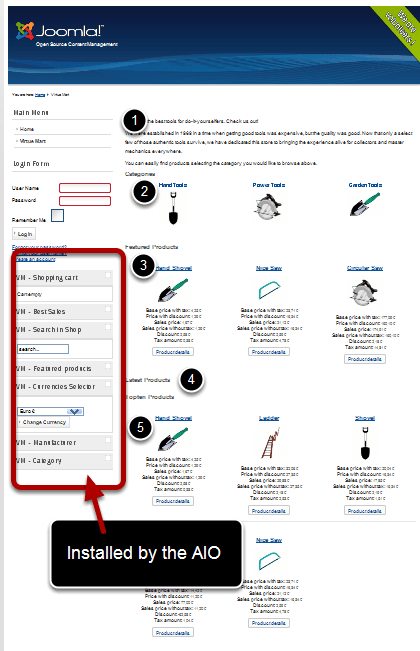
To View the store go to your home page and click the menu link you just created.
You will notice that all the modules that were installed now show on the site. You can modify and configure these in the Module Manager.
- VM - Shopping cart is closed
- VM - Best Sales is closed
- VM - Search in Shop is closed
- VM - Featured products is closed
- VM - Currencies Selector is closed
- VM - Manufacturer is closed
- VM - Category
The page divisions show products and create sections on the store front.
- Store Description
- Categories
- Featured Products
- Latest Products (empty until you add your own)
- Top Ten Products
Step 4. ACTION: Start modifyng the company information
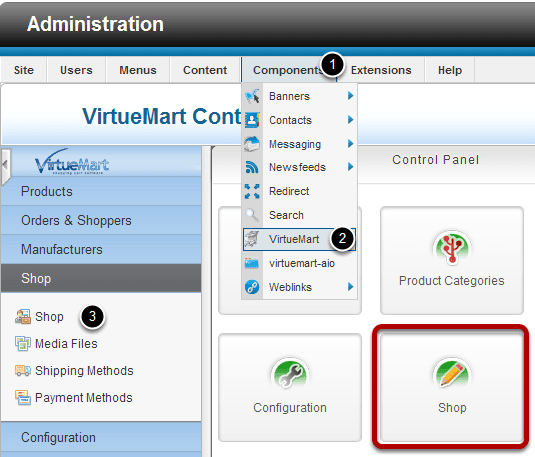
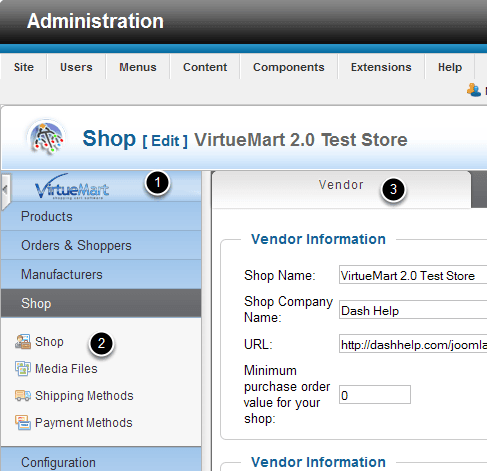
Go to Components > Virtuemart
Click on Shop - You can use the shop icon or click Shop from the menu. Both will work.
Step 5. CONFIGURE: Modify Vendor Information

Change the shop name and company name to yours.
Set the default currency and modify the list of accepted currencies.
The default will be set to Euros. To change the default currency, select a different one from the drop down menu.
Step 6. CONFIGURE: Modify the base currency and other accepted currencies
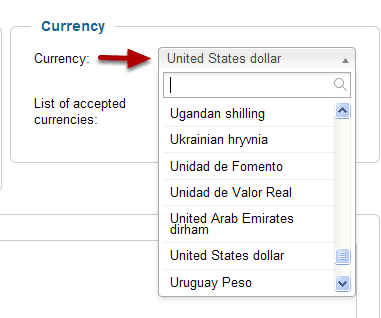
Use the dropdown to change the base currency.
I've changed the default currency to United States dollar, now all the prices will show with a dollar sign in the cart.
One of the modules you uploaded was a currency chooser. The user, while viewing the store, can use it to switch to any other currency you've approved. If you want to add or delete any other currencies use the List of accepted currencies field.
6a. CONFIGURE: Choose other currencies
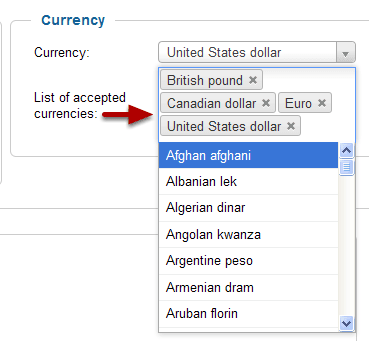
Place the cursor in the field and a selection menu will appear. You can click the x next to the ones that were added by default to delete them, or add one by clicking on the list selection.
6b. RESULT: Your currency section should like this
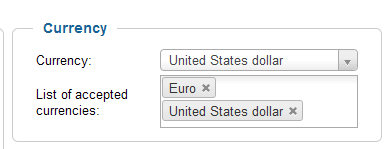
For the currency selector to work, you will need to add the base currency to the list of accepted currencies. If you don't the currency selector on the front end won't show the option for the customer.
If you only are going to use one type, you can leave the List of accepted currencies field blank, and just set the main currency.
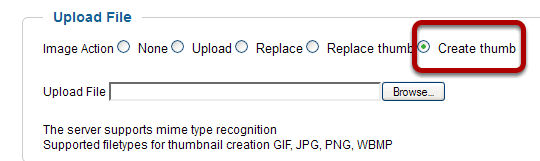
Step 7. ACTION: Change the logo image
- Scroll down to the Image Information Panel
- Change the name and details. ( You could un check Published if you aren't going to use a graphic)
- Check the proper radio button. Nothing will change if you don't choose. This is confusing because of the placement of the labels. Pick the right one.
- Browse your computer for the file to upload
- Return to the top of the page and click Save to complete the action
7a. REPEAT: For thumbnail
I found I had to repeat this step to generate and replace the thumbnail.
Step 8. CONFIGURE: Change the Vendor Additional Information
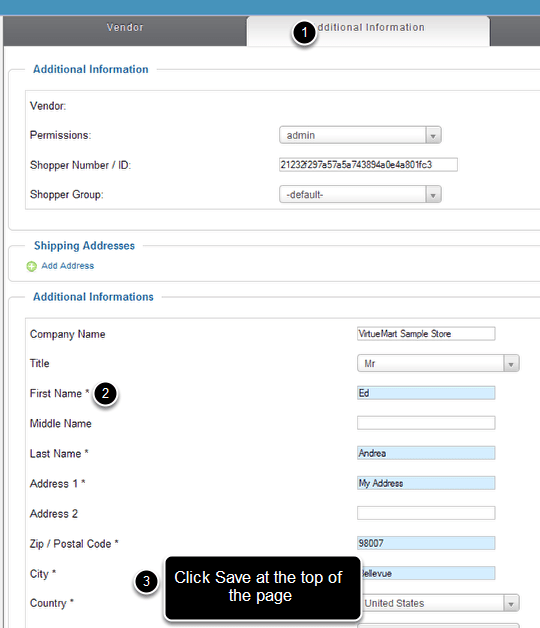
- Switch to the Additional Information tab
- Fill in the required fields
- Click Save at the top of the page
The fields indicated with an asterisk and a blue background must be filled in or you will not be able to save your changes. If you were starting the store from scratch instead of using sample data, all these fields would be empty and you would need to make this the first task on your list before you could change anything on the other tabs.
Step 9. ACTION: Enable Payment Methods
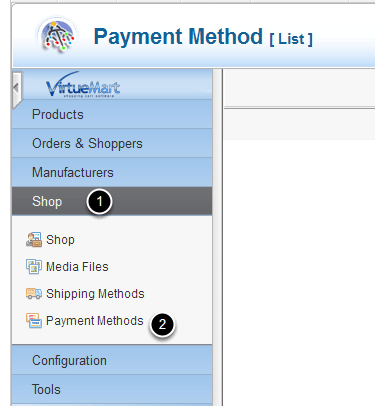
On the VirtuMart Menu go to Shop > Payment Methods.
When you get there you will see a mostly blank page.
9b. CONFIGURE: Add new
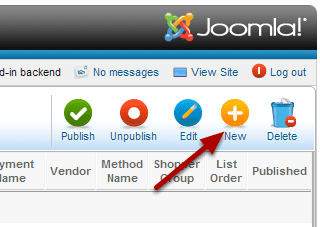
Click New.
9c. CONFIGURE: Choose method
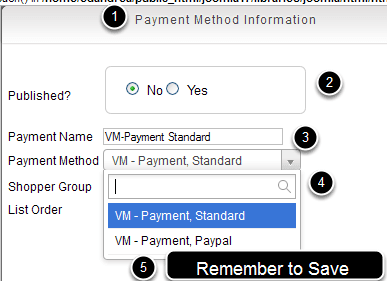
- Go to the Payment Method Information tab
- Click Yes to Publish
- Fill in a Payment Name ( it won't save unless you do this)
- Choose the payment method VM - Payment, Standard
- Click Save at the top of the page
REPEAT: If you are going to use PayPal in addition to VM - Payment, Standard, repeat this step and choose Paypal this time.
At this time there are only two payment methods available for VM2.0 We expect to see many more in the near future. You can get some plug-ins now from the JED for specific gateways, and several are on the road map for the VirtueMart development project, but no set release times. Eventually there will be many choices for you here.
Step 10. ACTION: Publish the payment methods
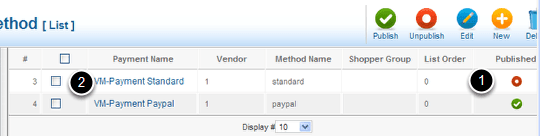
Now that they are enabled you will see them on the Payment Method List.
- Make sure you have published the ones you want.
- Click VM Payment Paypal. Click the Payment name, or select the box and use the edit icon at the top.
10a. CONFIGURATION: Switch tabs
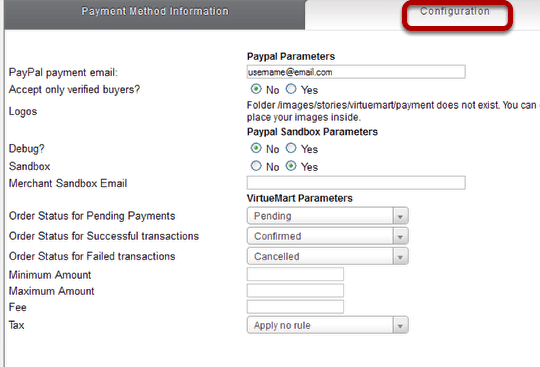
Choose the Configuration tab.
Edit the Parameters.
Be sure to save.
If you are going to use Payment Method logos, you will need to create folder using the Media Manager, or FTP, in this location
/images/stories/virtuemart/payment
Step 11. ACTION: Enable the shipping methods
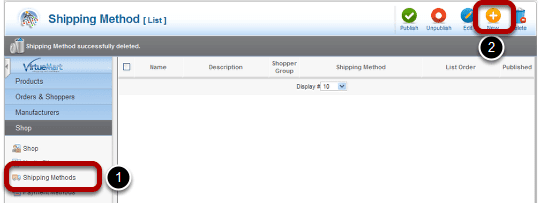
- On the VirtueMart menu go to Shop > Shipping Methods
- Click on New
You will see another blank page similar to the one for payment methods. The procedure for adding shipping is similar to adding payment methods.
11a. CONFIGURE: Choose method
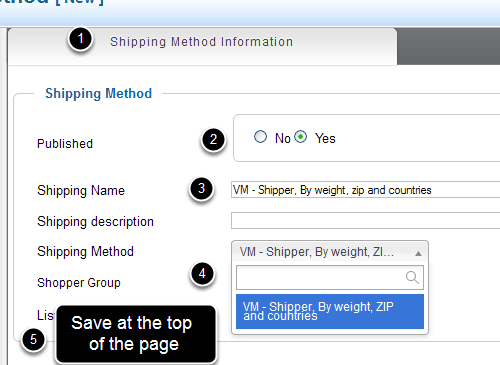
- Go to the Shipping Method Information tab
- Click Yes to Publish
- Add a Shipping Name
- Choose the method from the dropdown list
- Save your changes
There is only one shipping method at this time More are in the works.
11b. CONFIGURE: Configure the shipper
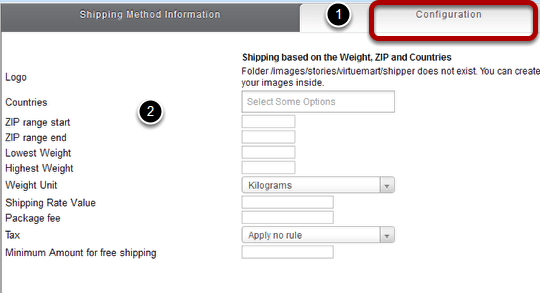
- Go to the Configuration tab
- Add the parameters
If you are going to use a logo, you will first need to create the folder for the images at:
/images/stories/virtuemart/shipper
The next item you could configure at this stage would be taxes.That's a big topic and deserves its own tutorial. There are sample tax structures set up now which we can use for the rest of the tutorial. We've adjusted and enabled all the basics, now let's get on to what most people want to do first. Change the way things look.
Step 12. ACTION: Modify the Store Description
When we installed the sample data a default store description was installed. We can change this to our own description.
12a. CONFIGURE: Navigate to shop
- On the VirtueMart menu go to Shop > Shop
- Click the Vendor tab
- Scroll down the page to the Description Panel
It should look familiar, we've been here before. We just need to scroll down to find it.
12b - CONFIGURE: Edit the content
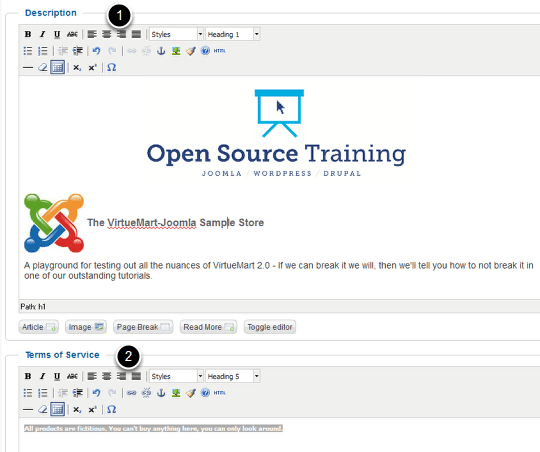
- Edit the Description
- Edit the Terms of Service
- Be sure to save your changes
You should edit the terms of service even if you aren't going to use them. Leaving this without change generates a message that you haven't yet edited the terms. The only way to stop it is to obey.
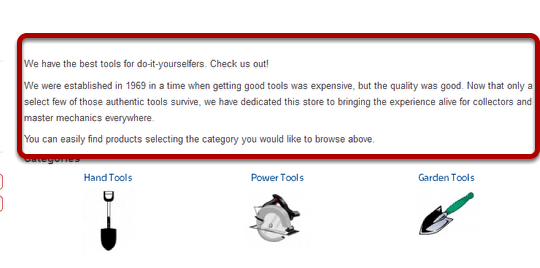
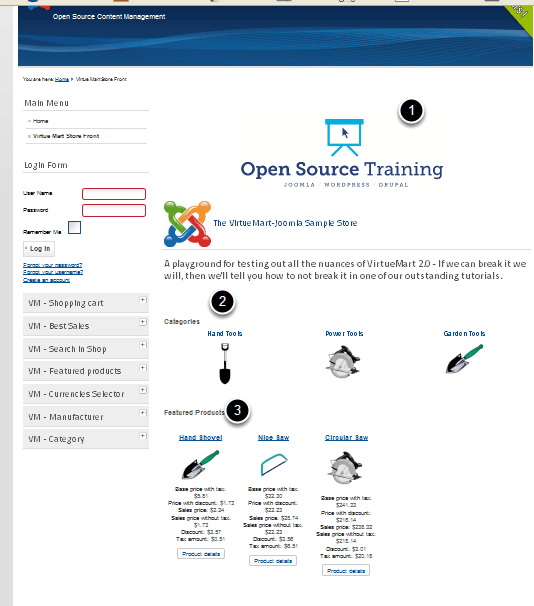
12c - RESULTS: The new introduction on the shopfront
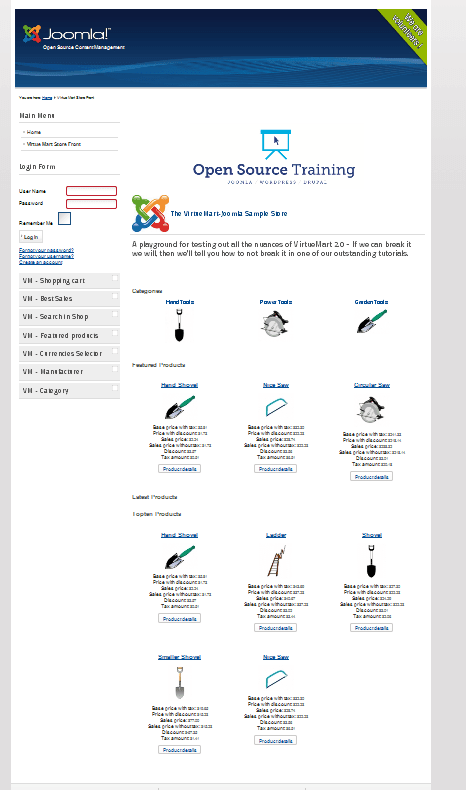
Here's what our modified store front looks like. It has a new introduction. If you don't want to show the introduction, and you don't want all these products and sections to display on the home page, you can can modify the display in the Configuration section.
Step 13. ACTION: Modify the store front layout
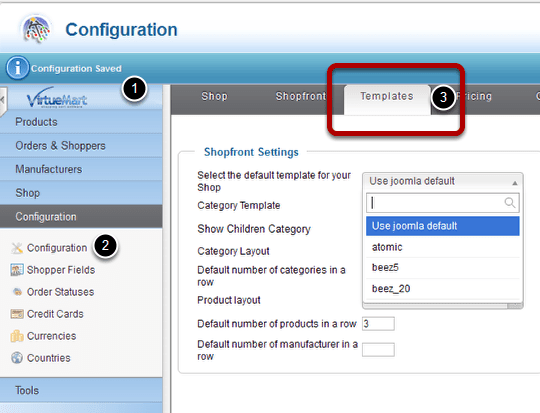
- On the VirtueMart Menu
- Go to Configuration > Configuration
- Click the Templates tab
The first thing you see is the Shopfront Settings. You can actually choose a template different from your default Joomla template just for the shop.
You can define the rows and category layout as well. For this tutorial, don't make any changes here. You can experiment with this later. For now lets scroll to the right side of the page and deal with the shopfront display.
13a. CONFIGURE: Choose the layout for the home page
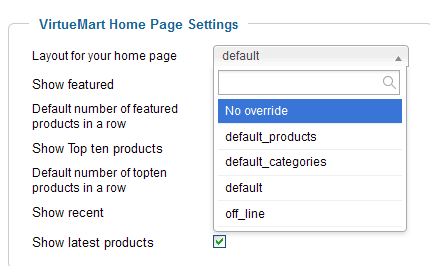
From the drop down you can choose:
- default_products - only products will show
- default_categories - only categories will show
- default - introduction, categories and products
- off_line - takes your store off line and displays a maintenance message
Let's leave it at default for now. But if you want to experiment, make a choice and save the change, then preview. You can always change it back
13b. CONFIGURE: Change the visible sections
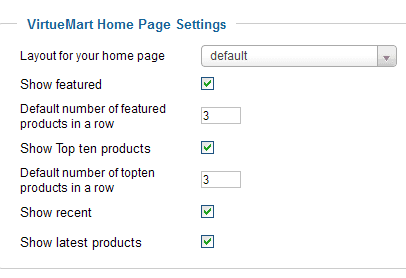
The default setting has your shopfront showing different products grouped in sections.
- Store Description
- Categories
- Featured Products
- Latest Products (empty until you add your own)
- Top Ten Products
You can turn these on and off by selecting or un selecting the check box for each one.
13c. RESULT: the modified shopfront.
Here I am using the default layout, and only have the Featured Products enabled. I changed the number of products per column to 5 (it was 3).
The customer now sees
- the Introduction
- the Categories
- the Featured Products
By choosing different combinations on the templates tab you can customize your store front within certain limits. No need for any coding or CSS.
Now that the front page is under control, let's take a look at the products.
Step 14. ACTION: Modify the products
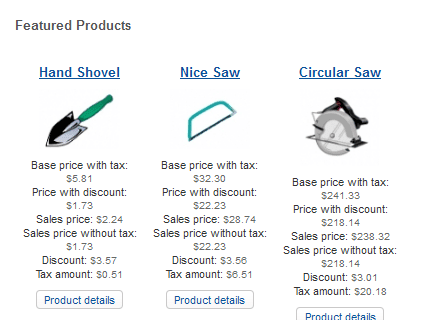
When you look at the short listing on the shopfront, you notice right away that there is an incredibly confusing array of prices. We need to fix that. So let's go to Pricing tab in the Configuration section.
14a. CONFIGURE: Enable and disable unwanted prices
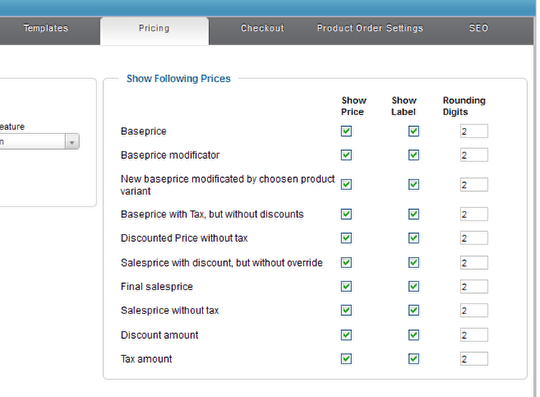
Click Pricing and you will see check boxes for showing or not showing the prices. Un check the ones you don't want to show. The Show Column controls the actual numbers. The Show Label column controls the label like "Salesprice without tax".
14c. RESULT: The modified products on the shopfront
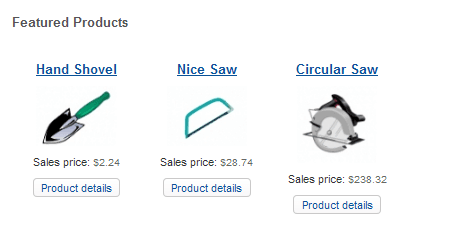
Here are the same products with the both columns checked next to "Final salesprice" and everything else unchecked.
RESULT: Final shopfront display
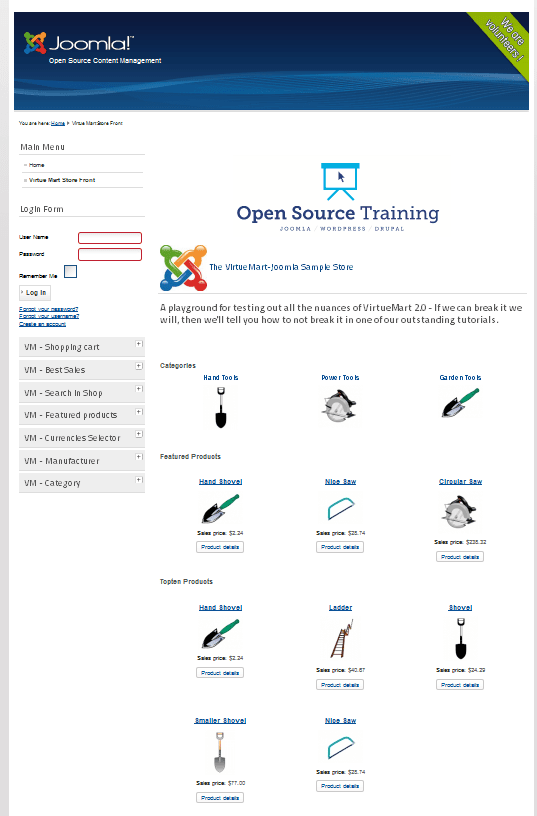
So here is the final store front showing my choices.
The shopfront shows:
- Introduction
- Category list
- Featured Products
- Ten Products
Shipping and payment are activated, so you should be able to place a test order at this point. There are lots of other tweaks and modifications you will want to make as you get more experienced. This tutorial was designed just to get your feet wet.
We're still waiting for some more payment and shipping modules, and there are quite few new design features that we will be discussing in future tutorials. If you have a topic you want covered, we do write tutorials on request for our active students. Just ask.