
One of our customers asked how to move their OSCampus Pro data from an old Joomla site to a new one. If you're doing the same, this guide is for you.
It walks you through each step using only the tools built into cPanel. You’ll use phpMyAdmin to handle the database. You’ll also use File Manager to move media files like course images or videos.
⚠️ Note: This guide assumes you’ve already installed the OSCampus Pro extension on the destination site.
Preparation: Get Your Database Prefixes
Before you can move your OSCampus data, you’ll need to know the table prefixes used on both your Joomla sites. Each site has a unique prefix. It’s important to match these correctly during the migration.
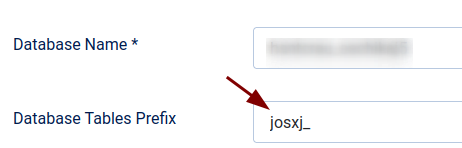
Start by logging into the Joomla admin panel for both the source and destination sites. Go to System → Global Configuration. Then click the Server tab. You’ll see the Database Tables Prefix value.
Write down the prefix for each site. For example, your source site might use josxj_, while your destination site might use j4u_.
Exporting Data from the Source Site
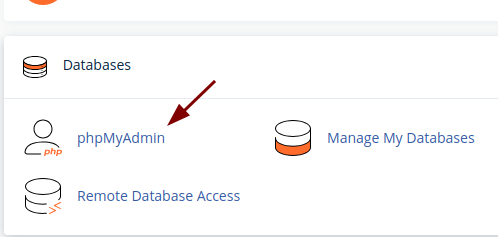
Now it’s time to grab the OSCampus data from your source site’s database. Start by logging into your source site’s cPanel. Then open phpMyAdmin from the Databases section.
On the left side of phpMyAdmin, click the name of your source site's database. A long list of tables will appear. Find the ones that start with your source prefix followed by oscampus_. These are the OSCampus tables.
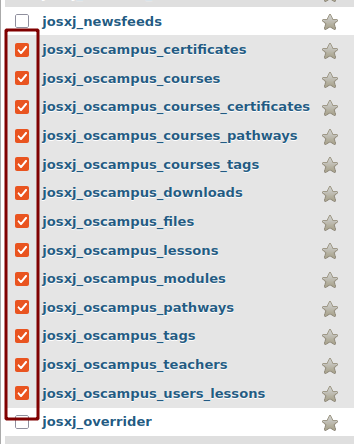
Select all of those tables by checking their boxes. Scroll down to the dropdown menu labeled With selected: and choose Export.
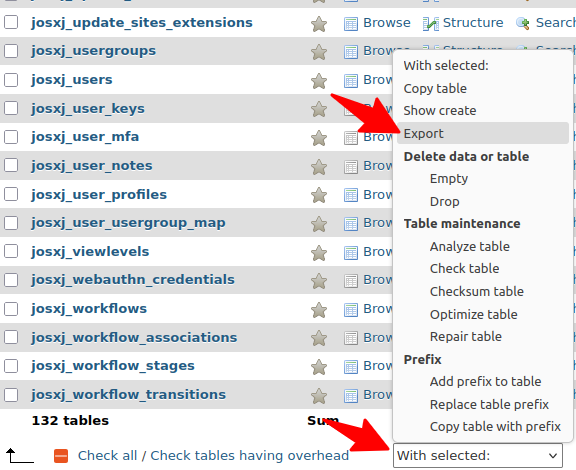
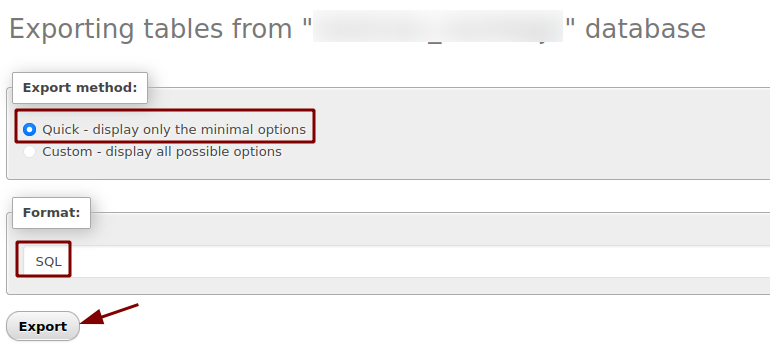
On the export screen, leave the method as Quick and the format as SQL. Then click Export to download the file to your computer.
Modifying the Exported Data
Next, you’ll edit the SQL file you just downloaded. This is where you update the table prefix so that the data matches your new site’s structure.
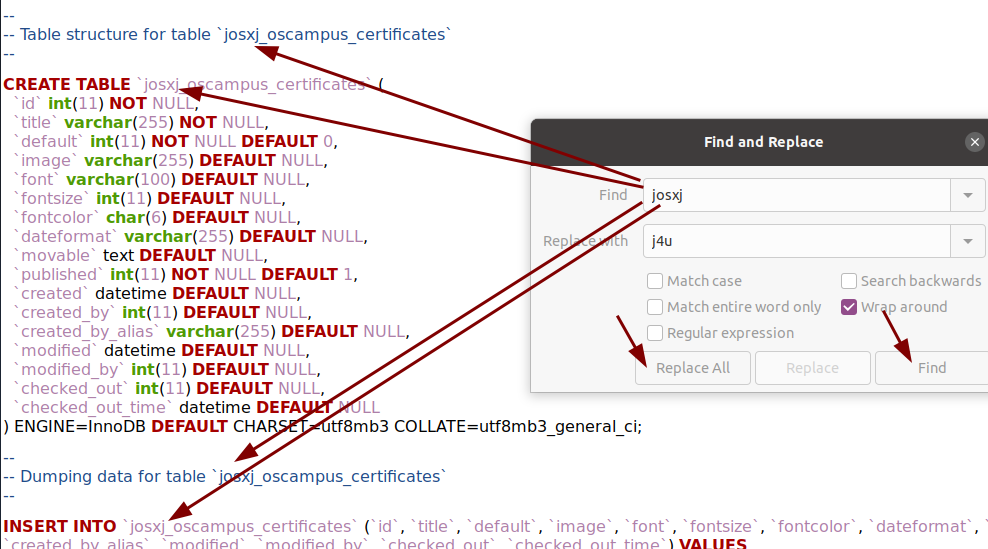
Open the SQL file using a plain text editor. You can use Notepad++, VS Code, or any other editor you prefer. Use the Find and Replace tool to search for your source site's prefix. Replace it with the destination site's prefix.
For example, if your source prefix is josxj_ and your destination prefix is j4u_, find all instances of josxj_ and replace them with j4u_. Once done, save the file.
Importing Data and Migrating Files
Now you're ready to move the data into your new Joomla site. First, you'll remove any old OSCampus data that may already exist in the destination database. Log in to your destination site’s cPanel and open phpMyAdmin.
Select the destination database from the left panel. Find the tables that start with the destination prefix followed by oscampus_. Select them by checking their boxes. Then, at the bottom of the screen, choose Drop from the With selected: dropdown. Confirm the deletion when prompted.
Next, while still inside the destination database in phpMyAdmin, click the Import tab.

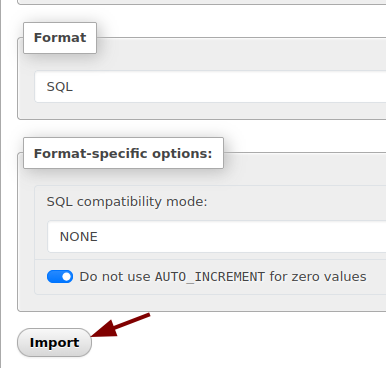
Click Browse and select the updated SQL file you saved earlier. Scroll down and click Import.
Once the import finishes, your OSCampus data will be live on the destination site. But there’s one more step — you’ll need to move the course media files.
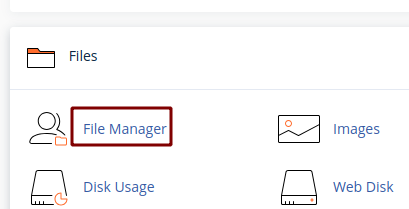
Go back to your source site’s cPanel and open File Manager.
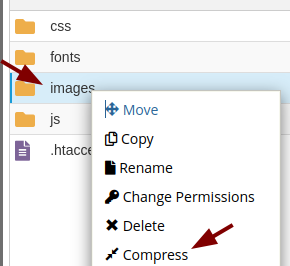
Navigate to public_html/media/com_oscampus/images. This is where OSCampus stores its media. Right-click on the images folder and select Compress. This will create a zip file, such as oscampus.zip.
Download the zip file to your computer. Then go to the destination site’s File Manager. Navigate to the same folder: public_html/media/com_oscampus/images.
Click Upload and upload the zip file. Once uploaded, right-click the zip and choose Extract. This will restore all your media files in the right place.
Final Check
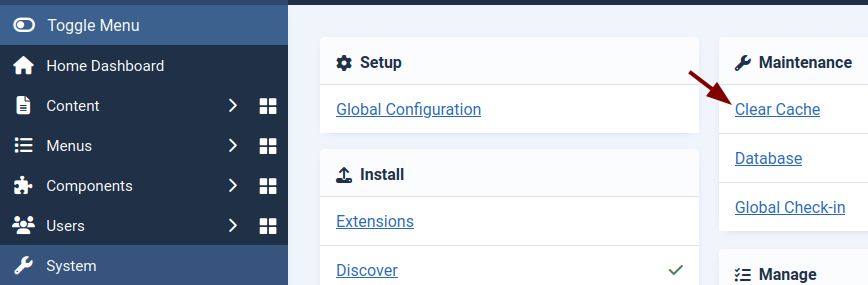
To make sure everything runs smoothly, clear Joomla's cache on the destination site. Log in to the Joomla admin panel. Click System in the sidebar. Then click Clear Cache under the Maintenance section.
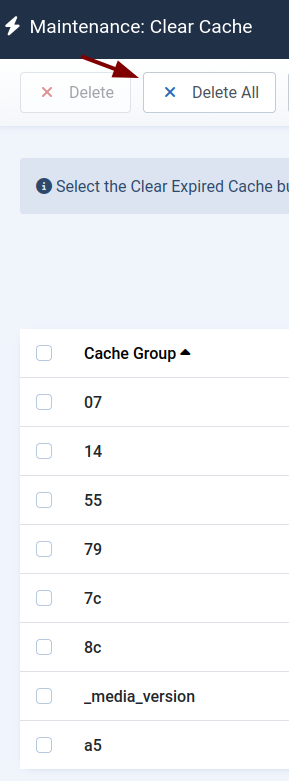
Click Delete All at the top of the screen.
That’s it. Your OSCampus Pro data and media have now been fully migrated. Visit Components → OSCampus Pro in your Joomla admin to confirm the courses are there. Then check the frontend to make sure everything works as expected.
What's Next?
Save $1,000's when you sign up for Joomlashack's Everything Club.
You will get your hands on our extensive range of over 20 extensions, plus legendary support!