
Inbound marketing is all about positioning your company in the right place, at the right time. If you can make it into that context, your next task is to provide the right information to the people you're reaching.
Calls to action are a critical part of this inbound information process - in this post, we're going to talk about how you can create and display them on a Joomla site.
First, let's take a look at some examples of calls-to-action in action across the web (sorry, I can't help myself when it comes to puns)...
HubSpot uses CTAs in the right column of their blog:

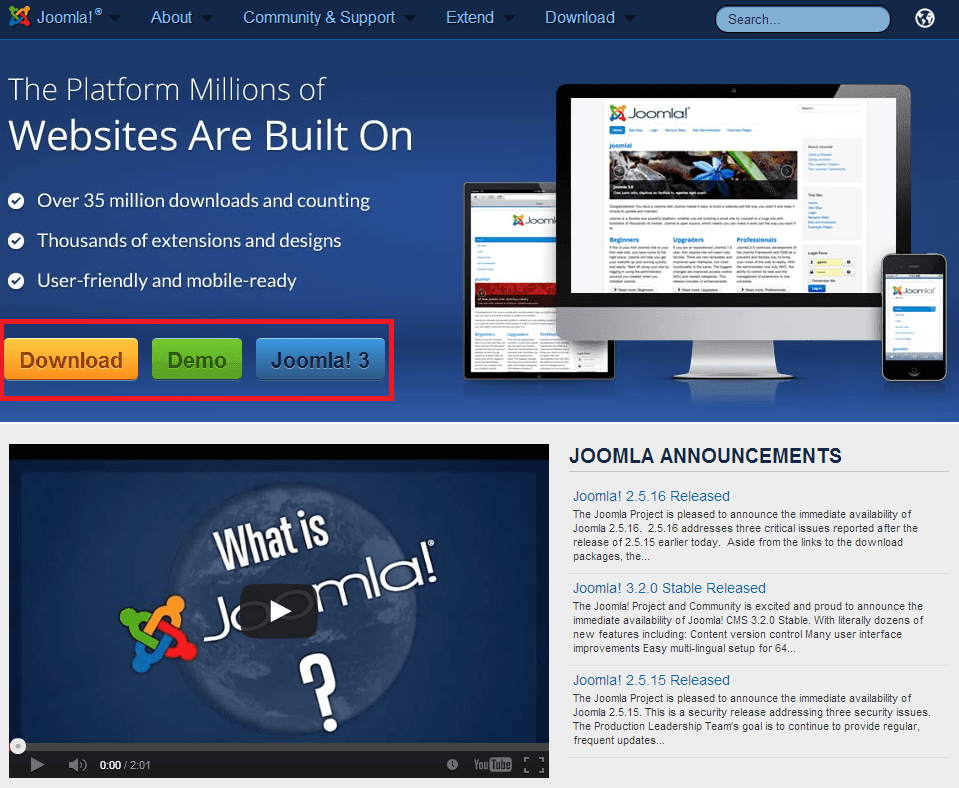
Joomla.org has CTA buttons to encourage demos:
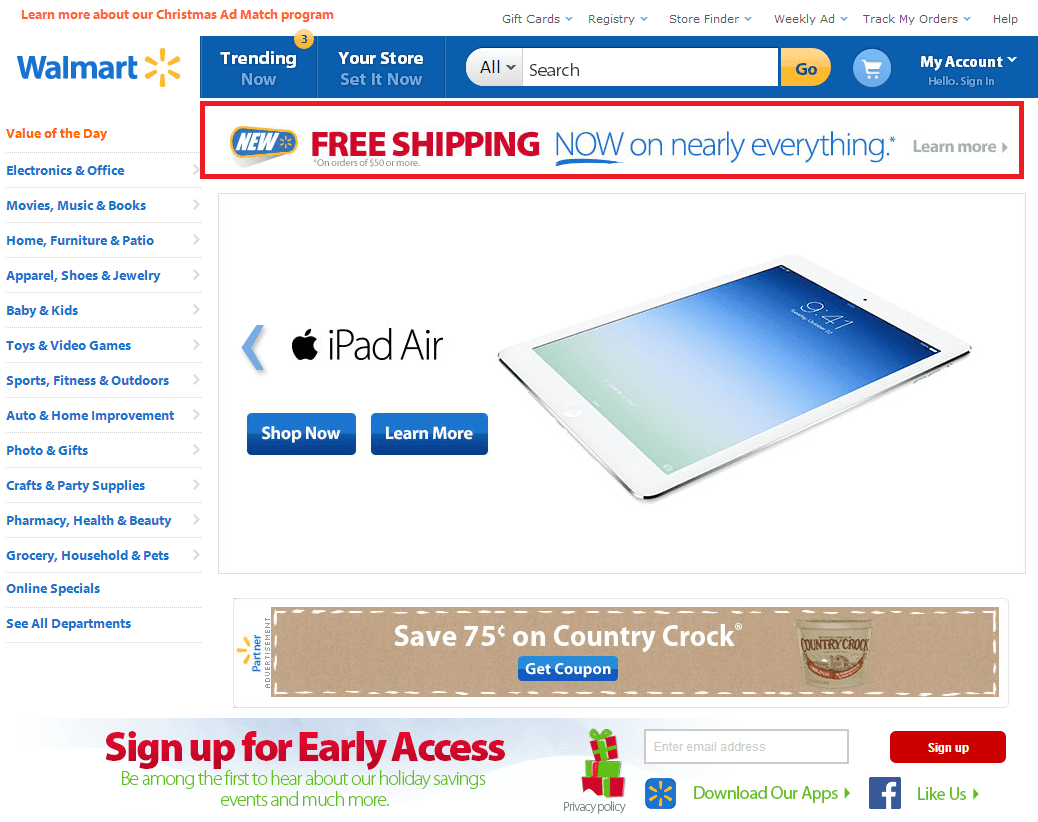
Even Walmart uses CTAs all over their homepage:
As you can see, CTAs are utilized in diverse contxts across the internet and are not necessarily exclusive to Inbound. The distinction between general Call to Action usage and Inbound usage is all about relevancy.
On an Inbound friendly Joomla site, your CTAs will be hyper-relevant to the environment they're displayed in. These calls-to-action can come in two formats:
Static - This type of CTA lives on a certain page and displays regardless of the content. Displaying one CTA on the right column of your blog is an example of static usage.
Since it lives there all the time, you'll need to utilize a CTA that is relevant regardless of the blog content is displays next to. (HubSpot is doing a good job of this above)
-OR-
Situational - These CTAs are handpicked by you to display on specific pages that you deem relevant to the action at hand.
In the Master Inbound example above, the article about SEO is displaying a CTA about SEO. This was manually placed (No, I'm not a psychich - I know because I wrote it!)
So, how do we display a CTA on a Joomla site? Great news, my friend - it's easier than you think:
1. Create your image
Start by creating your CTA image. Set your pixel size based on where you plan to display it, and go with a color scheme that matches your site. For this example, I created this work of art:

(This is in no way a visually "optimized" CTA, it's just a filler. For tips on what your design should actually look like, check out this article)
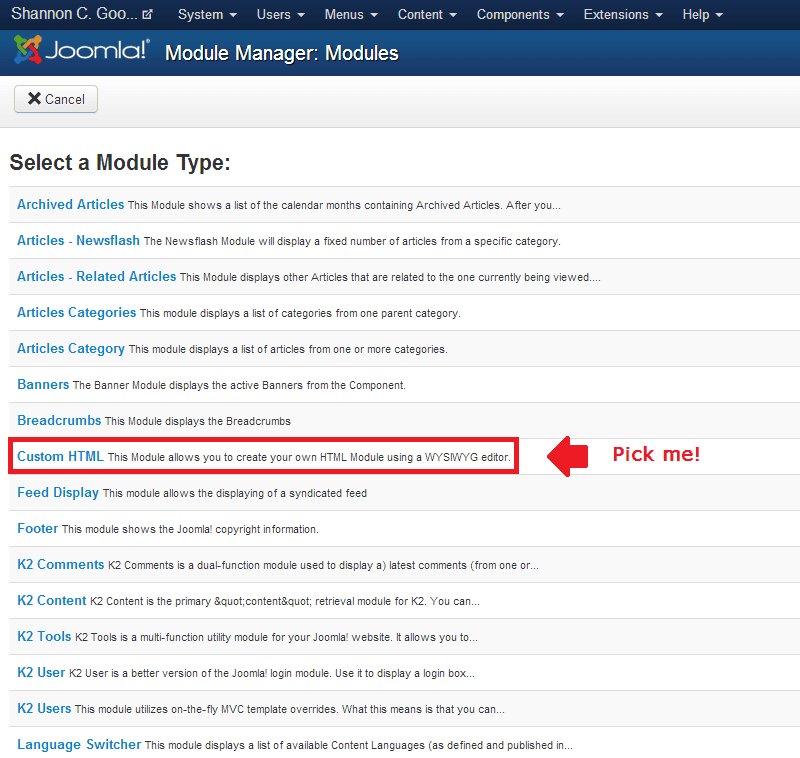
2. Create a Custom HTML module
Log into the back end of your Joomla site, and cruise over to the module manager under the Extensions drop down. Create a new module, and set the type to Custom HTML:
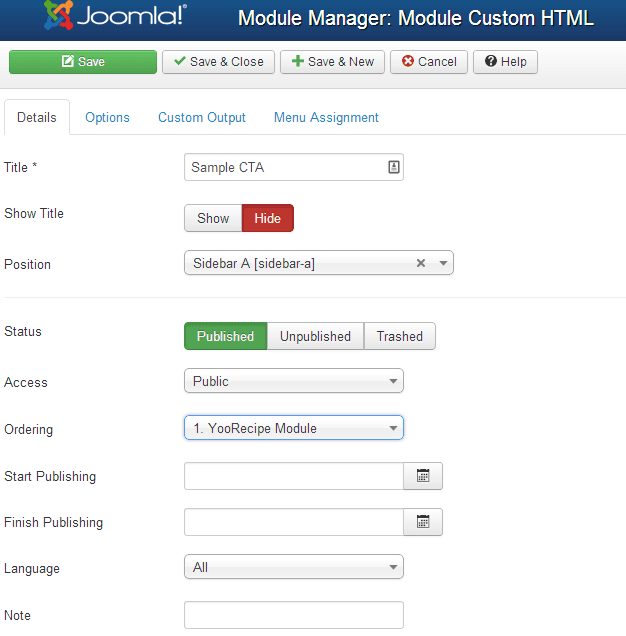
3. Name the module
Give your module a name, and either set it to display or hide that name. This dictates whether the user sees the title - so if you set it to display, it should be something like "Subscribe by email!", not "Email Module 1".
For a static CTA (one that always displays on a certain page), select the position you want it to display in. For a situational CTA (where you manually insert it), leave the position blank. Also note: for situational CTAs, you'll need to download Modules Anywhere.
If you're displaying multiple CTAs, choose the order in which you want them to display.
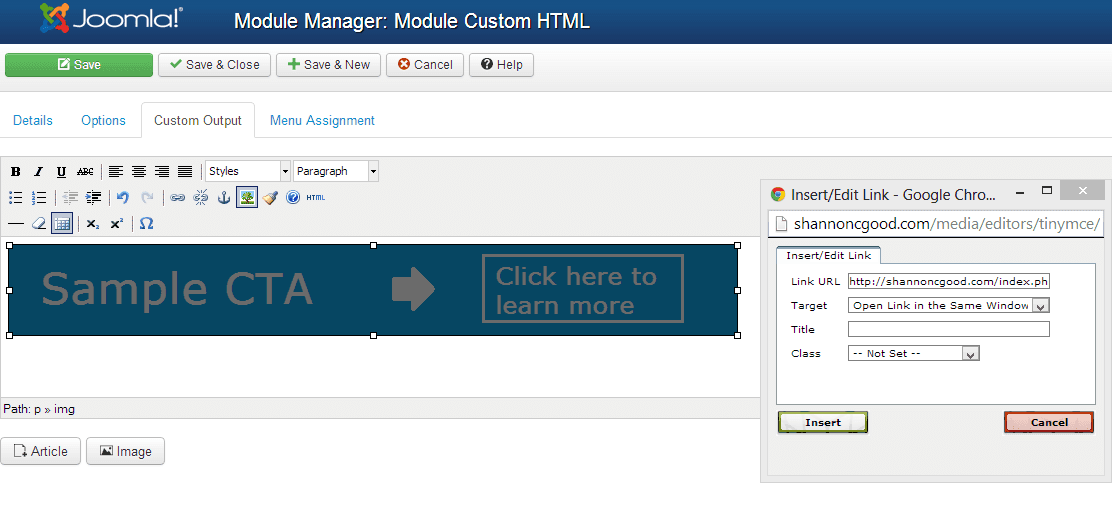
4. Add the image
Bounce over to the custom output tab, and upload the CTA image you created. Select the image, and link to to the page the user will view after clicking the CTA. Depending on whether you want the link to open in the same window or a new one, set your target appropriately.
5. Save your work
Hit Save and Close. If you set your module to a position, go to your site and see how it looks! If you're using a situational CTA, proceed to step 6.
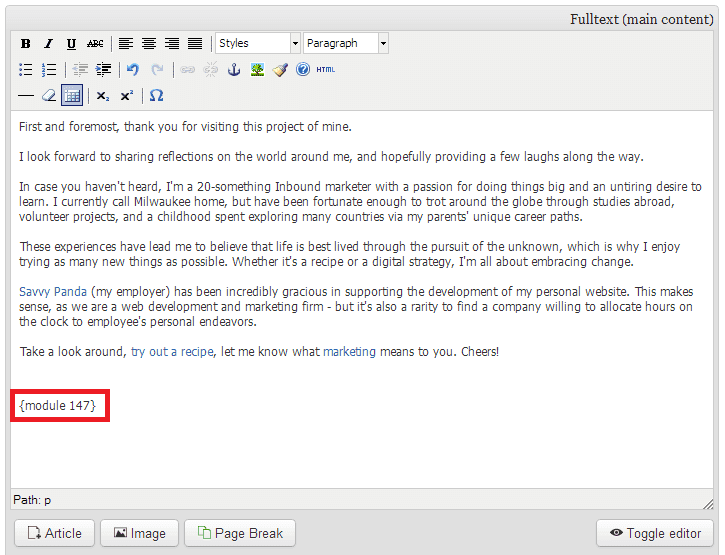
6. Identify the module ID
To manually display your module on specific pages, first write down the module ID of the CTA you just created. You can find this in the far right column of your module manager page (the module below is 147):

8. Add the module ID to your article
Navigate to the article or blog post where you want to display your module. In the example below, I'll add it into a K2 blog post by simply typing {Xmodule 147X} (minus the X's) at the bottom of the content:
9. Check your work
Head out to your site's front end and see how it looks! If it's displaying as the module item ID text and not showing the image, make sure your Modules Anywhere extension is properly configured. For reference, my author bio below is an example of a manually inserted module.
Good luck, and happy call-to-action-ing!