HikaShop - Ecommerce for Joomla
-
-
Written by Ed Andrea Ed Andrea
-
Published: 08 December 2011 08 December 2011
HikaShop is a relatively new shopping cart for Joomla. It's becoming a strong competitor to Virtuemart, and we're starting to get more and more questions about it from students. HikaShop comes in both a free version and two levels of commercial versions.
Since HikaShop is fully integrated with Joomla, you can get started very quickly. However, you do have to learn some new ideas on how to enter products. In this tutorial we'll show you everything you'll need to get up and running with HikaShop.
You can also read our tutorials on other Joomla ecommerce solutions: Virtuemart, RokQuickCart, SimpleCaddy, K2Mart and building a custom cart.
If you want to go further, we have a 20 video training class on Hikashop.
Overview of HikaShop
In this tutorial you will:
- Install Hikashop
- Add a product
- Add product details
- Add product categories and price
- Add variants
- Add categories
This isn't the ideal workflow for production, but it is the right sequence for getting an understanding of HikaShop and how all the parts fit together. After you understand this, you will be able to more efficiently plan out your cart and approach.
Notes on HikaShop: There are three versions available. Starter, Essential and Business. Starter (the free version), will cover the majority of online stores and products. If you want to try it out, use this version. It may be the only version you need.
The things that are missing are clearly marked in red letters in the administration section, but there is enough of the program there to produce a production site. You'll discover whether or not you need to upgrade to a more complete version.
In this tutorial we used the Business Edition, which has all the features and plugins installed. The free version does not let you create product options, and we wanted to be able to demonstrate them. You won't be able to do the options section with the Starter. Since adding options is just like adding products, if you follow this tutorial, you will have the skills to do so if you upgrade.
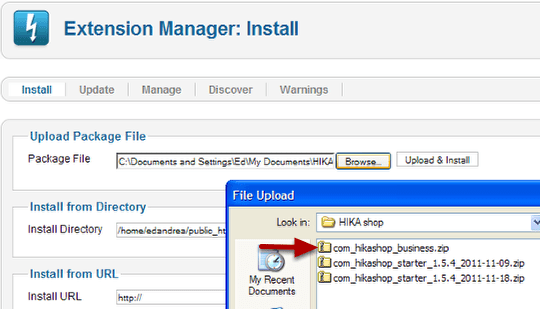
Step 1. Download and install
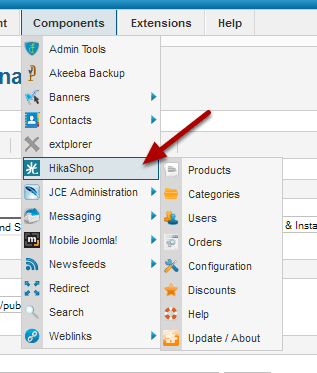
You can access it from your Components menu.
Step 2. Add a product
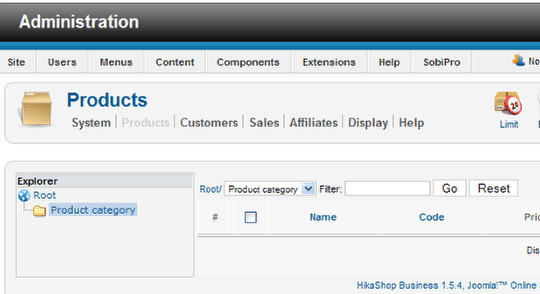
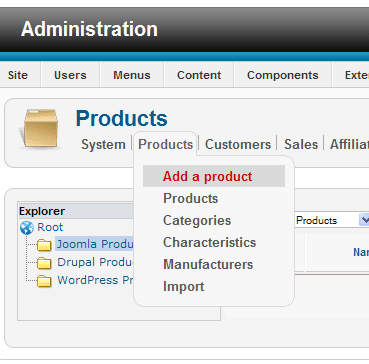
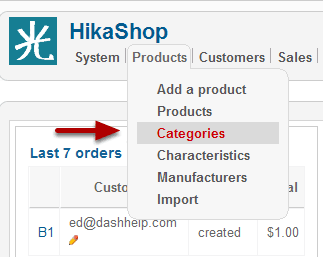
Go to Products > Categories on the HikaShop dashboard.
If you don't need categories, you don't need to create them. There is a default, top level called Product Categories and you can add all your products there. If you are going to have a more complex cart, you should probably create the categories first.
Highlight the category you want to put the product in.
You can add the product to other categories or change it to another one later. If Root is highlighted, it will go into root without being in a particular category. Your choice here becomes more critical in light of how you connect the menu item to the display. We aren't going to cover that here, we're sticking to product entry, so for our purposes the defaults are ok.
You can change the name "Product category". As you will see in subsequent screen shots, I have changed it to Joomla Products, and added Drupal and WordPress categories as well.
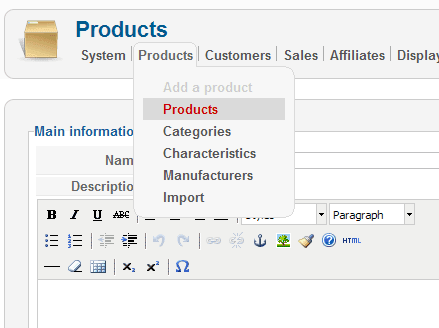
Click Add a product from the Products tab drop down menu.
Alternatively, you can click the New icon in the administration menu bar.
Step 3. Add product details
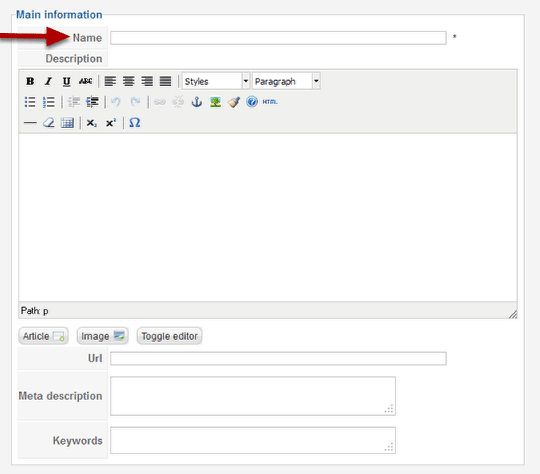
Enter the Name. This field is required.
You will see the Main Information panel on the left, and you have all the same editing capability you would have for a normal Joomla article. You also have meta input for SEO on your products. Fill it out and create dazzling display for your product.. Scroll down the page for more important information you need to add.
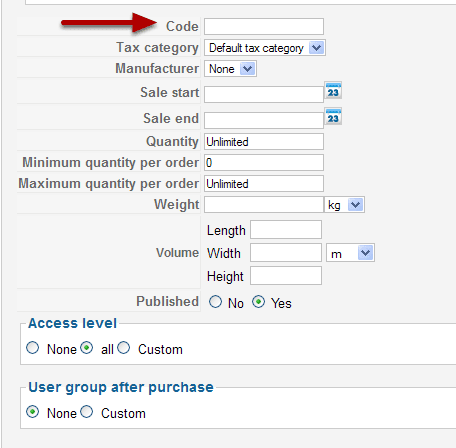
Enter the Code. This field is required. The rest of the fields depend on the product type and specifications, and are optional
The Access Level and User group panels won't be available in the free version. By default the product is viewable by all. After purchase, you can change this to none or have special products available to custom defined groups.
Now move to the right side of the screen.
Step 4. Add product categories and prices
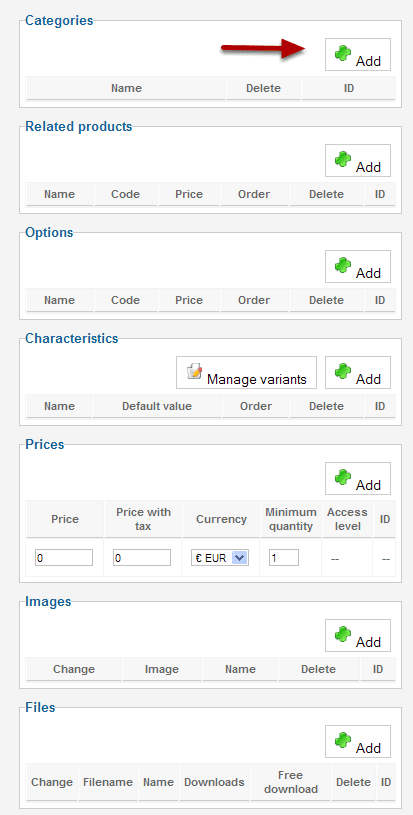
Click the Add button on the Categories panel.
Categories - When you save the product it will be assigned to category you had highlighted when you clicked "Add Product." or you can add it or assign it to different categories with the "Add" control. You will also be able to delete unwanted categories on existing products after they are added.
Add this product to the category called "Product categories" or whatever you might have named it to. In this exampe Joomla Products is the default "Product categories" renamed.
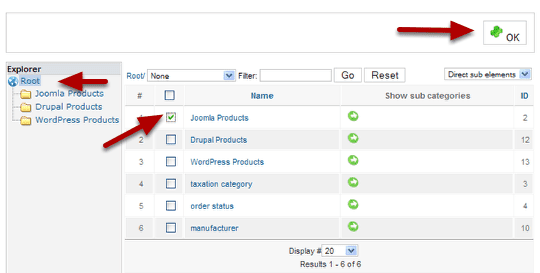
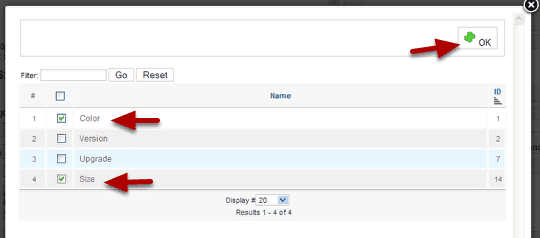
Navigate to the proper level using the Explorer and double clicking. Check one or more categories and then click OK.
The Explorer is a little confusing. Notice that the Root category is highlighted. You need to highlight the category one step higher than the category you want to use in order to get the proper list of check boxes. If I highlighted Joomla Products, the list would be blank. Clicking on OK would give me a message asking me to select a category.
So highlight the parent category in the left pane, so you can choose the category in the right.
The categories selected now show below the Categories panel. (You can select more than one.)
The next panel in line on the product entry page is for Related Products. The operation of the Related Products panel is identical. Since this is our first product, you won't be able to create any related products.
You use the Options panel until you have more than one product saved. We'll skip ahead to Prices for now.
Prices
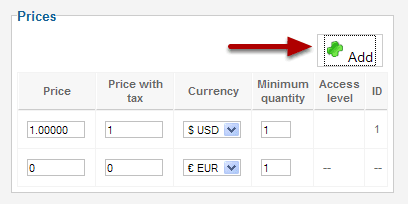
Click the Add button. You can add a price row by clicking on this button. If you want to remove a price row, just set its price to 0. Those modifications will be applied only after you saved the product.
In HikaShop, a product or a variant can have several prices.
- First, you can set prices for each of the currencies published on your store.
- Second, you can set prices based on minimum quantity so that people buying several times the same product in the same order will get a lower price per unit.
- Finally, if you don't set any prices for a product, it will be considered as a free product. For a variant, that will result in the system using automatically the main product prices and thus, it can only be free if the main product is free.
You cannot use the system to limit the user to order at least x items.
When the product is not free, you need to have a minimum quantity of 0.
Business Edition Only - Access level: With the Business edition of HikaShop, you will have an additional column named "Access level" where you will be able to limit a price to a group of users.
Step 5. Variants and options
Before you proceed, be sure you save your work. If you haven't entered anything yet, when you click on the next step you will get a message telling you to enter at least the name and the code number.
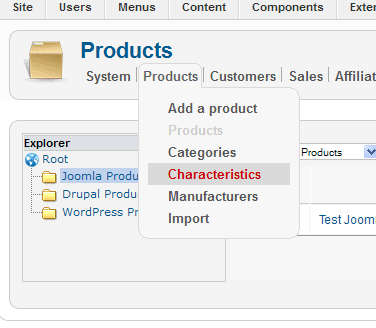
Before configuring the variant of your product, you need first to create one or several characteristics with the menu Products->Characteristics, and then add one or several characteristics to your product
Click Add to add a Characteristic after you've navigated to the correct section.
Shopping cart software developers often use the term "variant" to describe things like colors and sizes. Most people refer to these as options, but in shopping cart talk, options and variants aren't exactly the same thing. This is most easily explained with an example.
Suppose you sell a T-shirt which has 3 sizes and 3 colors. You have different amounts of stock for each for each, for the . Each one will have different weights, images, etc. But you want one shirt to be listed when your customers browse your shop. They get to choose several variants of the shirt when they get to the product page. Small and Red, for example might be some choices.
You need to create that list of variations here, then you can apply them to products as needed.
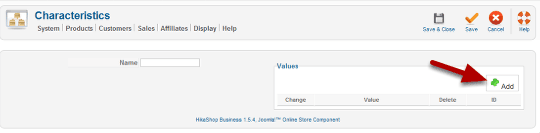
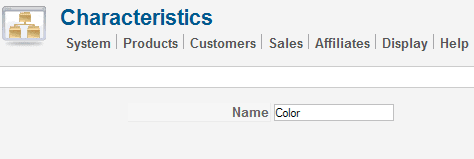
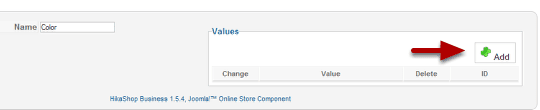
Start by entering the name of the variation
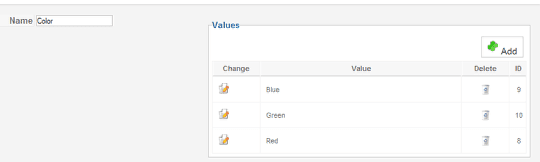
Add a possible value for this variant. In this case Red then click OK.
Repeat the process until you have Red, Green and Blue defined.
Save and close.
Then repeat this step for Size and create three values for size - small, medium and large.
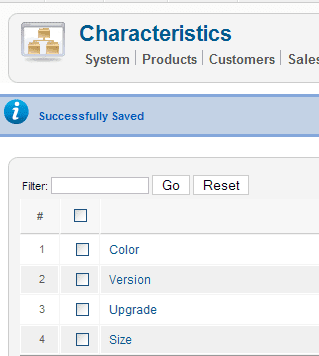
Do the same for any variants you might have. You'll have a list. You'll be able to apply the same color and size variants to any t-shirt in your store. You'll see them all listed in the Characteristics section.
If you are doing a large number of products, it would probably be wise to add all possible variants at the same time, so they will be available as you start entering products. Otherwise you'll have to stop and do this for every product you enter.
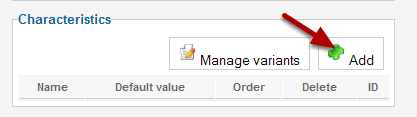
We've just created several characteristics with the menu Products > Characteristics, and now want to add one or several characteristics to your product.
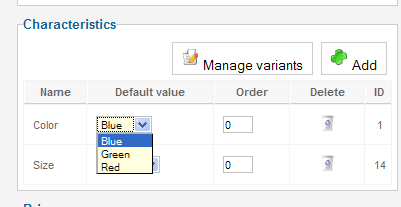
Return to the product page for this product. Click Add in Characteristics.
Check all the ones you want to add and then click OK. In this case we are adding both color and size.
You can now see them added to the Characteristics panel. When the customer purchases, they will need to make a choice of both color and size before they can place the order.
If you want different prices for different quantities, you can set that in the price panel. But what if you want some options. For example No Logo, Printed Logo or Embossed Logo, and each option is a different price?
You've just learned the basics how to go about this. To create an option you go back to the beginning and create a new product with the name of the option. It will have it's own prices, variants, pictures and be a complete product on it's own. You can hide it from the users by putting it in an unpublished category.
Step 6. Add categories
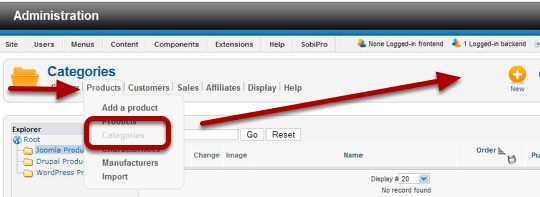
On the Hika Shop dashboard go to Products > Categories to start adding.
Create an unpublished category
- Click the New icon.
- Create a category called "T-shirt logos"
- Return to the product page and go to the Options panel.
- Click Add.
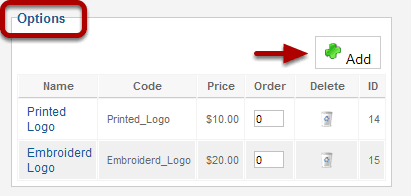
- Add the two options to the product.
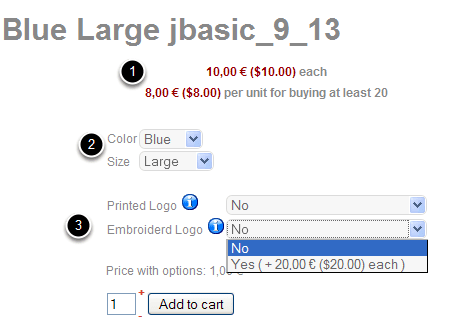
Here's what you'll get on the front end.
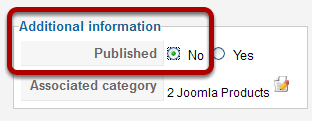
Before you save it choose No for Published. Save it.
Now return to your Products section and create two new products called Printed Logo and Embroidered Logo and put them in the T-shirt Logo category. You are now ready to add them as options to your basic t-shirt.
- Price - I added a discount for buying 20 or more shirts
- Variants - three colors three sizes
- Options - two options with an up charge for each.
You now have all the skills you need to start populating your store with products. All shopping carts are complicated and everybody seems to have some requirement that the developers haven't anticipated. You may find that with HikaShop as well as any product. But for now, you know enough to get products on line. HikaShop has context sensitive help available. check there first if you get stuck.