One of our customers asked how to place two images in their Joomla article next to each other. They also wanted the images to take the full page width.
For one article only, this can be done styling each of the two images individually. This is what you will learn in this post.
How it works
You can individually define a style of nearly any part of your Joomla article.
You can do this, for example, for a certain heading, or for a certain paragraph, or for a certain image. Such individual styling is called "inline" styling. It works using CSS (Cascading Style Sheet) code.
You don't need to know CSS code for your inline CSS styling to work. You just need to use proper syntax.
Here is in a nutshell how it works.
- Select the required HTML element of your article. For this tutorial, we will use the
<img>. - Use the
style=attribute with the selected element. - Place the
property:value;pairing between the double quotes after thestyle=.
Let's take a look at such inline styling at work.
Dividing the full page width between two images
We will use inline CSS styling to divide the full page width between two images in a Joomla article.
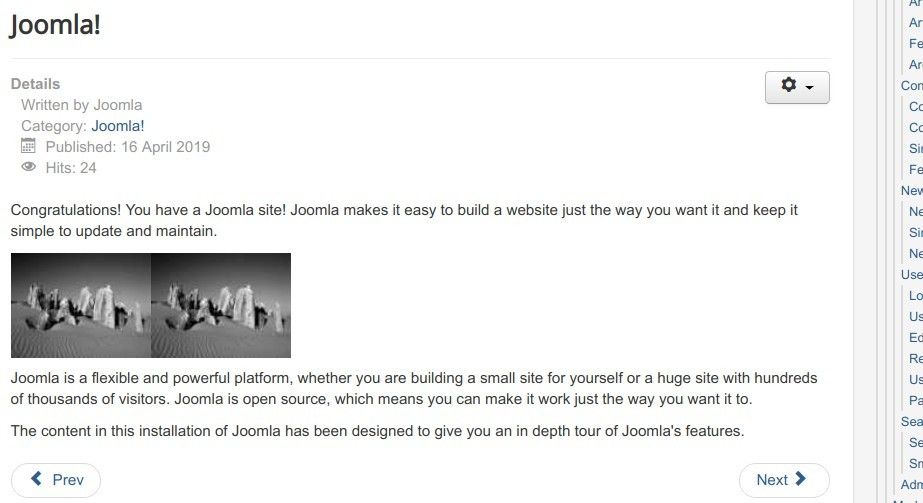
This is how the images look after we added them, with no styling:
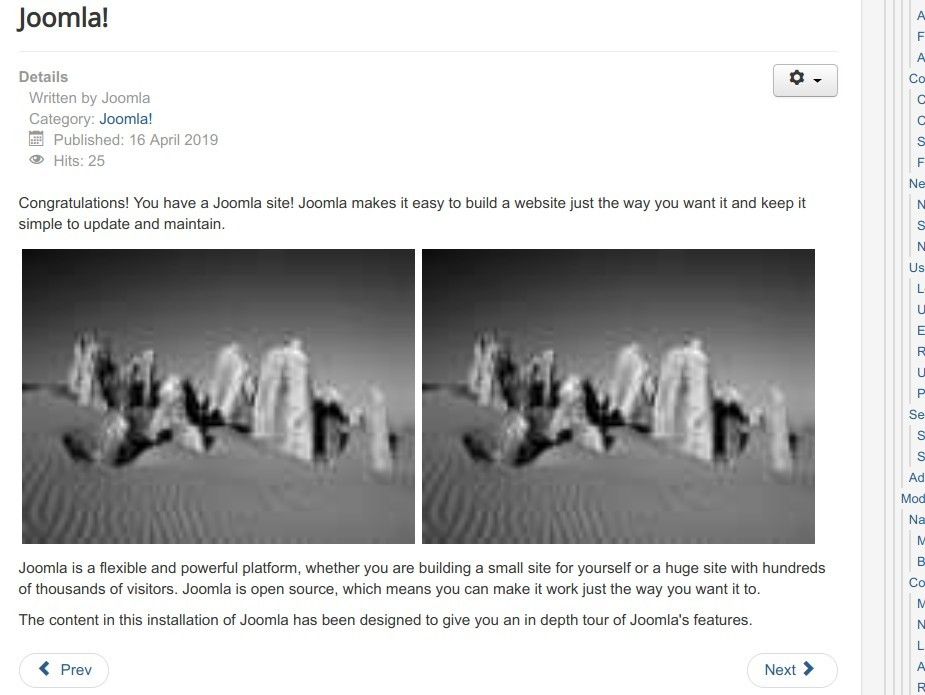
We would like them to take the full width of the page:
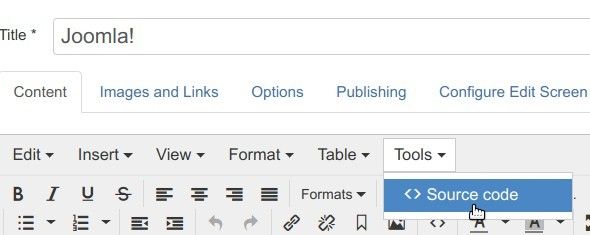
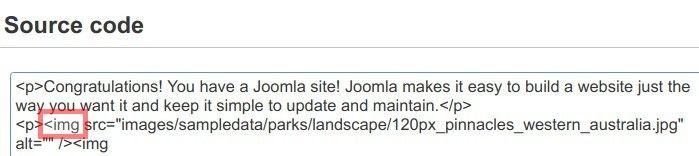
- In your Joomla article, go to Tools > Source code:
- You will see a white box with the Source Code heading. Find the
<imgHTML element of your first image:
- Paste after the
<imgthe following code for your inline styling:style="width: 48%; padding: 3px;". You should end up with your<imgelement's code resembling something similar to the following:<img style="width: 48%; padding: 3px;" src="/images/sampledata/parks/landscape/120px_pinnacles_western_australia.jpg" alt="" /> - Repeat this step for your second image. Your Joomla article's HTML source code should now resemble something similar to the following:
<p>Congratulations! You have a Joomla site! Joomla makes it easy to build a website just the way you want it and keep it simple to update and maintain.</p>
<p><img style="width: 48%; padding: 3px;" src="/images/sampledata/parks/landscape/120px_pinnacles_western_australia.jpg" alt="" /><img style="width: 48%; padding: 3px;" src="/images/sampledata/parks/landscape/120px_pinnacles_western_australia.jpg" alt="" /></p>
<p>Joomla is a flexible and powerful platform, whether you are building a small site for yourself or a huge site with hundreds of thousands of visitors. Joomla is open source, which means you can make it work just the way you want it to.</p>
<p>The content in this installation of Joomla has been designed to give you an in depth tour of Joomla's features.</p>
Excellent! When you check your two images at your site frontend now, you will see them placed next to each other and sharing the full width:
What's Next?
What's Next?
Save $1,000's when you sign up for Joomlashack's Everything Club.
You will get your hands on our extensive range of over 20 extensions, plus legendary support!