 Backing up your site is an essential task, but it can also be difficult to do.
The best tool available for backing up your Joomla site is Akeeba Backup.
In this tutorial, we're going to show you how to use Akeeba to backup your site to a remote server. For security, your backups need to be kept on a completely different system than your site.
If you store backups on the same server as your site, any problem that impacts your site may also impact your backups.
The version of Akeeba that allows you backup to other servers is do this isn't the free version, it's Akeeba Backup Pro. As of this writing, subscriptions start at 40 Euros.
In this post we'll see how to do offsite backups and at store the backups with Amazon Web Services.
#1. Log in or Create an Amazon AWS account
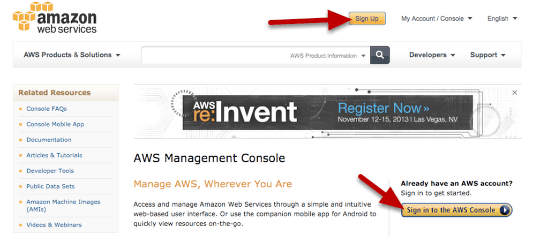
Amazon Web Services is located at https://aws.amazon.com.
If you already have an Amazon.com account, you can just use the same account information.
#2. Find the Security Center
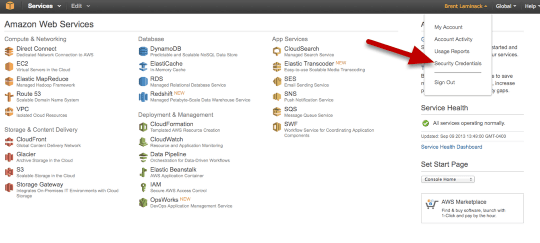
Once you're logged in, from under your name, choose "Security Credentials"
#3. Create New Security Credentials
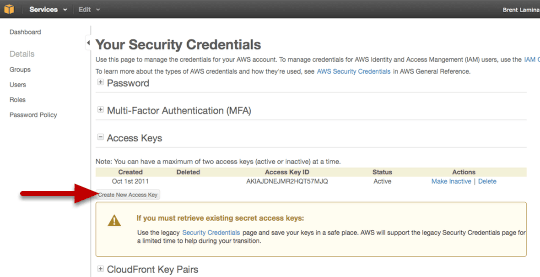
Then, under the "Access Keys" section, choose "Create New Access Key"
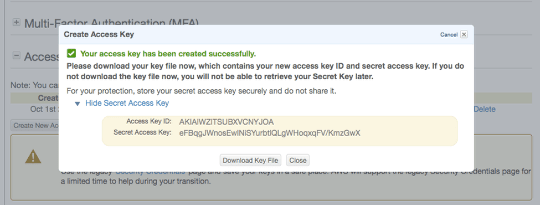
Then click on "Show Secret Access Key" and then either download these two pieces of information: Access Key ID and Secret Access Key. You'll need them next when we set up Akeeba Backup. Guard these secrets. Anybody who has them can read or destroy your backups.
#4. Go to Amazon S3
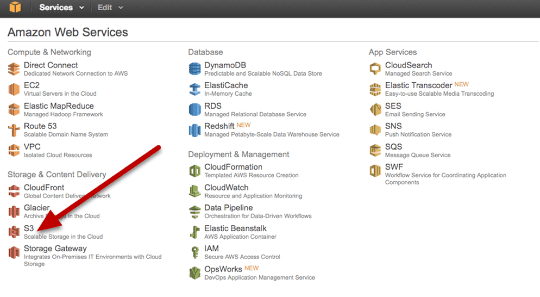
S3 stands for Simple Storage Service. It's a cloud-based data storage service. How much does it cost? You only pay for what you use. Their pricing is at: https://aws.amazon.com/s3/pricing/ You're charged by how many Gigabytes you store per month and how often you access it. But it's relatively cheap. For our purposes, it's about ten cents per Gigabyte per month.
#5. Create a Bucket
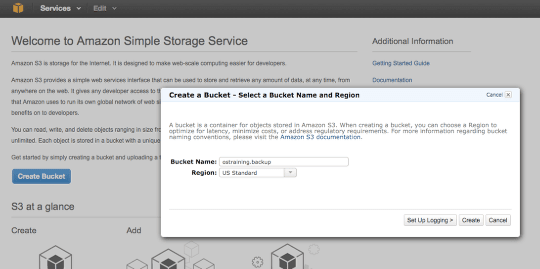
Click on the Create Bucket button and give your bucket a name. What's a Bucket? It's just Amazon's top-level organizational unit for handling data. Think of it as a virtual disk drive. Call it something you'll remember like yoursitename.backup or such. Remember it, as we'll need it next.
#6. Configure Akeeba Backup
From the Administrator side of your site, choose Components > Akeeba Backup, then Configuration.
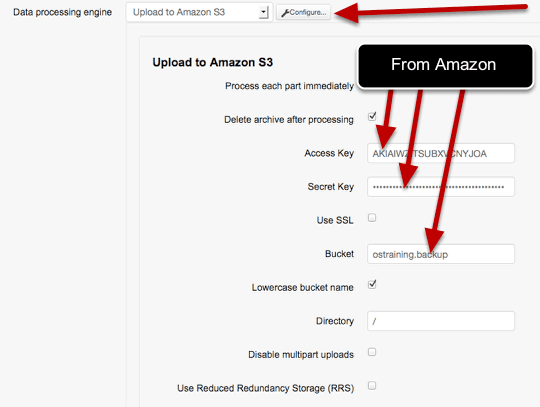
In the Advanced Configuration section, set the Data processing engine to Upload to Amazon S3.
Clicking the Configure.. dialog box will expand as depicted.
Enter the Access Key ID into the Access Key field and the Secret Access Key into the Secret Key field. You only then have to enter a Bucket name. Be sure to hit Save in the Toolbar
#7. Backup Now
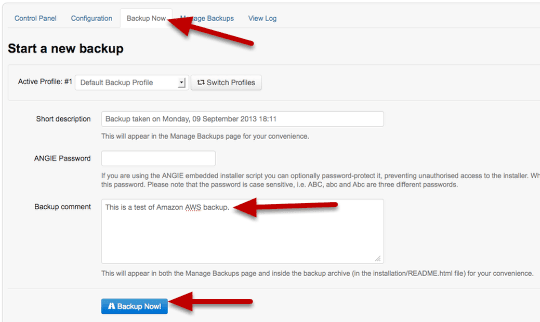
Go to the Backup Now tab, enter a comment or description of you like then, Backup Now!
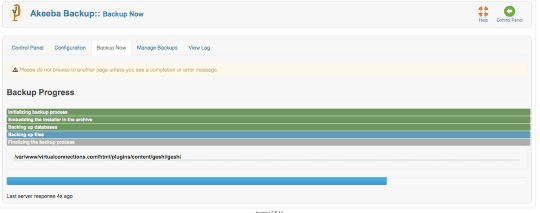
Take a break as Akeeba backs up your files
#8. See if the backup worked
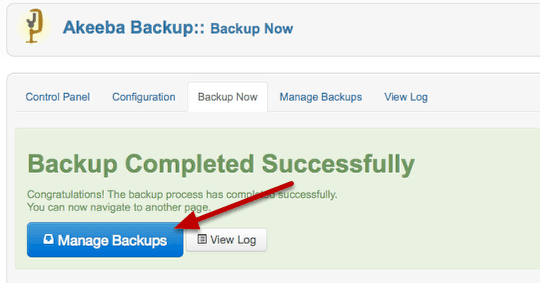
Click the Manage Backups button and we'll see if it worked.

Akeeba now lists a new backup and it's size.
Let's see if the backup made the journey to Amazon successfully.
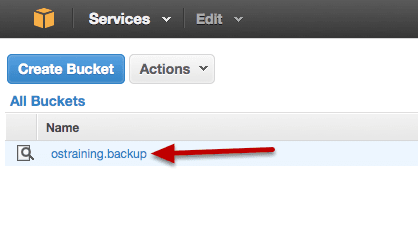
From the AWS console, click on S3, then your bucket name. Hopefully you'll be able to see the backup here.

Sure enough, Amazon says it has the same amount of data. Success!