Akeeba Subscriptions is an extension that allows you to create paid membership sites.
Akeeba Subscriptions integrates directly with Joomla's access controls and with dozens of popular extensions, such as JomSocial, Community Builder or Virtuemart.
In this tutorial, we're going to show you how to get started with Akeeba Subscriptions.
Our goal in this tutorial
Here's what we're going to do this tutorial:
- Create three groups of members: Joomla Subscribers, WordPress Subscribers, Drupal Subscribers.
- Create three levels: 90 Days, 6 Months and 1 Year.
Preparation
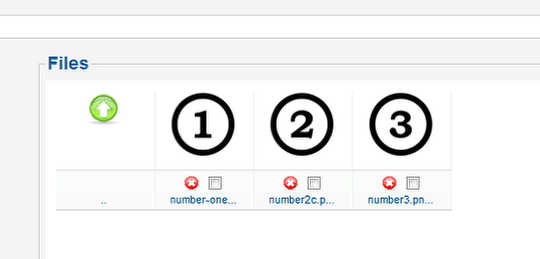
- Create at least one image to be used to go along with each subscription level.
- Upload the images. I went to Media Manager and uploaded mine into the /images/subs/ folder:
- You'll use the directory in the configuration steps below, and you won't be able to create a membership level unless you have at least image to associate with it.
Step 1: Install
- You can download Akeeba Subscriptions for free from https://www.akeebabackup.com/products/akeeba-subscriptions.html
- Go to your site's administrator area, then Extensions > Extensions Manager and upload the Akeeba Subscriptions package.
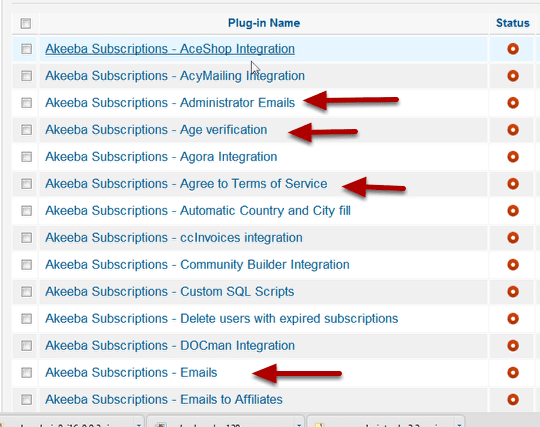
- Akeeba adds quite a few plugins to your site. You won't need all of them, but you might need several. I found at least four useful plugins and I've added arrows to them below.
Step 2: Basic configuration
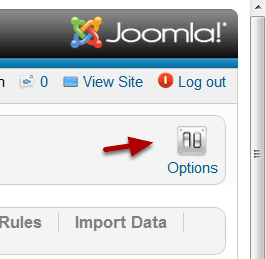
- Go to Components > Akeeba Subs.
- Click the Options icon.
- Set the currency in this section. The default is Euros. You may need to change it to your country's currency.
- Review the other configuration tabs and set up the basics, they are easy to understand. If you want to designate an images directory you will manually need to create the directory first using the Media Manager. It will not be created for you.
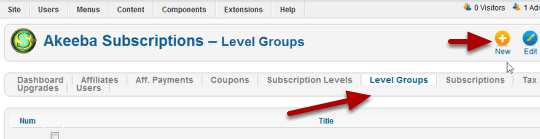
Step 3: Creating groups
Groups are necessary if you want to restrict different groups of members to different parts of your site. You may not need groups if you have only one basic service.
- Go to the Level Groups tab then click New.
- Give the group a Title. In our example, the groups are Joomla Subscribers, WordPress Subscribers, Drupal Subscribers.
- Click Publish.
- Click Save and New.
- Repeat for other groups you want to use.
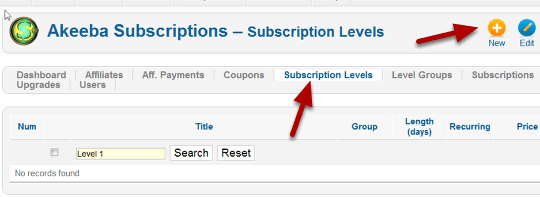
Step 4: Create subscription levels
Groups were optional, but subscriptions levels are not. We must create a subscription level in order to give our members access to the site.
- Go back to the dashboard and click the Subscription Levels tab.
- Click New, to add a subscription.
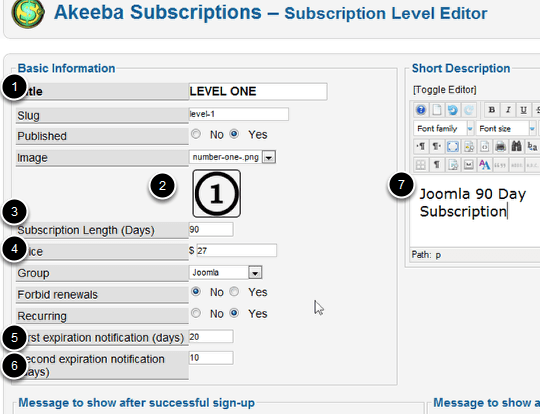
Here are the settings for each subscription level:
- Title: This is the name of the subscription that will be presented to your users.
- Image Select: A picture to represent your subscription. The image must be located in your site's images directory, or the one you specified in the basic options.
- Subscription Length (days): How many days a subscription in this level lasts. Common values are 30 (one month), 180 (half a year) and 365 (one year).
- Price: The price of a subscription in this level. If you need to enter a decimal value, use a dot as the decimal separator. For example, 12.30 is valid, whereas 12,30 is INVALID and will be interpreted as1230. Do NOT use a thousands separator.
- First expiration notification (days) Akeeba Subscriptions will send a notification email to users whose subscription is expiring soon. It can send up to two emails. This parameter tells Akeeba Subscriptions how many days before the subscriptions expiration the first email will be sent. Set to 0 to not send out a notification email.
- Second expiration notification (days): Akeeba Subscriptions will send a notification email to users whose subscription is expiring soon. It can send up to two emails. This parameter tells Akeeba Subscriptions how many days before the subscriptions expiration the second email will be sent. Set to 0 to not send out a notification email.
- Short Description: A description of the subscription to show to your users. Keep it short (around 30 words or less) or it will overflow the boundaries of the subscription presentation areas in the front-end.
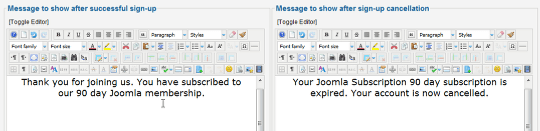
- Create a confirmation message.
- Create a cancellation message.
- Click Save and New.
- Repeat this for each level of Joomla subscription. You'll be able to use the copy feature to create the next group if the terms are the same and the messages aren't going to change, you'll only need to change the titles manually.
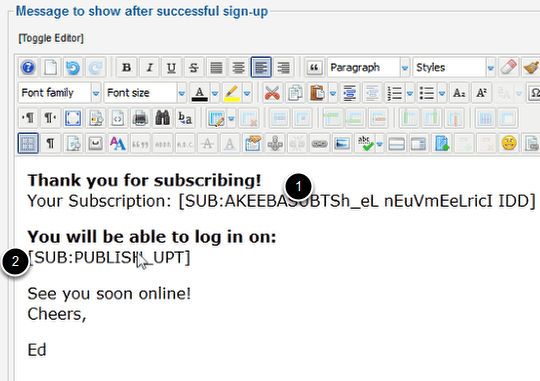
Since Akeeba Subscriptions 2.0.a3, you can personalize the messages which are shown after a successful sign-up or cancellation of the subscription process. This is done using "merge codes". The merge codes are explained and listed in the documentation. Check the PDF that comes with the download for a complete list. Here's an example using Merge Codes.
Step 5: Finish the Subscription Levels
- Make sure you are on the Subscription Levels page.
- Put check marks in the boxes and click cop. This will duplicate your three subscription levels.
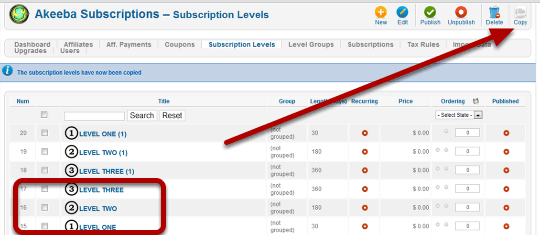
Open each subscription level for editing:
- Change the titles.
- If you are using groups, change the groups they are assigned to.
- Unless you used merge codes, change the text in the response windows
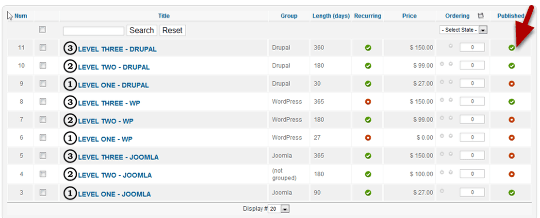
You should end up with nine subscriptions. Below is my list of nine levels. There are three levels for each group. Joomla (levels 1,2,3) Drupal (levels 1,2,3) WordPress (levels 1,2,3)
- Review your entries. You will be able to see the details all on the same page.
- Be sure to check to see if you have them published.
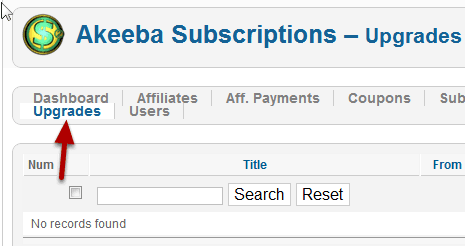
Step 6: Upgrades
The Upgrade feature is designed to reward loyalty. It will allow existing subscribers to get discounts if they move between subscriptions on your site.
- Click the upgrades tab.
- Click the New icon to the right to define an upgrade.
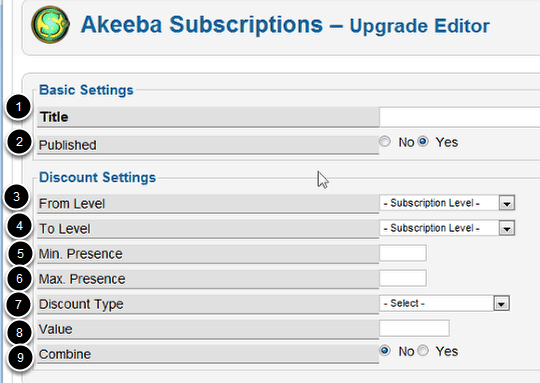
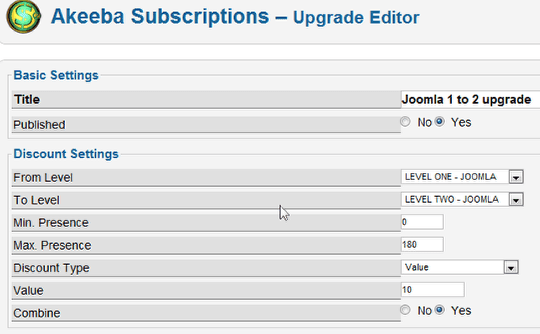
- Title - Just a title to remind you of what this upgrade rule does
- Published - If set to No, it won't be taken into account during a new subscription's price calculation
- From level - The subscription level for which the user must already have a valid subscription in order for the upgrade rule to take effect
- To Level - The subscription level which the user is currently trying to subscribe to and onto which the discount will be applied
- Min. Presence - The minimum number of days the user has to have a valid subscription to From Level for this rule to be applied
- Max. Presence - The maximum number of days the user has to have a valid subscription to From Level for this rule to be applied
- Discount Type - If it's Value, the Value field contains currency, e.g. if you're using Euros and type a value of 20 then 20 Euros will be subtracted from the price. If its Percent, then the Value field contains a percentage, e.g. if you type a value of 20 then a 20% discount will be applied to the price.
- Value - See above.
- Combine - The final discount is normally defined by the upgrade rule that generates the highest discount. When upgrade rules have the Combine option set to Yes, then all these (that apply to the subscriber's situation) will be added together (combined) to define the discount. In other words, the applicable upgrade rules with the Combined flag turned on work accumulatively instead of exclusively. This feature comes in handy when you want to give discounts to "bundle" subscriptions, i.e. subscription levels which give you the same privileges as buying several other subscription levels at the same time.
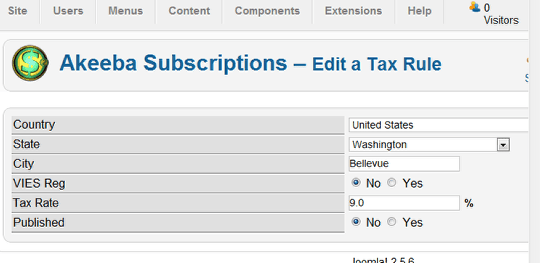
Step 7: Tax rules
Now you need to deal with taxes if it's required by your state or country. By default, the system is set up to charge no taxes. Here's a simple example.
- Click the Tax Rules tab and then click the New icon.
- Add the country, state, city and percentage for the US and Canada. If you leave the State and City blank the same tax rate will apply to the entire country.
- Only use numbers in the rate field. No % sign.
- Only use a decimal point to separate numbers. A comma will not be read.
Things are a little tougher in European countries. With Intra-EU and Extra-EU countries with VIES and VAT numbers you may end up creating 30 or 40 different tax rules. Our goal here is just to get you to through set up. Read the documentation for more complex instructions on VAT.
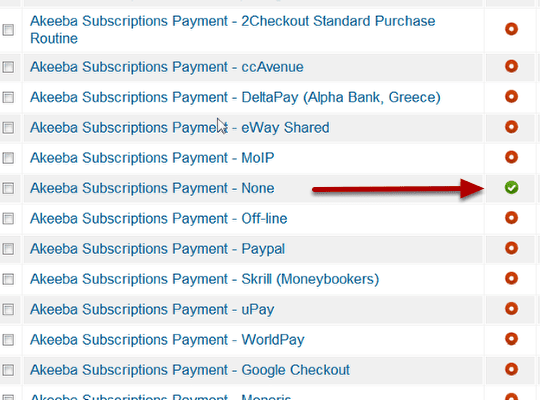
Step 8: Payment options
- Go to Extensions > Plugin Manager to activate gateways for your pay plans.
- If you are not charging you still need to activate None.
- If you're testing, you will need at least this checked to avoid error messages on the front end.
- There are so many gateways available we're just going to use None so we can get set up. The PDF Documentation has specific instructions on setting up all the different payment options.
Step 9: Create menu links
The final step in setting up Akeeba Subs is to make menu links to the subscription levels.
- Go to Menus > Main Menu > Add menu item to start adding.
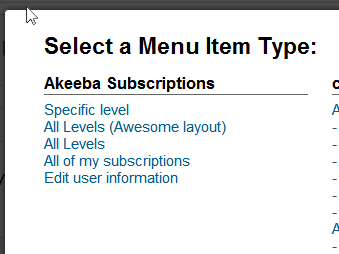
- Click Menu Type to open the pop up and you will see some choices added by the program:
- Specific Level: This links to a single level. Only one product.
- All Levels (Awsome Layout): This lets you choose one or more levels with a multiple select box.
- All Levels: This shows all your subscription levels on the same page.
- All my subscriptions: Logged in users will be able to see what subscriptions they have and edit their profile.
- Edit User Information: Users can edit their details on the site.
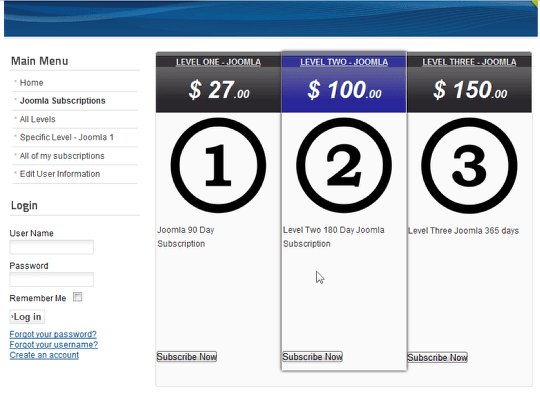
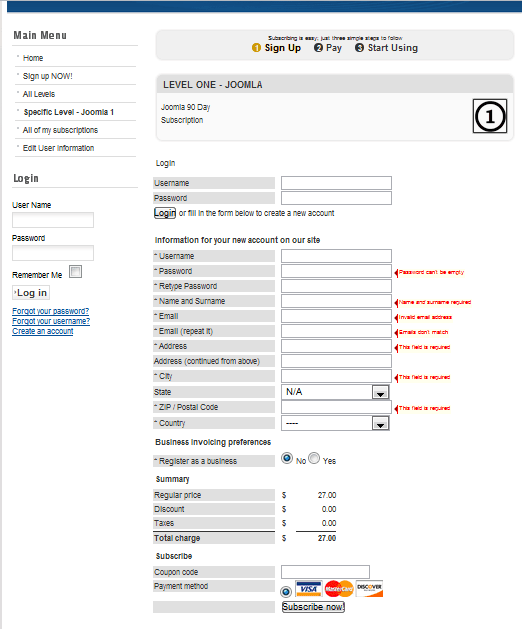
Example Sign Up Page for a Single Subscription Level
Example Sign Up Page for a Group