Step 1. Create a directory on your web host for the test site
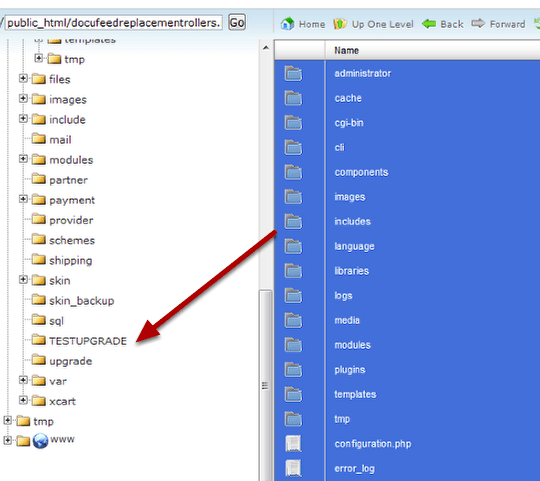
Use a file manager or FTP program to make a complete copy of your Joomla main directory in a subfolder.
You will want to have a complete copy of your main installation. I am going to use cPanel on my Hostgator account for this demonstration. If you are using a different host, the steps are the same, although the controls will be quite different.
- Log in to your hosting control panel. Often it can be accessed by https://yoursite.com/cpanel.
- Find the File Manager
- Navigate to your main directory.
- Highlight all the files you want to copy
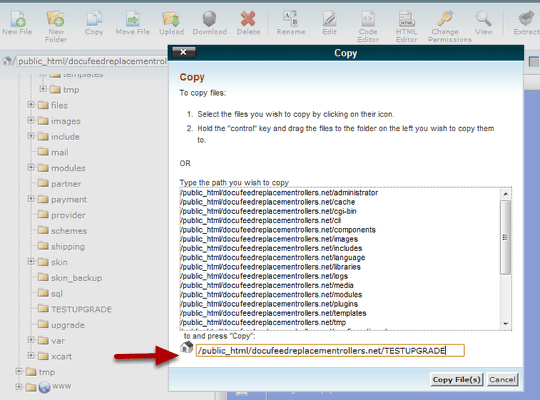
Copy all your Joomla files to a subdirectory. I named mine TESTUPGRADE.
You can use the drag and drop method or click the "copy" icon, and specify the path to the directory.
This folder can be a subfolder off the root directory or a subdirectory of a subdirectory. Just make sure you make a complete copy of all files and folders.
Step 2. Export your existing database using phpMyAdmin
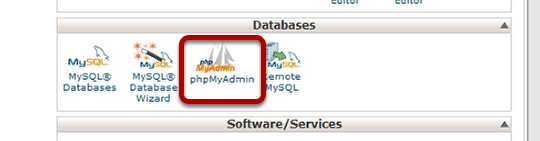
Return to your cPanel home page and click on phpMyAdmin.
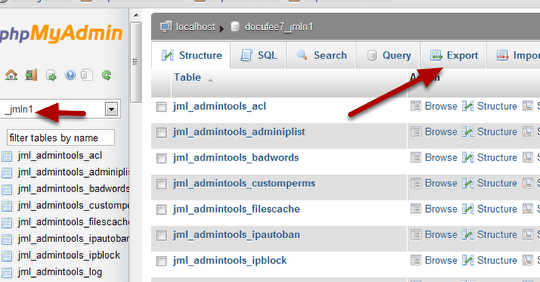
How to export? Go to existing database in phpMyAdmin and click Export at the top.
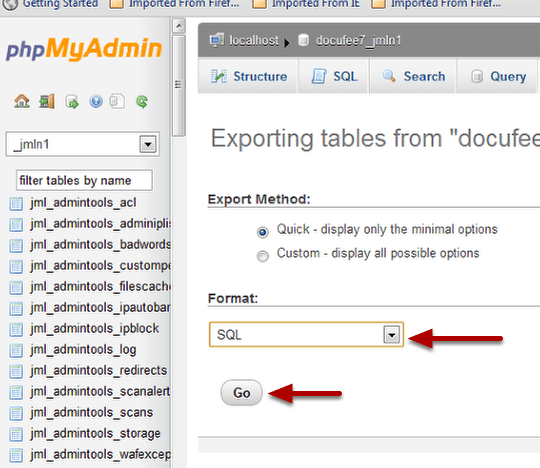
Select the Format: SQL and click Go. This will download a .sql file to your computer
You probably won't need to make any changes on the export page. Download the file to your local computer. Exporting as an SQL file is usually the best. If it's extremely large, you can export it as a .zip or .gz file and you will still be able to import it. On my Hostgator account I can import a compressed database, but I have noticed on some other hosts that you have to extract the zip file before you can upload it. You will get an error message telling you this if your server is not set up to extract the file on upload.
If it's a really huge file, you may need assistance from your webhost to avoid timeouts during download and upload.
Step 3. Create a new database
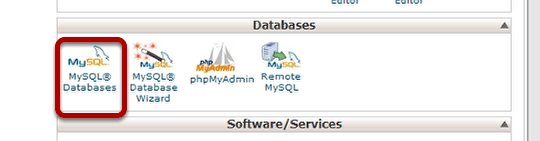
Click MySQL Databases on your control panel. You could also use the Database Wizard. I'm going to demonstrate without the wizard so you can see all the steps.

Give it a name and click Create Database.
Notice that on this server, the username is automatically added to the name you created. So the actual database name that you will need for your configuration would be (in this case) docufee7_testupgrade. It's a good idea to write this down.
Step 4. Add a database user to the new database
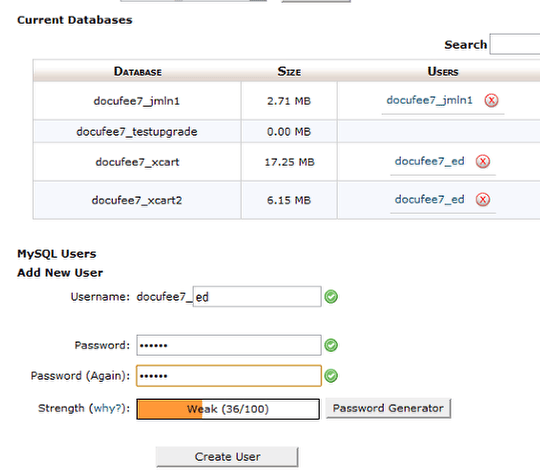
Create a database user by entering a username and password. Click Create User. Write down the username and password for future use.
Notice that it appends the name you used to the username. So the full username you need to remember for configuration is docufee7_ed.
NOTE: you can use an existing database user, you don't need to create a new one. In the step below you will see that the Add User To Database controls includes a dropdown for all the users, and another for all the data bases. You can have one user with privileges to multiple databases. I only created a new one to show the steps involved.
Step 5. Add the user to the database and give full permissions
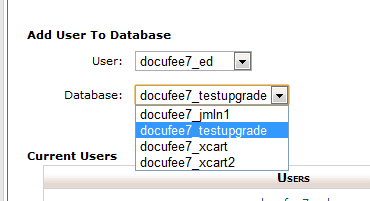
Choose the user and choose the database. Click Add User.
Step 6. Give all privileges to the new user
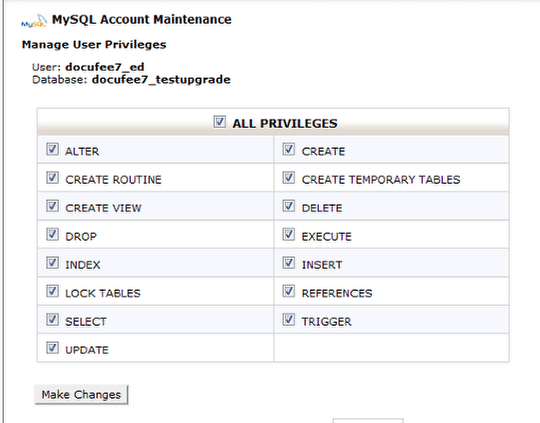
Check all the boxes.
Step 7. Import the data
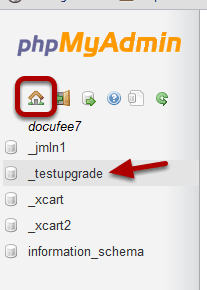
Return to phpMyAdmin and click the new database name in the top left.
Click the Home icon if you don't see the new database in your list. You may need to refresh.
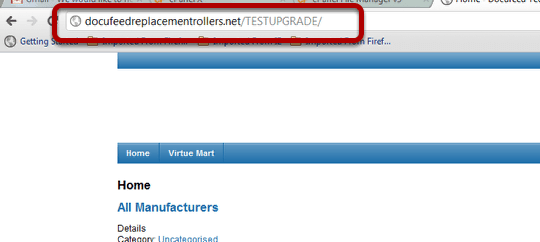
Navigate to the directory of your test copy and you will see a complete duplicate of your site. But now it is using a different database, and you can experiment with it as much as you want without disturbing your original site. You can now proceed with the upgrade.
Now you have a complete and exact copy of your main site. You can fix or experiment on this site and once it's working you have several options. You can duplicate your work on the original site, move the original out of the main directory and move this one from the subdirectory to the main one. Or you can move the entire site and all its data to a completely new server.
The process is always the same. Copy and move the files, then copy and move the database, and be careful that you always have your configuration.php file pointed at the correct database.
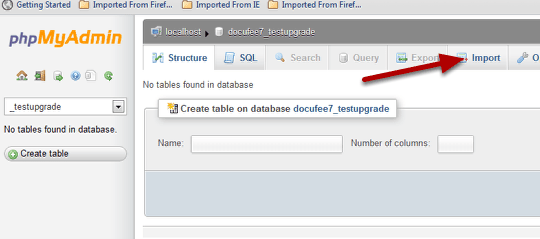
Click Import in the main area of phpMyAdmin.
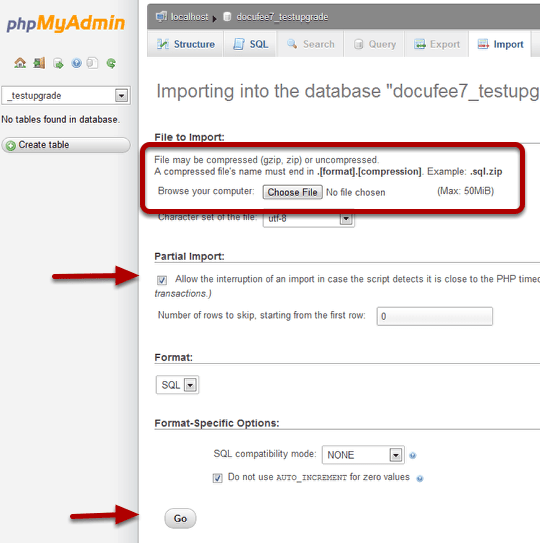
Click Choose File to browse your computer for the file you downloaded. Check Partial Import to help prevent time outs while loading. Click Go to upload.
If you have Partial Import selected and are still having timeout errors, the only help is to call or contact the hosting company for assistance.
Step 8. Connect the new copy of your site to the new copy of your database

Open the configuration.php file that is located in the copy you placed in TESTUPGRADE (or whatever you named it). Notice that the permissions in the copy were automatically set to 444 by the server. The results may be different on your server.
Before you can make any changes to this you will need to change the permissions to at least 644. If you can't change permissions, contact your host or use Akeeba Admin Tools to change the permissions.
Step 9. Edit the configuration.php file with the new database connection
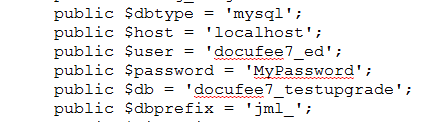
Change the database connection information to match the new database. In this example the information would look like the picture above.
- $host: will be the same as the old one. Often it's localhost, but not always. You can look at the original version of configuration.php to see what was used there.
- $user: docufee7_ed
- $db: docufee7_testupgrade- the database name you created
- $password: YourPassword - I used a simple one I could remember for this example, Your password will be whatever you chose when you created the database user.
Step 10. Check your new test site
Visit the new site. You should now have an exact replica of your existing site. You can safely test any changes here before you apply them to your live site.