This tutorial will show you how to create a development site in Joomla. You can make changes to your test site and then, when you've tested and are happy with them, automatically push out those changes to your live site. This is professional development behavior, because it reduces the potential for mistakes and allows you eliminate most errors before they become public.
To create a development site we're going to use an extension called Working Copy.
Install Two Joomla Sites
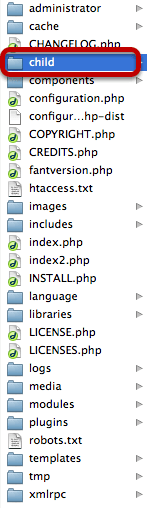
In order to synchronize a Joomla live site and a Joomla development site, you first need to make sure you have both of them. So, I've installed a live site and then a development site inside it, in a folder called /child/. You can use other arrangements, but this is a simple way to get started.
Note: Please make sure that you keep your development site private from visitors and from search engines. That means at least password-protecting the folder.
Getting Working Copy Set Up
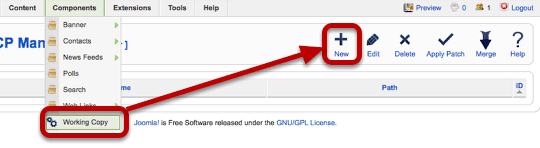
We need to install Working Copy on both of our Joomla websites. When we've done that, login in to one of them and go to Components >> Working Copy >> New.
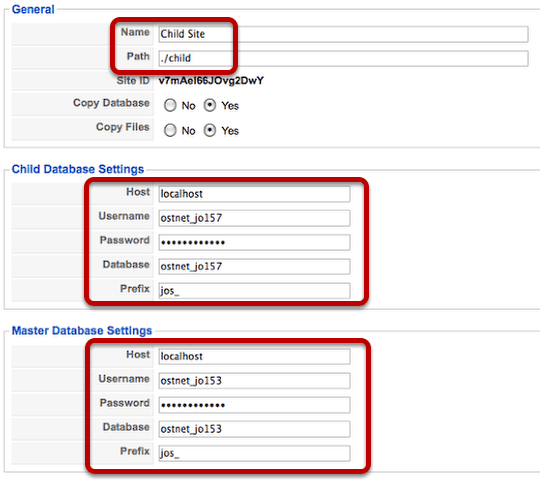
There are three pieces of information you need to enter in this area:
1) Choose a name for this entry and enter the path to the child website.
2) Enter the database information for the child site. If you don't know it, you can find this in the site's configuration.php
3) Enter the database information for the main live site.
That's all you need to do here. There other, more advanced settings, but that's enough to test Working Copy and get it working.
However, don't forget to enter this exact same data into both your live site and your child site.
Make a Change To Your Child Site

Now let's make a change on our child site - it doesn't need to be large. In fact, to test Working Copy, I recommend making only a minor alteration. In this case I modified the name of one article. I then went to the front of the site to check that the change was complete.
Seeing the Changes in Working Copy
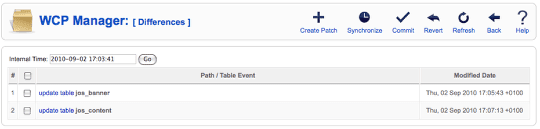
Now in your child site, go to Components >> Working Copy >> Differences and you'll see a list of the things that have changed. In this case it will an update to the jos_content table (when I edited my article) and an update to the jos_banner table (when I visited the site and saw the advertising banners).
Applying Changes to the Live Site
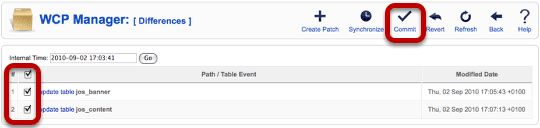
Select the changes you'd like to see made on your live site and click "Commit". You should see a blue "Commit completed" message.
Check Your Changes
Go to your live site and check to see whether the change has been made.
Changing Files

OK, OK, you might say. That was fairly simple. We were able to move some database tables over. Well, let's have a look at how can we also move over file updates.
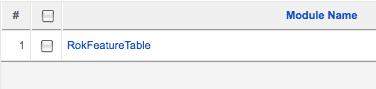
For, this example I've uploaded a module from Rockettheme to my child site, but any extension will do. You can see that 2-15 are file changes and 16-17 are module updates.
Check the Changes
Now, go over to your live site and look for the new extension. It should have been successfully transferred.
Commit the Changes
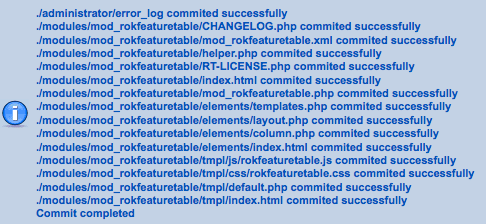
Now select those changes, click "Commit" and you should get a message saying that you've successfully moved the test changes to your live site.