Welcome to the fifth and final part of our series on the Gantry 5 framework.
In this closing post, I'm going to discuss more advanced options in Gantry. Don’t expect anything extremely technical - all these options are useful for (almost) non-coders and are very practical for most template users.
Tip #1. Using multiple layouts
So far in this series, we have only been using a single template style (Outline) for our demo site. However, we already saw that the Hydrogen template ships with a second Outline for the homepage, which we have ignored till now. Even though this outline is called "Home” this does not mean that we are forced to assign it to the homepage.
Let’s take this "Home" Outline and start using it on our site.
- Go to Menus > Main Menu.
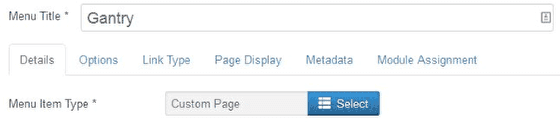
- Create a new menu item called Gantry (within the Main Menu). As we will see in just a minute, the Home Outline does not use any Joomla output, so we can use a special type of menu for this: Gantry 5 Themes – Custom Page. This type of menu item is just an empty shell with any further Joomla output.
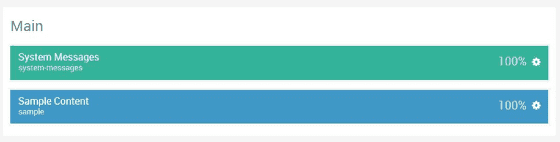
Note: Don't use this menu item if your Outline is using Gantry's "Page Content" Particle because that renders Joomla's Component area. Indeed in the Home – Outline this feature is lacking, the Main section just contains the System Message component and a Sample Content Particle:
- Access the Hydrogen template and make sure the Home – Outline is active.
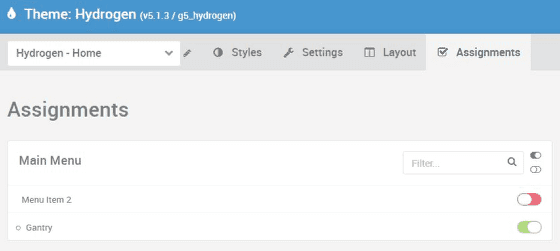
- Go the Assignments tab and assign this outline to the "Gantry" menu item we just created:
- Save these changes and go the frontend of your site.,
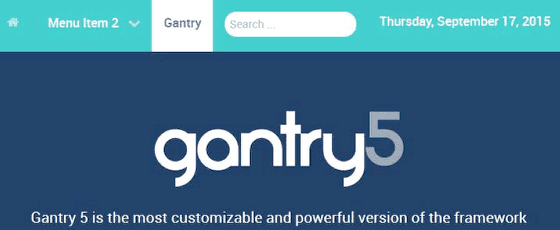
- When you go to the Gantry option in the menu, the look and feel will be completely different from the rest of the site:
It is easy to create more Outlines beyond these pre-configured two:
- Click the Outlines button in the top-right from within any Outline. You will get an overview of the existing Outlines.
- Click the big plus sign which is the last item in the row of Outlines.
- Give your new Outline a name and save it.
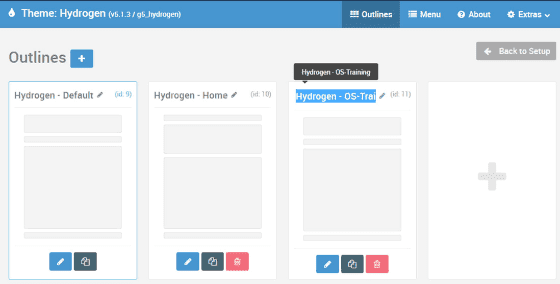
If you create an Outline this way, it will be a duplicate of the default Outline.
You can also create a duplicate of any other Outline by clicking the grey icon sitting between the edit and delete icon of an existing one. Especially if you need an Outline that is just slightly different from an existing one, it makes sense to create a duplicate of that one.
Finally, edit your new outline, changing the styling and layout. Then assign your new Outline to a menu item.
Tip #2. Advanced CSS customization
Beyond using Gantry's customizer options, such as the color-pickers and font-selectors, you can also edit the actual template files.
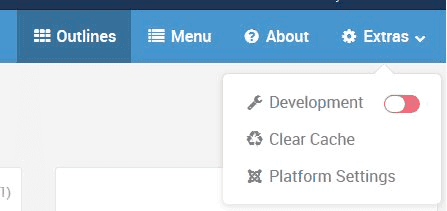
While editing Gantry's template files, it may be best to set the template to development mode. This does make the template run a bit less efficiently, but any changes you perform are immediately applied. You can set Gantry to development mode under the Extras option in the top-right.
Now let’s make a very simple CSS rule in a custom file.
Go to your template files. In the example of Hydrogen, you will see a folder called custom:
- templates/g5_hydrogen/custom
Any customization you do should usually be put in this folder. This advice applies not only for CSS changes, but also for other tasks such as creating a custom Particle.
For a new Particle you would create a subfolder called particles, but in our cases, for CSS, create a new folder called scss and within that folder, create a file called custom.scss. This will give you the following folder structure:
- templates/g5_hydrogen/custom/scss/custom.scss
Note: Gantry uses the SCSS format for CSS. It will compile this file for you into actual CSS that the template can use. Never edit the existing CSS files. Don’t worry about this being difficult, within this file, you can still use plain CSS syntax, though you can also use SCSS syntax. For now, let’s simply add a short line to make all paragraph text red:
html p { color: red; }Now your text is a nice ugly red. Doing it this way, you don’t have to worry about losing your changes with template updates, since this file will be left untouched, including your custom changes. This advice brings us to the upgrading process:
Tip #3. Upgrading Gantry
When we are talking about upgrading Gantry, there are separate processes for the Framework and the template. For both, available upgrades are shown as any other extension with the auto-upgrade feature in the Joomla Extension manager screen, under Updates:

Tip #4. Finding more advanced techniques
You more want to explore even more advanced Gantry 5 features, beyond the scope of these 5 tutorials
Fortunately, Gantry has an extensive set of documentation, describing every option in Gantry. You can find the documentation on docs.gantry.org/gantry5/. You'll find tutorials on many different topics, including.
- All the basics
- Creating your own Particles and Atoms
- Creating your own layout presets
- Advanced use of the Layout manager
- Advanced theme customization
- Creating your own themes
- And much more