Welcome to the second in our 5-part series on the new Gantry 5 framework from RocketTheme.
In the first post, I gave you a general introduction to Gantry 5. Now it's time to start using Gantry 5 and building websites.
The best way to learn a framework is to work with it, so in this tutorial I'm going to show you how to build a simple Joomla site using Gantry 5.
Step #1. Installation
Installation is easy:
- Go to gantry.org/downloads and download both the Gantry Component and the Hydrogen theme.
- Go to your Joomla Extension manager and install both as you would any other extension: First Gantry, then the template.
- Go to Extensions > Templates, you will see the Hydrogen template installed.
By the way, you can also access the template's configuration via Components > Gantry 5 Themes or via the Gantry 5 themes quick-launch icon in the Control Panel. But let's keep it simple and work from the Template Manager for now:
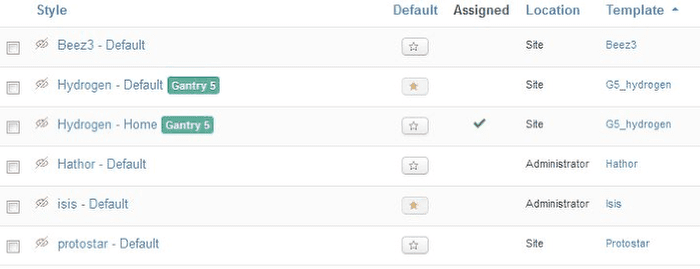
You may notice several things here:
- The template decided to set itself as the default template (which you normally have to do yourself)
- You see 2 instances of the template.
- Gantry also self-installed a template-style (Gantry calls this an Outline). This Outline is assigned to the homepage now, which creates a separate layout for the homepage as compared to the rest of the website.
The template also installed some other sample data, including a small menu. For this tutorial, I'm going to ignore the sample data in order to keep things simple.
Step #2. Template Configuration – Base Outline
First, you need to understand how the theme display is built up.
Basically we have a top-level configuration called the "Base – Outline". This defines the 'global' configuration. Anything you define here counts for all other Theme Outlines, unless overridden.
- From the Joomla Template Manager, click on the Hydrogen- Default style to access the template. Note that you always first enter the Theme – Outline configuration, in this case for the Hydrogen - Default Outline.
- To switch to the Base – Outline, click on the dropdown on the top-left which now shows Hydrogen – Default and choose Base – Outline:
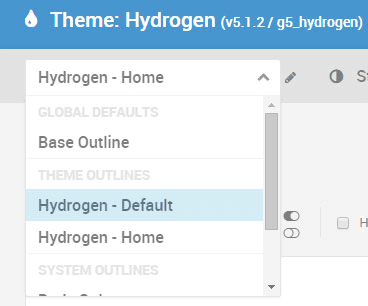
Note that for the "Base - Outline" we only have the "Styles" and "Settings" tabs. The "Layouts" and "Assignments" tabs are only available for Theme – Outlines.
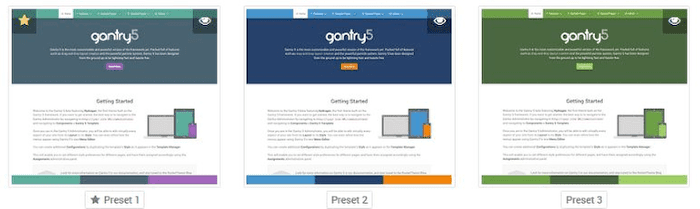
You may have noticed that on the frontend of the site we have a green template. This is because of the Preset that is currently active. Let's change this to the blue preset, called Preset 2.
We can also further customize this by using the settings lower down the page. Let's make a small change to the color of the Navigation area:
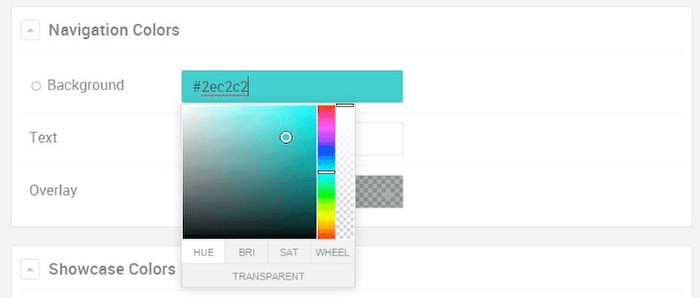
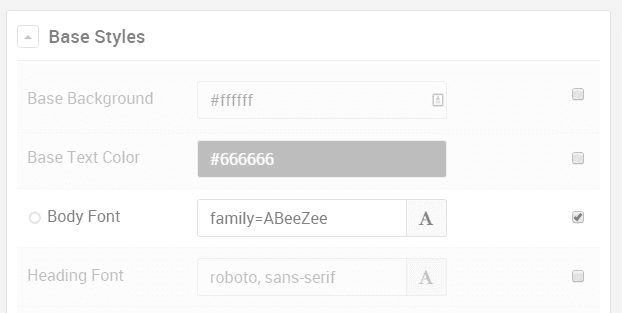
Feel free to change more settings. You can change more colors, and also fonts and breakpoints for mobile display, favicon, etcetera. Make sure to save your changes.
Now go to the Settings tab. You can change your settings such as Copyright settings, Logo settings, Google Analytics code, etcetera.
One item might need changing, as it can confuse matters. The currently active menu is not the Main Menu, but the Hydrogen Theme menu. In the menu-setting, switch to the Main menu again:
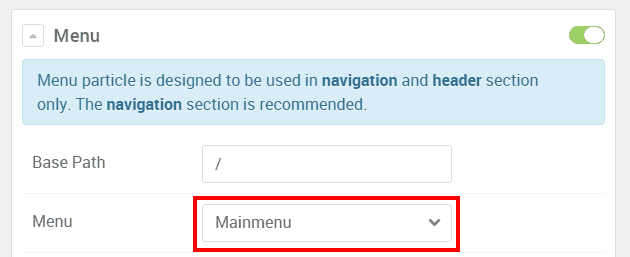
- Go to the Menus > Main Menuand make the Home item on the Main Menu into the default homepage.
Step #3. Template Configuration – Theme Outlines
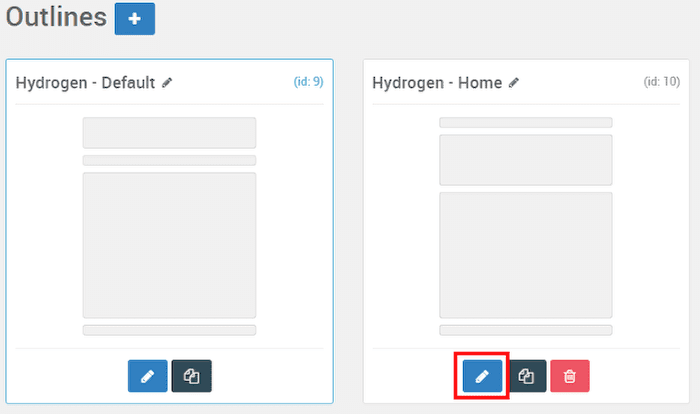
We noticed that the template has 2 styles or Outlines active (Home and the Default for the rest).
To keep things simple for this first post, we will remove the Hydrogen – Home Outline from the homepage first so that we have a consistent look for the whole website first.
To switch between outlines we can either use the dropdown button on the top-left, as we already did earlier to switch to the Base – Outline, or use the Outlines button at the top-right.
- Click on the top-right "Outlines" button:
This shows us the currently defined Theme Outlines, currently 2 (plus some system-outlines).
- Click on the edit-icon for Home – Outline:
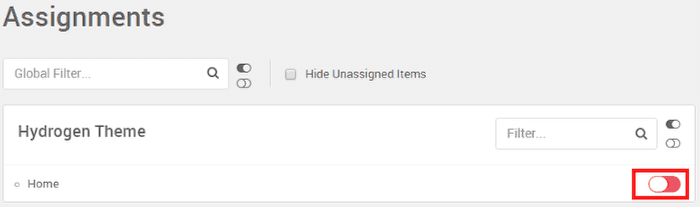
- Go to the Assignments tab.
- Un-assign this Outline from the Homepage. Now all pages are assigned to use Default – Outline.
Step #4. Configuring the Default – Outline
We are now using Default – Outline for the whole site.
When you look over the settings for Default – Outline, you see that they look similar to the ones in the Base – Outline. They only difference is that they seem greyed out a bit and they have a little checkbox next to them. If something is greyed out, it means that that the inherited setting from Base is still active. If you click into a field that you want to change you will notice that the checkbox is marked and the field is no longer greyed out:
My advice is to keep things simple: keep your settings in the Base – Outline as much as possible.
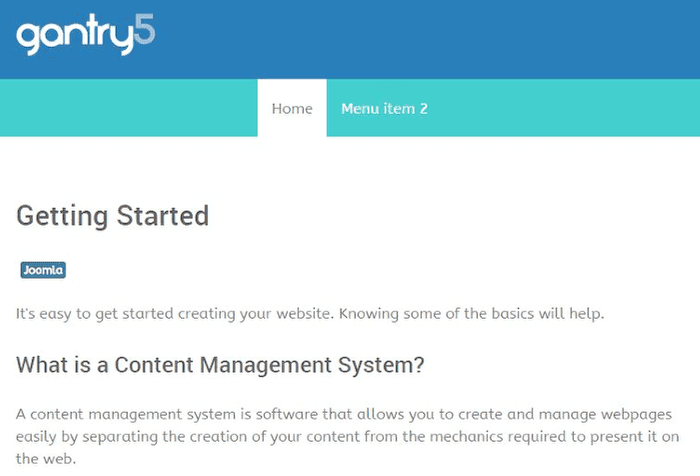
If you followed along so far your website should more or less like mine here (note that for demo purposes I added a second menu-item to the Main Menu):
Step #5. Using Layouts
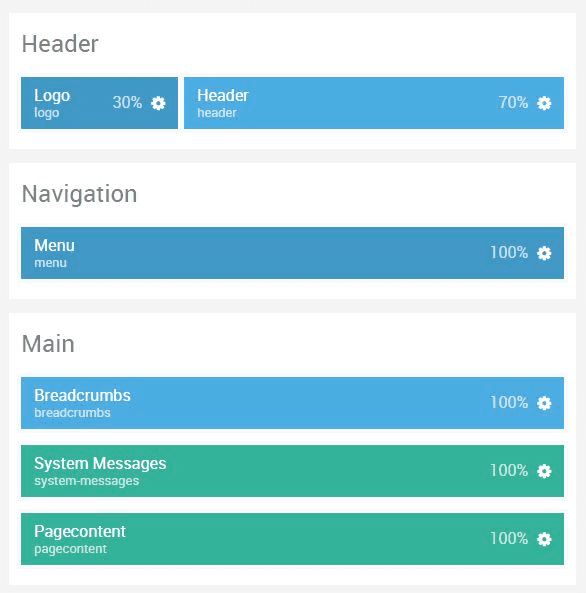
Now let's take a quick look at the Layouts tab and see what's in there currently.
On the left-hand side we see all the items that we could possibly add to the Layout. In the main area we see the currently active layout. To understand this, you need to know which items can be included:
- Module positions
- Module instances
- Page content and System content
- Particles
- Atoms
- Spacers
All these will be discussed in more detail in the next tutorial in this series. For now, let's simply take a look at the current layout and see if we can populate it with more content:
If you click on the little cog-icon for any position of the layout, you can see of what kind of type the position is. To give you 2 examples:
- Example 1: The Logo position is a setting that you may have already noticed from the Settings tab. It is of the type Particle, and the settings you see are inherited from the settings tab of the Outline (hence the greying out and the checkmark), which in its turn inherits from the Base – Outline. This tells you that this is a Particle, and the settings are coming from the Template – Outline (unless you override them right here), which is why they are greyed out and have a checkbox next to them.
- Example 2: The Header position is of the type Position, which means it is a normal Joomla position that you can configure from the Joomla Module Manager:
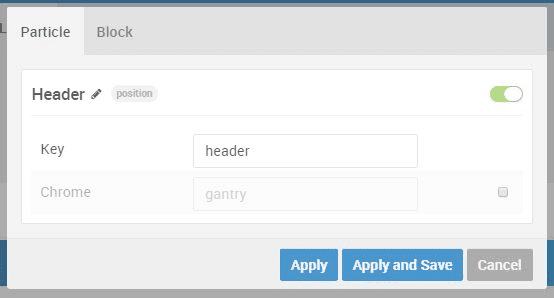
You see that there are hardly any settings to apply here, apart from changing the name and state.
- Go to the Extensions > Modules.
- Click New and create a custom HTML module.
- Enter a nice tagline, like "Gantry 5 rocks!"
- Assign the module to the position Header.
- Your new module will be shown on the frontend, on the right-hand side of the logo:

Similarly, you can assign the Breadcrumbs module to the Breadcrumbs position and add a Joomla module for the Footer position.
All other existing settings for the current Layout are Gantry Particles and Atoms (apart from the Main content of course).
In the next post in this 5-part series, we are going to expand on this discussion of layout options, discussing the possibilities in detail.