This tutorial will show you how to add a custom favicon to your Joomla site.
Your first question might be what is a favicon? Favicon stands for favorite’s icon.
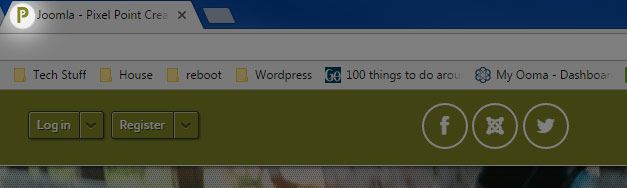
It is a small 16px x 16px icon associated with a URL that is variously displayed, as in a browser's address bar or next to the site name in a bookmark or favorites list.
Below is a highlighted visual in case you are still unsure:
Depending on the template you are using, you may need to add or replace the favicon.ico file. For example, Rockettheme templates have no favicon icon by default. Yootheme uses the standard Joomla! favicon.
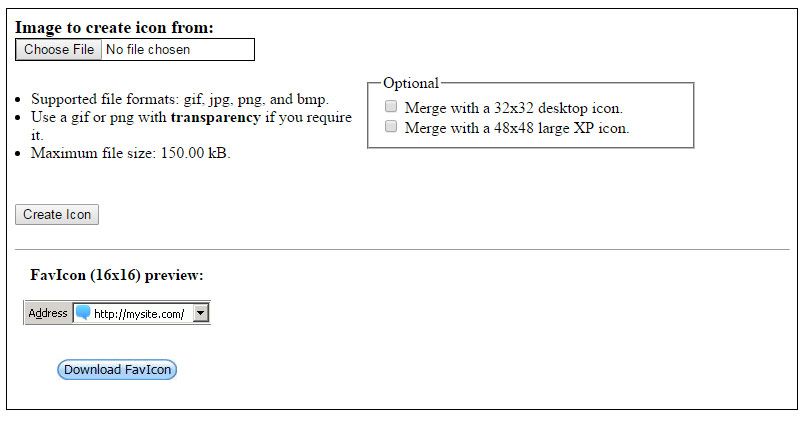
Please note that the favicon must be named favicon.ico. You can use one of many online tools to create your favicon.ico file. I like Dynamic Drive’s Favicon Generator. It is a simple, no frills generator that allows you to upload your image file and quickly convert it to a favicon. It gives you a preview of your new favicon and allows you to download it directly.
Below is a screenshot of the Dynamic Drive’s Favicon Generator:
Now that you have your newly created favicon, it is time to upload it to your website. Joomla looks for the favicon in your templates root directory. I.E. https://www.yourwebsite.com/templates/your_template/
To complete this action, you need to upload the favicon file using your preferred upload method. You can use your favorite FTP program to transfer the file, or you can use several extensions for Joomla that act as file managers. I prefer to use an extension called ProFiles. ProFiles mimics the look and feel of a windows desktop file explorer.
There are many other extensions for file management such as eXtplorer or Simple File Upload. The Joomla extensions directory has 17 extensions listed in this category, so you can find one that works best for your needs. Once installed, any of the above options will allow you to upload your new favicon in just a few clicks.
That’s it! Your website now has a new favicon that matches your brand and makes your site look more professional. Let’s sum up the process here.
- Create a 16px x 16px image to use as your favicon. Often it is part of your logo or a dominant element you use for your brand. If you don’t have anything to use for your favicon, there are a number of free favicon resources on the web.
- Convert your image file to a favicon.ico file using an online conversion tool.
- Upload your new favicon to your templates root directory.
- Enjoy your new favicon!
NOTE: Favicons are notoriously hard to see once you replace them. Commonly, display issues are due to the browser accessing a cached version of your page. If you are having trouble seeing your new favicon please open your site in another browser to check. Eventually, it will appear once your browser cache expires.