One of our students was wondering how to create a two column layout in a single Joomla article. We offered to create this tutorial for her.
This tutorial will show you step-by-step how to create a two column layout in a single Joomla article using JCE, a WYSIWYG editor. The tutorial will not use any tables which are not recommended as they can become quite messy.
Install JCE
If you haven't done so already, please install JCE. You can find the how to install JCE tutorial here.
Once you've installed JCE, go to the article for which you want two columns.
Insert Divs
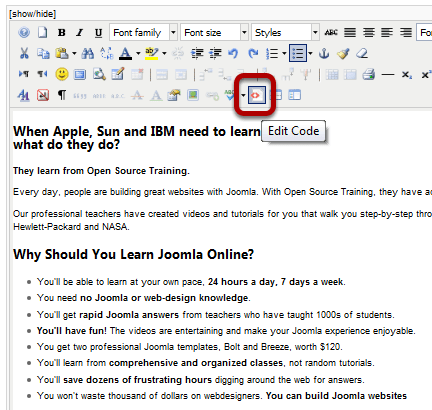
Click the Edit Code button.
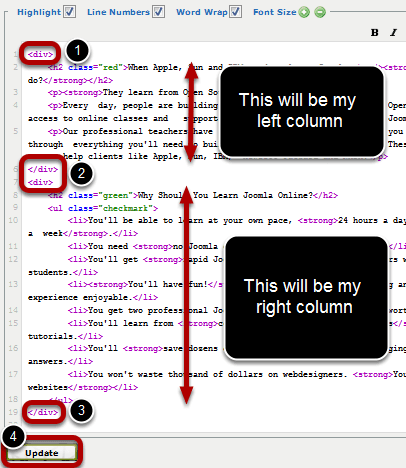
Insert an opening and closing div tags around each part that you want to be a column. You can see those tags circled in the image above.
Once finished, Update
Style First Column with JCE's Built-in CSS Styling
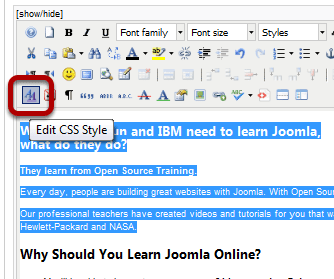
Highlight the part that you want to be the first column and then click the Edit CSS Style button.
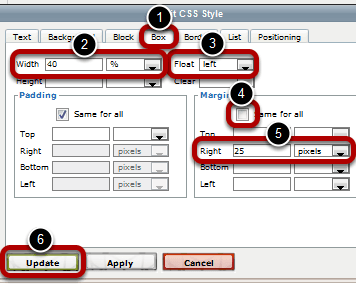
Box >> Width 40% >> Float left >> Margin >> Un-check Same for all >> RIght 25 pixels >> Update
Style Second Column with JCE's Built-in CSS Styling

Highlight the second column and then click the Edit CSS Style button.
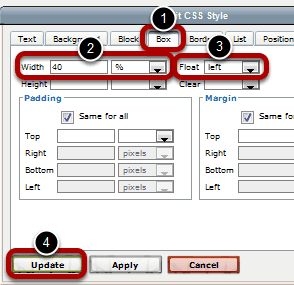
Box >> Width 40% >> Float left >> Update
Apply
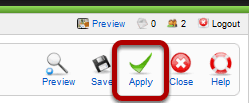
Apply your changes and then preview the article in the front end. You can adjust the widths and margins to your liking.