Joomla's Banner Component is perhaps one of Joomla's least used features, yet at the same time one of its more advanced features that comes with the core installation of Joomla.
One of the primary reasons this powerful component is not utilized is because of users' lack of familiarity with it. When you are given a banner to put on the site, the tendency is to create a custom module and insert the banner in there, then assign it to a module position and menu item.
However, there is very little organization with this approach and if you are managing a bigger site, you will soon be wasting needless hours that you could have spent elsewhere. Furthermore, with that approach there is no way to keep track of the number of impressions and clicks on the banner, thus the reason for the banner component and this tutorial.
The tutorial will walk you step-by-step through how to set up a banner via the banner component and shed some light on it along the way.
Accessing the Banner Component
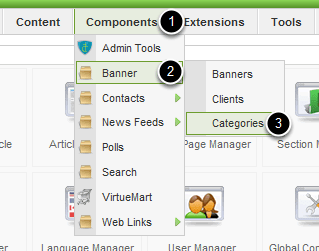
Go to Components >> Banner >> Categories. We are going to the categories section of the banner component first because in order to create a banner you must assign it to a category, so we need to create the category first.
Create Your First Category
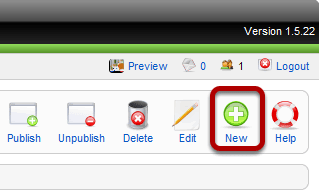
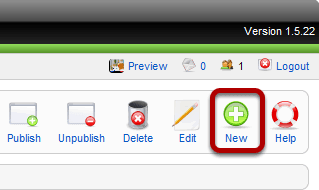
Click New to create a new category in the categories section.

Fill in your information appropriately. There usually is not a need for an image as that is just an image for the category which in most instances will not be displayed in the front end.
Once finished, scroll down to the category description.
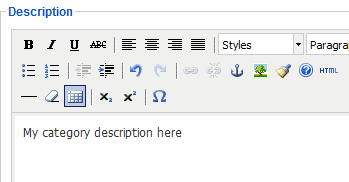
Enter your category description.

Save when finished.
Create Your First Client

Next we are going to create at least one client. Click on the clients tab to go to the client section.
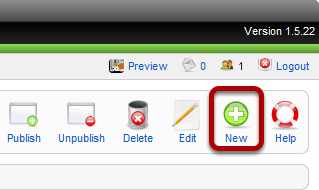
Click New to create a new client in the clients section.
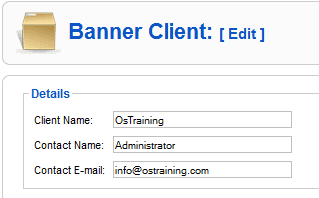
Fill in the information appropriately.
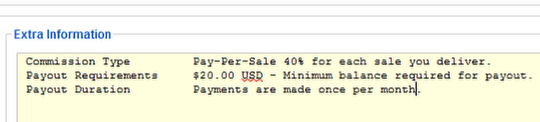
Here you can type in any extra information about the client that you may need to reference later.
Save when finished.
Create a New Banner
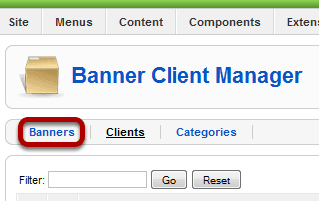
Click on the banners tab to go to the banner section.
Click New to create a new banner in the banners section.
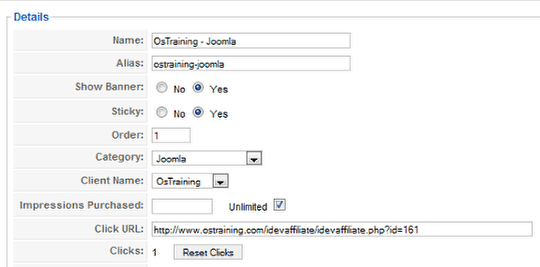
Fill in the information appropriately.
All the settings are pretty self explanatory except for two: Sticky and Impressions Purchased.
Sticky specifies the priority of the banner over other "non-sticky" banners. E.x. If you have sticky banners and non sticky banners and you set the banner module (we will explain the banner module shortly) display setting to "Sticky, Randomize" then any banners in that category that are sticky will display until all the impressions run for the sticky. Then the non-sticky banners will display.
Impressions purchased specifies the maximum number of times the banner should be displayed on the front-end.
Once finished with this section, scroll down.
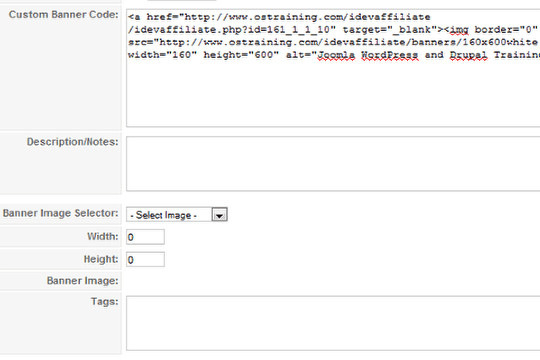
Fill in the information appropriately.
We have two options for displaying:
1) Use Custom Banner Code
Or
2) Upload Banner to /images/banners folder (which you can access via Joomla's Media Manager)
I have chosen option one as it is a lot easier and the code is already provided by our affiliate program and I just have to copy and paste the exact code.
Tags are optional keywords to be used for displaying specific banners based on the content of the Article being viewed. It relates to the Search By Tag parameter in the Banners Module (explained later).

Save when finished.
Displaying the Banner Using the Banner Module
Almost finished! Now we just have to display the banner on the front end and we are going to use the banner module to do that.
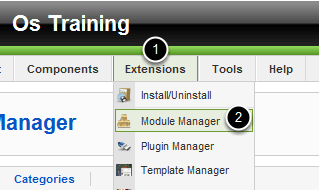
Go to Extensions >> Module Manager.

Click New to create a new banner module in the module manager.
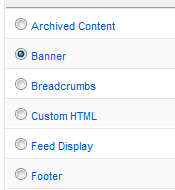
Select Banner.
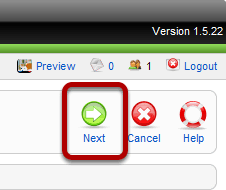
Click Next.
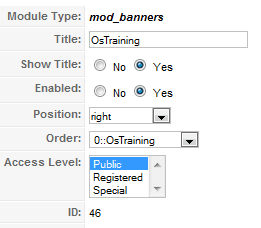
Configure appropriately with special attention given to setting it to enabled (as it is often forgotten) and the module position in which you want the banner to appear.
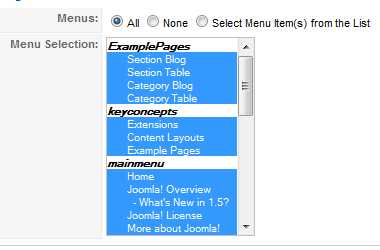
Select which menu items (i.e. pages associated with a menu item) you want the banner to appear on.
Fill in the information appropriately.
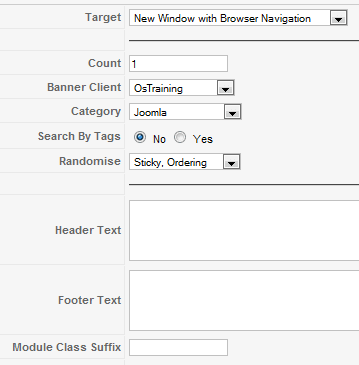
All the settings are relatively self explanatory except for three: Count, Search by Tags, and Header/Footer text.
Count is number of times that the banner should be displayed. E.g. 500; the banner will be displayed 500 times in the pages that you assigned it to in the previous step.
If Search By Tags is set to 'Yes', Banners whose Tags match the keywords entered for each article will display when that article is being viewed.
Header/Footer text is simply text that you can put before and after the banner, respectively.

Save when finished.
Check the front-end
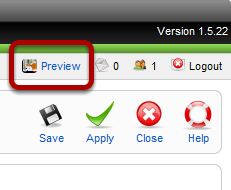
Preview the site and go to the menu item that you set the banner to appear.
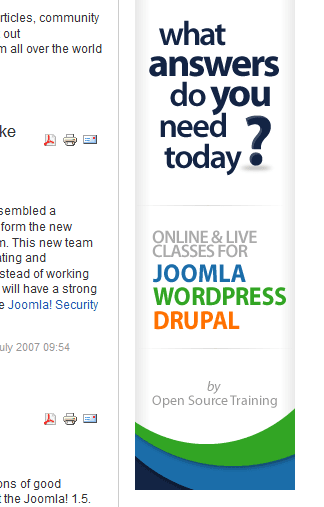
Beautiful!
Check the Statistics
Next we want to check the statistics on our banner.
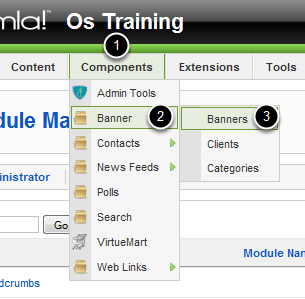
In the back-end, go to Components >> Banner >> Banners.

Now you can keep tracking of which banners are doing well and which are not doing so hot, thus allowing you optimize your advertisment space and be organized at the same time!