Cron is a feature of many servers but is sometimes unavailable to the user. For example, Godaddy does not give users access to cron.
Using the JPrc Cronjobs extension, we'll show in this tutorial how anyone can use cron on their Joomla site.
Notes before we start
JPrc Cronjob isn't technically a cron function, but it does an accurate simulation.
JPrc Cronjob is activated when a visitor lands on your site. For example, if you set JPrc Cronb to run at 3:00am, it might run 3:10am if that is your next visitor.
If you have a low traffic site, or you need it to run without being dependent on traffic, you'll need to use a host that offers cron, or sign up for one of the free web services that will manage cron for you.
Step 1: Download and install JPrc Cronjobs
- Get JPrc Cronjobs from the JED.
- Install JPrc Cronjob using the Joomla Extension Manager.
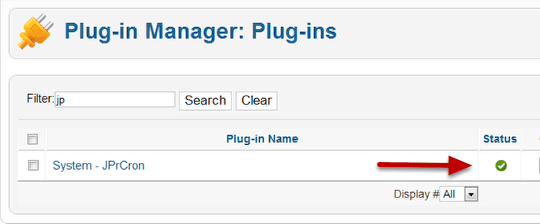
- Go to Extensions > Plugin Manager.
- Search for JPrCron.
- Enable the JPrCron plugin.
Step 2: Configure the plugin
- Go to Components > JPrc Cron to access the controls.

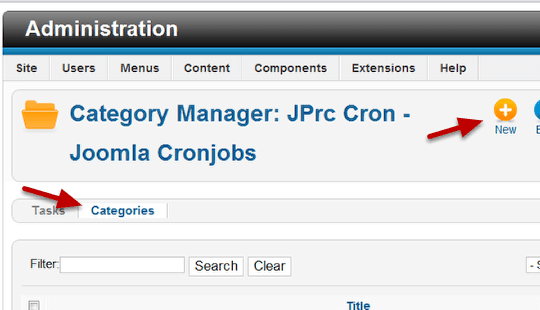
Step 3: Create Categories
- Click the Categories tab.
- Click New.
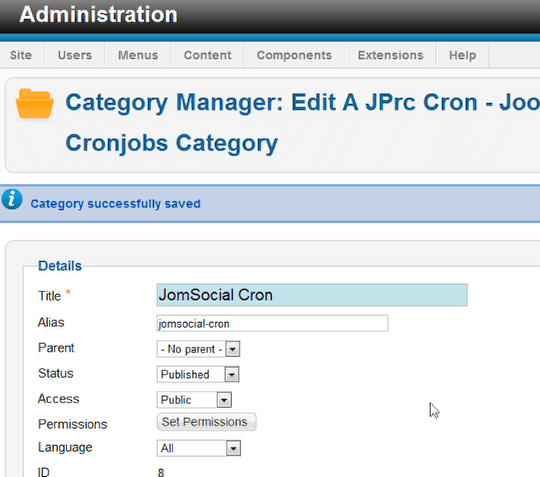
- You will see that adding categories is exactly the same process as adding any other category to Joomla.
- Save and Close. You'll be returned to the main page.
- Click the Tasks tab.
- Click New.
Step 4. Define the cronjob
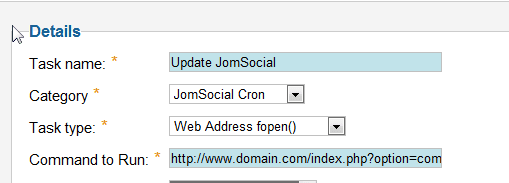
- Task name: Give the cron job a name.
- Category: Choose a category.
- Task type: Choose the task type.
- Command to Run. Enter the command. This will come from your extension's documentation. In this case I want to update JomSocial, so the command I entered is https://www.domain.com/index.php?option=com_community&;;task=cron
Step 5: Schedule your task
The easiest part to understand here is the scheduler so we'll describe that first:
- The scheduler is just what it looks like: a menu for choosing the time that the action should start and how often it should be repeated.
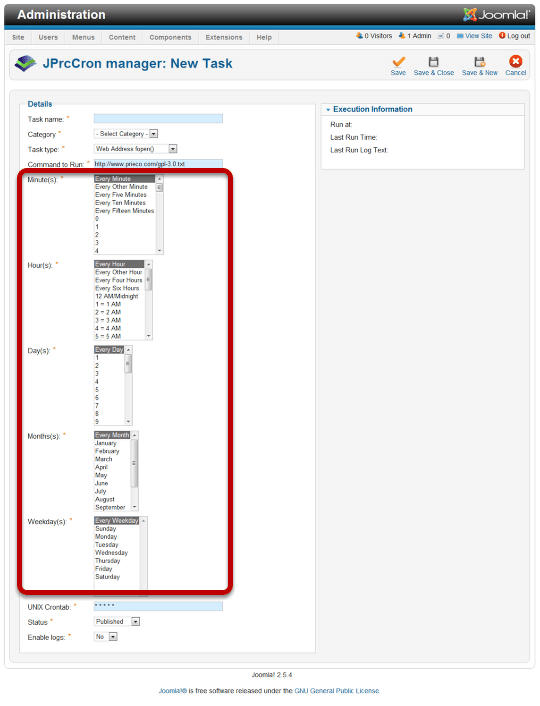
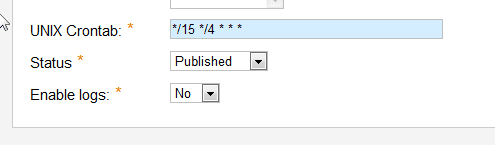
- Unix Crontbab: As you set the schedule, the UNIX Crontab will fill itself in. Each asterisk represents a time definition. The default is for every minute, every hour of every day and that schedule will be represented here by a line of 5asterisks - * * * * *. Each time you make a change in scheduler, the time will be written in the appropriate place, so you won't have to figure out what to put here.
- Status: published means it's set to run as soon as you're done.
- Enable logs: If logs are enabled you will get a line written to your log file every single time the cron runs. That could eat up a lot of file space if you have several jobs running every minute. So you would normally set this to No. Change this to Yes only if are trying to troubleshoot the cronjob.
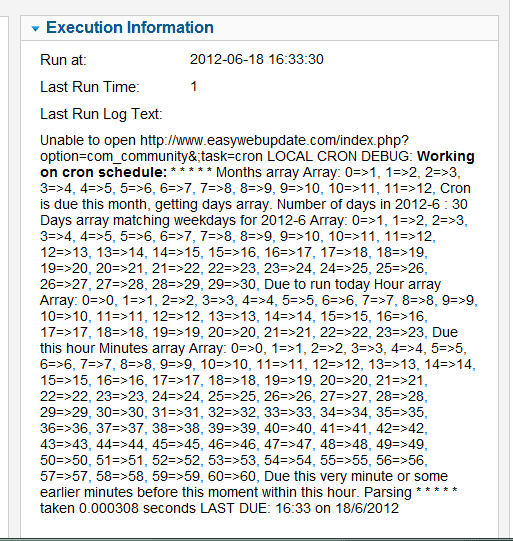
After visiting the test site, here is an example of the log message that you can read in the admin panel when logging is set to yes.