![]() Kunena Forum is a discussion forum for Joomla sites.
Kunena Forum is a discussion forum for Joomla sites.
Kunena is flexible, well maintained and easy to use. As a result, Kunena is currently the most popular extension on the Joomla Extensions Directory.
In this tutorial we'll show you to how to install, configure and use Kunena.
Step 1: Install and Set up Kunena
- Download directly from https://www.kunena.org/.
- Install Kunena using Extensions > Extension Manager.
Step 2: Use Kunena
The default installation of Kunena includes:
- Sample forum categories
- A module to show key Kunena links
- The Kunena menu which shows as tabs at the top of the Kunena pages.
In fact, the default installation of Kunena is so well done that if you visit the front of your site, your forum will be fully functional almost immediately.
Step 2: Configuration
Even though Kunena works immediately after installation, you will need to customize the configuration options to your needs.
- Go to Components > Kunena on the admin menu.
- Click on Forum Configuration.
- Scan through the settings and customize them to your needs.
- If you have a public forum and want to reduce spam, ou will need your ReCaptcha keys. You can get those here https://www.google.com/recaptcha/admin/create if you don't have them already.
You might also want an API Key for Stop Forum Spam available here https://www.stopforumspam.com/

Step 3: Organize Your Categories
Perhaps the most important way in which you'll customize your forum will be the categories. These will be the areas that hold your members' discussions.
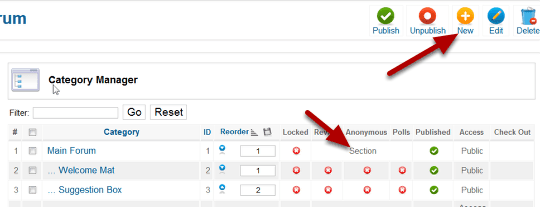
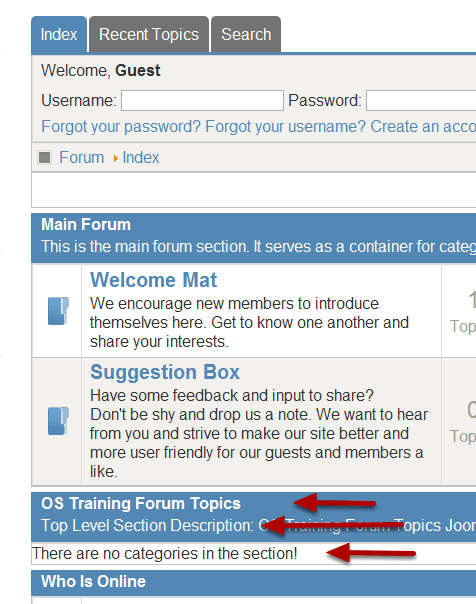
It may seem a bit confusing, but first you need to create a Section. This is a hangover from Joomla 1.5: section is really just a top level category. The sample categories in the image below show you how Sections and Categories are setup. The first line is the Main Forum and it is marked as a Section
A section is used as a header or divider for forum topics. You can't submit any posts to a Section. You could add a topic to the Main Forum section, or you could create an entirely new section.
Let's create a new section so we learn the process from start to finish.
- Click Category Manager.
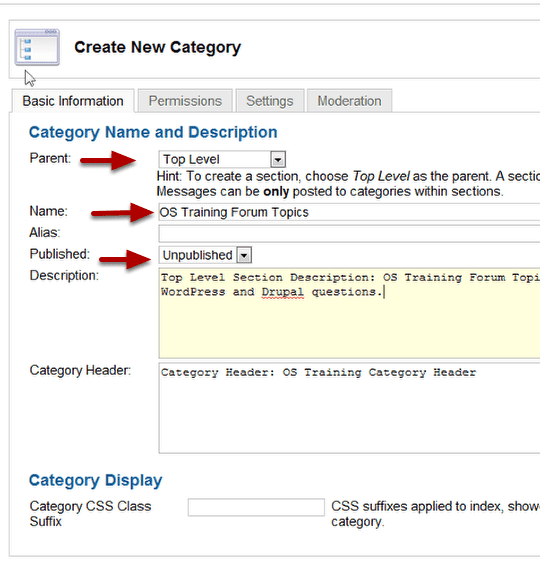
- Click New.
- Parent: Top Level
- Name: Choose the name for your Section.
- Published: Published.
- The Description and the Header are optional. You can decide if you want to use them after you see where they show up on the front end.
- Click Save at the top right.
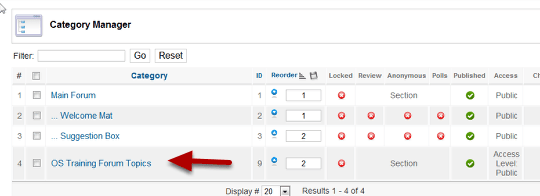
- Return to the main Category Manager page.
- You'll see a new section added to your category list on the backend:
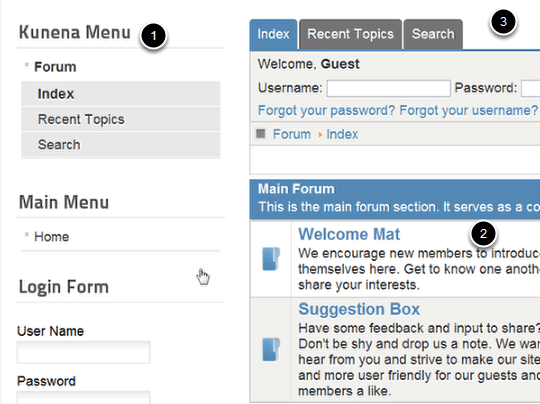
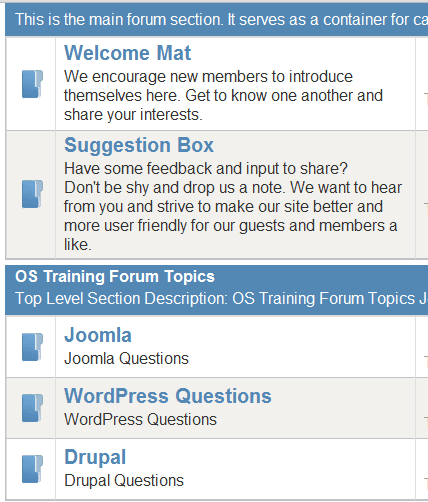
- On the front end it will look like the image below.
- You can see the Title and Description on the forum index page.
Step 4: Create Categories
Now we need create the categories that will go in this section:
- Go to Components > Kunena > Category Manager.
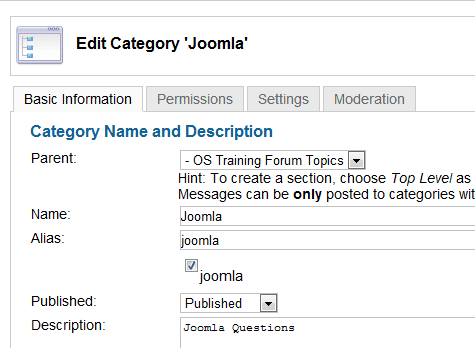
- Click New.
- Parent: Choose the Section you created earlier.
- Fill in the remaining fields.
For our example, we're going to create three categories:
- Joomla Questions
- WordPress Questions
- Drupal Questions
Step 5. Define Permissions for Categories
On many sites, there are particular forum categories that you want to restrict only for certain users. In Kunena you can do that by using Permissions.
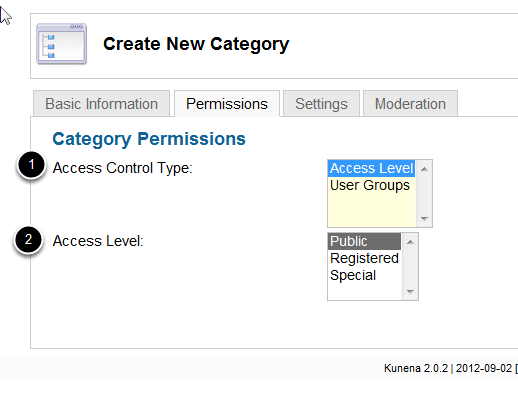
Click the Permssion tab.
- Access control type to be used in this category.
- Access Level:The Access Level Group that is allowed to view this category.
For simple sites and memberships this may be adequate. If your site is more complicated, Choose "User Groups" on the dropdown and you will be presented with a new set of choices.
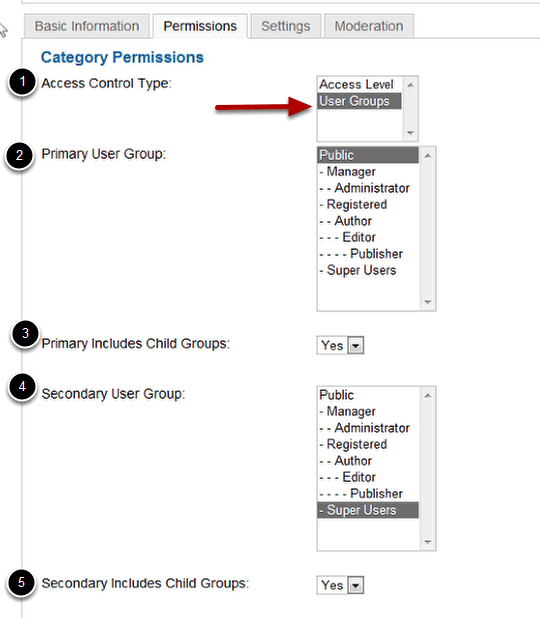
- Access control type to be used in this category.
- Primary User Group: The user group that is allowed to view this category. By default access is allowed to everyone who inherits the user group. Alternatively you can restrict access to the specified user group only by setting Include Child Groups = No. Hint: Public means either everyone or only guests depending on the Include Child Groups setting if you haven't changed Guest User Group from Joomla >> Users >> User
- Primary Includes Child Groups:Should primary child groups be allowed access as well? If set to No, access to this category is restricted to the selected group only.
- Secondary User Group: Secondary user group that is allowed to view this category. Secondary group can be useful for example if both Publishers and Managers need to be able to see the category. Hint: You can disable secondary group by setting it to have the same value as Primary User Group. Hint: It might be a better idea to create an Access Level Group instead of using Secondary User Group.
- Secondary Includes Child Groups: Should secondary child groups be allowed access as well? If set to No, access to this category is restricted to the selected group only.
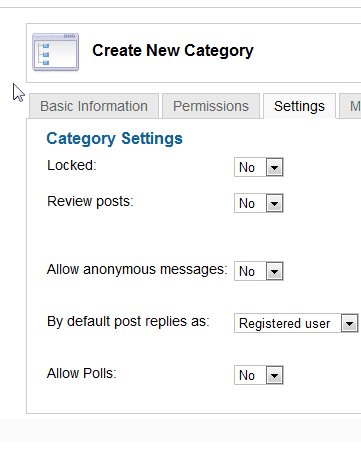
Step 6: Category Settings
Click the Settings tab:
- Locked: Set to Yes if you want to lock this category. Nobody but Moderators and Admins can create new topics or replies in a locked category (or move posts to it).
- Review posts: Set to Yes if you want posts to be reviewed by moderators prior to publishing them in this category. This is useful in a moderated categories only! If you set this without any moderators specified, the site admin is solely responsible for approving/deleting submitted posts since these will be kept 'on hold'!
- Allow anonymous messages: Anonymous messages can be used by registered users to post sensitive information to this category: No user related information will be stored with anonymous messages (including IP address).
- By default post replies as: If anonymous messages have been enabled, this option selects the default choice for the user. Regular users can later edit their own posts to be anonymous, but only moderators have the ability to edit anonymous posts.
- Allow Polls: Set to Yes, if you would like to allow polls in this category.
Step 7: Publish the categories
- Check the Category Manager page to see if everything is correct.
- Make sure the subcategories are indented.
- Make sure there is a green circle with a check in the published column. If not, click the red circle to change it to green.

You've now created a new section with three new categories and Kunena is ready to use:
If you need additional features for Kunena, you can also choose from a large number of extensions specifically built for Kunena. Kunena extensions have their own category on the JED.