 For many years, there was one name that everyone turned to when creating multilingual Joomla sites: Joomfish. However, that changed in 2011.
First, some of the features from Joomfish were incorporated into Joomla 1.6, and so it was possible to make a decent multi-lingual site using only the Joomla core. We have a tutorial on how do that here.
Second, a release of Joomfish for the latest version of Joomla has been slow in coming. It's hoped that Joomfish will soon be ready any day now for the latest Joomla. However, for now many people have been using a fork called FaLang. In this tutorial, we'll show you how to use FaLang. When Joomfish becomes available, the instructions will be almost identical.

Step 1: Install FaLang
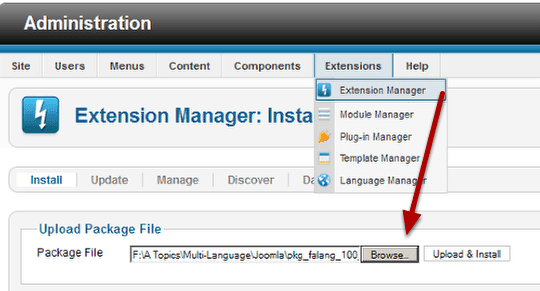
Click here to download FaLang from the JED.
Go to Extensions then Extension Manager and browse for the downloaded file. Click Upload & Install.
Much of the text you will find in Joomla is stored in site-wide language files. This includes the text used in labels, error messages and the basic communication between Joomla and you. Many language packs are available and those translations have been done for you and are easy to update.
The extension depends on you already having the standard Language Pack installed. Once you've accomplished that, we will show you how to install, activate and configure FaLang.
Step 2: Get a language pack
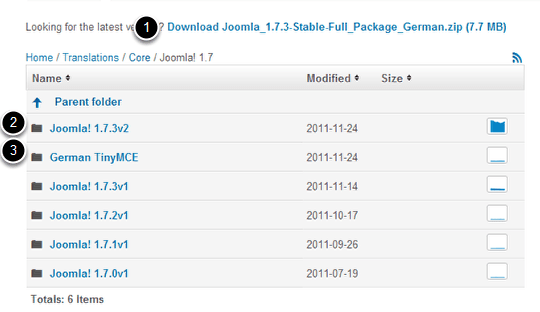
There are many language packs already available for Joomla. Download the ones you need from the Joomla Extension Directory by clicking here.
There are three types of packages that you can download.
- A full installation of Joomla in the native language The default download from Joomla.org is English, but you don't have to start with that one.
- A language pack you can add to an existing site to add languages.
- A language pack for a specific plugin.
Modules and extensions may have their own language files as well. If the developer or the community doesn't have translations available, you will need to manually translate it.
You will need a different pack for each language you want on your site. After you have installed those, you can install FaLang according to the instructions below. You must also set which language is your default and which are additional languages.
The language configuration is located in the Language Manager.
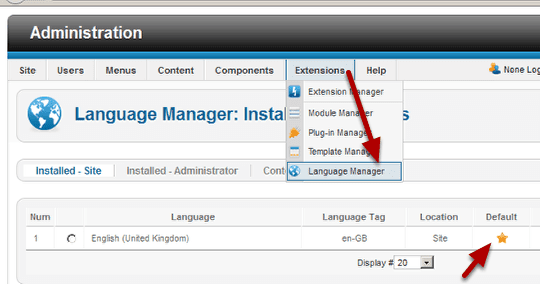
The default language will be indicated with a gold star. For complete instructions on activating languages, see our tutorial Multi-Language Sites in Joomla 1.7.
Step 3. Enable the plugins and modules
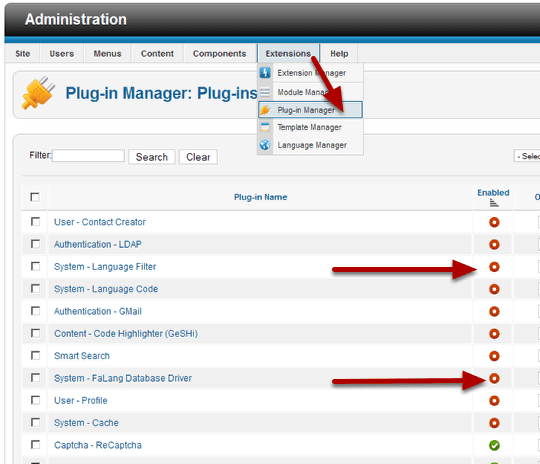
Go to Extensions then Plug-in Manager.
Activate the plugin by clicking the red circle. There are no other parameters to set here. Also enable the language filter
- System- Falang Database Driver (Falang plugin)
- System - Language Filter (Joomla! language plugin)
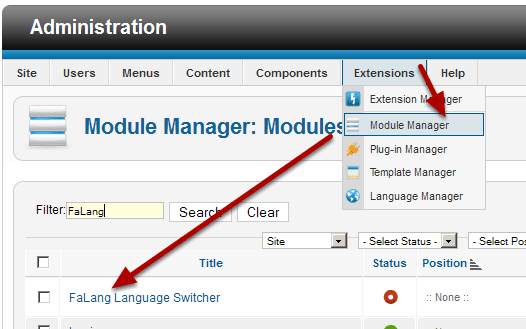
- Go to Extensions then Module Manager.
- Search for FaLang Languge Switcher.
- Click the title to configure.
Step 4: Select a module position
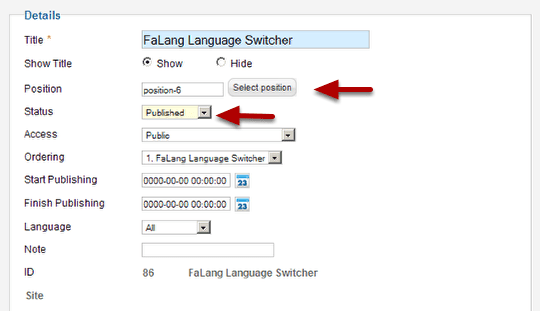
Select a postion in which to place the module and then enable the module.
Step 5: Assign the module to pages
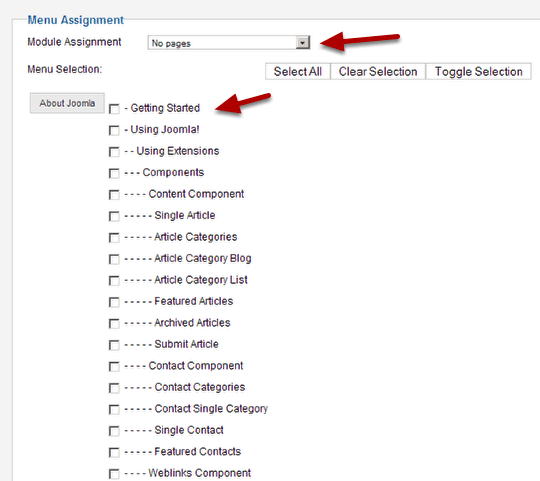
Place the module on your desired pages by changing the selection in the drop down box and/or checking the boxes for specific pages.
Step 6: Set the basic options
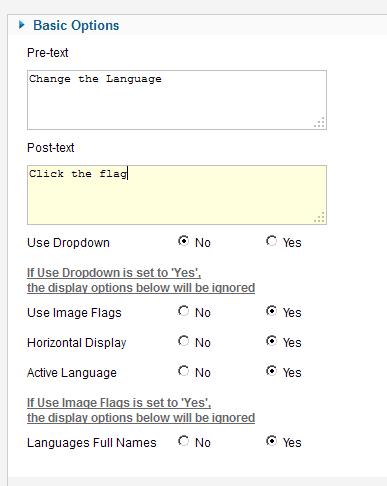
These basic options deal with the appearance of the module. Here you can decide whether your users will switch languages using flag icons or text dropdowns. Use the text fields if you need to write instructions for your users.
There are a few advanced options you can decide on at this time. Be sure to save your configuration before moving on.
Result of module installation
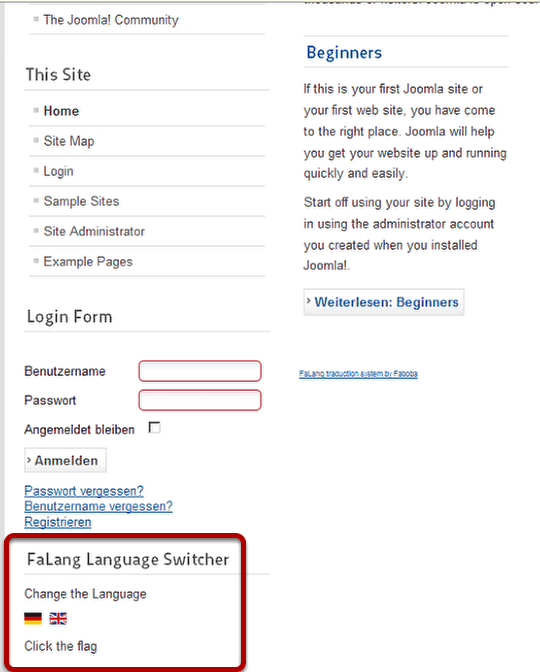
Here is the language switcher positioned at the bottom of position-7 in the Beez-20 template. Clicking the flag changes the language.
In the illustration above I already clicked the German flag and you can see that the only words translated were labels generated by the core language file. The language switcher does not translate the content of the articles. You still need to do that part.
Step 7: Access the FaLang dashboard
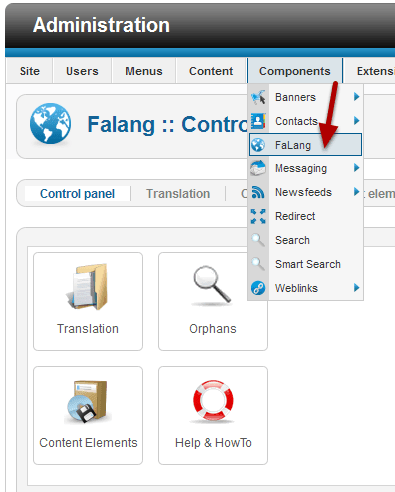
Go to Components then FaLang to access the dashboard.
Step 8: Access the list of content components to edit
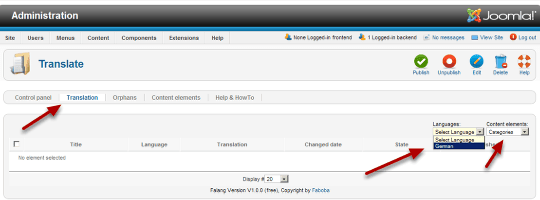
Go to the Translation tab. It will appear blank until you choose a language from the dropdown menu.
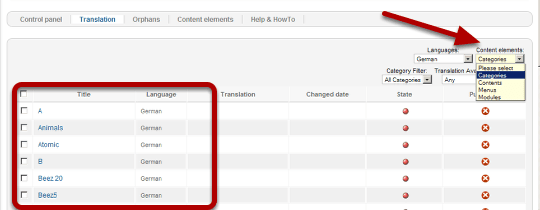
After you've selected the language, select the Content element you want to edit. You will then see all of your content elements listed.
Step 9: Edit a Menu Item title
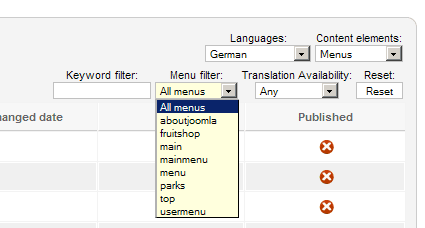
The keyword filter will allow you to drill down more quickly to find items to translate.
Click the title of one of the items in your list to begin the translation process.
Step 10: Enter the translation
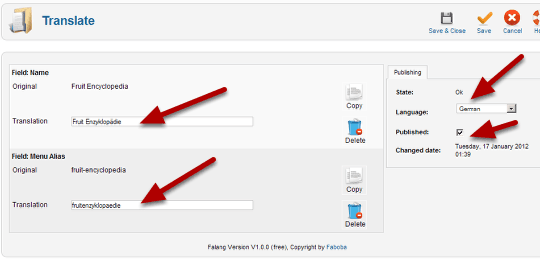
In the Field Name I will type the German words: Fruit Enzyklopädie
In the Field: Menu Alias I will type a database name. No punctuation other than a "-" and no spaces: fruitencyclopedia
Note this doesn't have to be in a different language. It's main purpose is to connect the foreign word to the translation via the data base. It needs to be unique.
Choose the language and check the Published box.

Now the list reflects my translation. The translation is date stamped and the green check mark indicates that the translation is completed.
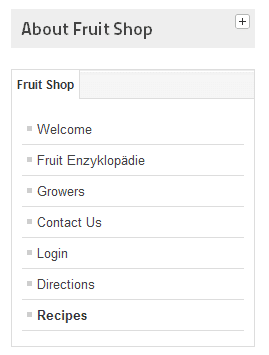
In the image above, you can see that I have only translated one menu item. When I click the language switcher, that it's the only item translated. For a full translation you would need to repeat this step for each menu item and all the content items you want translated.
Step 11: Translating all other content
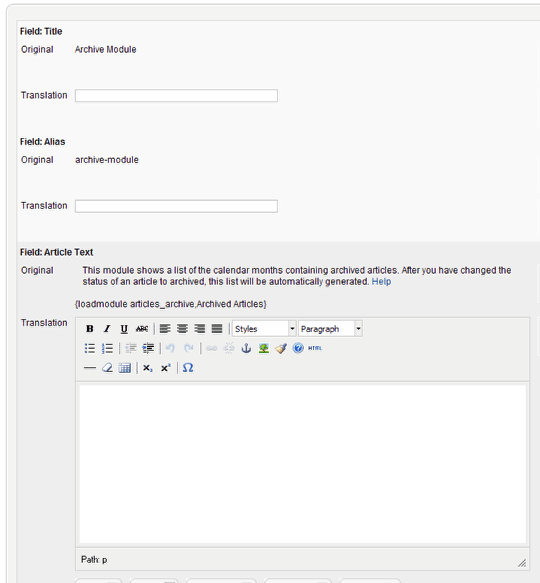
Translating an article, module or category is identical in process. You will have additional fields for the Article/module text or the category description. You can see the original text and you can type the translation below.
Step 12. Translate the meta data

For articles there is a meta description involved. You will have the option to provide a translation for the meta data.
Yes, this can be a laborious process. You essentially have to recreate the almost the entire site in another language. But if you need multiple languages, this solution is the best for Joomla 2.5 so far.
Tip: A shortcut tip is to use something like Google Translate to do a quick translation of the article and paste it into the text window. This won't be adequate for most purposes, but it may be easier to edit the stilted language of the automatic translation than starting from scratch.