Update: Projectfork is no more, but if you're really interested in project management in the open source area, check out UpStream, a WordPress project management plugin.
Projectfork is the most popular Joomla project management extension.
In this tutorial, we're going to give you step-by-step directions on how to use Projectfork. We're going to create a project, add milestones to the project, add to-do tasks and do much more.
Step 1: Download and install
- Download Projectfork from https://projectfork.net.
- Use the Extension Manager to upload the file.
- After confirmation, go to Components > Projectfork and choose to install with or without sample data.
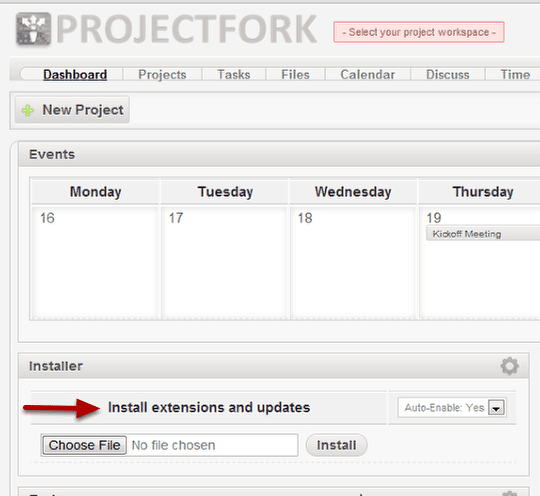
- If you've purchased any add-ons you install them from the Projectfork dashboard rather than using the Extensions Manager. This is a little different than the normal Joomla procedure.
Step 2: Create a new project
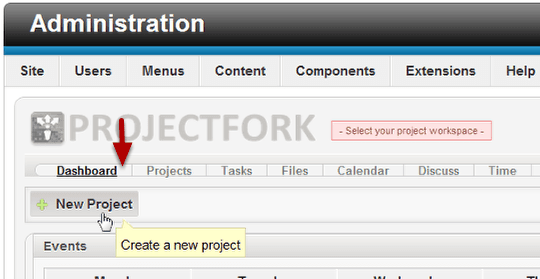
Projects play a central role in Projectfork. Everything you do is directly related to a project and most features are not accessible if you do not have a project selected as a workspace. So the first thing you want to do after installing Projectfork is to create a project.
- From the dashboard click New Project.
Step 3: Enter project details
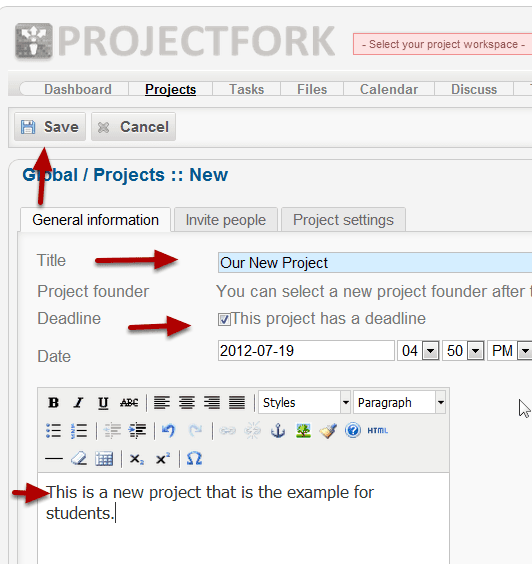
- Give the project a title.
- Click the box, "This project has a deadline". The date field will appear when the box is checked.
- Give the project a description.
Step 4: Invite people
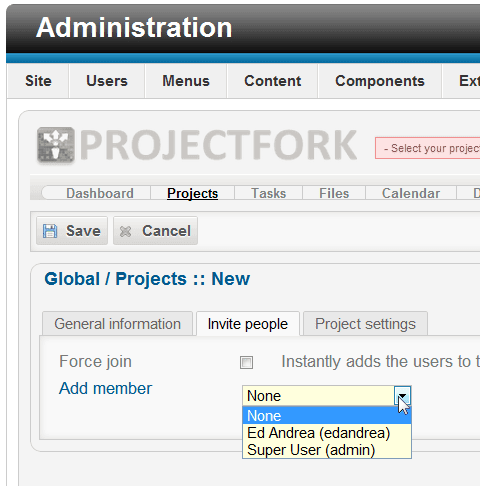
- Click the Invite people tab.
- Checking the Force join box adds them to the project. If that is unchecked, they will receive an invitation and they have to confirm their participation.
- To add a member, click the Add member link and the dropdown box will appear. You won't see it until you click it. Add one member from the list.
- Click the Add member link each time you want to add a new member and a new dropdown box will appear for another selection to be made.
Note: Projectfork uses the same user list as Joomla. If someone joins your site or is entered from the Joomla user administration they will appear in the list Projectfork list. If you've added the member via Projectfork, they will automatically be added to your Joomla users.
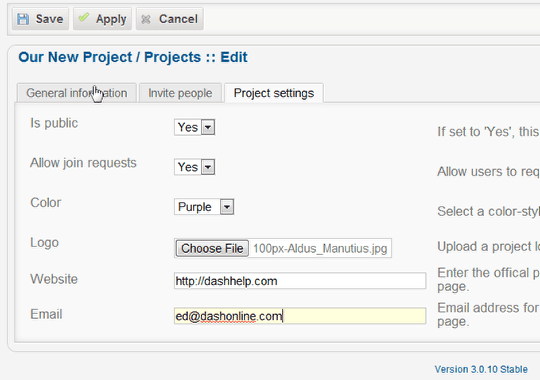
Step 5: Project settings
- Click the Project settings tab.
- Choose the settings you desire.
- Click Save.
- Click Projects to see your newly created project.
Step 6: Add a task
- Choose the correct workspace from the dropdown next to the Projectfork logo.
- Click Tasks on the menu.
A workspace defines your current focus or area of activity, meaning that everything you do right now will be associated with the project you have selected. Making sure you are in the correct workspace is a good habit to develop. Otherwise you'll find yourself adding a long list of tasks to the wrong project!

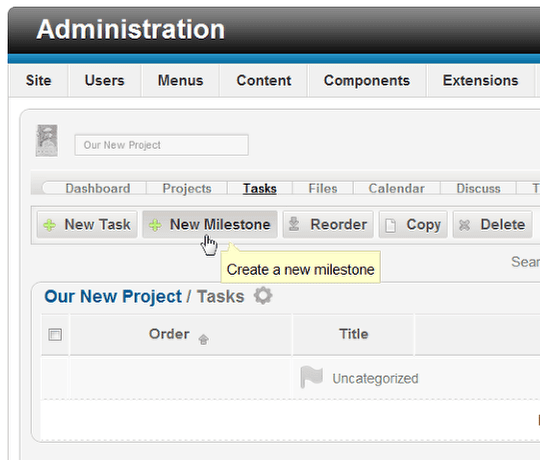
Step 7: Add a milestone
- Click New Milestone.
You could start adding tasks into "Uncategorized" immediately if you want. But we're going to assume you have a complicated project with several milestones. You can think of milestones as categories for grouping tasks in your to-do list. It's far easier to do this if you have the milestones entered first.
For the illustration, say you are planning on going after a major account and you want to make sure you follow all the proper procedures.
Here are some milestones you might use:
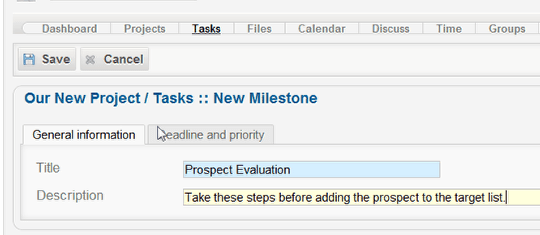
- Prospect Evaluation
- Client Meeting
- Prepare Proposal
- Enter a Title and a Description.
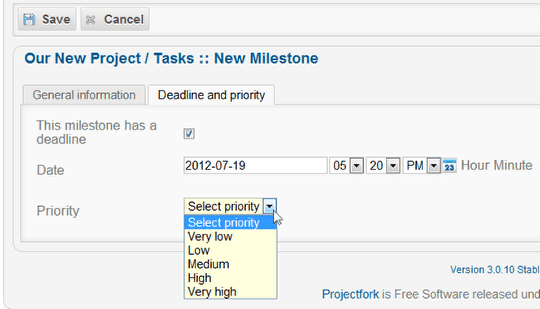
- Move to the Deadline and priority tab.
- Check the "This milestone has a deadline box" to get the date field to appear.
- Give it a priority.
- Remember to save.
- Repeat this step for any other milestones you have determined are part of your project.
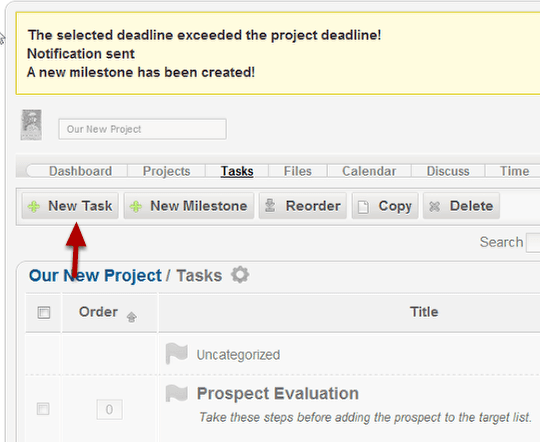
Step 8: Add a task to the milestone
- Click New Task.
- Note that I got a warning that my deadline date was impossible! All participants also got a notification that I made a change. When you're building the project, you might want to wait until you have completed the milestones and tasks to keep from filling up eveyones inbox with all your changes.
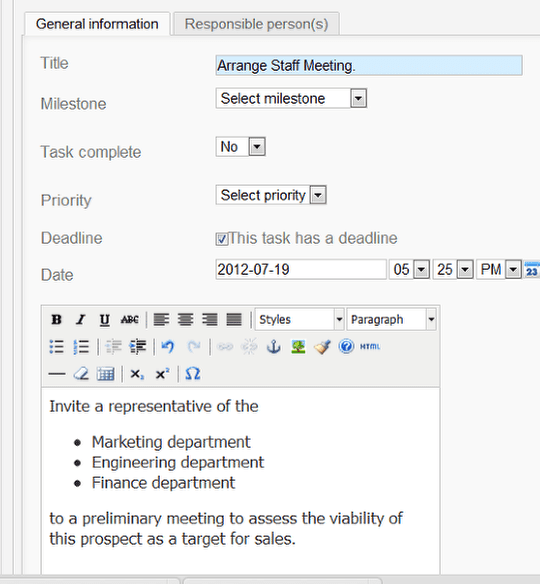
- Enter a title.
- Select a milestone.
- Pick "No" for task complete.
- Select a priority.
- Deadline works the same here as in the previous examples.
- Give it a description.
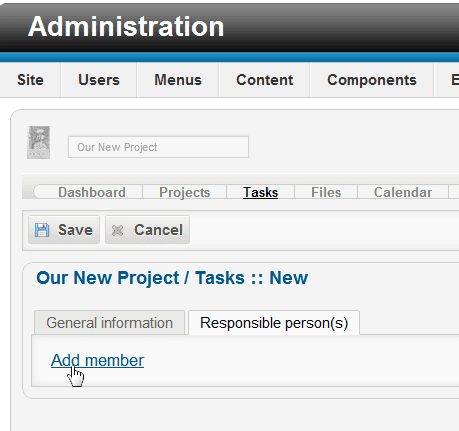
- Move to the Responsible person(s) tab. (Consider saving at this point so you don't lose any work.)
- Assigning a responsible person is the same process as assigning members to the project. Click Add Member and choose the member.
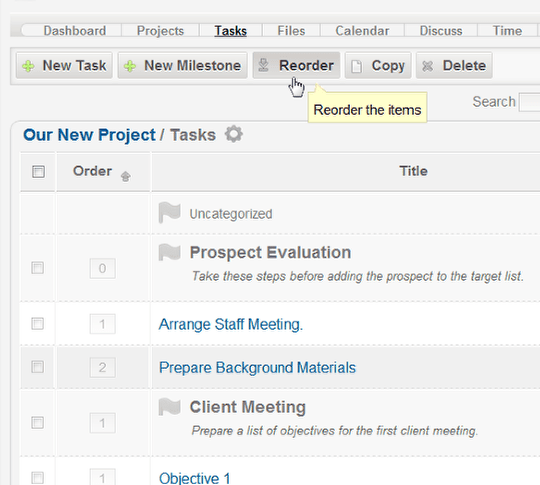
Step 9: Reorder for easy reading
Here's what the project milestones and tasks look like. They will list alphabetically unless you change the order.
You can rearrange the order by changing the order numbers and saving your changes by clicking "Reorder" on the menu.
You can change the order of the milestones with the top number. Right now they are in alphabetica order because the top number for each one is the same. Change the Client meeting to 1 to move it down. '0" is always the lowest number and will come first if you use it.
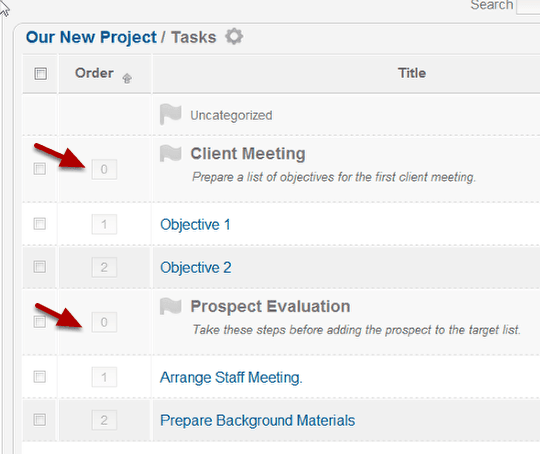
Reordering the milestones does not reorder the tasks associated with them. they have their own numbers that can be changed in the same way. Fine tun your todo lists by changing the numbers on the tasks. Now you're ready to move on to the other aspects of Projectfork.
Projectfork is now ready!
After completing this tutorial, Project fork is now ready to use.
- You have a complete project organzed, completely outlined and assigned to the proper people.
- You created a group to work on the project by inviting specific members.
- You set deadlines on all the tasks.
- You prioritized the milestones and tasks.
- You put the milestones and tasks in a logical order for viewing.
Now you can dig in start exploring all the other features Projectfork has to help manage your projects.