Step 11. Template - Using a different template
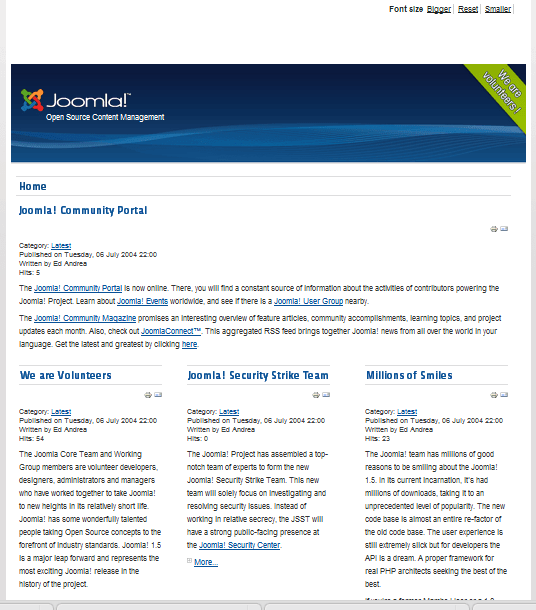
The actual content has been moved, and we've chosen the Beez2 template for the demonstration.
You don't see any of the modules. The old template, rhuk_milkyway, had completely different module positions than the new beez2 template.
Go to the module manager and reposition all the modules.
Below we'll touch on the process involved in making everything show on a new template.
Step 12: Template - finding alternate module positions

You can get instructions on finding the module position view from this tutorial: https://www.ostraining.com/blog/joomla/how-to-find-the-module-postions-in-a-joomla-16-template/
Find the site module positions by using https://yourdomain.com/?tp=1 This function is automatic in Joomla 1.5 and you won't need to go to the admin to enable it. Just go directly to the url.
Step 13: Template - Reassign modules to new positions.
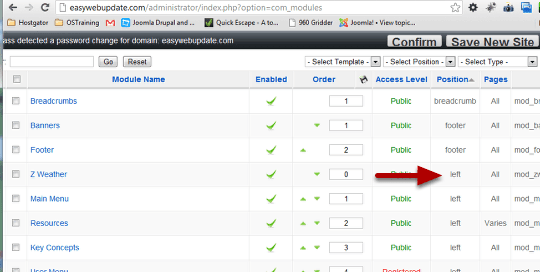
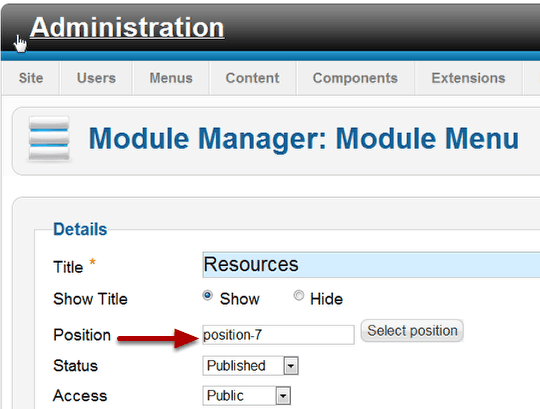
The Module Manager in the source site shows you that they are mostly in the "left" position. On the Beez2 template that would correspond to position-7, so we'll have to manually go through the modules and reposition them for the new template. Not a problem if you have an updated version of the same template. All the positions will be the same, so you won't need to go through this step.
This is an illustration of what you may need to if you're forced to change templates.
Step 14: Template - Adjust module positions on the destination site.
You will need to open each module and change it's position if you are using a different template with different positions.
While you are doing this, scroll down on the configuration page, check the menu assignments and the basic options as well to make sure everything is the way you want it. Menu assignments won't necessarily be transferred.
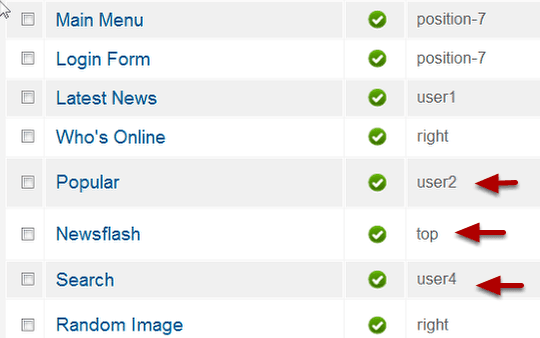
Positions may not correspond exactly. You might have to make arbitrary decisions on what "right "or "user2" or "user4" would translate to best. The "top" position in the new template isn't designed to display the same as the source template. So even though the position is the same name, you might need to consider changing the contents of "top" to another position.
You can use https://yourdomain.com/?tp=1 to see what positions you have available and make comparable choices. If you don't know how to do that, we have a tutorial which will show you exactly how to reveal the module positions on a Joomla 2.5 template.
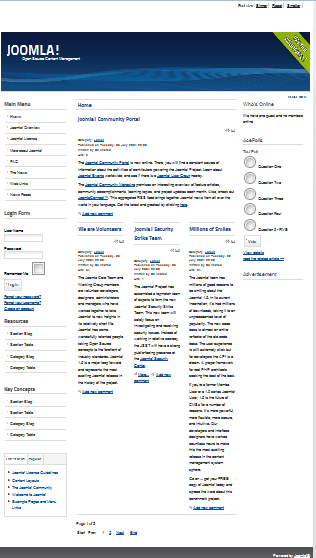
Take a look at the site so far.
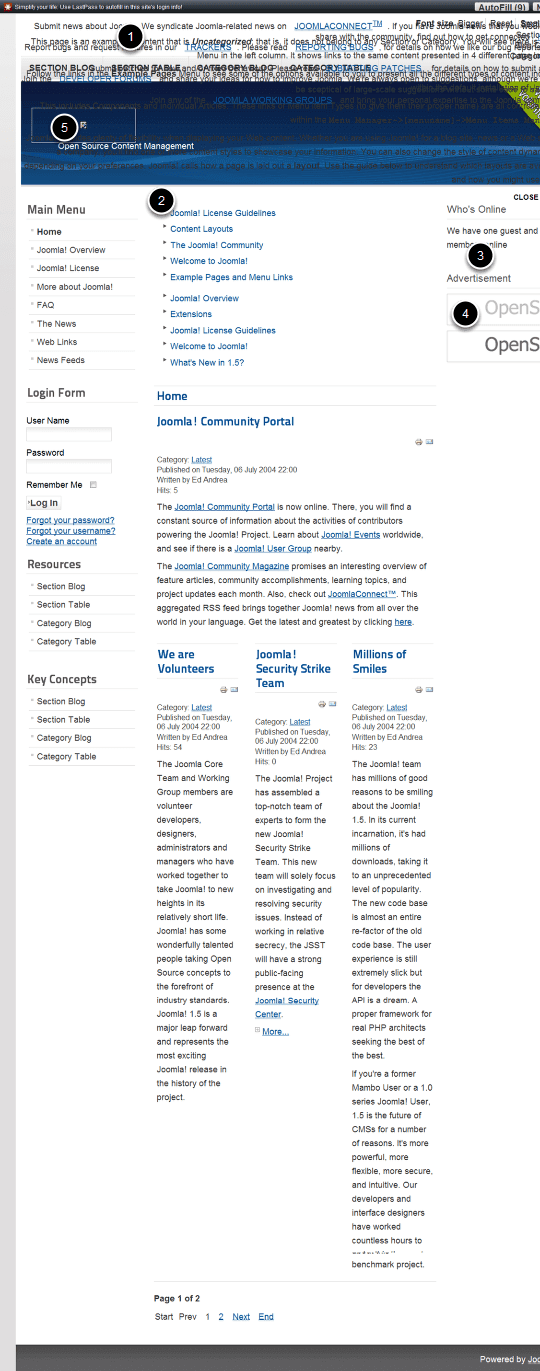
- Newsflash looks bad.
- Latest News Module and Popular module are stacked instead of side by side and titles don't show.
- Polls module is missing
- Advertisement is images instead of text links.
- Logo is missing
Article teasers are a bit long. The typography and spacing is a bit different, but that's what you'd expect from different templates. These kinds of problems need to be dealt with by modifying your style sheets and modifying the individual articles that don't display well in the new template
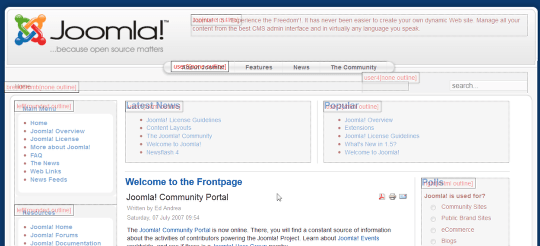
Let's start at the top with Newsflash.
On the old template Newsflash in the "top" position.
In the new template it's assigned to position-0. Making this fit here means adding a module position or complicated CSS changes. I've decided to just leave it out.. You could try to put it in another position.
Step 15. Template - Check all module configuration and page assignments
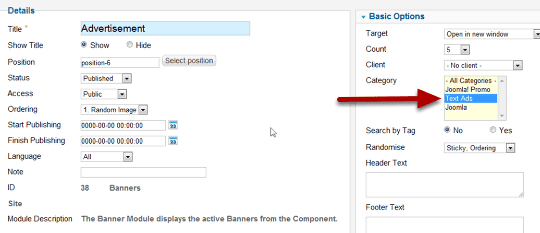
Fix the Advertisement module.
Go to Extensions > Module Manager.
Open the options for the module you want.
Review all the settings.
In this case, the category selection in the Basic Options was not transferred.
Change that to Text Ads.
Make sure the modules are enabled, published and assigned to the correct pages.
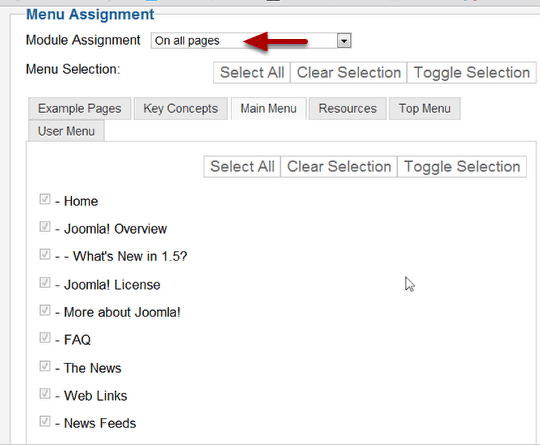
Check Menu Assignments.
If you look at the source site you'll see that this module only appears on the home page. But in the transfer On all pages was selected. So go through your module options if something isn't the same.
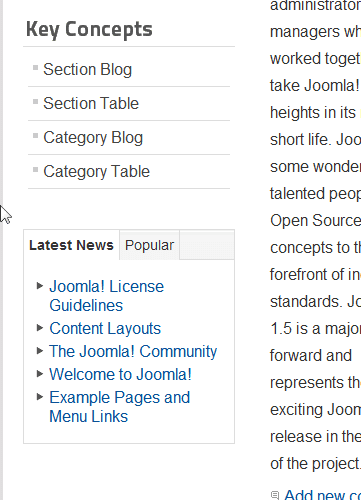
Do the same thing for the Popular and Latest News modules. Unfortunately, These modules just don't look right in the positions I originally chose. It would take some complicated template and CSS changes, which is just way beyond the scope of this tutorial. The easy answer - move them to a position where they fit better. I moved them both to position-5 where they look good in tabs.
Just continue to check all your pages and make adjustments.
Be sure to click all menu items to check for possible alias changes or any Page Not Found errors.
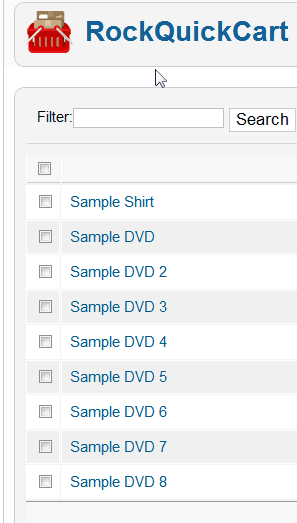
Now let's deal with any problems you might have had with transferring data from third party extensions in the source site to the destination. I included RocQuickcart here as a demonstration.
If you have extensions that you uploaded go to the extension and check the data. In this case you can see that the sample data was loaded when I installed the component, but there are no products except the samples.
Go to Components > SP UPgrade > Database Transfer
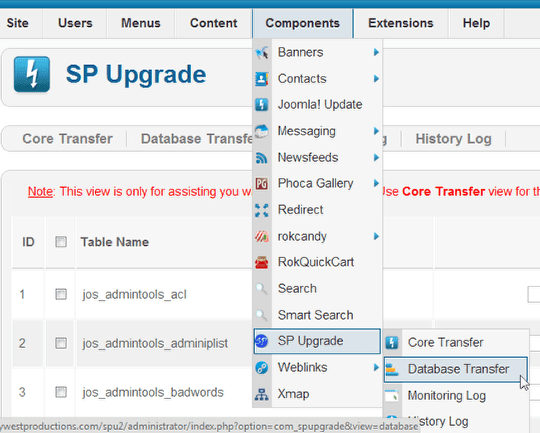
Scroll down and find the -- quickcart database table.

Click Choose.
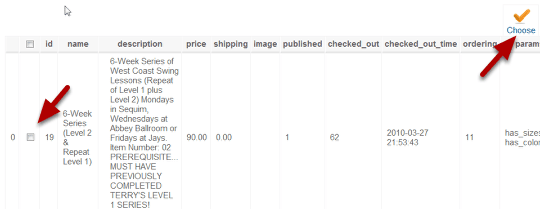
Choose the data by clicking the checkbox.
You can choose all by clicking the box in the title bar, or you can scroll down and click just the data you want to transfer.
Click the Choose Icon when you're done.
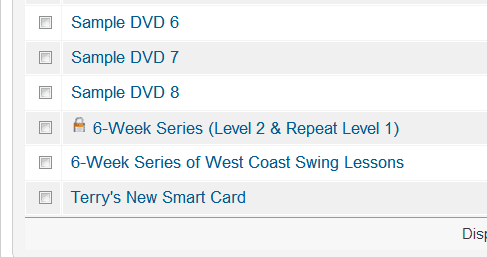
You will be returned to the previous page and you'll see your choices.

Confirm that the item is checked.
You will see the Item ID's of the what you chose in the field.
Go back to the top of the page and click the Transfer icon.
Return to the component and check your product list. You will see that your products have been transferred.
From here it's a process of checking all the details and making changes if needed. With what you've learned here, you should be able to deal with any problems that might come up.
Step 16: Go live with the new site.
The steps are simple.
1. Empty the main Joomla directory. Completely move or remove all the existing files.
2. Copy all the new files from the J25 insulation to the main directory.
I'll demonstrate using the cPanel file manager.
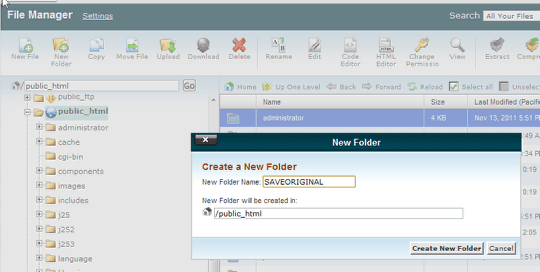
Go to cPanel and open the file manager. Navigate to your main Joomla folder.
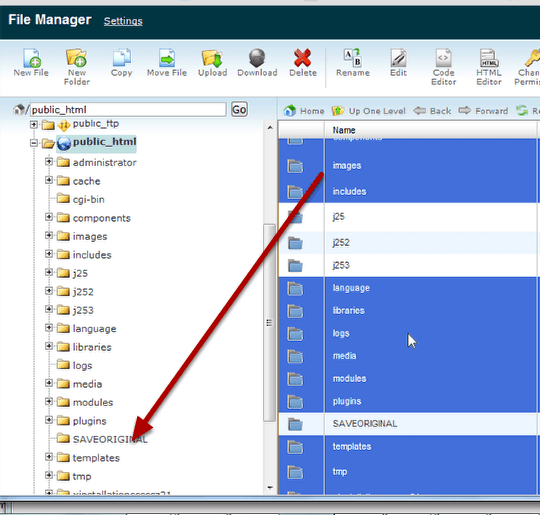
Create a new directory to move the files to. I named mine SAVEORIGINAL. (tip: Remember that file and folder names onLinux-type servers are case sensitive)
Use the move icon on your file manager toolbar or the drag and drop method and move all the files and folders to the SAVEORIGINAL directory.
Note that I am not moviing my original destination directories. (j25, J252 and J253 - i did the migration three times).
You can't move a directory into itself, so un-select the SAVEORIGINAL folder.
You're host may have a different manager, so the look might be different, but the steps are the same.
Move the files instead of deleting them. That way you have a backup and can move them back if anything goes wrong.
Your directories will look like this after the move.
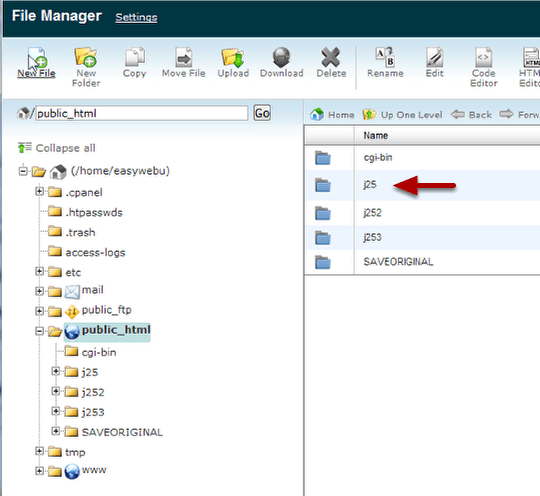
Open the folder that contains your migrated Joomla 2.5 installation.
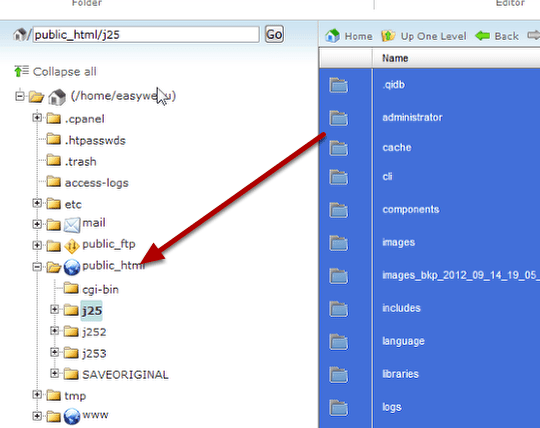
Copy all the files to your main directory. In this case I will copy the entire contents of J25 to the public_html directory.
Copy instead of move.
The built in advantage to copying instead of moving is that you will have preserved the original. If anything happens you can always copy it again.
Don't actually delete anything until you are absolutely sure you're done.
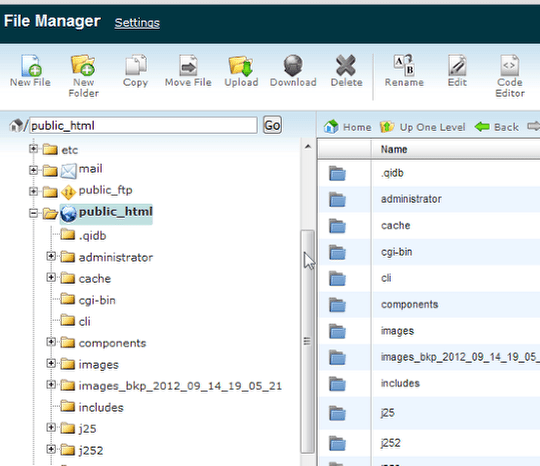
Your public_html directory should look like this.
Visit your page. Do a final check of all links and images.
You're done!