One Joomlashack user came to us and asked this question:
"I want to allow some users to create Joomla articles from the frontend of our site. But, I don't want them to see articles written by other users".
In this tutorial, I'll show you how to do this with the Shack Article Manager extension.
If you haven't used Shack Article Manager before, these two videos will be a good introduction. You can then follow along with the rest of the tutorial and set up your publishing workflow.
Introductory videos for Shack Article Managger
How to allow users to create content from the Joomla frontend:
How to manage articles from the Joomla frontend:
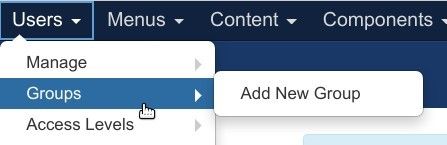
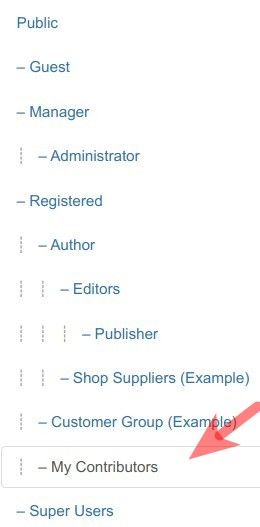
Step #1. Create a user group for contributors
The first step is to create a new user group.
- In your Joomla admin area, go to Users > Groups > Add New Group:
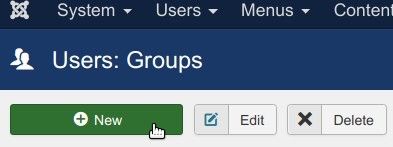
- In the top left corner, click the green "New" button:
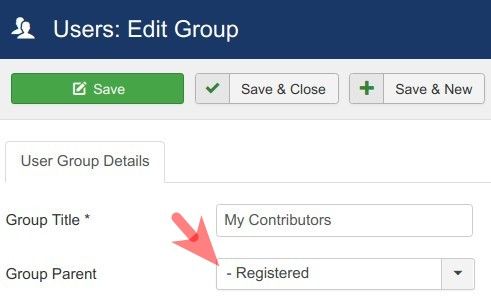
- Creae a new user group called "My Contributors".
- Select "Registered" for the "Group Parent" option.
- Click "Save & Close".
Step #2. Create an access level for contributors
In thtis second step, we'll create an access level for this new contributor group.
- Go to Users > Access Levels > Add New Access Level:

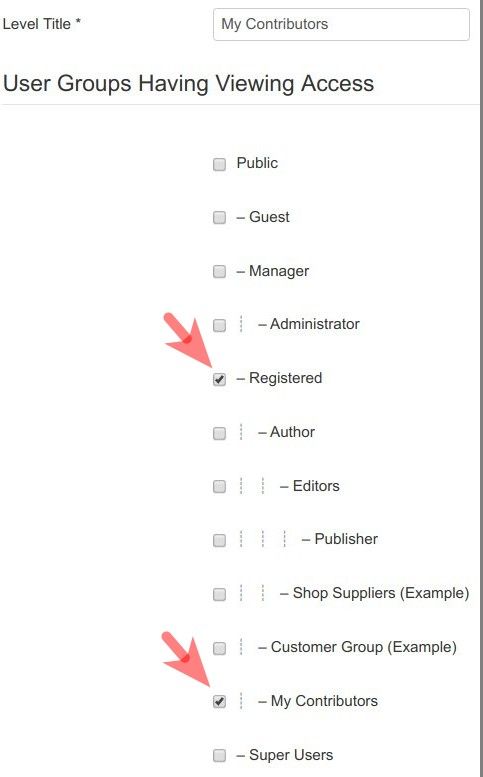
- Create an access level called "My Contributors".
- Select the User Group you created in the previous step, as well as the "Registered" group:
Step #3. Add contributors to the new user group
You now have a user group and an access level for your Joomla article frontend contributors.
This is good time to add the contributor user accounts. In the image below, I have created two users: "Contributor 1" and "Contributor 2":
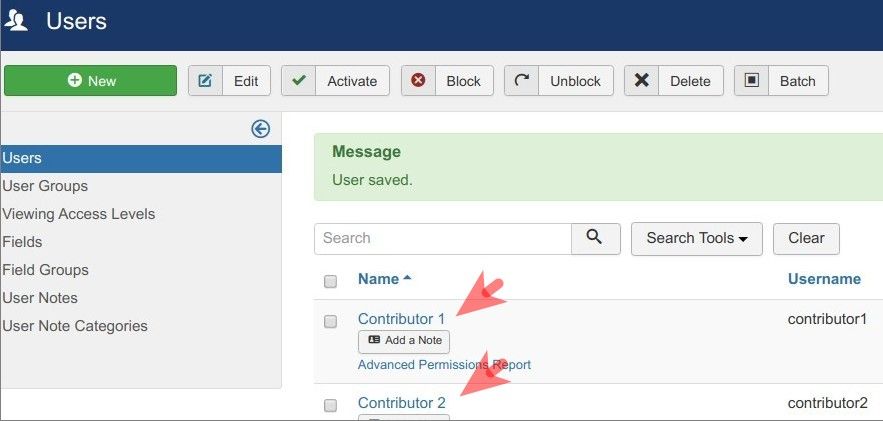
Let's assign each of them to their user group of the frontend contributors.
- Go to Users > Manage.
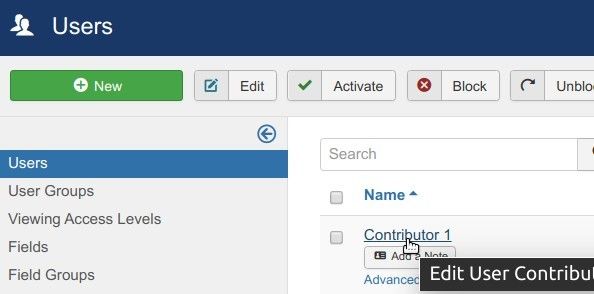
- Click on the name of the user to be a frontend article contributor:
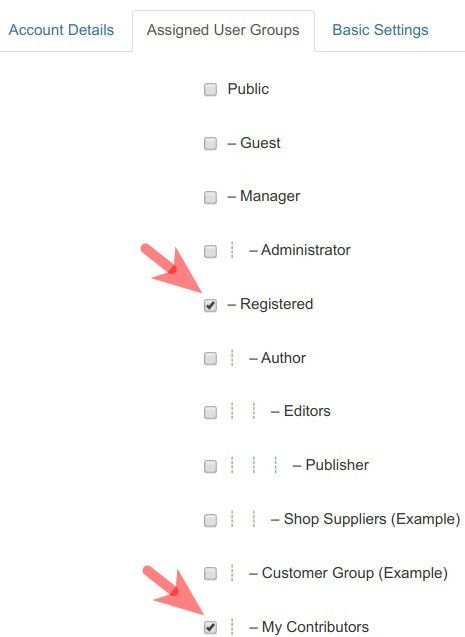
- Click the "Assigned User Groups" tab.
- Select the "Registered" group, and the user group you created for your Joomla contributors.
- Repeat the same steps for all the users you want to have as contributors.
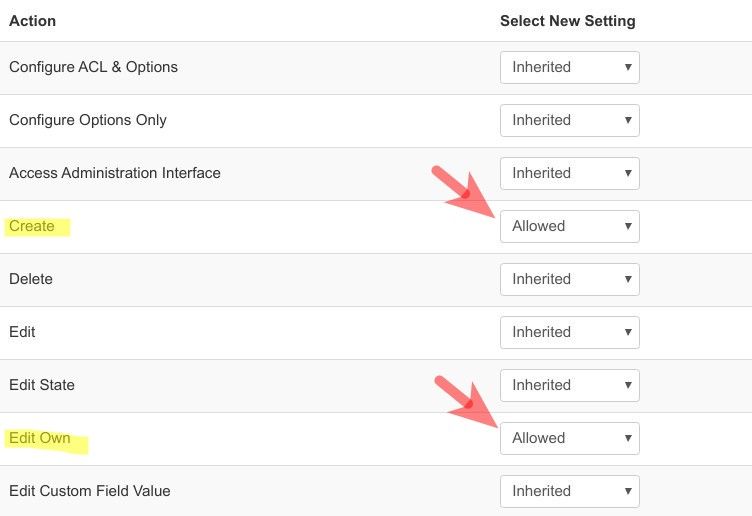
Step #4. Set permissions for the contributors
In this step, choose the permissions for our contributors.
- Go to Content > Articles.
- In the top right corner of the "Articles" screen, click "Options":

- Click the "Permissions" tab:

- Make sure you have "Articles" highlighted in the "COMPONENT" column:
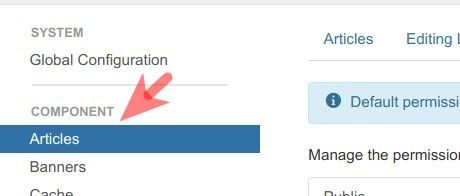
- Select the User Group you created in Step #1. For this tutorial, I chose "My Contributors":
- Select "Allowed" for the "Create" and "Edit Own" actions.
- Click "Save & Close".
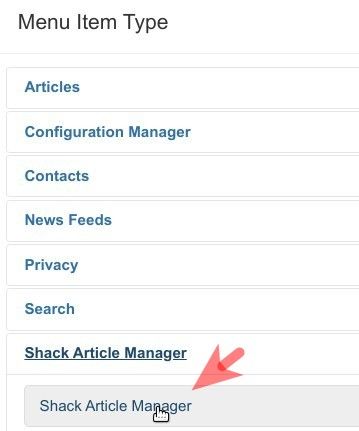
Step #5. Allow access to the frontend
We are nearly finished at this point. We just need to give the contributors frontend access to Shack Article Manager.
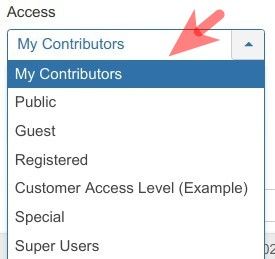
- Create a menu item using the "Shack Article Manager" type:
- Set the "Access" parameter to the "Access Level" you created for contributors.
- Click "Save & Close".
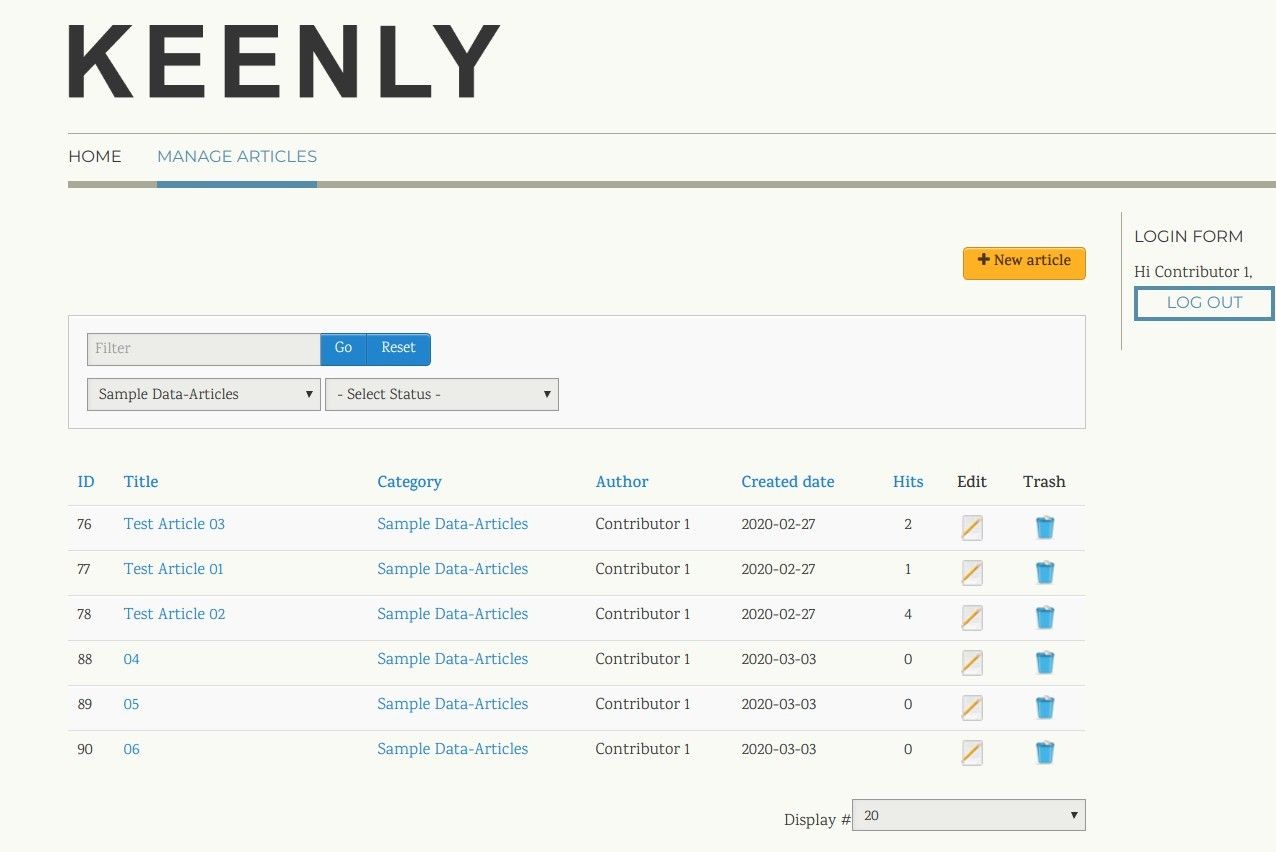
Check the final result
- Log into the frontend page of your Joomla site using one of your contributor accounts.
- Visit the "Shack Article Manager" link.
- Try creating Joomla articles. You should find that each of your contributors can see only their own articles:
About the author