
In JCal Pro you can register event participants in two ways:
- Via Joomla administrator panel. Your site administrators would create the registrations via the "JCal Pro: Registrations" administrative page.
- Via the frontend. JCal Pro event participants will register themselves from the event's frontend page.
In this blog post, I'll show you how the second use case works.
Here is the workflow:
- You would need to enable events registrations firstly globally, site-wide
- Then you want to enable registration in each of the required events individually.
- And lastly, you would want to slightly tweak JCal Pro registration permissions.
Let's look at these steps in more detail.
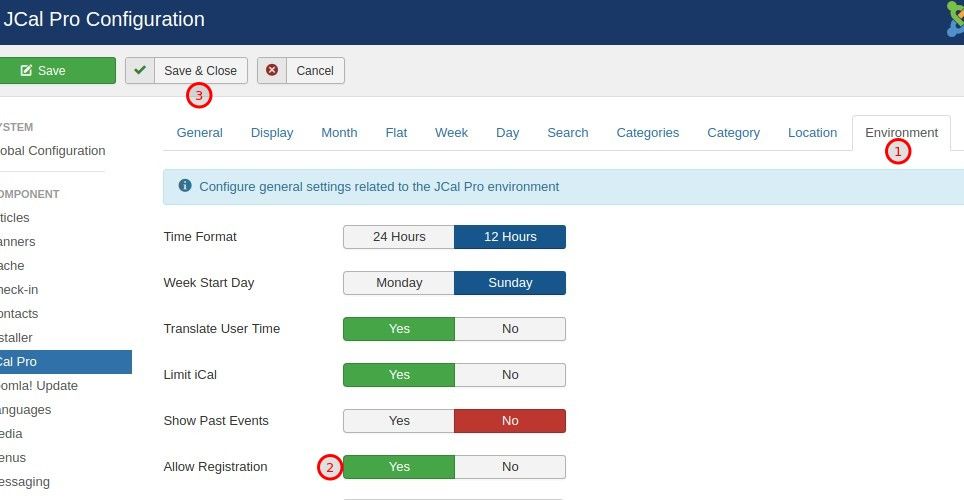
Your first step is to ask JCal Pro to allow events registration in your Joomla site.
To do this, in your JCal Pro control panel, you would go to "Options":

This will bring you to the "JCal Pro Configuration" page. Once there, you'd go to the "Environment" tab.
On this tab, you would set the "Allow Registrations" to "Yes" and click "Save & Close":
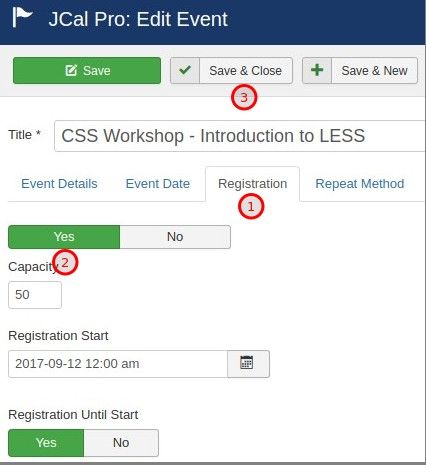
The next step is to enable registrations in the required events.
To do that, you would open a selected event for editing and click the "Registrations" tab. Then you click "Yes" and then - "Save & Close":
At this point, your JCal Pro is set to work with registrations of the events. You also set the required events to accept registrations from the frontend of your Joomla site.
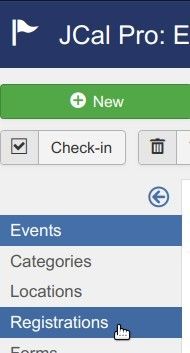
But by default JCal Pro doesn't allow to create registrations from the frontend. You have to tweak the component's Access Control List.
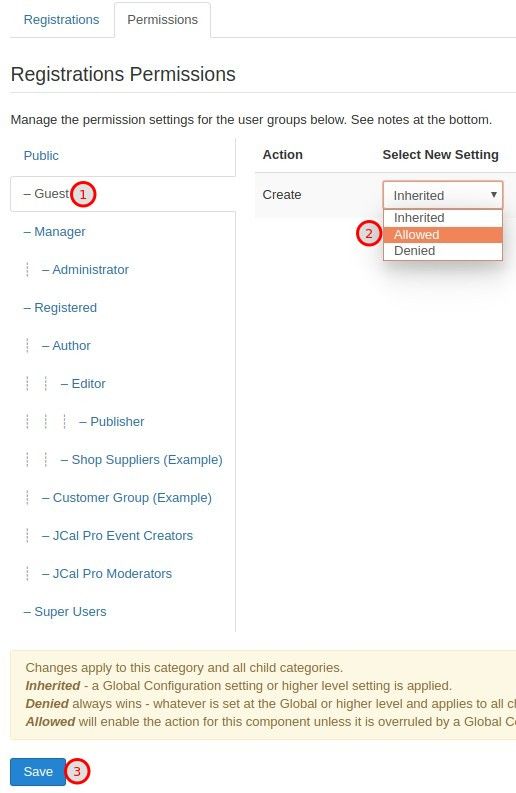
To do this, in your JCal Pro control panel, you would click "Registrations":
You will be taken to the "JCal Pro: Registrations" screen. Once there, you want to click the "Permissions" tab:
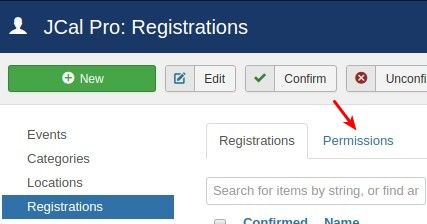
On the "Permissions" tab, you would want to click the "Guest" tab. Now select the "Allowed" setting for the "Create" action and click "Save" or "Save & Close":
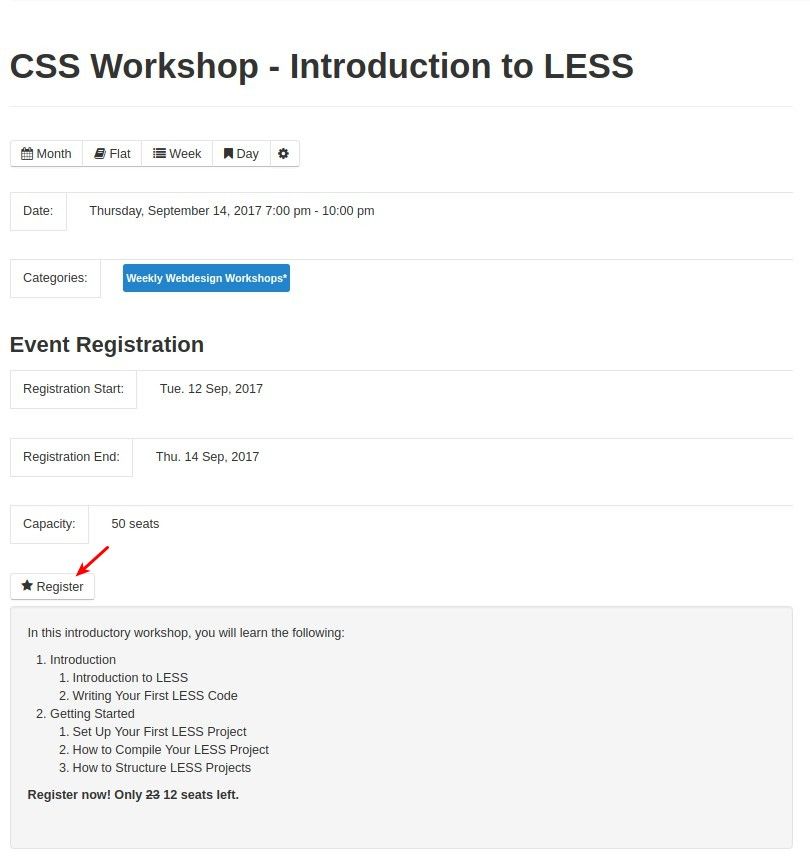
You are now ready to visit the event's page to check the final result. You should see the "Register" button displayed underneath the event details:
What's Next?
What's Next?
Save $1,000's when you sign up for Joomlashack's Everything Club.
You will get your hands on our extensive range of over 20 extensions, plus legendary support!