
One Joomlashack customer asked us how connect a Joomla site to "Matomo Analytics".
Matomo Analytics is a server-side PHP/MySQL analytics self-hosted platform. It aims to be an open source alternative to Google Analytics.
You can quickly install it using your hosting control panel. In this blog post, I'll show you how to connect Matomo analytics software to your Joomla site using the Shack Analytics extension.
Step #1. Install Matomo
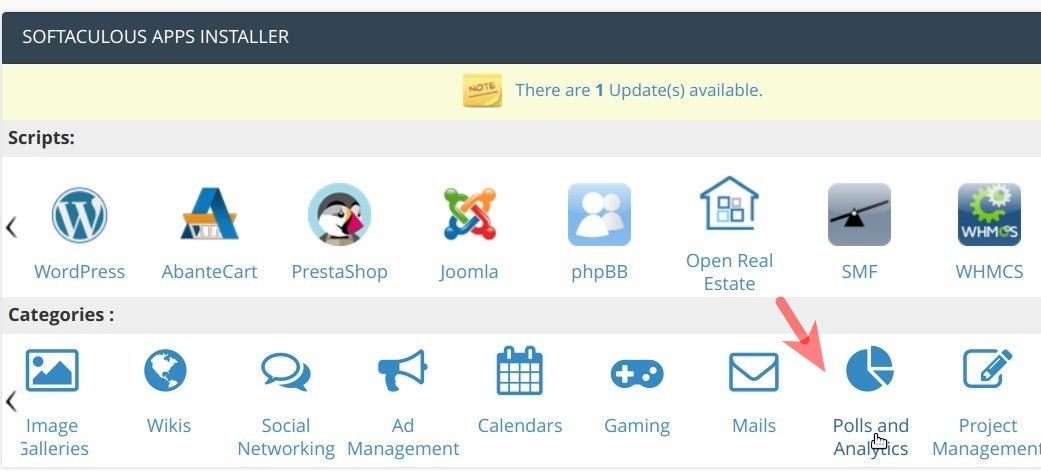
"Matomo Analytics" is a PHP/MySQL software. If you run a Joomla site, you can install "Matomo Analytics" on the same server. For my demonstration, I will show you how to install it under "cPanel".
Once you opened your hosting control panel, you want to click the "Polls and Analytics":
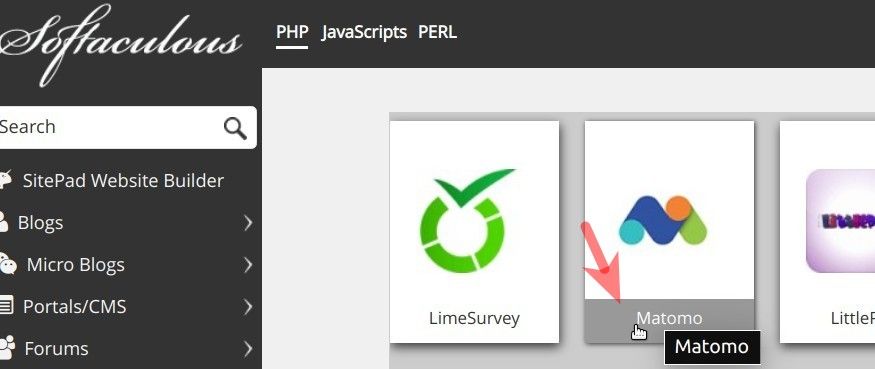
On the next screen, you want to click "Matomo":
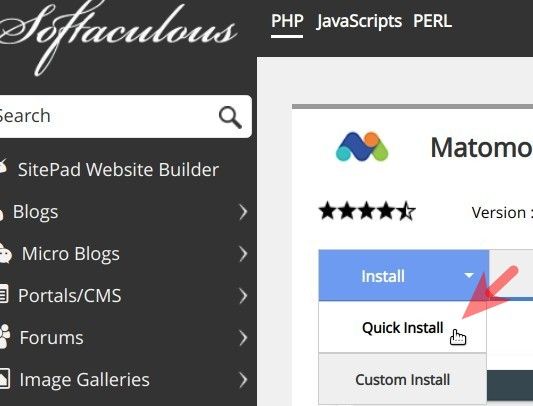
This will bring you to the "Matomo" installation screen. On this screen, you want to click the little arrow to the left of the "Install" button:
![]()
You will see the dropdown list of the installation options. You want to click "Quick Install":
This will open a few new fields on your installation screen.
One of those new fields will be the "Choose Installation URL" with your site domain name. At this point, you are telling the "Matomo Analytics" installation script how you would like to call the installation folder. For my demonstration, I entered "matomo":

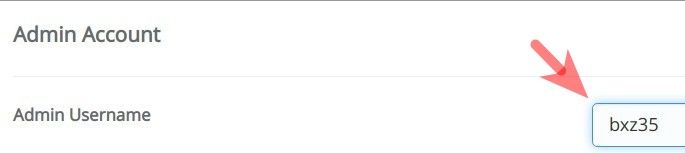
The next field is the "Admin Username". Type in here your own admin username or leave the default "admin". For this blog, I entered "bxz35":
One more new filed is the "Admin Password". To harden the security of your Matomo installation, replace the default "password" with a hard to guess password:
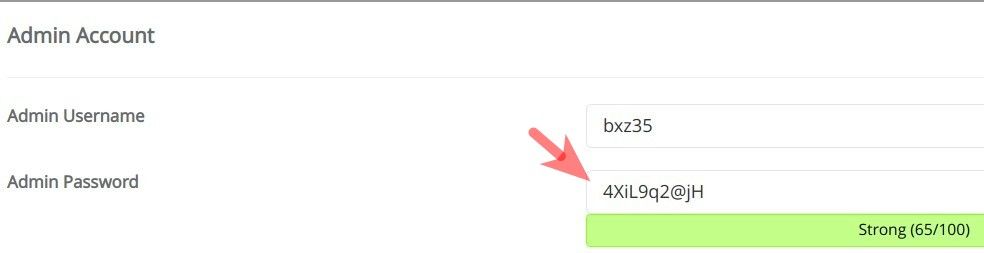
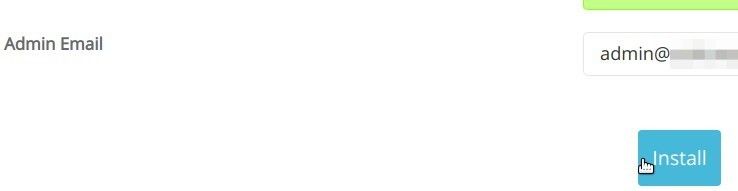
And the last field for you to fill in will be the "Admin Email". Here you can either leave the preset default admin email address or enter a different one:

Now would be a good time to initiate the installation and click "Install":
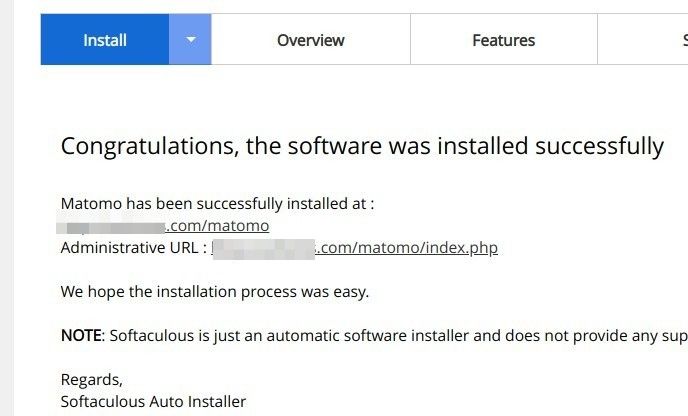
After a fearly brief screen activity, you should see the message stating that your installation was successful:
Great! You are now one step away from getting your "Matomo Analytics" tracking code. To get it, you would want to visit the URL of your Matomo installation and log into your Matomo analytics administrator dashboard:

This would open your Matomo Dashboard. On the Dashboard, you want to find the "JavaScript Tracking Code" section and copy the code snippet:
![]()
Excellent! At this point, you are done on the "Matomo Analytics" side. You are now ready to move to your Joomla site to connect it to your Matomo analytics.
Step #2. Create a Matomo global tracking tag in Shack Analytics
The "Shack Analytics" Joomla extension is really your Swiss Knife when it comes to connecting a Joomla site to external or server-side analytics tools. Let's connect your Joomla site to "Matomo".
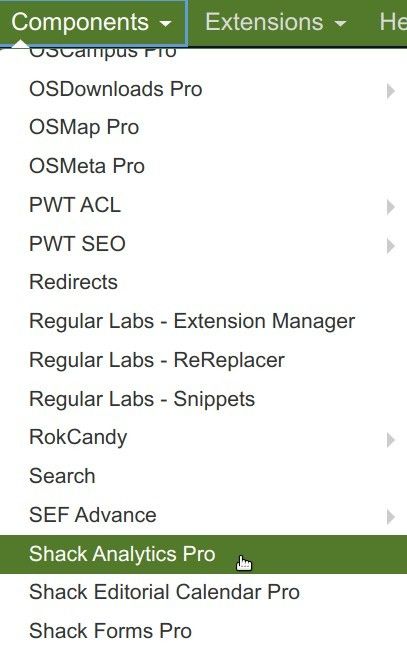
In your Joomla administrator panel, you would go to "Components" > "Shack Analytics Pro":
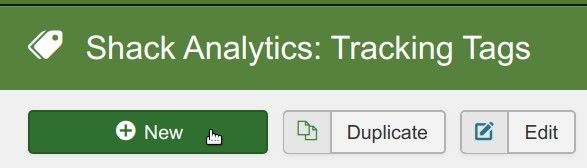
This will bring you to the "Shack Analytics: Tracking Tags" screen. In the top left corner, you would click "New" to create a new tracking tag:
This will open the "Shack Analytics: New Tracking Tag" page. You want to enter "Matomo" or something similar into the "Title" field and paste the code you copied in the previous step into the "Header Custom Code" box:

Now would be a good time to click "Save & Close". You should see your newly created tag listed:
![]()
So far so good. You have created your Matomo tracking tag but you have not applied it to your Joomla site yet. To rectify this, let's assign this tag as a global tag for your Joomla site.
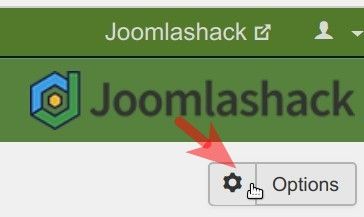
In the top right corner, you want to click "Options":
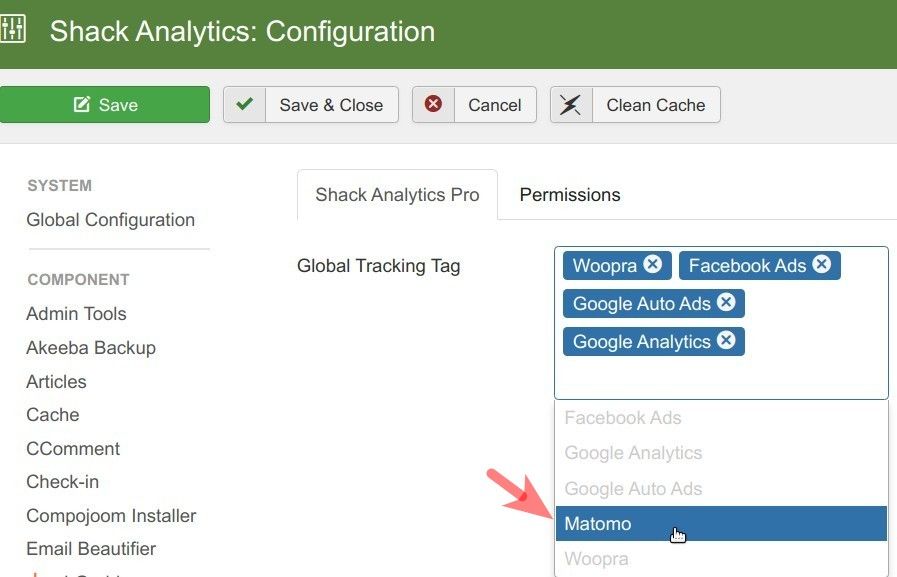
This will open for you the "Shack Analytics: Configuration" screen. Here you want to click inside the "Global Tracking Tag" box and then - on your Matomo tag:
You should see your Matomo tracking tag sitting pretty inside the "Global Tracking Tag" box:
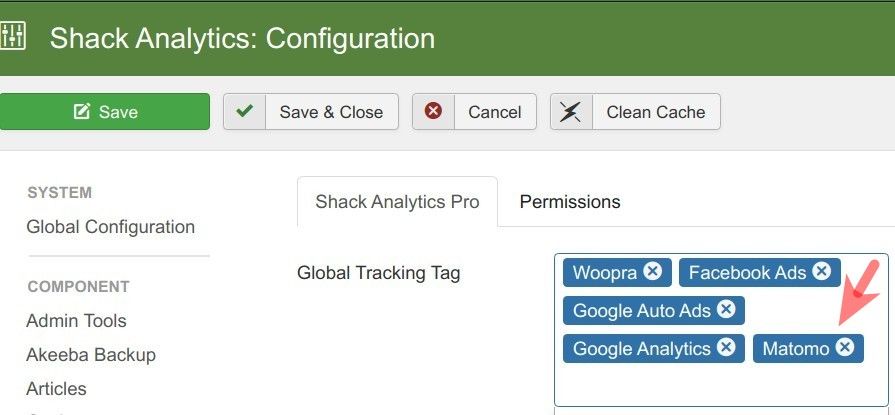
Now would be a perfect time to click "Save" or "Save & Close".
Go and check the HTML source code of your Joomla site. You should see the JaveScript code snippet from your Matomo installation embedded between the opening <head> and closing </head> tags:
![]()
Excellent! Your Joomla site is now connected to your Matomo analytics installation. You are well on your way to become a data wizard!
What's Next?
What's Next?
Save $1,000's when you sign up for Joomlashack's Everything Club.
You will get your hands on our extensive range of over 20 extensions, plus legendary support!
Click here to join the Everything Club
About the author