OSCampus is the best way to build an online training site with Joomla.
This extension is incredibly robust and is used by 10,000's of people every week. OSCampus runs the video training at OSTraining.com, and also the official Joomla.org training site!
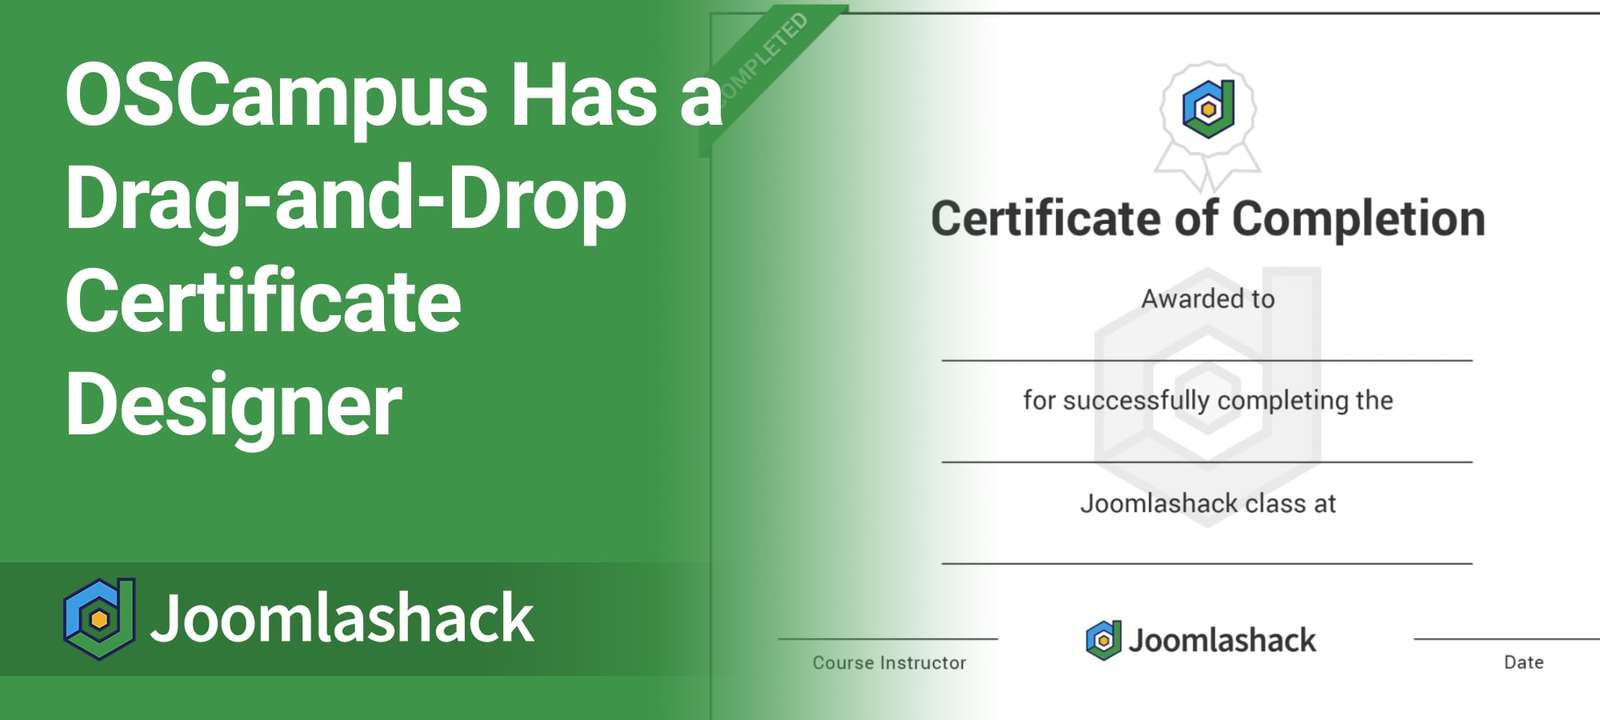
OSCampus has a new and powerful drag-and-drop designer for certificates. This is a great way to reward your users when they finish a class. You can create as many certificates as you need, and then assign them to different classes.
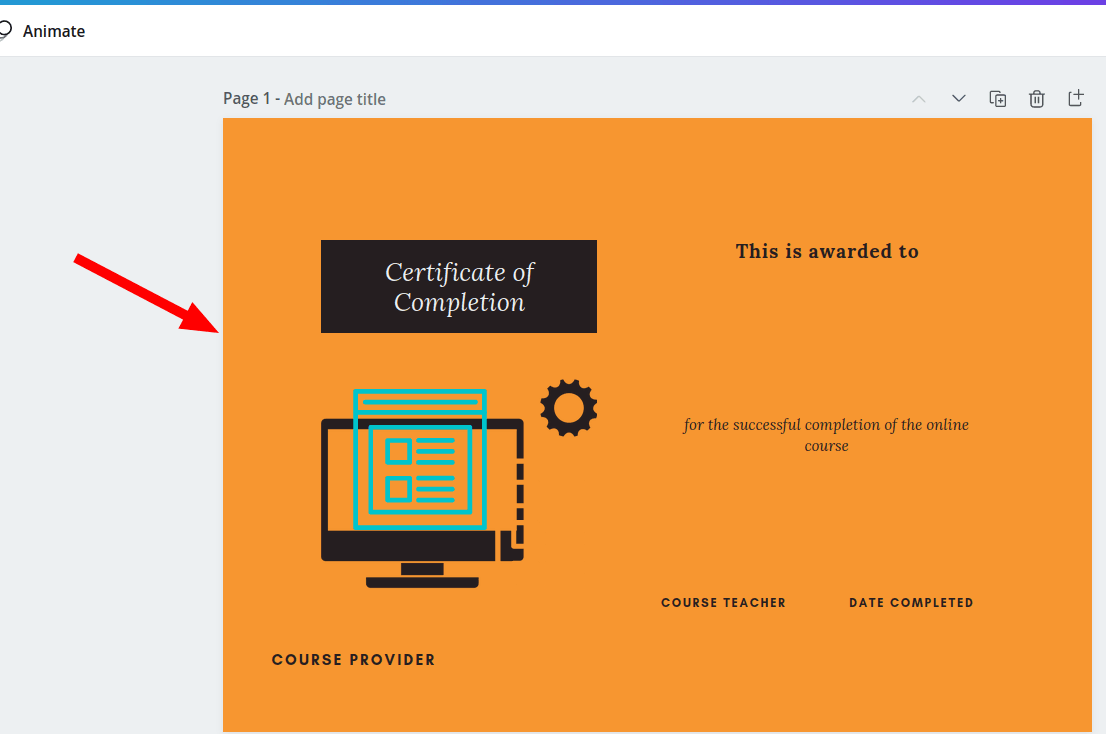
Let's see a preview. In the image below, you can see the certificate here at Joomlshack. You can drag-and-drop any fields onto the certificate image:
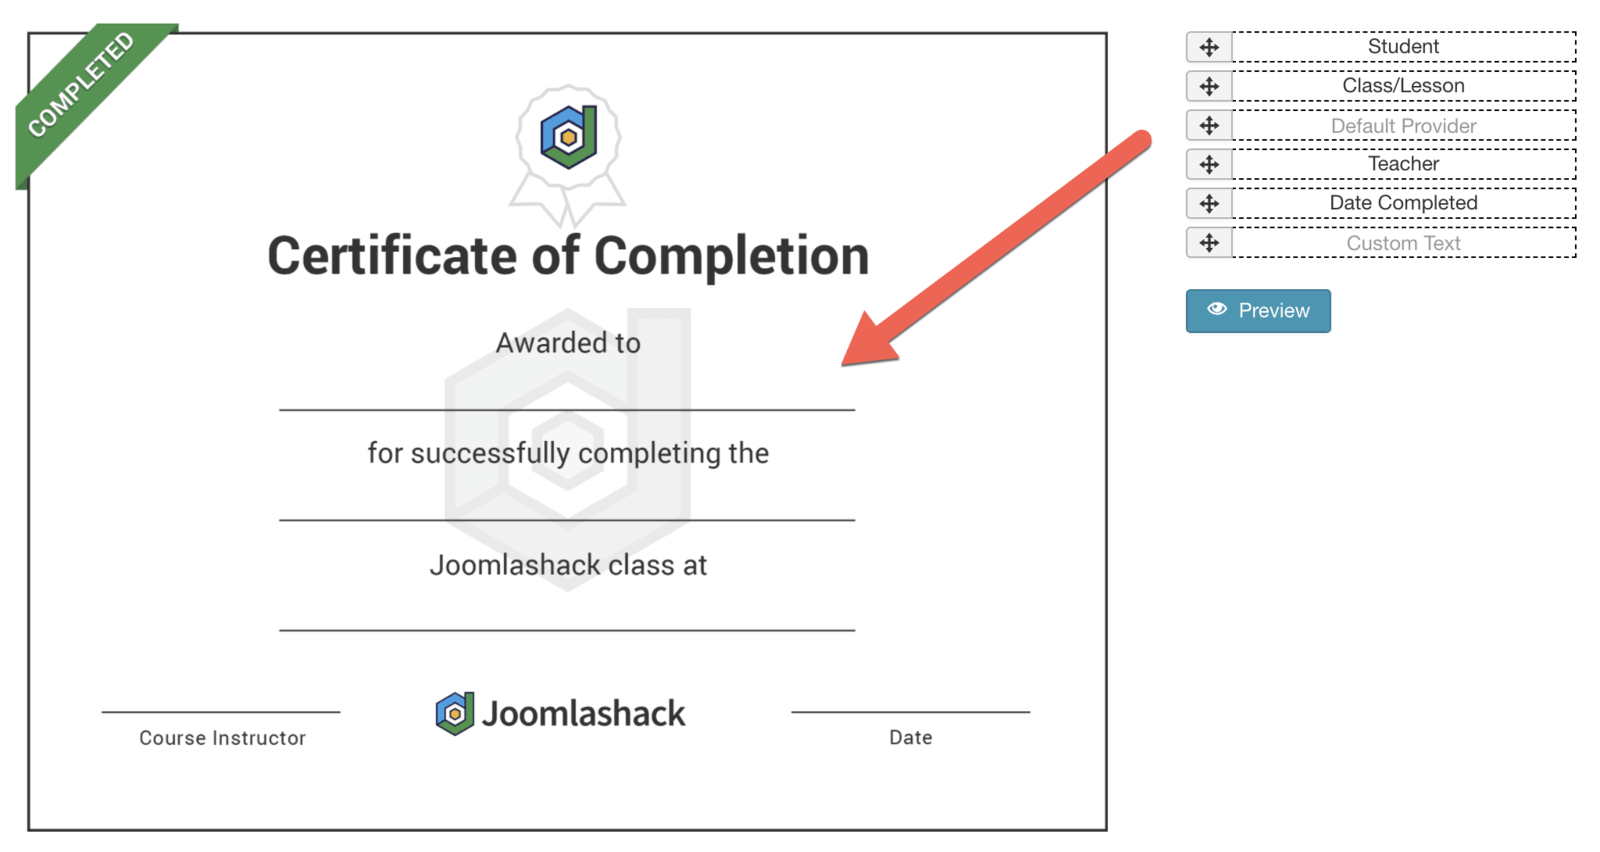
Your OSCampus certificate can include the following fields:
- Student: the name of the student the certificate is awarded to.
- Class/Lesson: the title of the class completed by the student.
- Default Provider: the URL of your Joomla website.
- Teacher: the teacher of the class completed by the student.
- Date Completed: the date when the student completed the class.
- Custom Text: any custom text you see fit to add to your custom certificate.
Step #1. Create a custom image for your custom certificate
You can either design custom images for your certificates, or you can use an online service to do it for you.
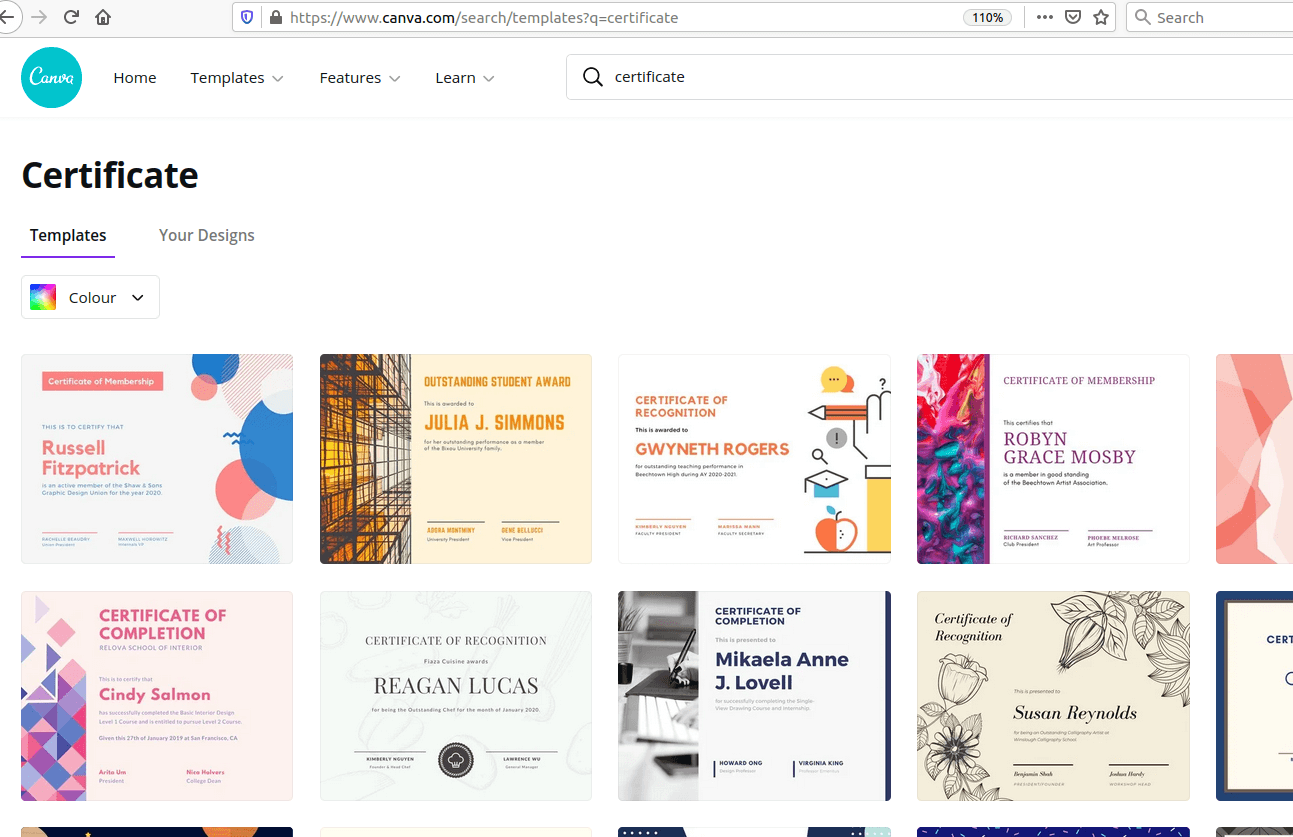
In this tutorial, we''ll show you how to create a certifcate image using an online service called Canva.com. They provide a wide range of certificate images for free, as you can see in the image below:
Here is a certificate image template I selected at canva.com:
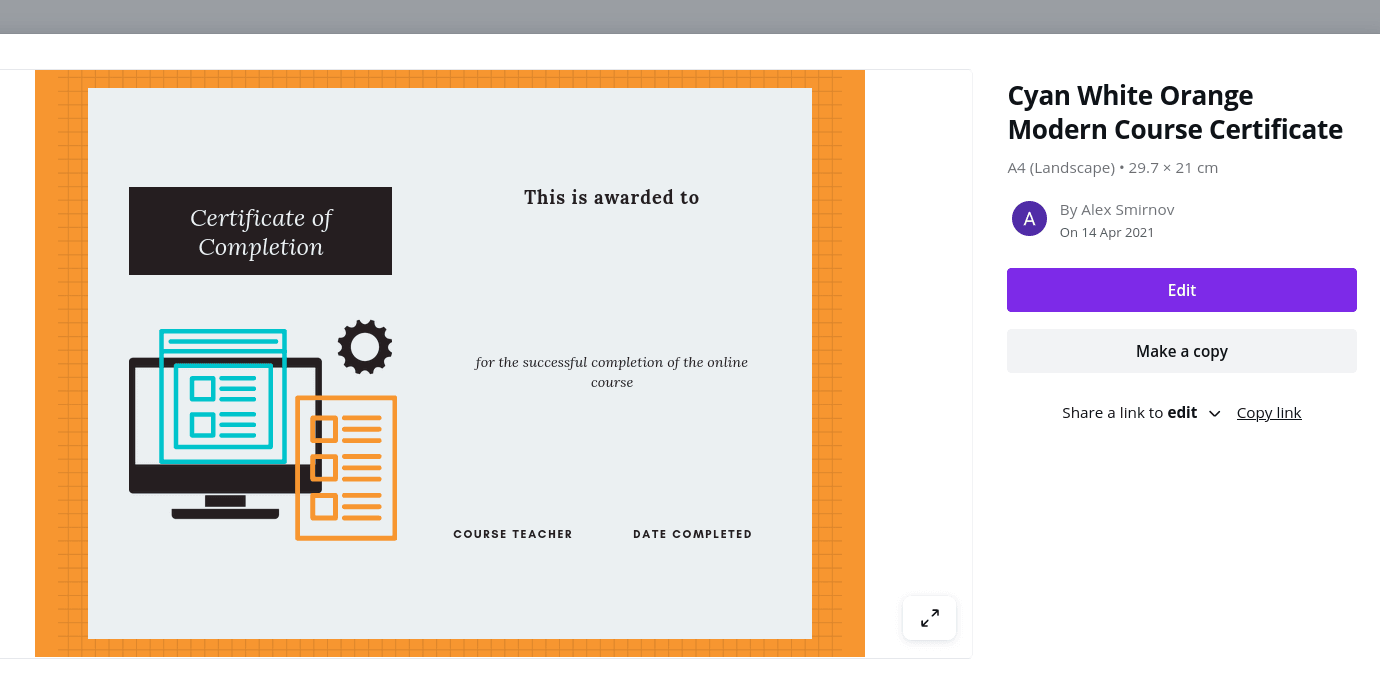
As you can see, this template already contains placeholders for nearly all fields I determined to include in my custom certificates. In particular, it contains the following fields:
- The student name.
- The class title.
- The name of the teacher.
- The date of the class completion.
Step #3. Create your custom certificate
- In your Joomla administrator panel, go to "Content" > "Media" and upload your custom certificate image to your site.
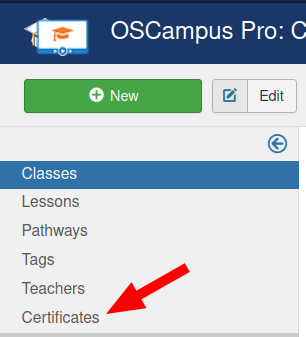
- Go to "Components" > "OSCampus Pro".
- This will bring you to the "OSCampus Pro: Classes" screen. In the left menu, click "Certificates":
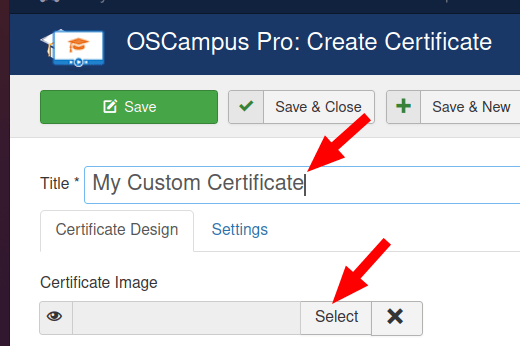
- You will see the "OSCampus Pro: Certificates" screen. In the top left corner, click "New":
- This will bring you to the "OSCampus Pro: Create Certificate" screen, as you can see in the next image. Enter a title in the "Title" field.
- Click the "Select" button:
- Select your new custom certificate image that you uploaded to your Joomla site in Step #2. Click the "Insert" button:

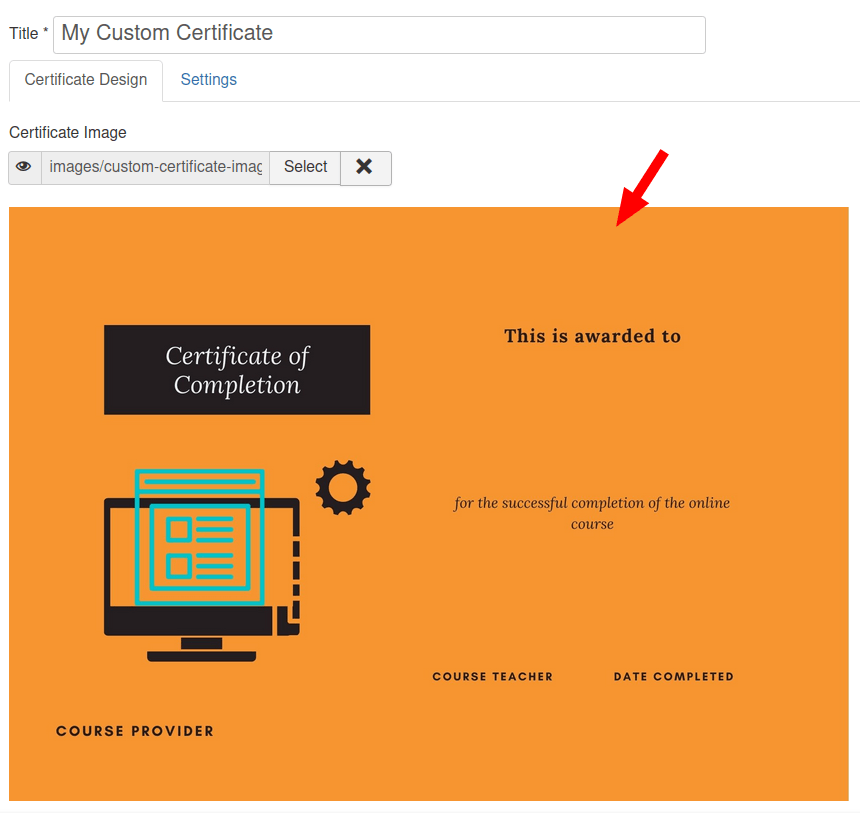
- You will see that your custom certificate image has replaced the default certificate image:
Now we will drag-and-drop the certificate data fields onto the image.
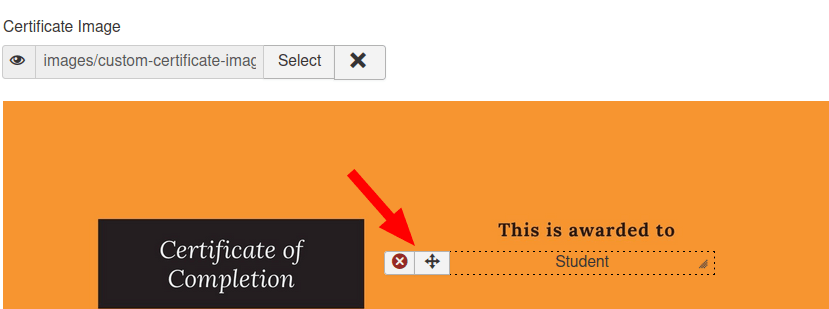
- Point your mouse to the little cross icon of the "Student" data field:
![]()
- Left-click your mouse and drag the "Student" data field to the certificate image near its data placeholder:
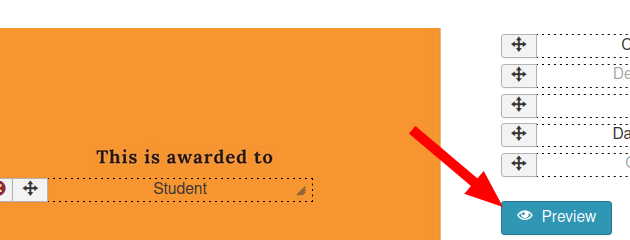
- Click the "Preview" button to preview your certificate with the "Student" data:
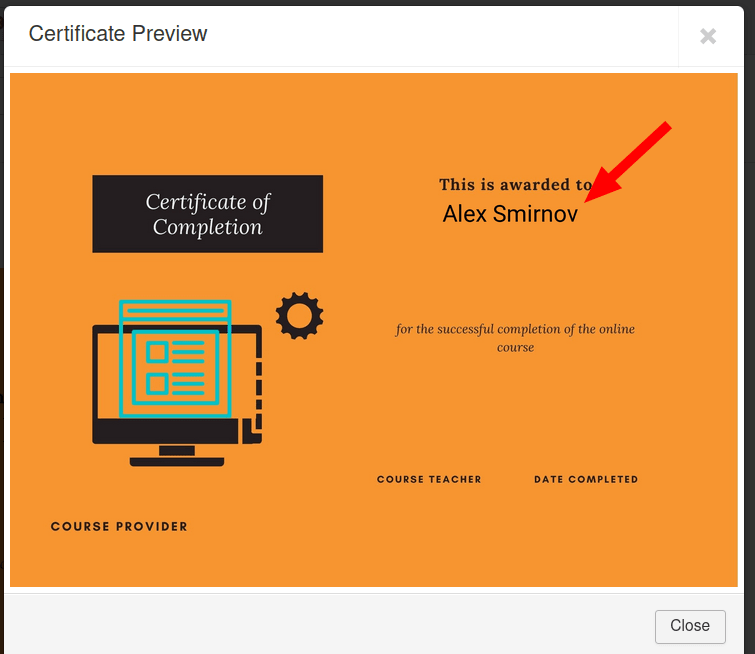
- You will see the "Certificate Preview" modal box displaying the student's data on your custom certificate:
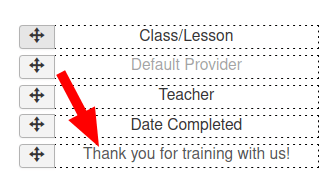
- Repeat this step with the rest of the fields. With the "Custom Text", enter your custom text into the field before dropping it to your custom certificate image:
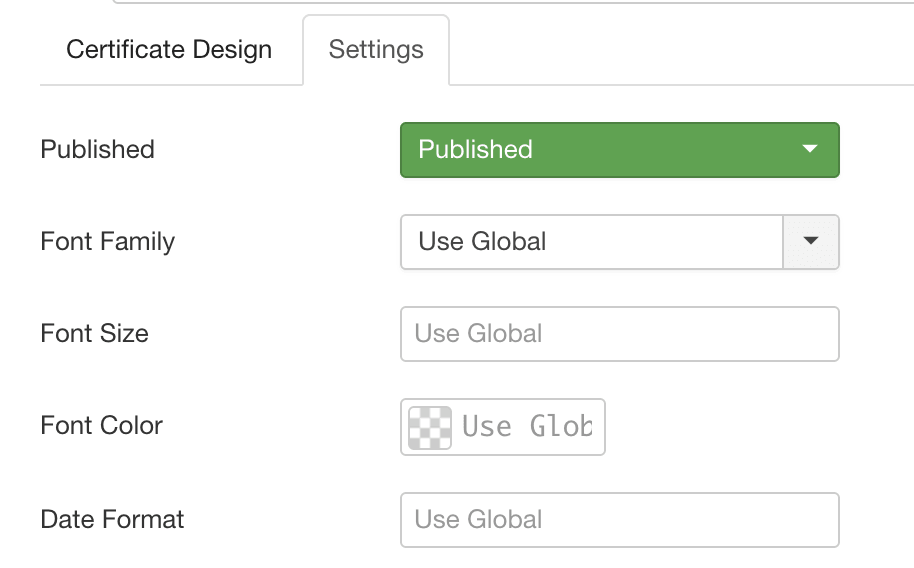
- You can also adjust the fonts and dates used in the fields by going to the "Settings" tab.
- Click the "Preview" button. If necessary, adjust the positions of your data fields on your custom certificate image. Once you are happy with the certificate preview, click "Save" or "Save & Close".
Step #4. Assign the custom certificate to a class
You can assign your newly created custom certificate to any number of your OSCampus classes.
- Open up your required class for editing and set the "Certificate" parameter to your new custom certificate:
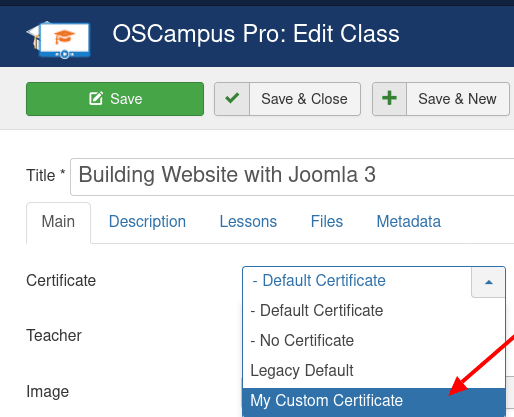
- Click "Save" or "Save & Close".
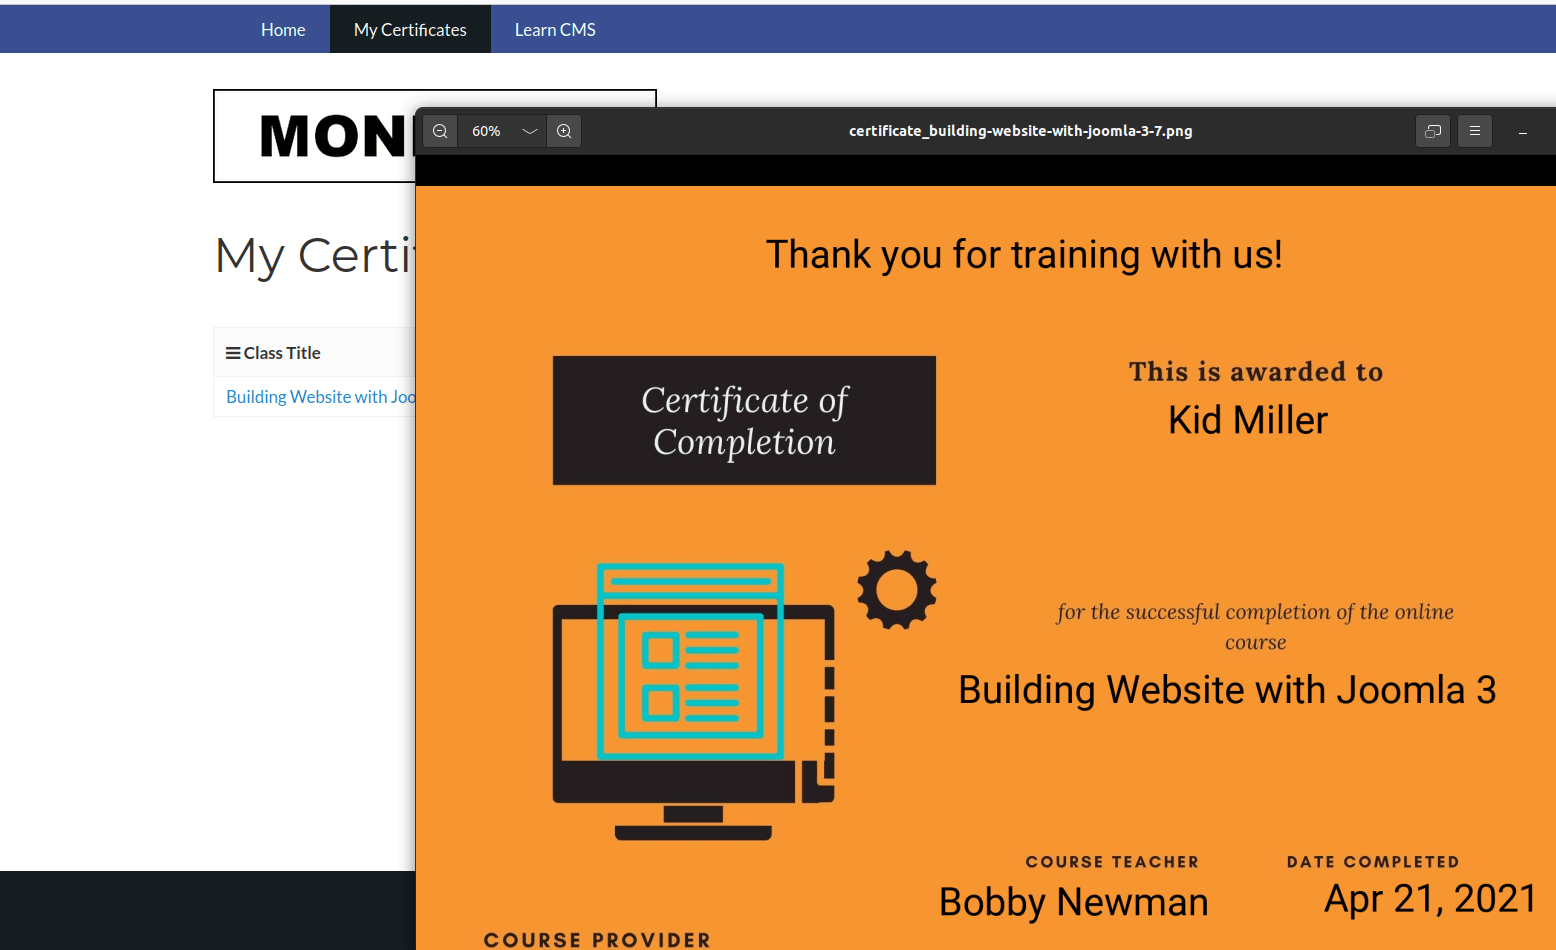
When your student finishes this class and goes to the "My Certificate" page, they will be able to download their certificate with your custom design:
About the author