
One of our customers asked how to give each Joomla user a JCal Pro calendar only with events they created themselves from the frontend. JCal Pro calls such events private events.
In this blog post, I will walk you step by step through creating multiple private calendars with JCal Pro.
This is a seven-step process:
- Create a Joomla user group for creators of private JCal Pro events
- Create a Joomla access level for creators of private JCal Pro events
- Assign to the user group of the creators of private JCal Pro event the "Allowed" permission for the required actions
- Assign the required Joomla user as the creators of private JCal Pro events
- Create a frontend menu item for the creators of private JCal Pro events
- Create a frontend menu item for a calendar view
- Test the final result.
Let's take a look at this process in more detail.
Step #1. Create a new User Group for private event creators
The first step is to create a new Joomla user group specifically dedicated to your JCal Pro private event creators.
To do that, In your Joomla control panel, you want to go to Users > Groups > Add New Group:
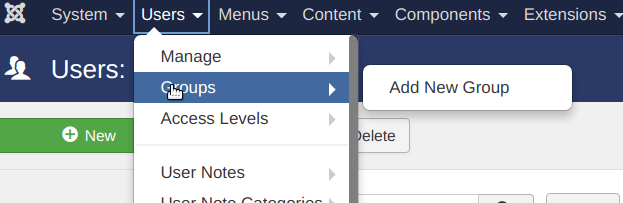
You will see Users: New Group administrative page. You may want to create a new user group. It could be a group similar to the following :
- Group Title: Enter Private Event Creators.
- Group Parent: Select the Registered user group:
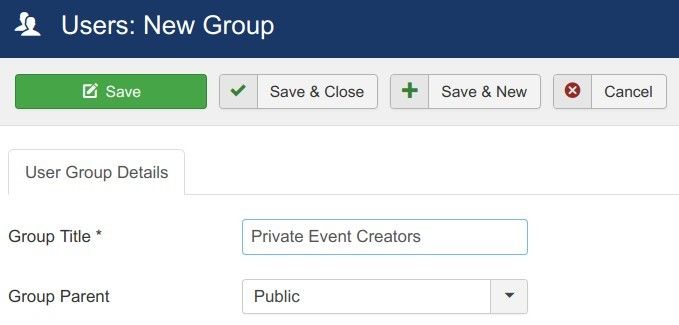
Now you can click Save & Close.
Good job. You now have a special Joomla user group for your JCal Pro private events frontend creators. Let's create for this group its own access level.
Step #2. Create a new Access Level for private event creators
In this step, you will create a special access level for the creators of private JCal Pro events.
In your Joomla administrator panel, you would go to "Users" > "Access Levels" > "Add New Access Level":

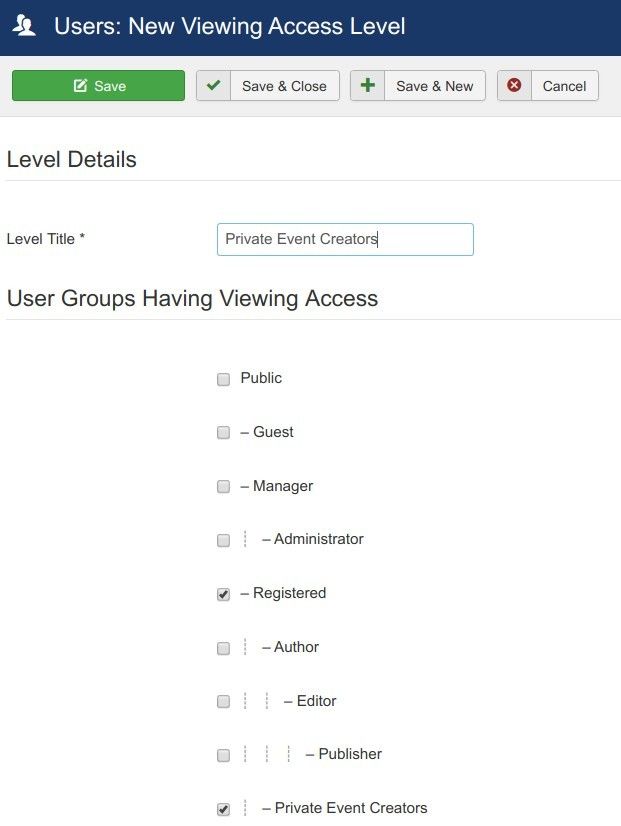
You will be taken to the "Users: New Viewing Access Level" screen.
- Create a new access level similar to the following:
- Level Title: Private Event Creators
- User Groups Having Viewing Access: click "Registered" and click "Private Event Creators":
Now would be a good time to save your changes and click "Save & Close".
Excellent. At this point, you have the new Joomla user group. You also have a new Joomla access level for your JCal Pro private events creators.
Now is a good time to set the "Allowed" permission for the required actions for the user group of your JCal Pro private events creators.
Step #3. Assign required permissions to private event creators
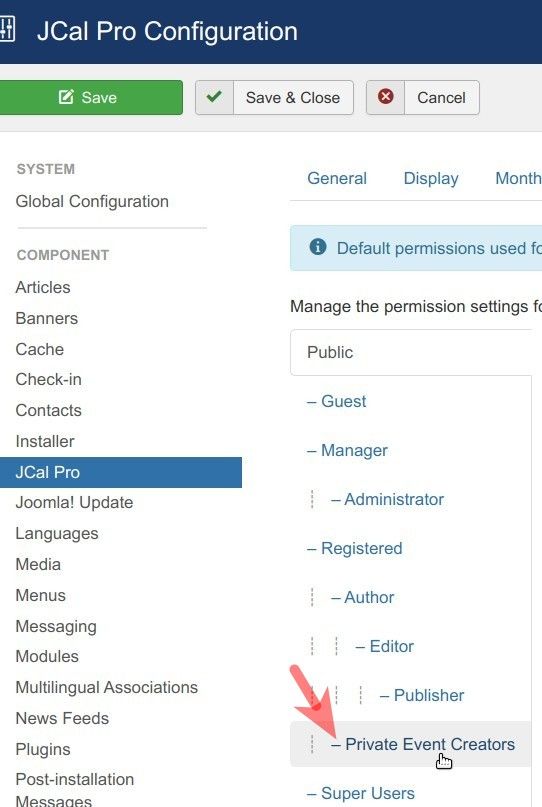
To set the proper permissions, you want to go to "Components" > "JCal Pro".
You will see the JCal Pro: Events default page. In the top-right corner, you want to click the Options button:

This will bring up the JCal Pro Configuration page. Here you want to click the Permissions tab:
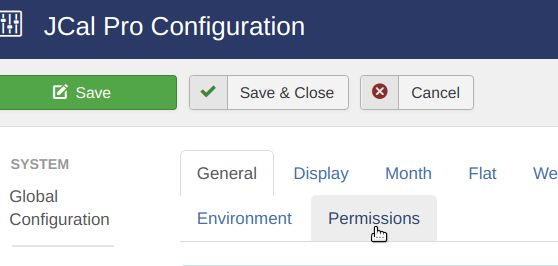
Now you want to click the "Private Event Creators" tab:
Here you want to set the "Allowed" permission for the following actions:
- Create
- Create Private
- Edit
- Edit Own:
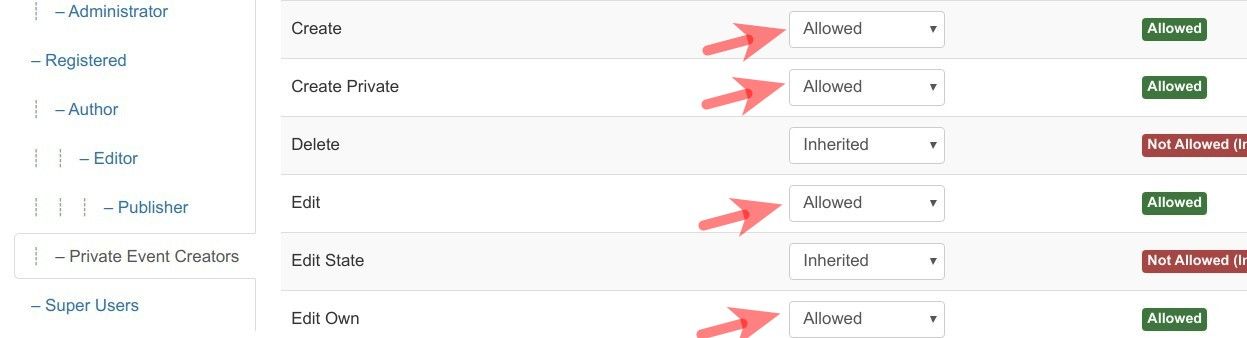
This would be a good point to click "Save & Close" to save your changes.
Well done! You are now ready to allow the "Create" and "Edit" actions for JCal Pro private events creation to your required Joomla user.
Step #4. Assign required users to the new user group
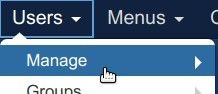
To assign required users their appropriate permissions, you want to go to "Users" > "Manage":
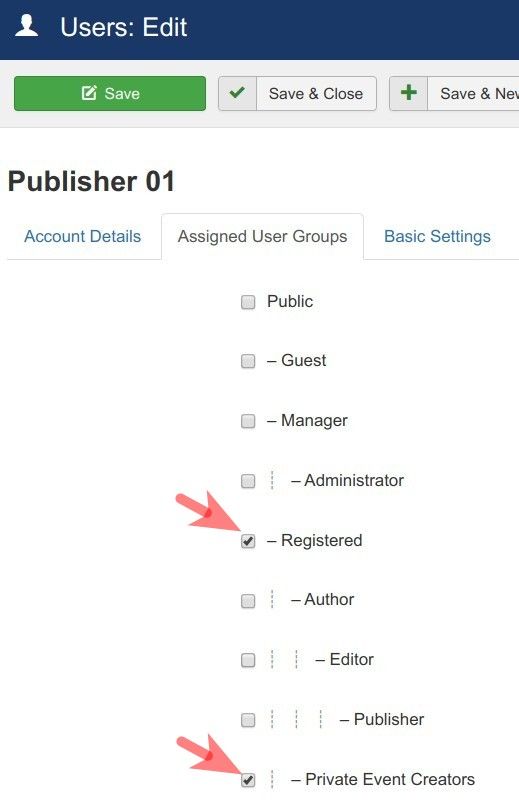
You will be taken to the "Users" screen. Here you want to click on the required users > tab "Assigned User Groups".
On that tab, you want to click on the checkboxes next to the "Registered" user group and next to the new user group, that you created in Step #1:
So far so good. Now would be a good time to click "Save & Close".
Step #5. Create a frontend menu item for private event administration
In this step, you want to create a frontend menu item for the creators of JCal Pro private events.
You do this by going to "Menu" > [Menu of your choice] > "Add New Menu Item". For my demonstration, I will create a new menu item for the "Event Management" menu:
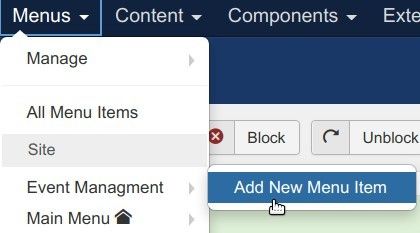
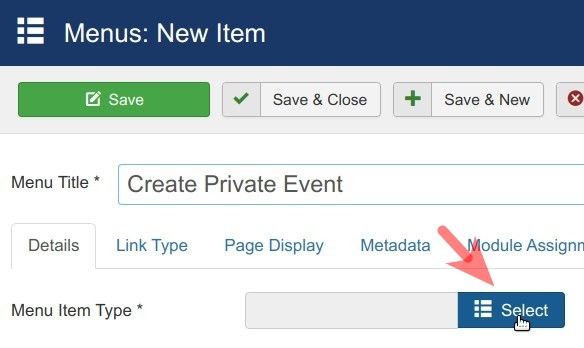
You will be brought to the "Menus: New Item" screen. On this screen, you want to enter the title of your new menu item into the "Menu Title" field and click the blue "Select" button:
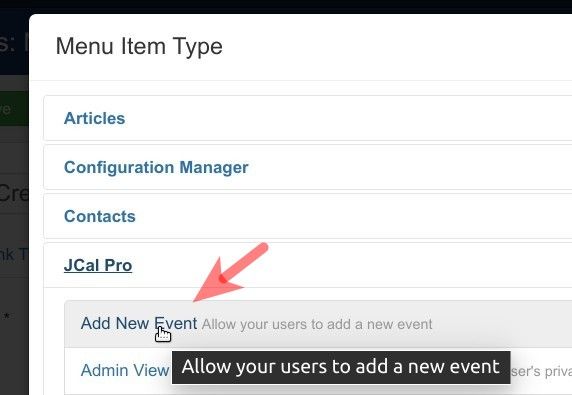
This will bring up the "Menu Item Type" box. Here you want to click "JCal Pro" > "Add New Event":
Excellent. At this point, you can click "Save & Close".
Well done. Now would be a good time to provide to every of your JCal Pro private event creators a calendar page. This should be done by creating a frontend menu item for the JCal Pro calendar monthly view.
Step #6. Create a frontend menu item for a calendar view
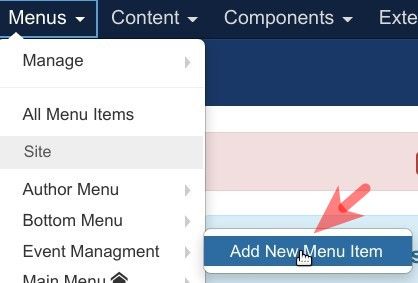
You want to go to "Menus" > [menu you created for your private event creators] > "Add New Menu Item". For my demonstration, I will go to "Menus" > "Event Management" > "Add New Menu Item":
This will bring you to the "Menus: New Item" screen. Here you want to enter a title into the "Menu Title" field and click the blue "Select" button:
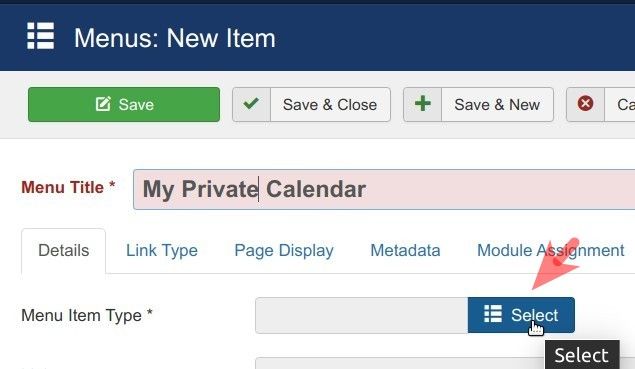
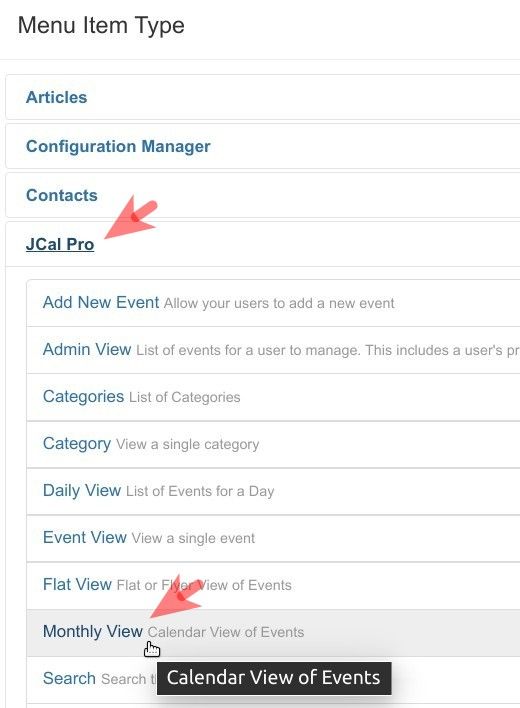
You will see the "Menu Item Type" box. On this box, you want to click "JCal Pro" > "Monthly View":
At this point, you are ready to save your changes and click "Save & Close".
Good job! You are now ready to test multiple private JCal Pro event calendars.
Step #7. Test the final result
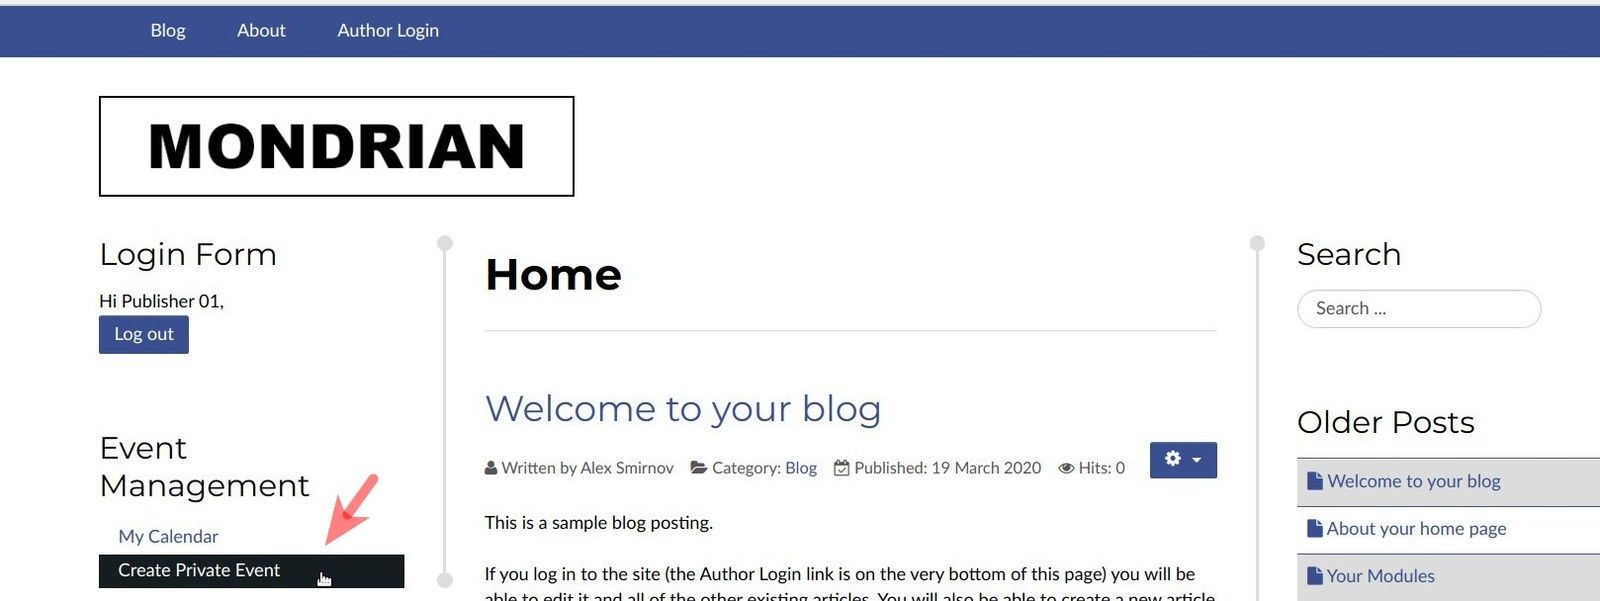
Log in to your site frontend as one of the creators of JCal Pro private events.
Click the menu item you created in Step #5. In my example, I will click "Create Private Event":
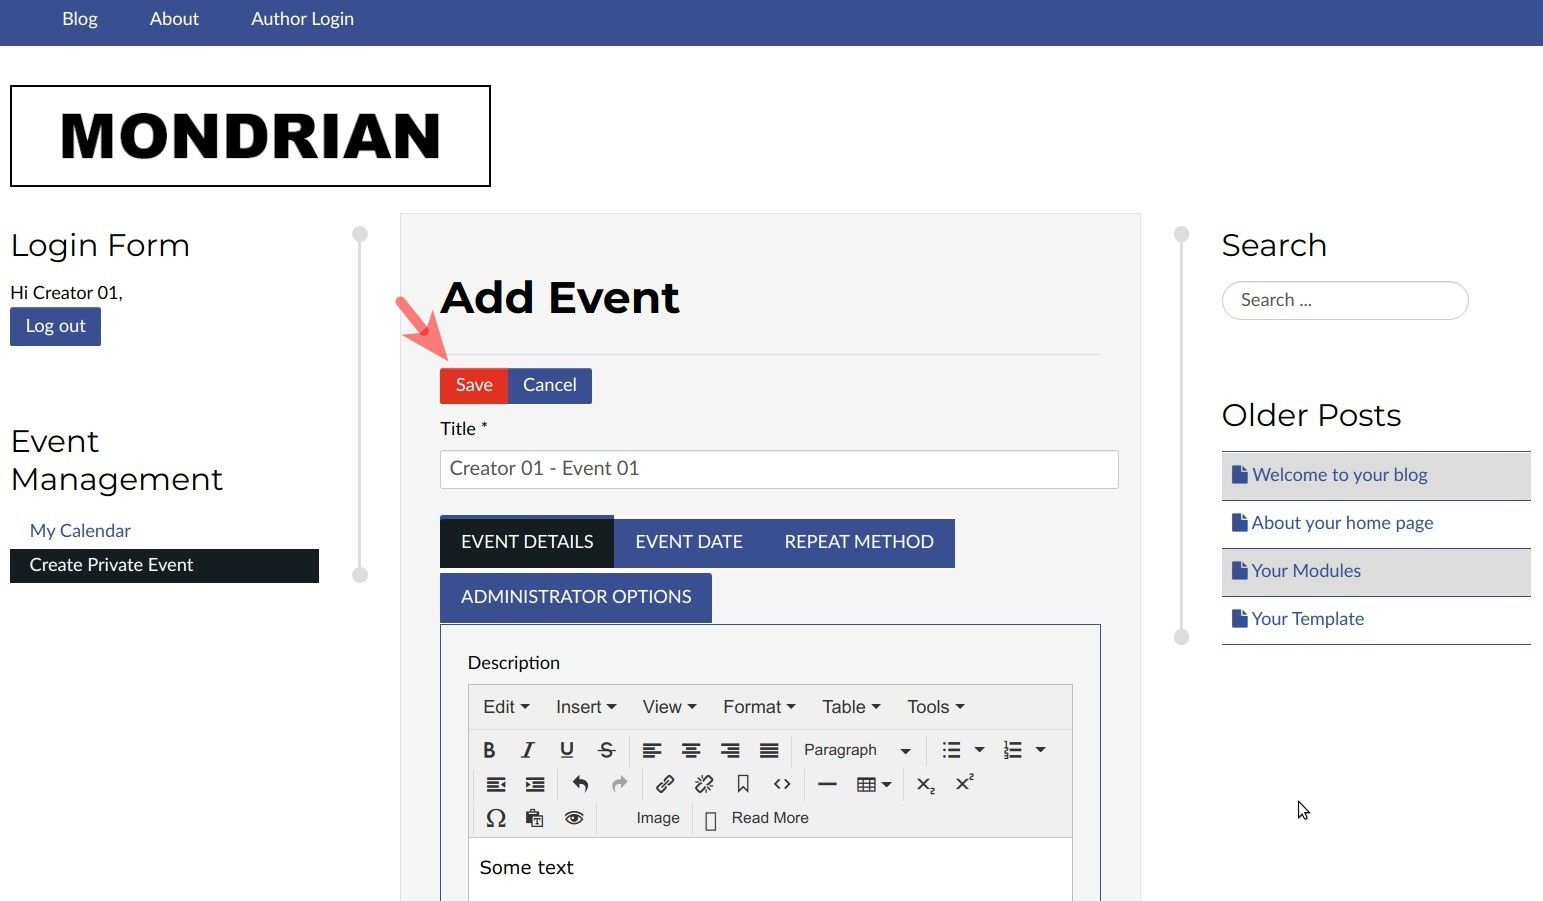
Your user will be taken to the "Add Event" frontend JCal Pro page. Enter a title, select a category and click "Save" to create a private test event:
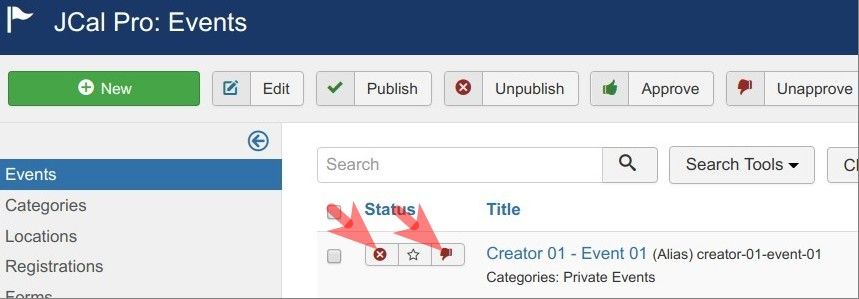
You want to go back to your Joomla administrator panel > "Components" > "JCal Pro".
You want to click on the two icons in the "Status" column to change the status of the event you just created to the "Published" and "Approved":
Log out and repeat the same frontend event creation as another user you also assigned in Step #4 as a private events creator.
You will see that the JCal Pro calendar will display to each of your private event creators the only events they created themselves.
What's Next?
Save $1000's when you sign up to the Everything Club today! You'll get access to all our extensions, templates, and Joomla training.
About the author