One of our customers asked how to track their Shack Forms submissions with Google Analytics.
Setting such tracking is a six-step process.
- Connect your Joomla site to Google Analytics.
- Create a "Thank You" Joomla article for your form.
- Create a hidden menu item for the "Thank You" article.
- Set your form to redirect to the "Thank You" article page upon submissions.
- Create a goal in Google Analytics to track the URL of the "Thank You" page.
- Test the goal conversion in your Google Analytics.
In this blog post, I'll walk you through this process step-by-step in more detail.
Step #1. Connect Joomla to Google Analytics
Before proceeding with this tutorial, you need to make sure that Google Analytics is tracking your site. This guide will get you set up.
Step #2. Create a "Thank You" article
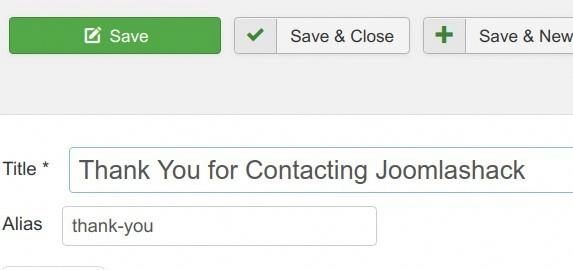
- In your Joomla administrator panel, go to "Content" > "Articles" > "Add New Article".
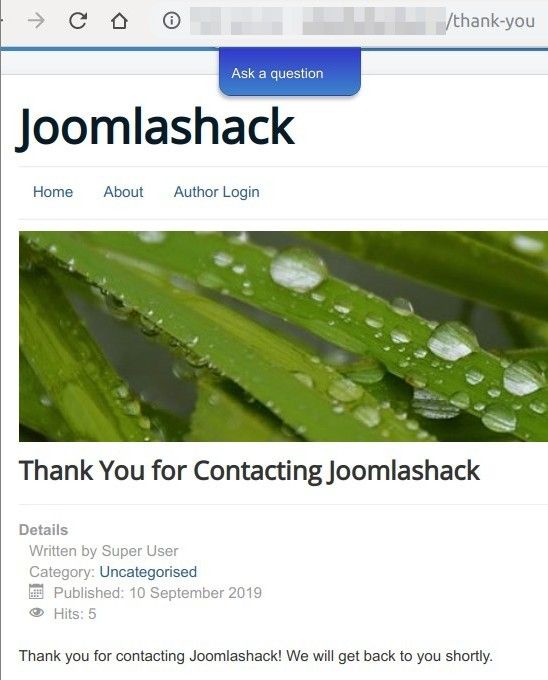
- Create a "Thank You for Contacting Us" Joomla article:
Good! You now have a "Thank You" page. Every time someone submits your Shack Form, they will get automatically redirected to this page.
For this redirection to work, your Shack Form needs a Joomla menu item linking to the "Thank You" article. This menu item doesn't have to be displayed to your site visitors. It can be hidden. But it does have to exist in your Joomla system. Let's create this menu item.
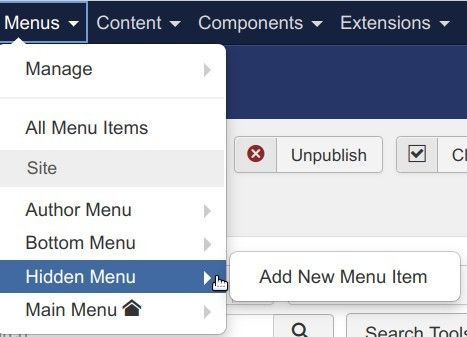
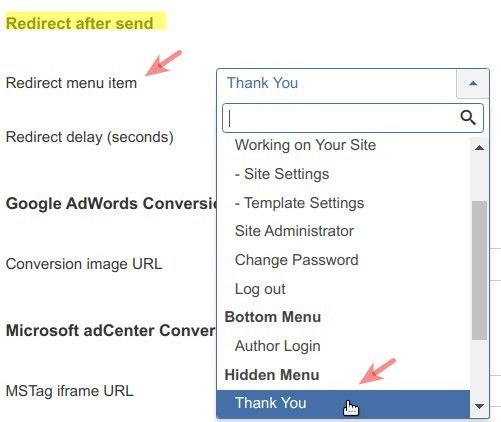
Step #3. Create a menu item
- Go to a Joomla menu of your choice. For my demonstration, I go to the separate menu called "Hiden Menu". I created it specifically for menu items that won't be displayed. Click "Add New Menu Item":
- Create a new menu item linked to the "Thank You" Joomla article. As you can see on the screenshot below, I called mine "Thank You":
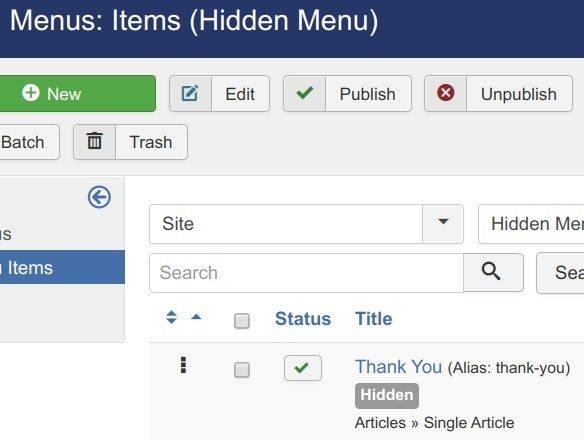
Good job! You now have your "Thank You" Joomla page. You also created a Joomla menu item for this page.
Now is a good time to set your Shack Form submitters to get redirected to the "Thank You" page.
Step #4. Set your form to redirect to the "Thank You" page upon submissions
- In your Shack Forms module, go to the "Events" tab:

- Scroll down to the "Redirect after send". Set the "Redirect menu item" parameter to the "Thank You" menu item:
- Click "Save & Close".
- Go to your Joomla site frontend. Submit your Shack Form with some test data.
- Your form will get redirected to the "Thank You" page. Copy its URL:
Well done! Shack Forms is all set for tracking the form's submissions in your Google Analytics.
Let's set your Google Analytics to track them. You will achieve this by creating a Google Analytics goal for the URL you just copied.
Step #5. Create a goal in Google Analytics
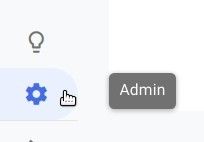
- In your Google Analytics, click the "Admin" icon in the bottom left corner:
- Under the "View" column, click "Goals":

- Click "NEW GOAL":

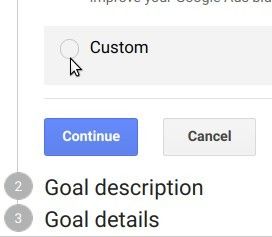
- On the next screen, click "Custom" and then click "Continue":
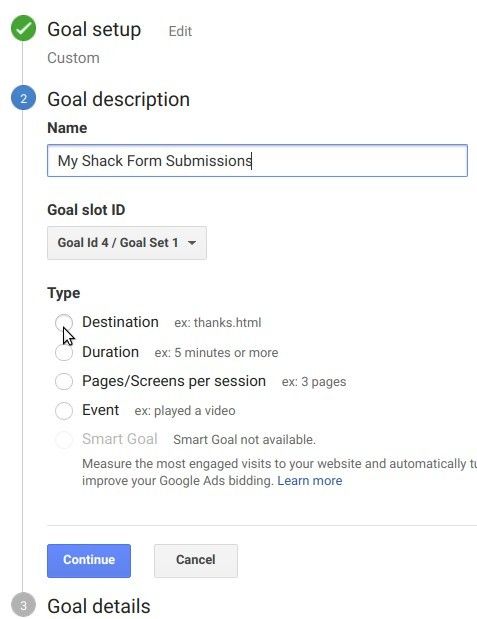
- Enter your goal description, click "Destination" and click "Continue":
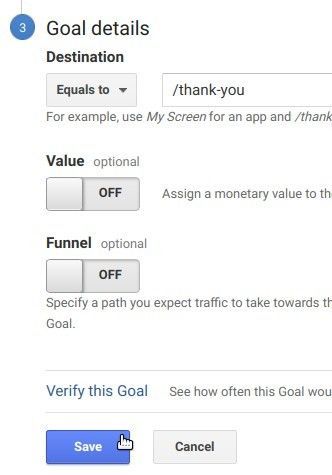
- Enter your URL without your domain name into the "Destination" field and click "Save":
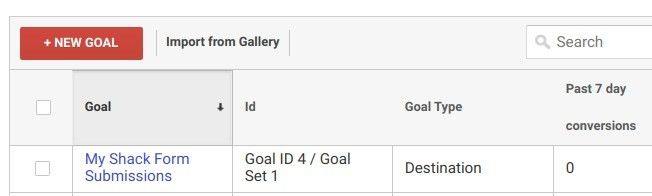
- You will see your Google Analytics goal listed:
Good job! Now is a good time to test your Joomla form submissions tracking.
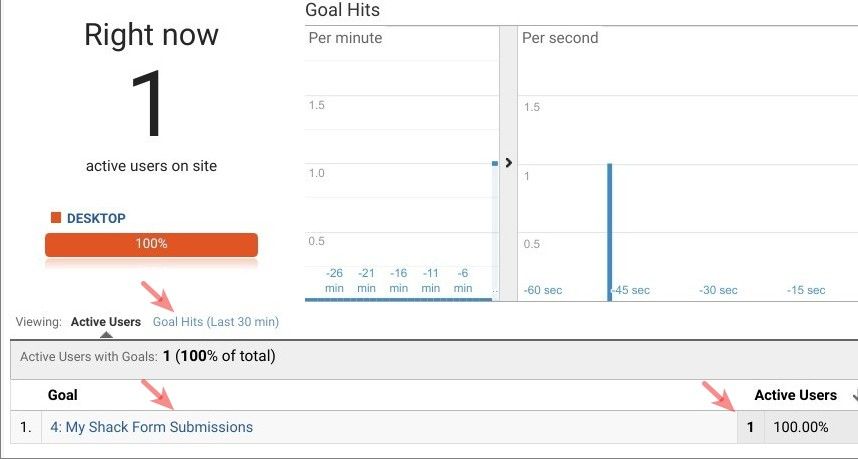
Step #6. Test the goal conversion in your Google Analytics
- Go to the frontend of your Joomla site. Submit your form with test data.
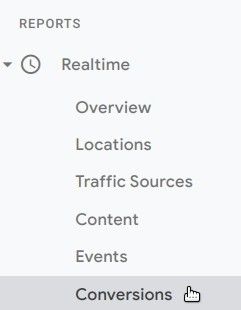
- In your Google Analytics account, go to "Realtime" > "Conversions":
- You will see that Google Analytics successfully tracked your goal-related hit: