
If you would like your Joomla site to communicate in multiple languages, you need a multi-lingual Joomla site. In this tutorial, you will learn how to install a multi-lingual Joomla site with dummy content and localized menus.
Once you finish the installation, you will then be able to replace the dummy content for every language with your own.
Here is the process in a nutshell:
- Get ready for Joomla installation. Firstly, you want to upload and unpack the latest Joomla installation pack to your server and create a database for your Joomla site.
- Run the installation. Then you want to run the installation process for a multi-lingual Joomla site.
- Translate the dummy Joomla content and add new content for every required language.
Let's take a look at this process in more detail.
Step #1. Get ready for the installation
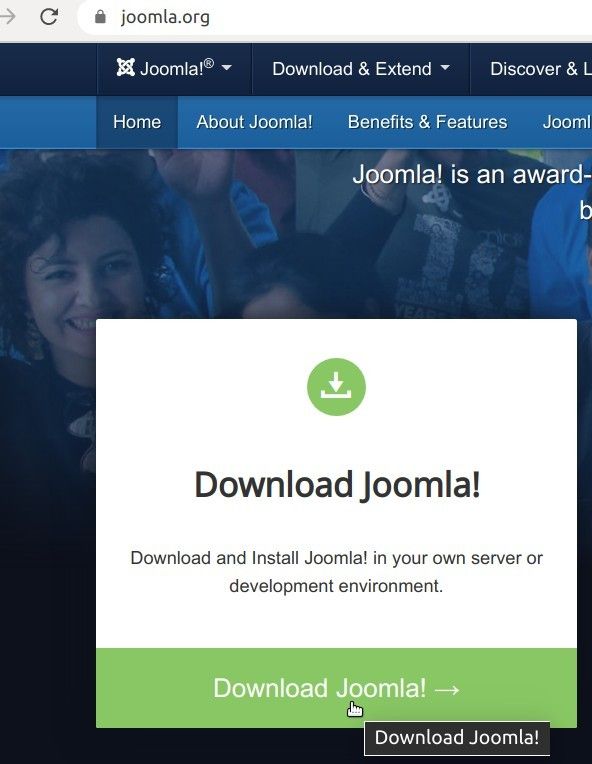
You start preparing the stage for a multi-lingual Joomla installation by downloading the latest Joomla installation pack from Joomla.org:
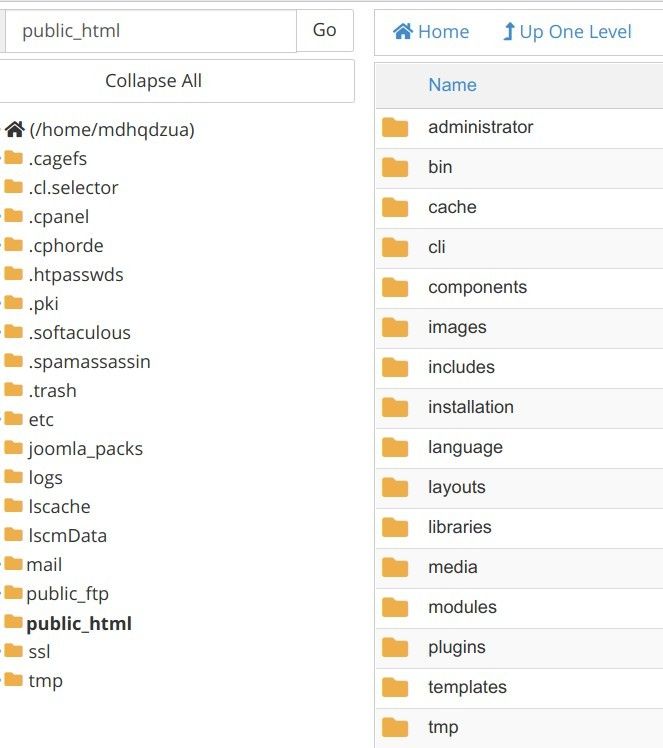
Once you downloaded the latest Joomla pack, upload it to your server and unpack it there:
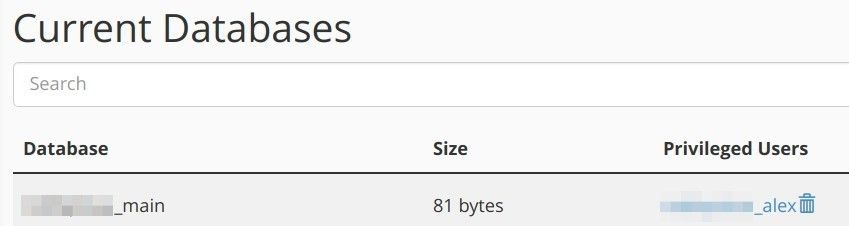
Your Joomla installation needs a database, to keep your site content and settings. So, now would be a good time to create a database with an administrator user:
Excellent! You are now all set to start the installation process of a Joomla site with a multilingual dummy content.
Step #2. Run the installation
You will be able to install a Joomla multilingual site with no technical skills. The installation process is as easy as following the on-screen instructions.
You start by pointing your browser to the folder where you unpacked the latest Joomla installation pack and hitting "Enter".
For my demonstration, I unpacked the Joomla installation pack into the /public_html/ folder on my remote server. So, to start my installation, I need to point my browser to my domain.
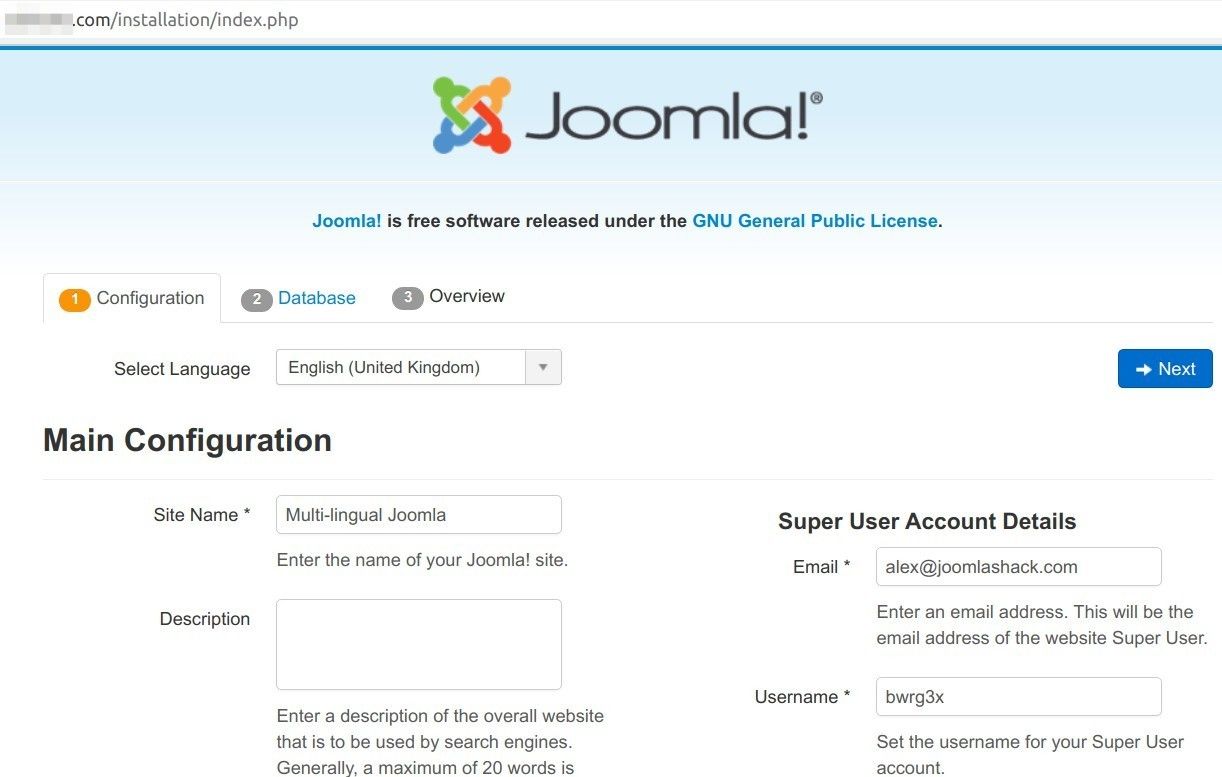
Once you hit the “Enter” key, you will be taken to the "Main Configuration" screen of the Joomla Installer. At this point, you want to fill in all the required fields and click the blue "Next" button in the top right corner:
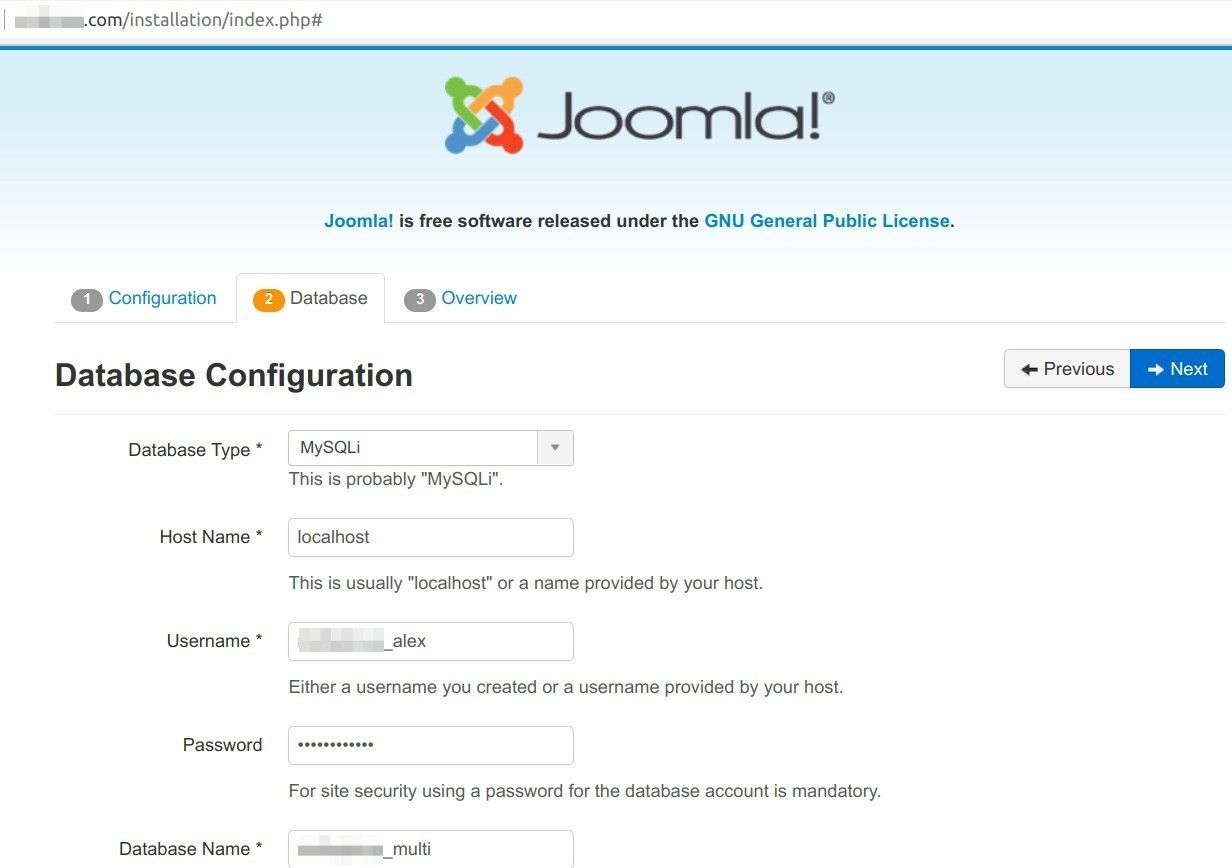
This will take you to the "Database Configuration" screen. As with the previous screen, here you also want to fill in the required field here and click "Next":
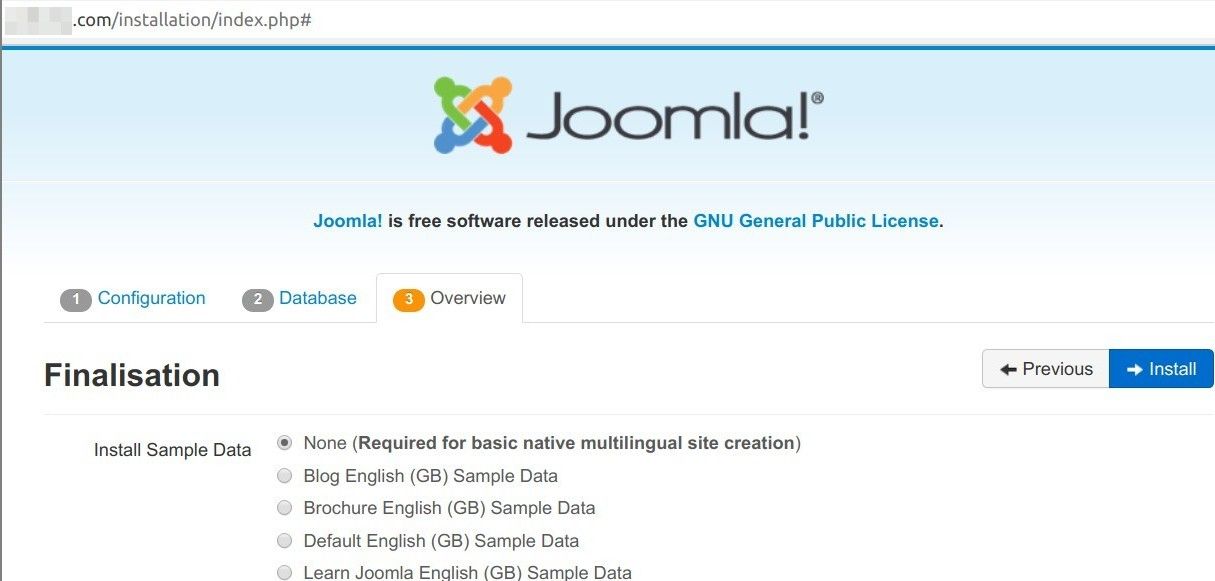
Now you will be taken to the "Finalization" screen. Her you want to select "None" for the "Install Sample Data" and then click the blue "Install" button:
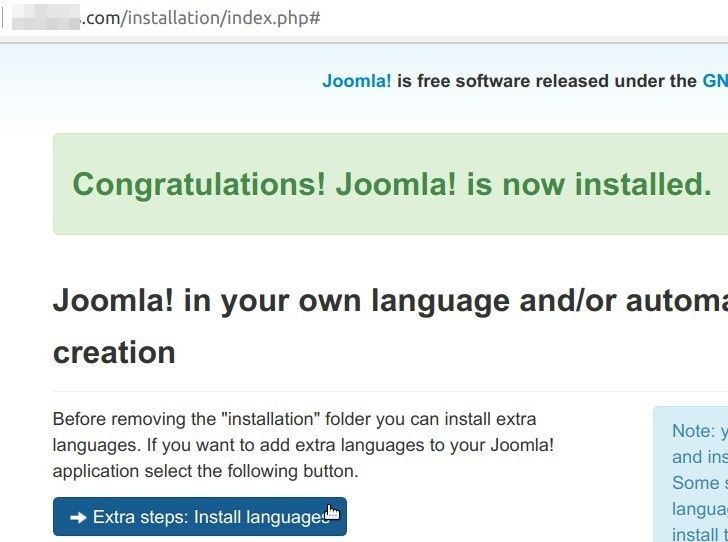
You will seel the "Congratulations! Joomla! is now installed." message on the light green background.
Nice job! You just installed Joomla. At this point, you are ready to install multiple languages and dummy content for them.
You want to click the blue "Extra steps: Install languages" button:
Note: you will need internet access for Joomla! to download and install the new languages.
You will arrive at the "Install Language packages" screen. You want to select your required languages and then click the blue "Next" button:
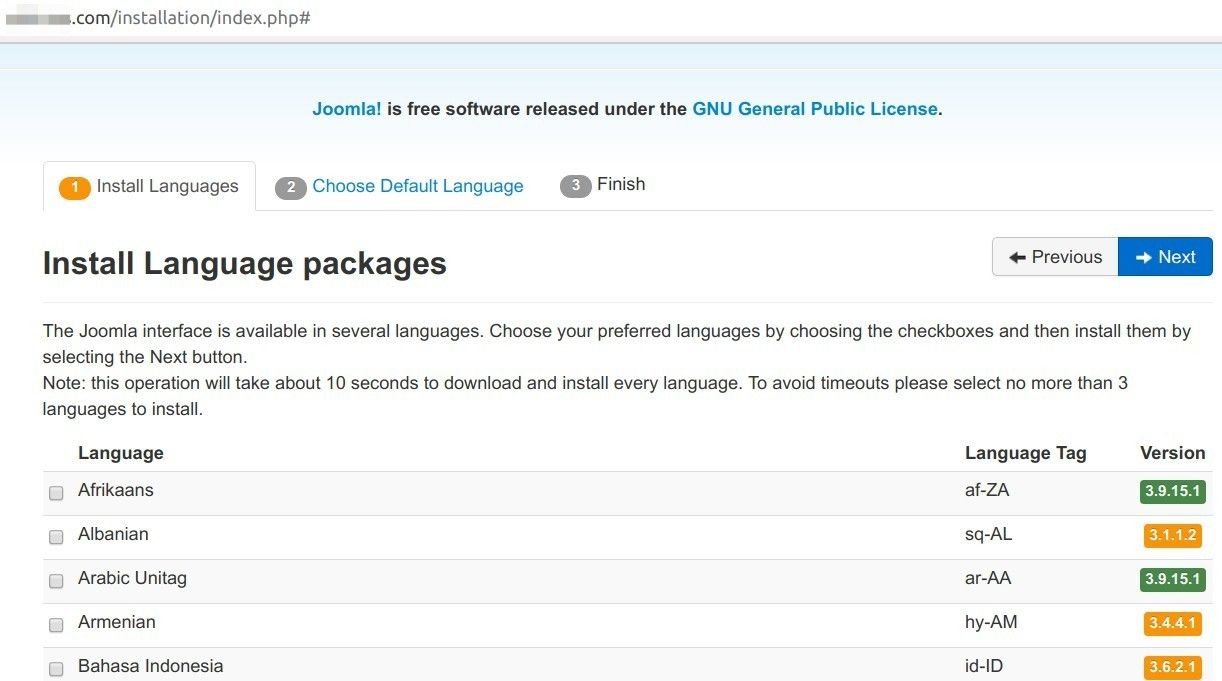
Note: this operation will take about 10 seconds to download and install every language. To avoid timeouts please select no more than 3 languages to install.
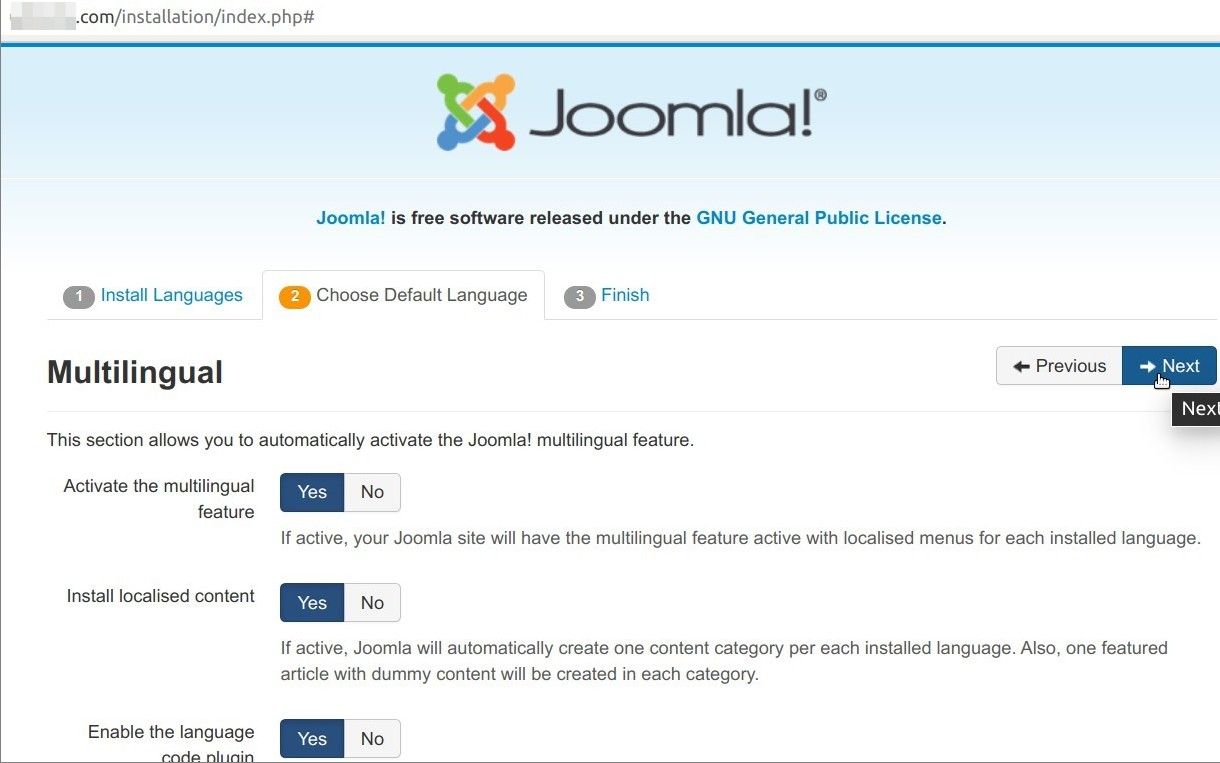
The Installer will bring you to the "Multilingual" screen. You want to click "Yes" for the "Activate the multilingual feature" setting:
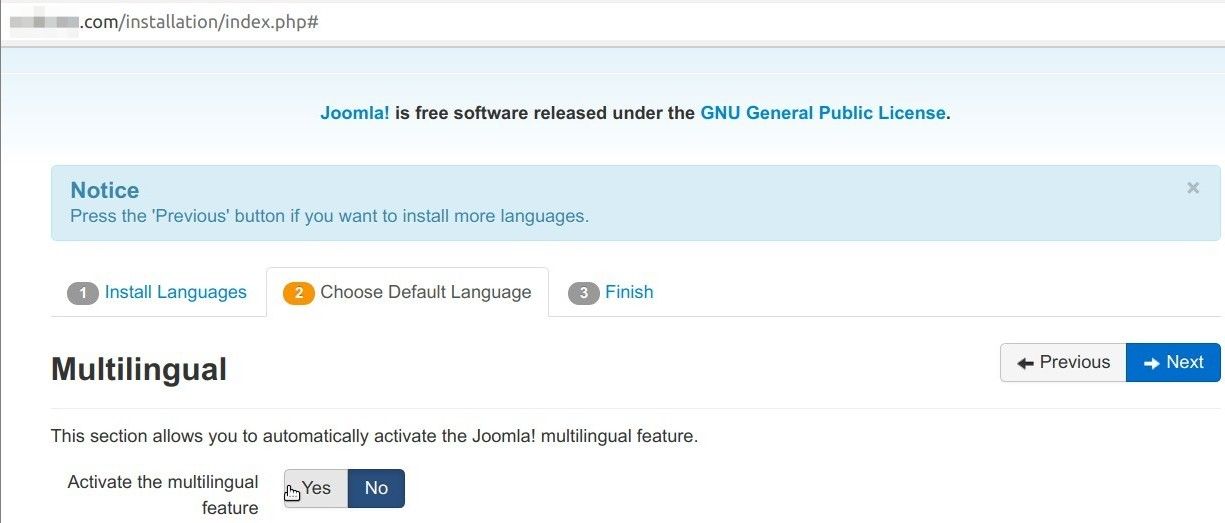
You will see two more options appear. For better SEO, you want to click "Yes" for the "Enable the language code plugin" setting and click the blue "Next" button:
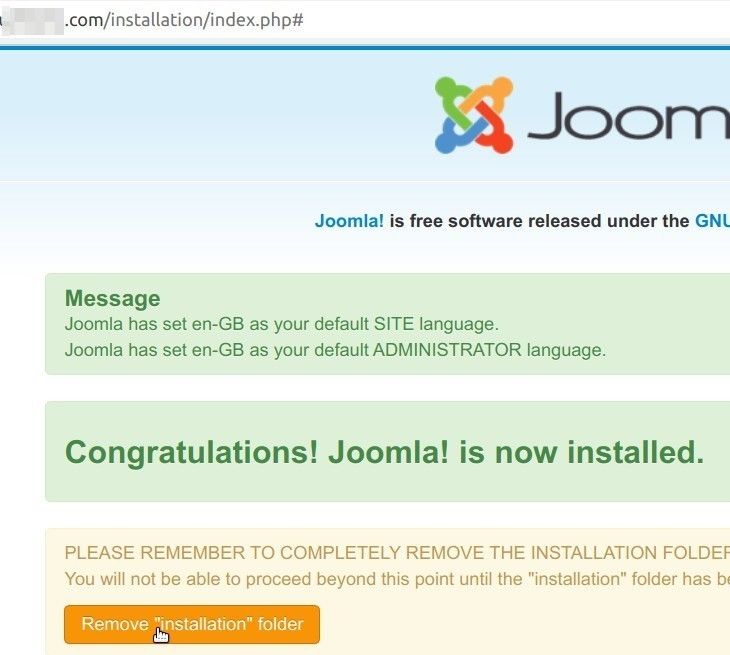
This will bring you to the screen with two boxes on a light green background with success messages, as on the screenshot below.
So far so good! You are almost done. To finish the process, you want to click the "Remove "Installation" folder" button:
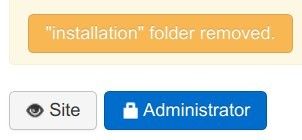
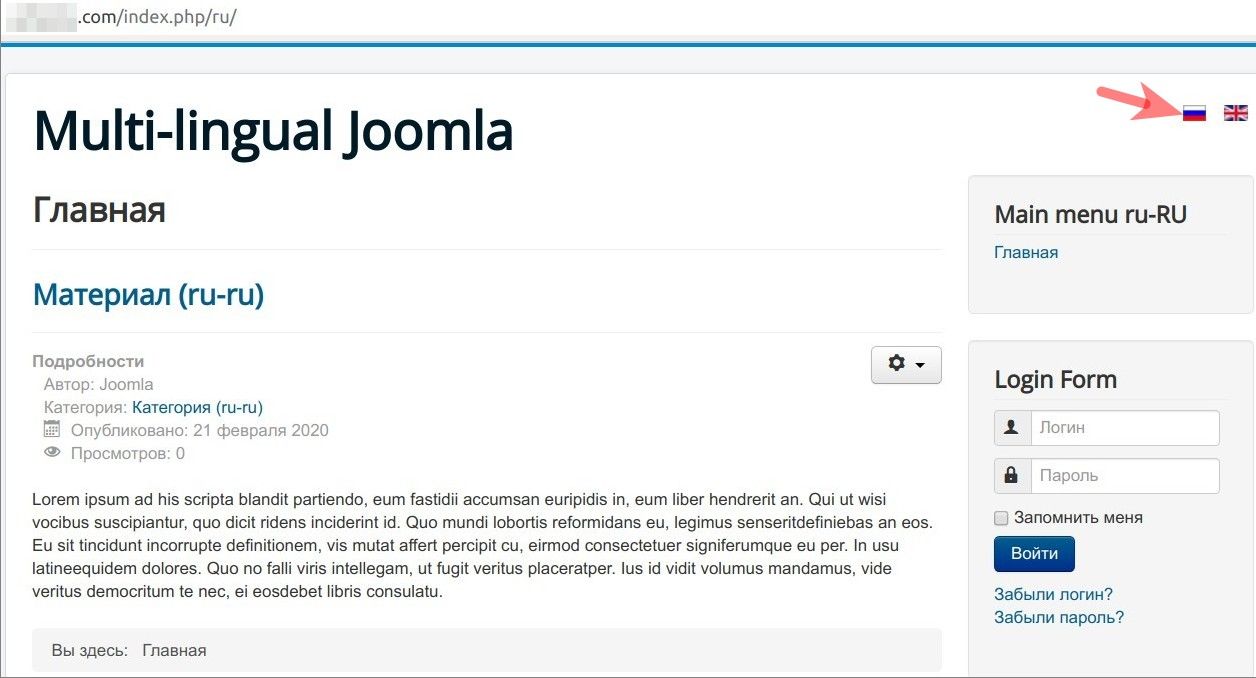
You should see the button's text changed to the ""Installation" folder removed". At this point, you want to click the "Site" button underneath to test your multilingual Joomla site at work:
This will bring you to the frontend of your newly installed site. In the top right corner, play with clicking the flags of the countries which languages you installed. You should see that if you click a flag, your Joomla site frontend switches to the corresponding language:
You are all set to start translating what needs to be translated and add new content for each language.
About the author