Documentation for Joomla 6
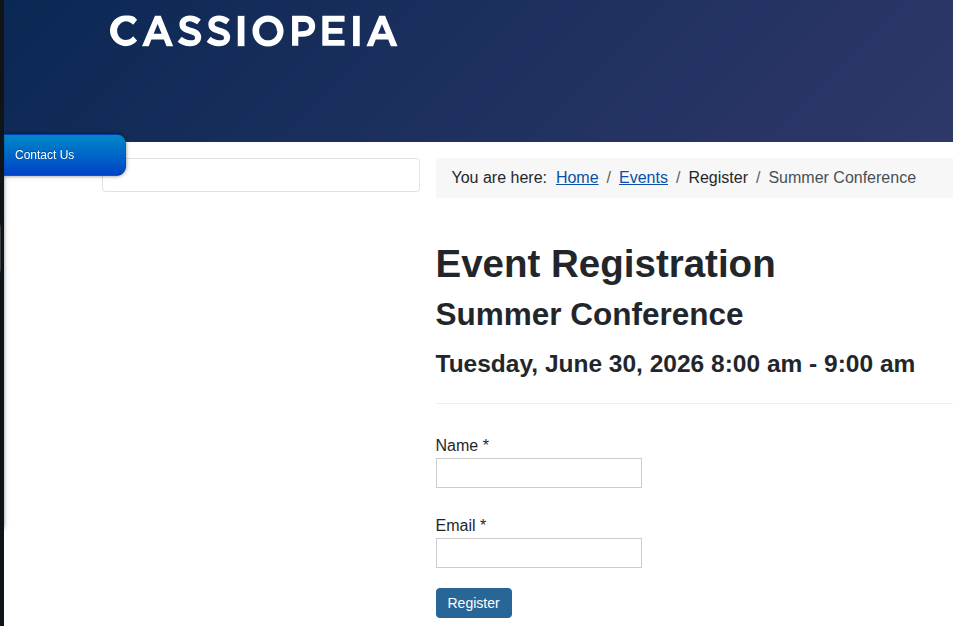
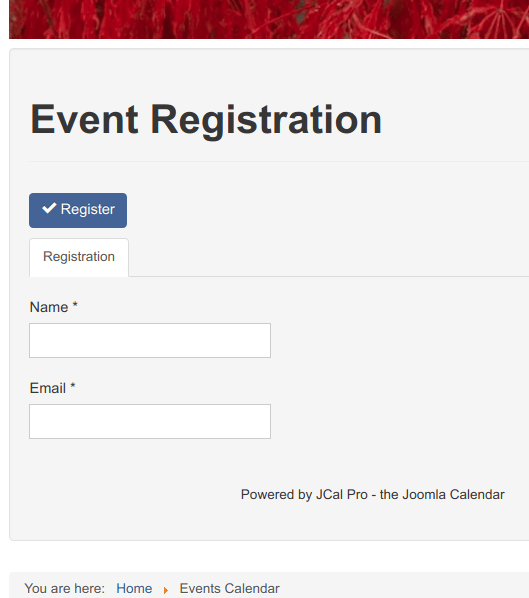
By default, the JCal Pro event registration form only asks registrants for their name and email address:
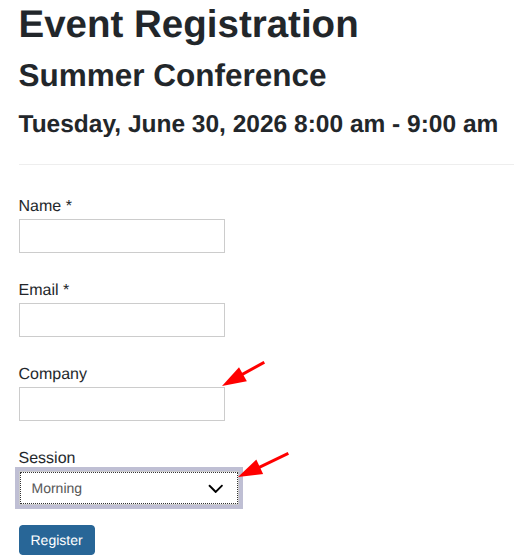
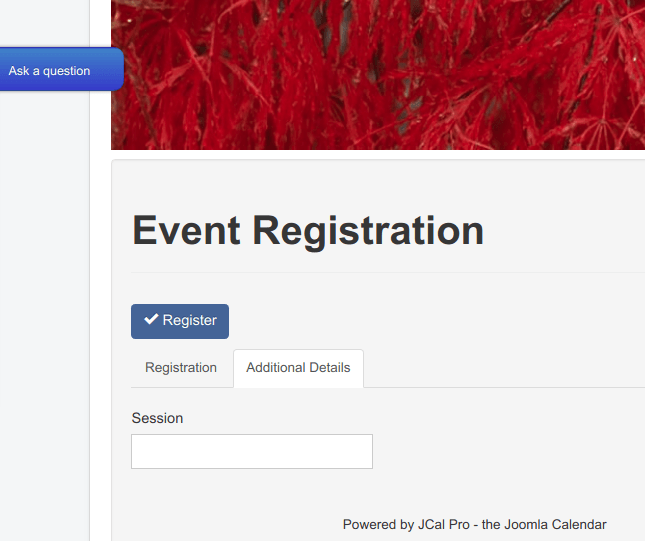
You can extend the default registration form by adding your own custom fields:
This is a five-step process:
- Enable frontend event registrations.
- Create custom registration fields.
- Create a custom registration form.
- Assign the custom registration form to an event category.
- Enable registrations for the required events.
How It Works
Event registrations are disabled by default in JCal Pro, so the first step is to enable the registration feature in the global configuration.
Next, create the custom fields that you want to collect from your event participants.
Once your fields are ready, create a custom registration form and add those fields to it.
Then assign that registration form to the event category where it should be used.
Finally, enable registrations for the individual events that should accept registrations.
Let's go through each step.
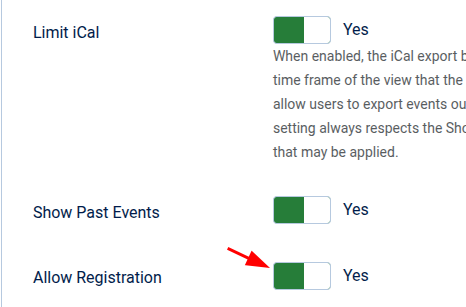
Step #1. Enable frontend event registrations
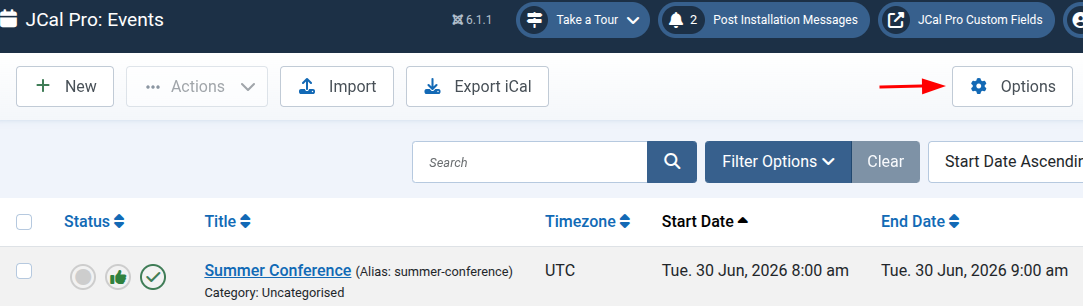
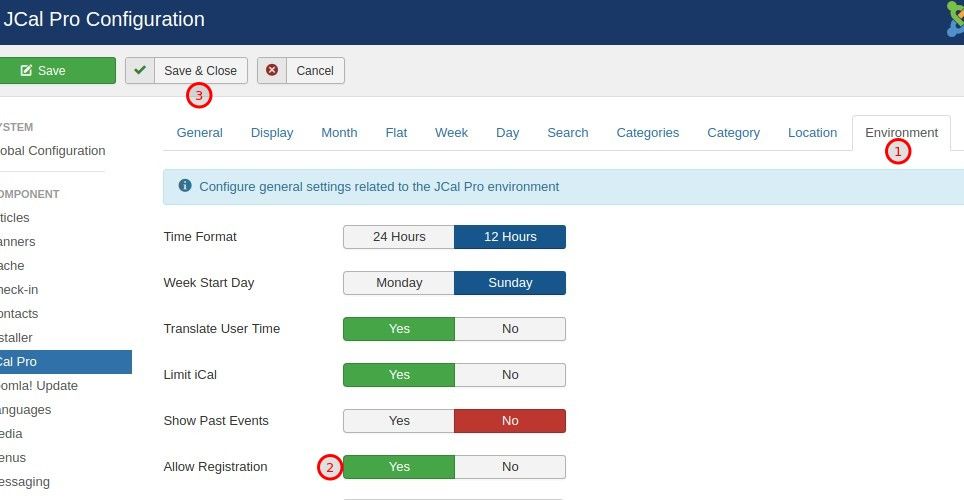
- In your JCal Pro dashboard, click Options:
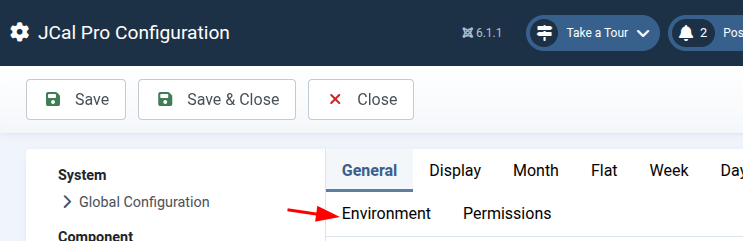
- Open the Environment tab:
- Scroll down and set Allow Registrations to Yes.
- Click Save & Close.
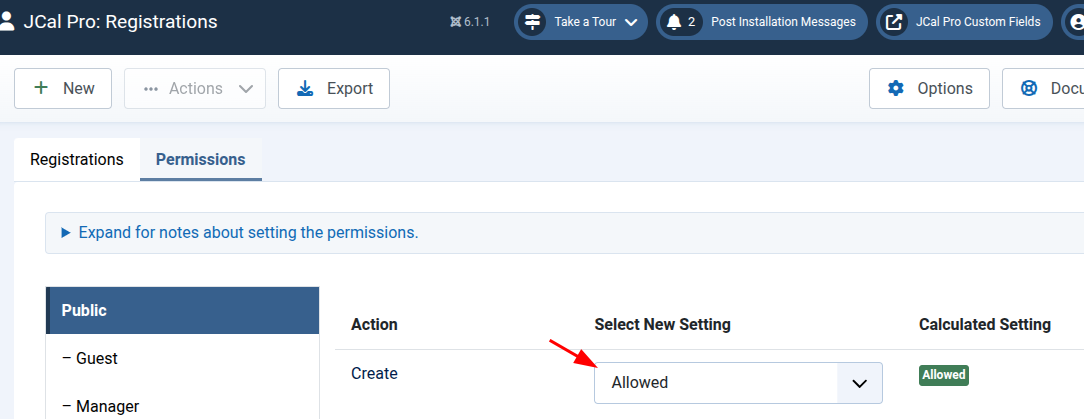
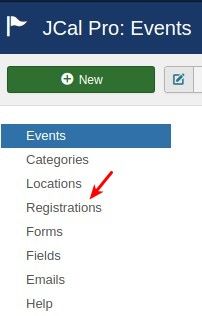
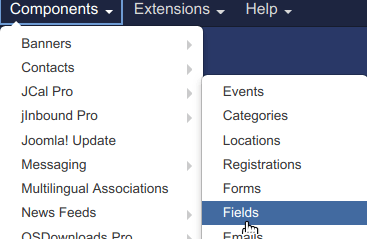
- Go to Components > JCal Pro > Registrations:
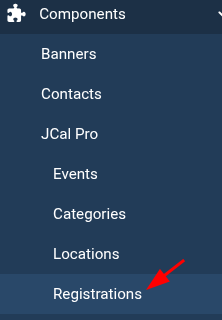
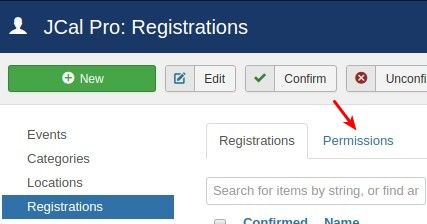
- Open the Permissions tab.
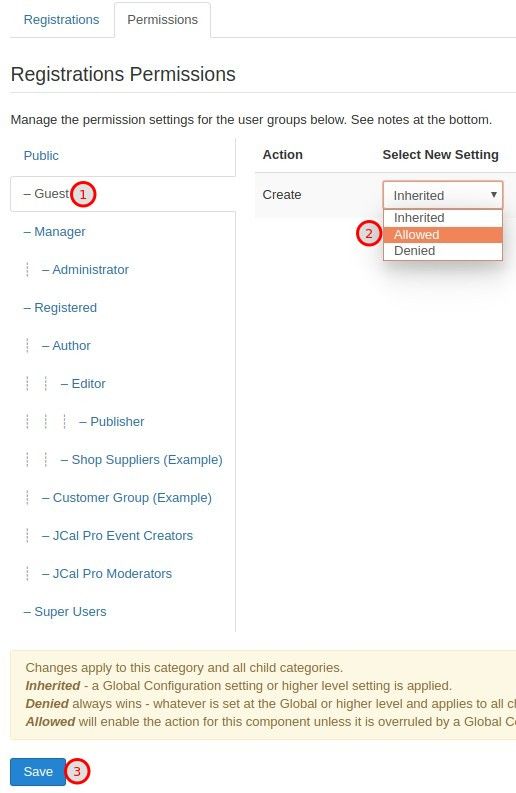
- Set the Create permission to Allowed.
- Refresh the page and confirm that the Create permission is now set to Allowed.
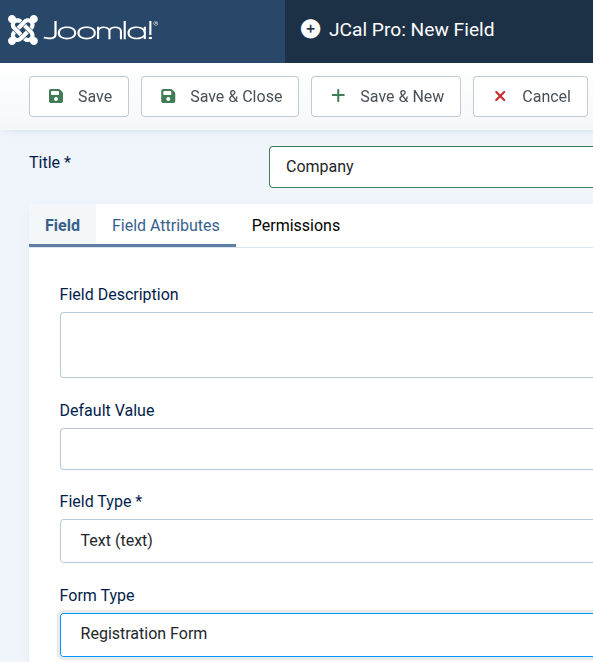
Step #2. Create the required custom fields
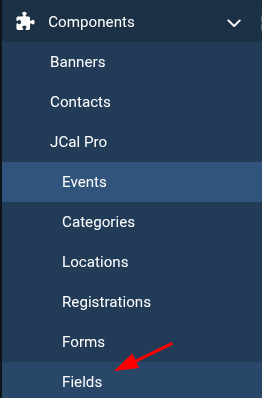
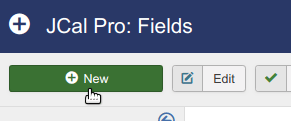
- Go to Components > JCal Pro > Fields:
- Click New:

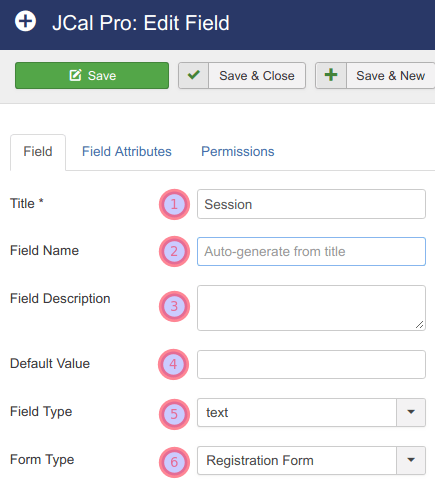
Create your custom field using the following settings:
- Title: Enter the field title.
- Field Description (optional): Enter a description if required.
- Default Value (optional): Leave blank unless needed.
- Field Type: Select the required field type.
- Form Type: Select Registration Form.
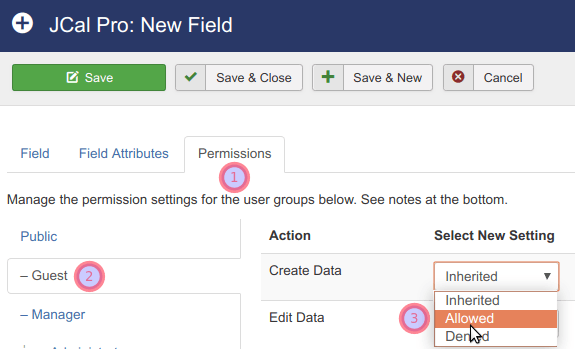
Next, allow event participants to use this field by assigning the required permissions.
- Open the Permissions tab.
- Select the Public user group.
- Set both Create Data and Edit Data to Allowed.
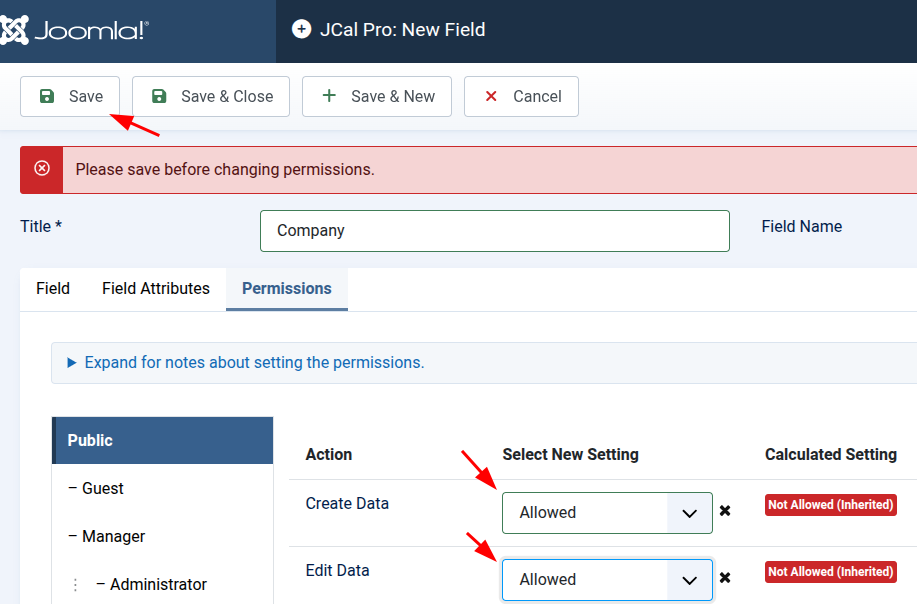
- Set Published to Published.
- Click Save & Close.
Great! You have enabled event registrations and created your first custom registration field.
Next, you'll create a custom registration form that displays both the default Name and Email fields and your new custom fields.
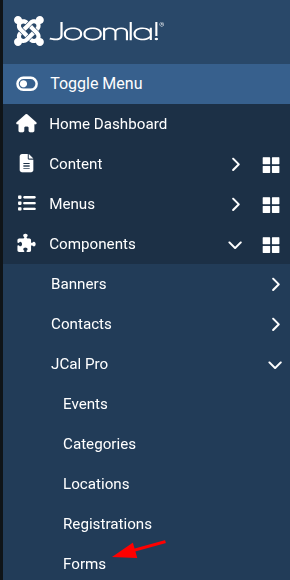
Step #3. Create the custom registration form
- Go to Components > JCal Pro > Forms:
- Click New.
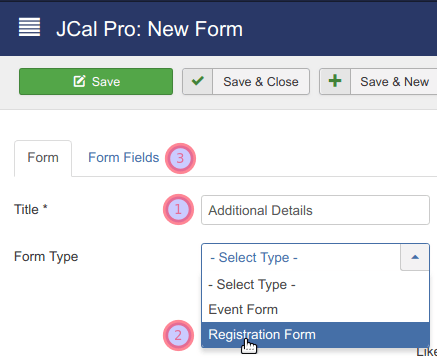
- Enter a title for your form.
- Set Form Type to Registration Form.
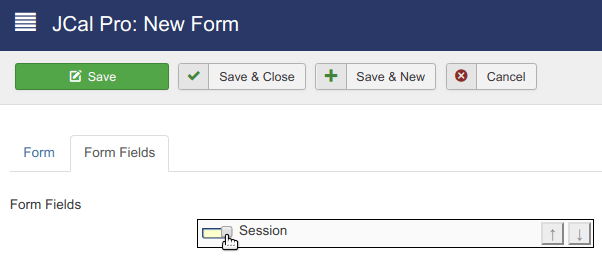
- Select the custom fields you want to include under Form Fields.

- Make sure the form is set to Published.
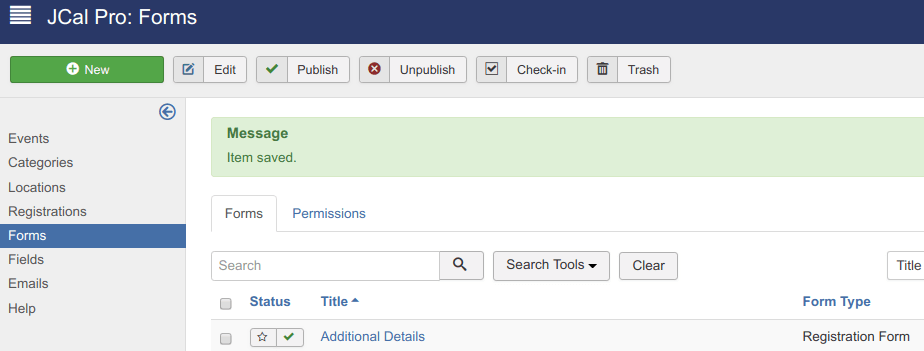
- Click Save & Close.
Your custom registration form is now ready.
Step #4. Assign the custom registration form to an event category
- Go to Components > JCal Pro > Categories.
- Open the category that will contain your events.
- Click the JCal Pro tab.
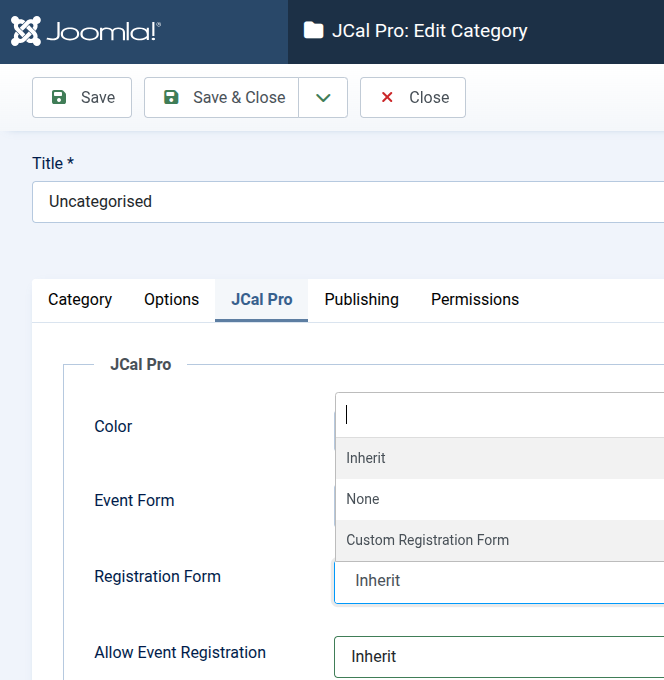
- Set Registration Form to your custom registration form.
- Set Allow Event Registration to Yes.
- Click Save & Close.
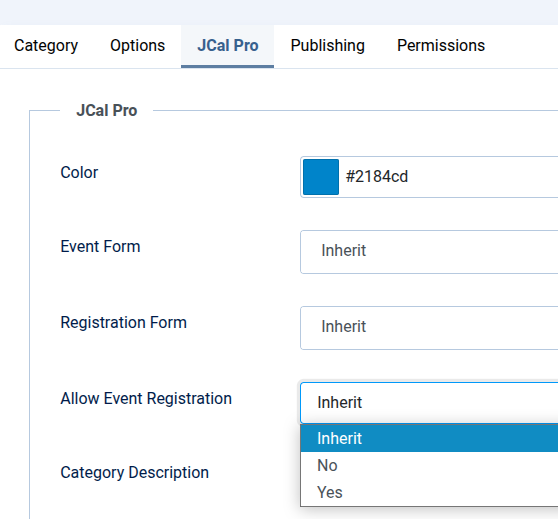
Your event category is now configured to use the custom registration form you created.
Note: New events are still created with registrations disabled by default. You must enable registrations for each event individually.
Step #5. Enable registrations for your events
Even if registrations are enabled for the event category, each event has its own registration setting. New events are created with this setting set to No by default.
- Go to Components > JCal Pro > Events.
- Open the event that should accept registrations.
- Click the Registration tab.
- Switch the Registration option to Yes.
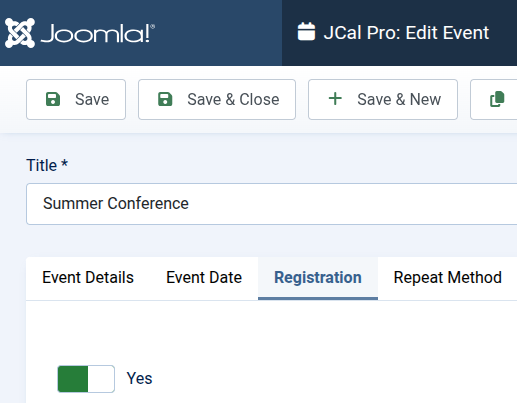
- Click Save & Close.
Congratulations! You have successfully created a custom event registration form with your own registration fields.
When visitors open an event with registrations enabled, they will see your custom registration form, including both the default Name and Email fields and your custom fields:
Documentation for Joomla 3
The default event registration form in JCal Pro only asks for your name and email address:
You can enhance this default form with more fields using JCal Pro's custom form builder:
This is a five-step process:
- Set up the front-end event registration feature.
- Create required event registration fields.
- Create a required event registration form.
- Assign the form to required event category.
- Enable participants registration for required events.
By default, event registration feature is turned off in JCal Pro. Your first step is to enable event registration capability in JCal Pro global settings.
Next, you need to create fields that you would like to be displayed in your custom event registration form.
Once you enabled JCal Pro event registration feature and created required fields, it is a good time to create your custom event registration form to contain and display these new fields.
Your JCal Pro events categories are all set up to work with the default event registration form. You must explicitly assign your new event registration form to the required event category(ies).
Finally, once your JCal Pro custom event registration form is ready, you need to enable event registration feature in the required event(s).
Let's take a look at this process in more detail.
Step #1. Enable frontend event registration
- In your JCal Pro control panel go to Options:

- You will see the JCal Pro Configuration page.
- Click the Environment tab
- Set the Allow Registrations to Yes
- Click Save & Close.
Next step is to tweak JCal Pro Access Control List.
- Click the Registrations menu item:
- Click the Permissions tab:
- Click the Guest tab.
- Select the Allowed setting for the Create action.
- Click Save & Close.
Step #2. Create the required fields
- In your Joomla control panel, go to Components > JCal Pro > Fields:
- You will be taken to the JCal Pro: Fields fields creation screen. In the top left corner, click New:
You will see the JCal Pro: New Field screen. Create your required field:
- Title: Enter your field title.
- Field Name: Leave this field empty. JCal Pro will populate it once you save the new field.
- Field Description (optional): Enter your new field description, if you wish.
- Default Value (optional): Leave empty.
- Field Type: Select your required field type.
- Form Type: Select the Registration Form option.
Next, you need to allow your JCal Pro event participants to fill in this new field. You will do this by setting the necessary permission.
- Click the Permissions tab.
- Click the Guest tab.
- Select Allowed for the Create Data action.
- Click Published under the Details:
- Click Save & Close.
Good job! By now, you turned on event registrations in your JCal Pro and created a new field.
Next step - to create the custom form which, additionally to the default Name and Email fields, will use the newly created field(s).
Step #3. Create the required form
- On the left menu, click Forms:

- You will be taken to the JCal Pro: Forms administrative screen. In the top left corner of the screen, click New:

- You will see the Form tab. Enter the form title into the Title field.
- In the Form Type parameter select the Registration Form option.
- Click the Form Fields tab:
- You will see the Form Fields tab open with your new field. Click inside the field's checkbox:
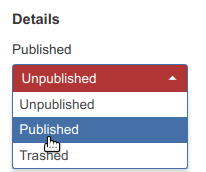
- In the Details column, parameter Published, select the Published option:
- Click Save & Close.
You will see the Item saved message on the light green background and your custom event registration form listed:
Good job! You set your JCal Pro to allow event registrations. You also created your own custom event registration form with its fields.
At the moment, your events categories are all set to work with the default event registration form. You need to explicitly assign your new event registration form to the required event category(ies).
Step #4. Assign the form to the required event category
- On the left menu, click Categories:
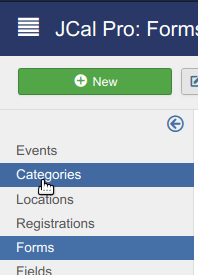
- You will see the JCal Pro: Categories screen. Click on the title of the events category to which you wish to assign your custom event registration form.
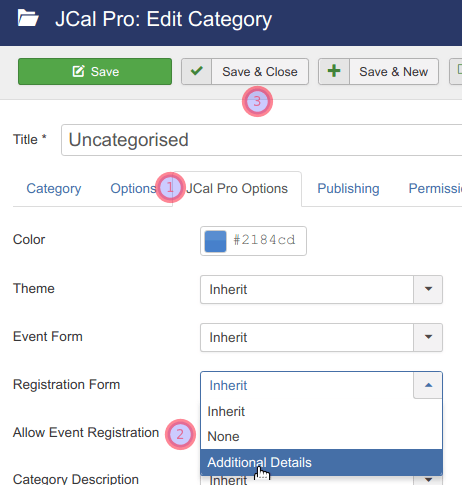
You will be taken to the JCal Pro: Edit Category administrative page.
- Click on the JCal Pro Options tab.
- Locate the Event Registration Form parameter and set it to your new custom form.
- Click Save & Close.
Excellent! Your own JCal Pro custom event registration form is ready and assigned to the required events category.
But by default, events registration is turned off in each of your JCal Pro individual events' settings. You need to turn on registration for each of your required event(s).
Step #5. Enable registrations for the events
- On the left side menu, click Events:
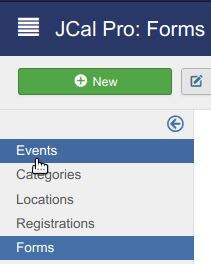
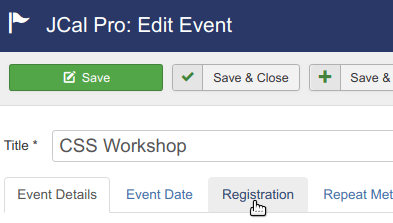
- On the JCal Pro: Events screen, click on the required event title:
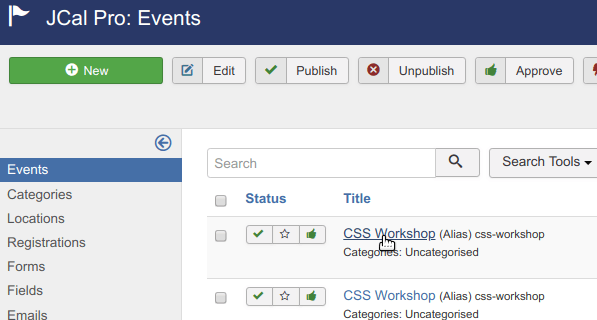
- You will see the JCal Pro: Edit Event administrative screen. Click the Registration tab:
- On the Registration tab, click Yes:
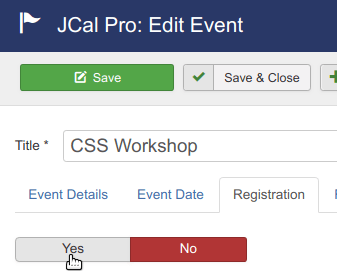
- Click Save & Close.
Congratulation! You finished creating your own custom event registration form for your required JCal Pro event(s).
When you check one of those events with enabled registration, you will see the form at work: