The JCal Pro Flex module allows you to cleanly and compactly display multiple calendars and lists of your JCal Pro upcoming events.
This image below shows three examples of the JCal Pro Flex module:
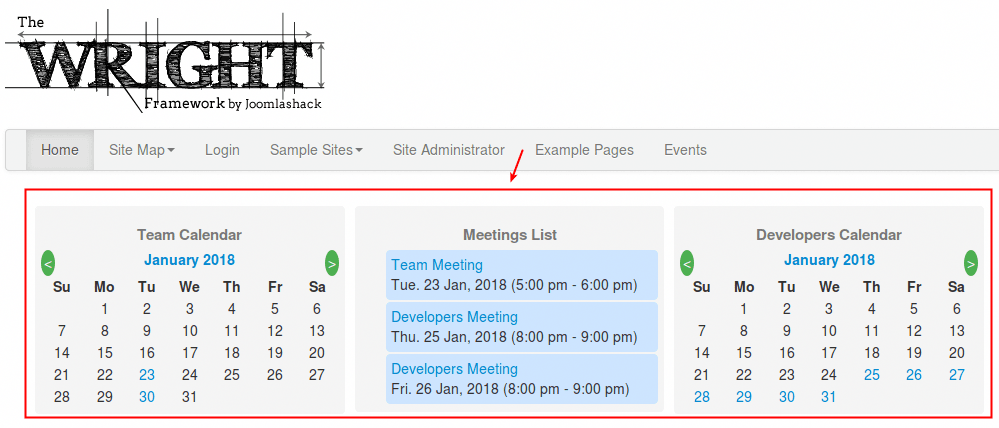
The JCal Pro Flex module has the option to display multiple event calendars and event lists using only one module.
In this tutorial, you will learn how to use the Flex module to display two mini-calendars and one list of your JCal Pro events. Just like on the above image.
Step #1. Preparation
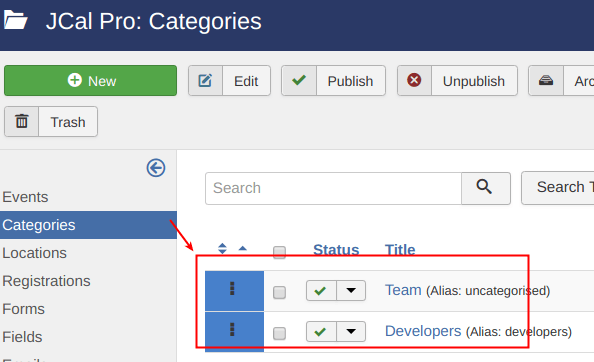
- Create JCal Pro category "Team".
- Create JCal Pro category "Developers".
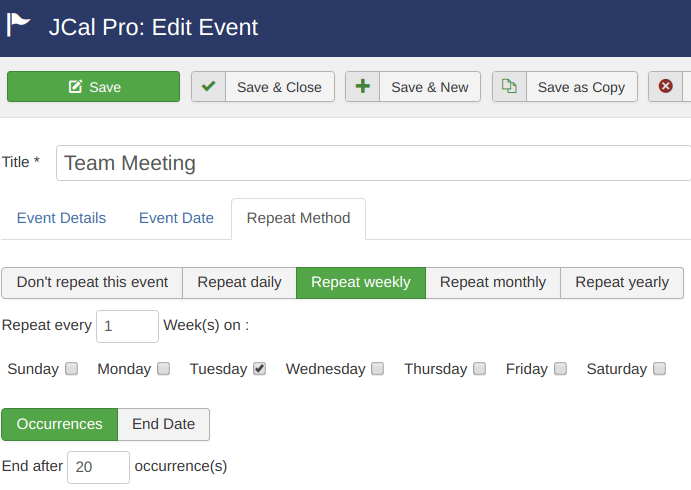
Create the following event in the "Team" category:
- Title: Team Meeting.
- Event date: set it to the next Tuesday, starting at 5 PM and finishing at 6 PM.
- Repeat Method: Repeat Weekly, Tuesday.
- Repeat Occurrences: End after 20 occurrences.
- Create the "Developers Meeting" in the "Developers" category following the same steps. Only this time, set it to repeat daily, starting at 8 PM and finishing at 9 PM.
With your JCal Pro events created, you are now ready to create your JCal Pro Flex module to display them.
Step #2. Create Team Calendar Panel
- Go to Extensions > Modules > New.
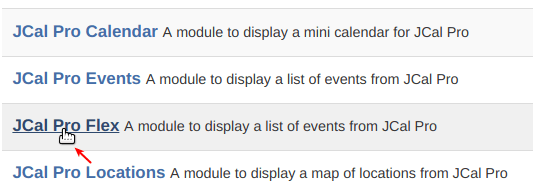
- Click JCal Pro Flex.
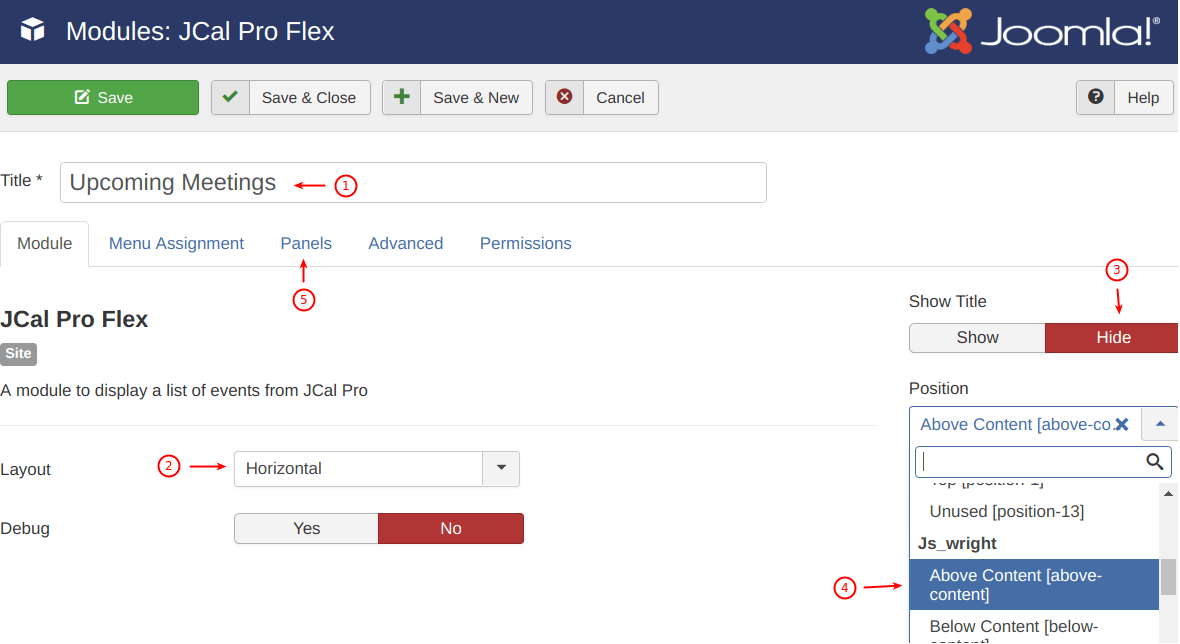
- Enter Upcoming Meetings in the Title field.
- Select Horizontal from the Layout field.
- Click Hide for the Show Title field.
- Select Js_wright > above-content for the Position.
- Click the Panels tab.
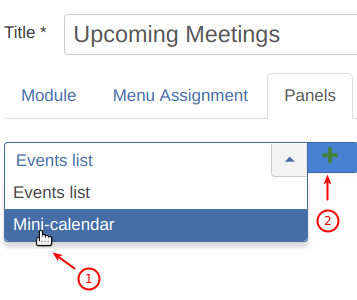
- Select Mini-calendar.
- Click the plus icon.
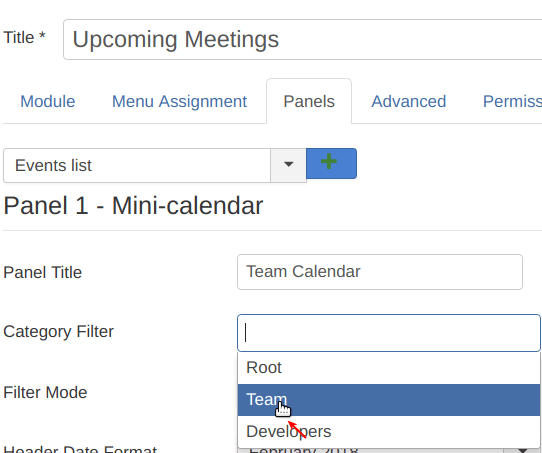
- You will see the Panel 1 - Mini-calendar panel. Enter Team Calendar in the Panel Title field.
- Click Save.

- You will see some new fields appeared. Select the Team category from the Category Filter field.
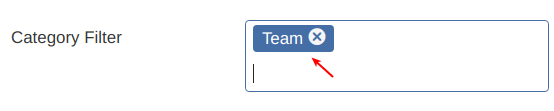
- You will see the Team category appeared inside the Category Filter box. Click Save at the top.
- Now check your site front-end. You will see this first panel displayed.
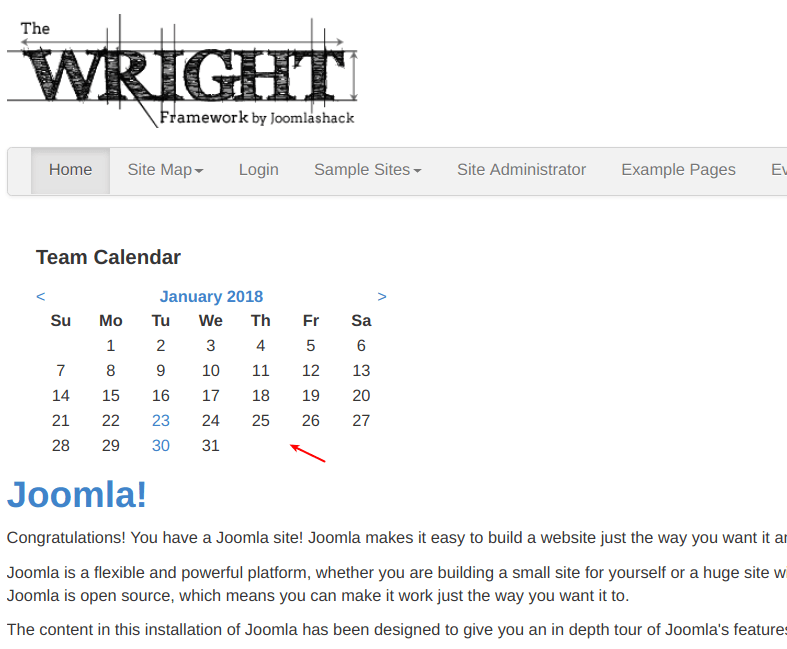
Well done! You just created one of the three panels with your JCal Pro upcoming events. Two more to go.
Step #3. Create Events List Panel
The next panel will display upcoming events from both the Team and the Developers event categories.
- Repeat the same steps to create the second panel with events.
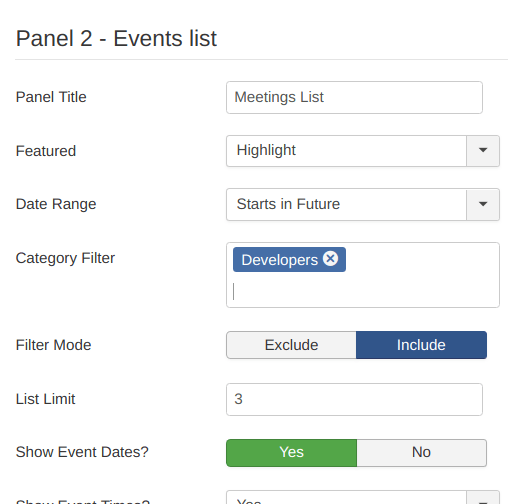
- Set it as Events list.
- Enter Meetings List for the Title and click Save.
- Select Starts in Future for the Date Range.
- Enter 3 in the List Limit field.
- Set the Show Description to No.
- Set the Show Categories to No.
- Click Save.
- Now check your site front-end.
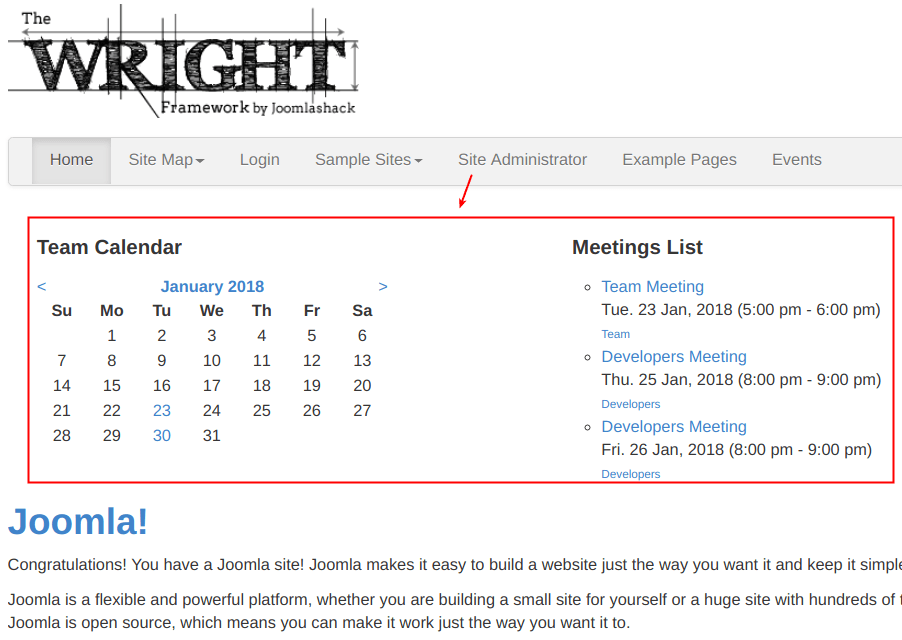
You can see your JCal Pro Flex module now displays the two panels. One - as a mini-calendar of your team meetings and another one - as a flat list of all the upcoming meetings.
Step #4. Create Developers Panel
In this step, you'll create the last panel. It will display a mini-calendar of your developers' meetings.
- Select Mini-calendar and click on the plus icon.
- Enter Developers Calendar in the Panel Title field.
- Click Save.
- Scroll down to Panel 3 - Mini-calendar.
- Select Developers inside the Category Filter.
- Click Save.
- Now check your site front-end. You should see all three panels displayed.
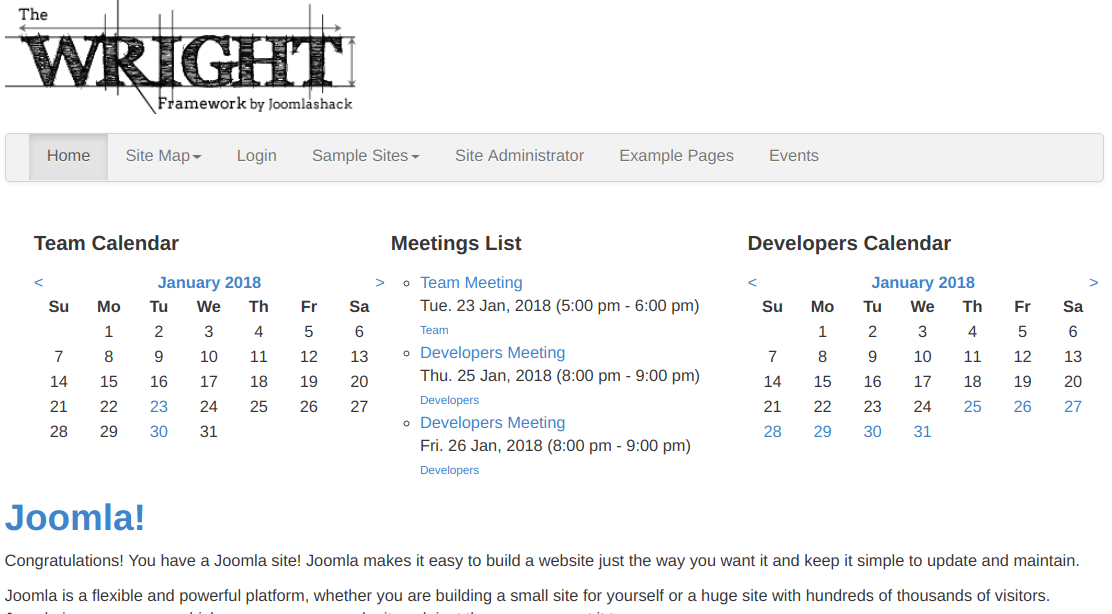
Well done! You just learned how to compactly display two mini-calendars and one list of events in one module position using JCal Pro Flex module.
In the last step, you will learn how to customize its feel and look to match the overall style of your Joomlashack Wright template.
Step #5. Create a JCal Pro Flex Module Style
To perform this step, you will need to download, install and enable the Add Custom CSS Joomla plugin. If you never worked with this plugin, please visit our tutorial "Add Custom CSS to Your Joomla Site".
- Once you installed and enabled it, create an empty custom.css file in the root of your Joomla installation.
- Add in the custom.css file the following code:
.jcalpro_flex_pane {
border: 1px solid #f5f5f5;
max-width: 26%;
padding: 5px; margin: 5px;
background-color: #f5f5f5;
border-radius: 4px;
}

.jcalpro_calendar_nav_next {
background-color: #4CAF50;
color: white;
border-radius: 50%;
padding: 3px;
}

.jcalpro_calendar_nav_prev {
background-color: #4CAF50;
color: white;
border-radius: 50%;
padding: 3px;
}

.jcalpro_events_event {
list-style-type: none;
background: #cce5ff;
margin-bottom: 2px;
border-radius: 4px;
padding: 5px;
}

.jcalpro_flex_pane h4 {
text-align: center;
color: #777;
font-size: 15px;
margin-bottom: 5px;
}
- Go to Extensions > Plugins.
- Find the Add Custom CSS plugin and open it for editing.
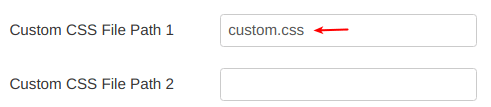
- Type custom.css in the Custom CSS File Path 1 field.
- Click Save & Close.
If you check your site front-end now, you will notice that your Flex module looks much more stylish and appealing. It's style now also matches the feel and look of the site overall.