Do your OSCampus Pro students need to scroll back to the top of the page to navigate between lessons? If so, consider adding the “Home,” “Prev,” and “Next” buttons beneath the lesson content. This simple tweak improves usability and helps your learners move through your course more efficiently.
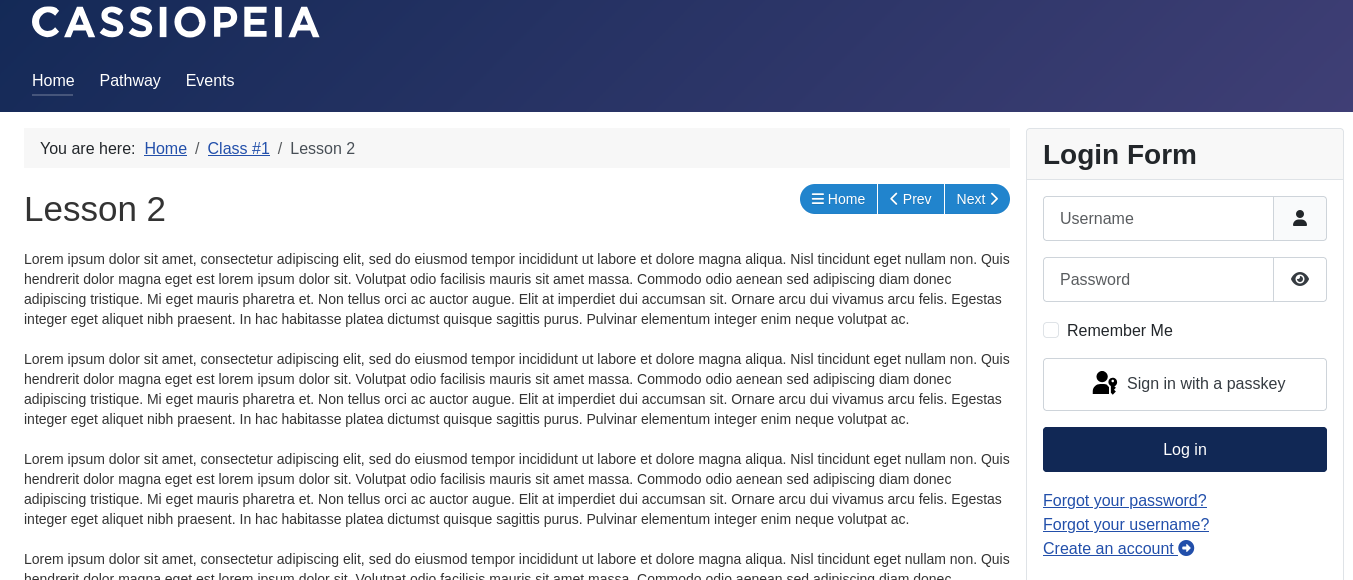
Here’s an example of a lesson where the navigation buttons appear only at the top:
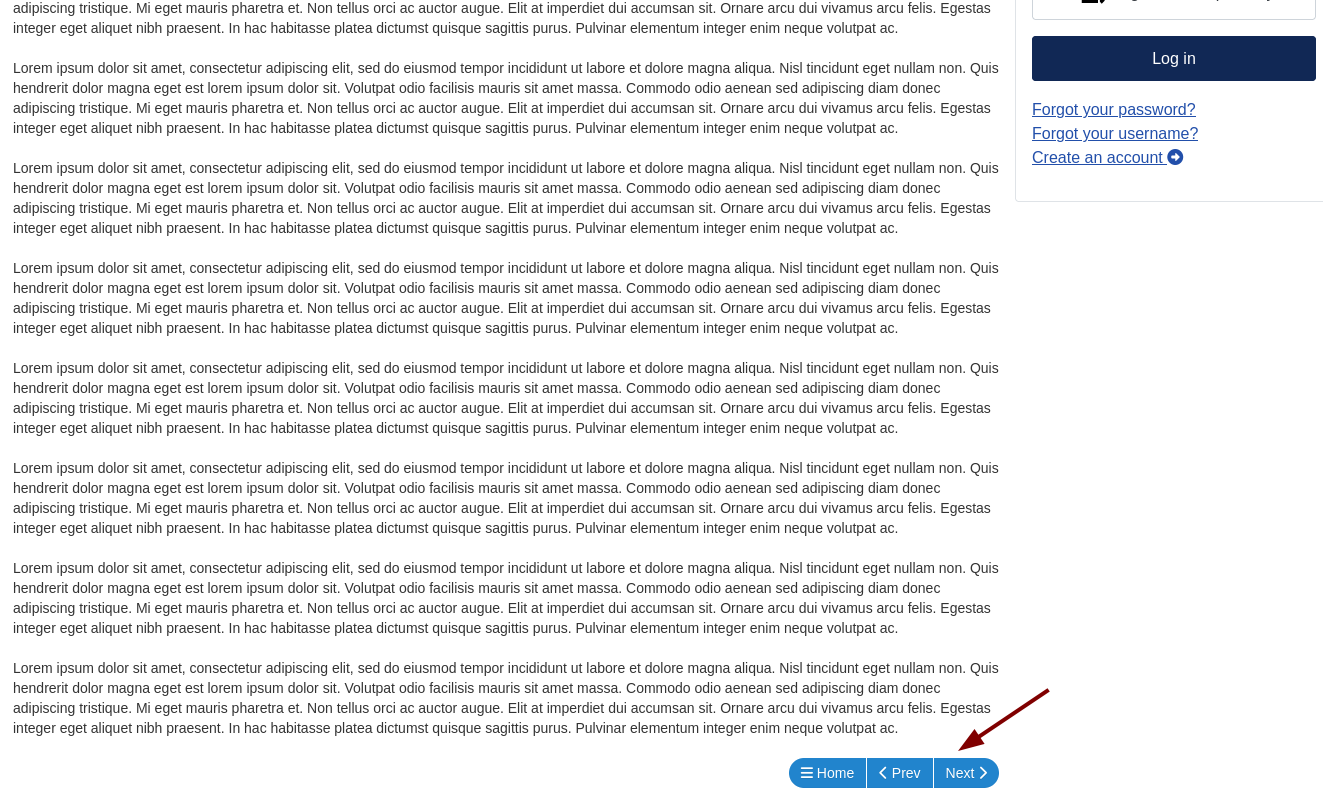
And here’s an example of a lesson where the same buttons also appear at the bottom:
In this tutorial, you’ll learn how to display the lesson navigation buttons both above and below the OSCampus Pro lesson content.
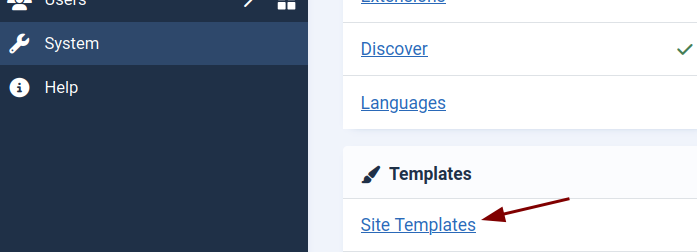
- In your Joomla admin dashboard, go to System > Site Templates:
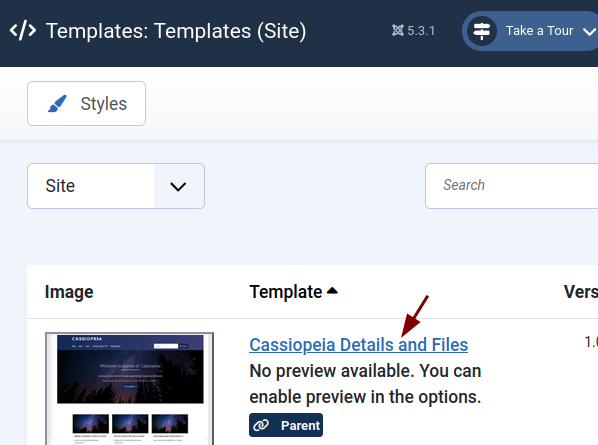
- Click on the name of your active template:
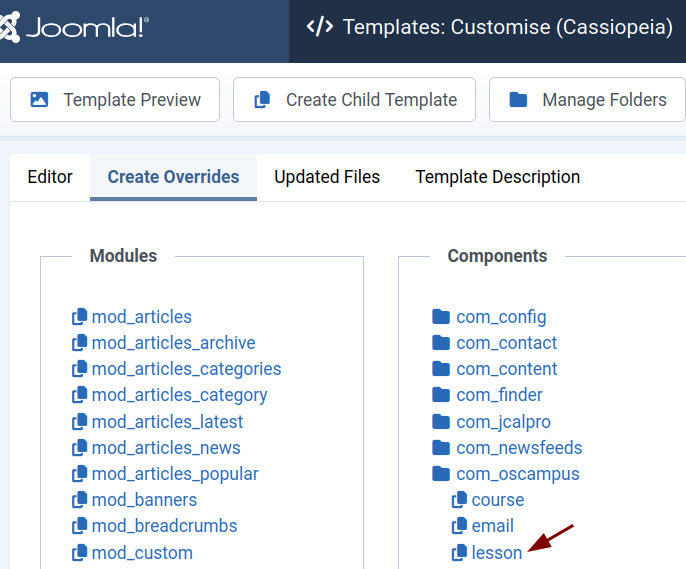
- In the Create Overrides tab, look under the Components column and click: com_oscampus > lesson:
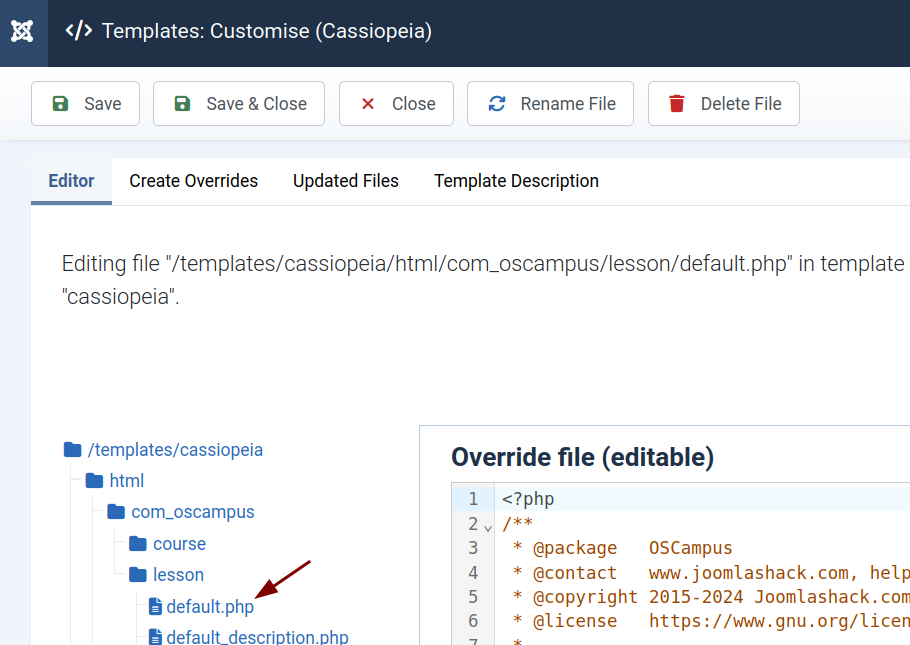
- Switch to the Editor tab, then navigate to: html > lesson > default.php.
- Click here to open the updated
default.phpfile at the Dropbox.com cloud file storage. - Copy its content.
- Return to the
default.phpfile your Joomla admin dashboard. - Delete its content and replace it with the content you copied from the file at Dropbox.com.
- Click Save or Save & Close.
That’s it! When you visit the front end of one of your OSCampus Pro lessons, you should now see the “Home,” “Prev,” and “Next” buttons displayed both at the top and the bottom of the lesson page.