
Documentation for Joomla 6
If you want to make specific OSCampus lessons available only to specific students, you can do so using Joomla's built-in Access Control List (ACL) system.
In this example, your students register as standard Joomla users. You then manually assign each student access only to the lessons they should be able to view.
The process consists of six steps:
- Make sure the built-in Registered Joomla User Group is the default group for new users.
- Create a Joomla User Group for each lesson.
- Create a Joomla Access Level for each lesson.
- Assign the correct Access Level to each lesson.
- Assign each student to the appropriate User Group.
- Test the final result.
Let's go through each step.
Step #1. Make sure the built-in "Registered" Joomla User Group is the default group for new users
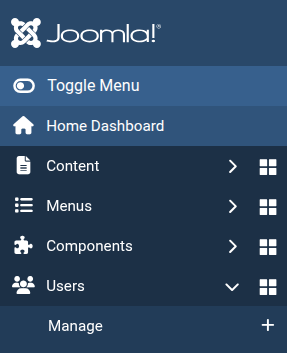
- In your Joomla administrator area, go to Users > Manage:
- On the Users page, click Options in the upper-right corner:

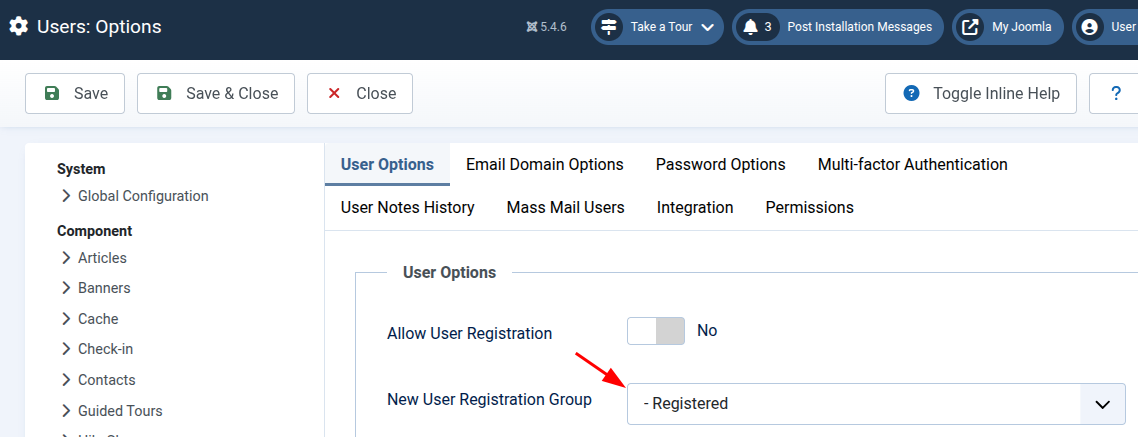
- Locate the New User Registration Group setting and make sure it is set to Registered:
Once this setting is confirmed, continue to the next step.
Step #2. Create a Joomla User Group for each lesson
- Create a separate Joomla User Group for each OSCampus lesson that requires restricted access. If you need help creating User Groups, see this tutorial.
- For this example, I created two User Groups: Lesson #1 and Lesson #2. Both use Registered as their parent group:

Step #3. Create a Joomla Access Level for each lesson
- Create a separate Joomla Access Level for each lesson. If you need assistance, see this tutorial.
- Assign each Access Level to its corresponding User Group. For example, assign the Lesson #1 Access Level to the Lesson #1 User Group.
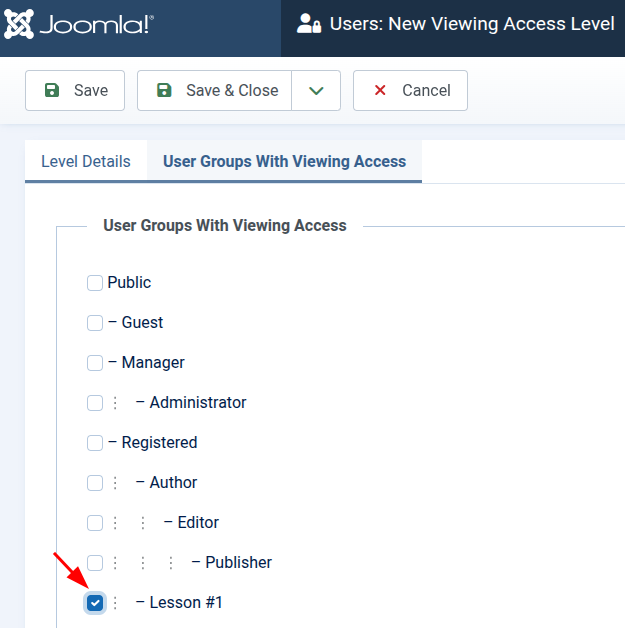
- Click Save & Close.
Note: Do not include the Registered User Group in your newly created Access Levels. Otherwise, every registered user will be able to access those lessons.
Next, assign the appropriate Access Level to each OSCampus lesson.
Step #4. Assign the correct Access Level to each lesson
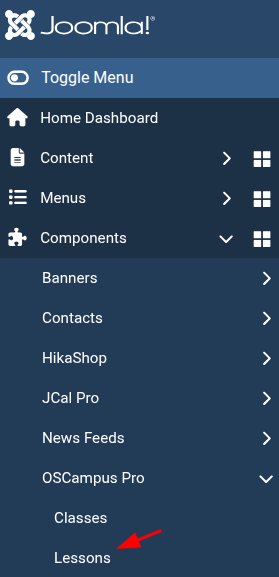
- Go to Components > OSCampus Pro.
- In the left sidebar, click Lessons:
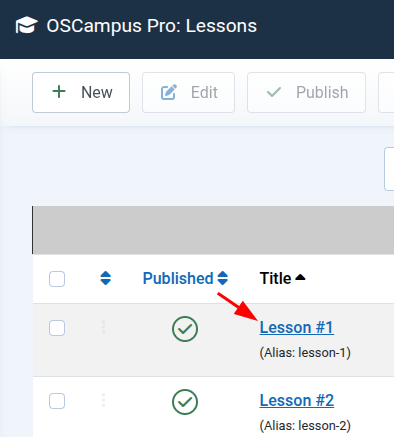
- Open the lesson you want to restrict. In this example, I will edit Lesson #1:
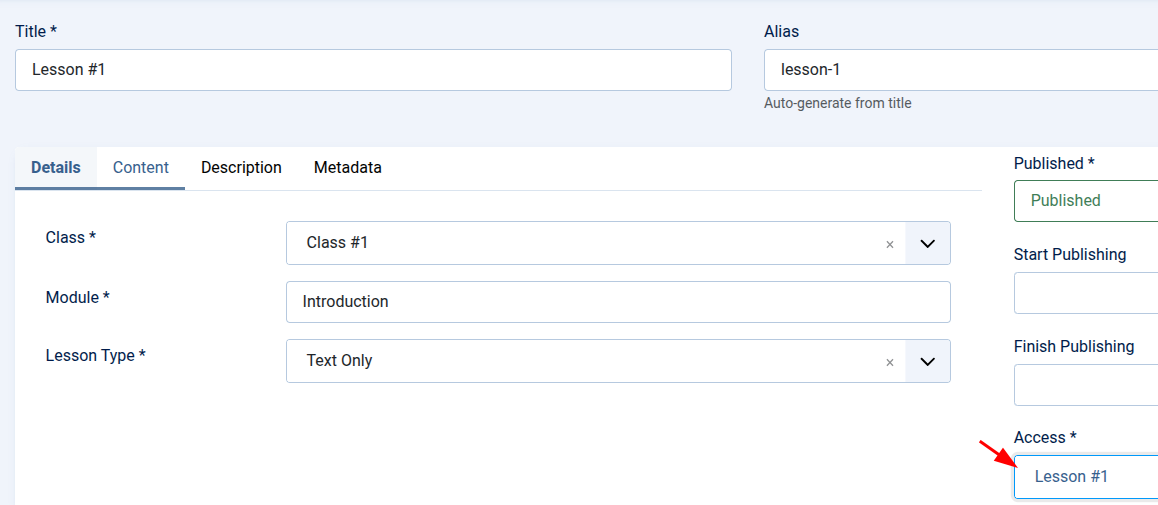
- Set the Access field to the Access Level you created for this lesson. In this example, I selected Lesson #1:
- Click Save.
- Repeat these steps for each lesson that you want to restrict.
- When you have finished, click Save & Close.
Your lessons are now protected. The final task is to assign students to the correct User Groups.
Step #5. Assign each student to the appropriate User Group
- Go to Users > Manage.
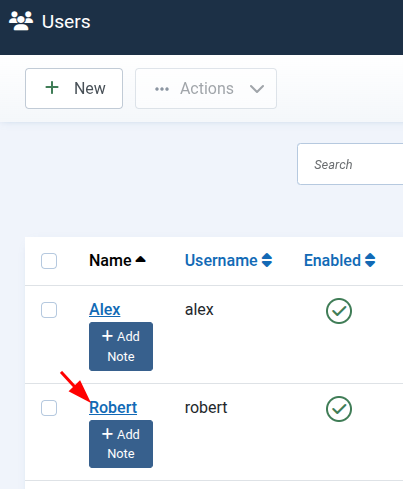
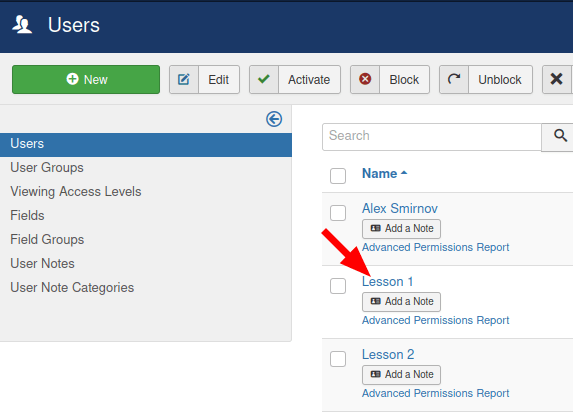
- Open the user account of the student you want to update. In this example, I will open the user named Lesson #1:
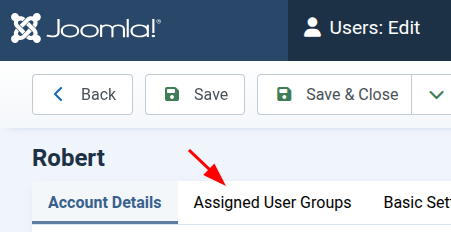
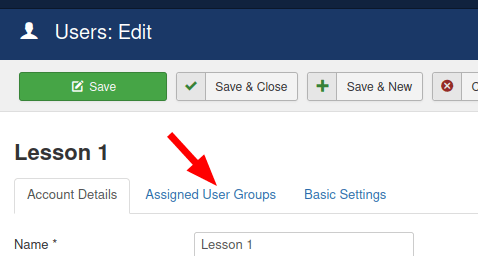
- Open the Assigned User Groups tab:
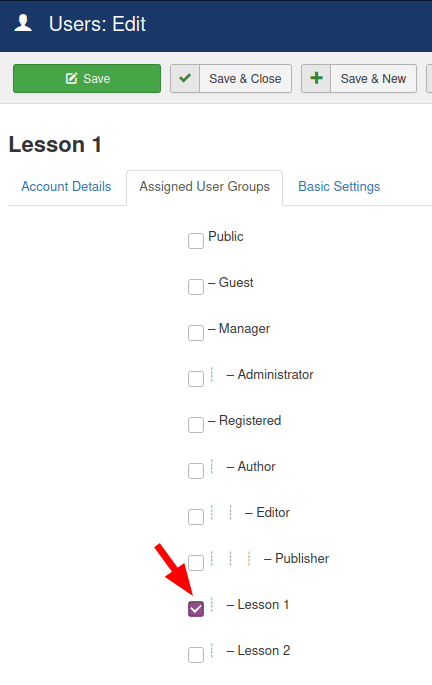
- Select the User Group that corresponds to the lesson the student should be able to access. In this example, I assigned the user Lesson #1 to the Lesson #1 User Group:
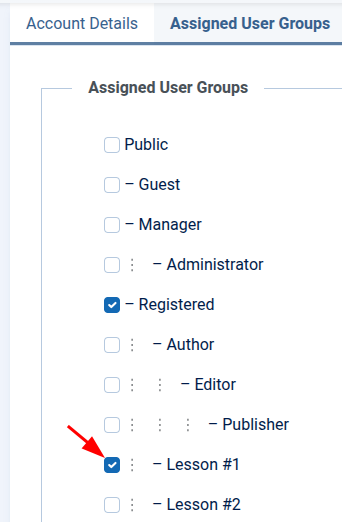
- Click Save & Close.
- Repeat these steps for each student as needed.
Step #6. Test the final result
- Log in to your site's frontend as one of your students.
- Navigate to your OSCampus training.
- Open the available lessons. The student will only be able to access the lessons assigned to their User Group.
That's it! You have successfully limited access to your OSCampus lessons based on Joomla User Groups and Access Levels.
Documentation for Joomla 3
If you want to make specific OSCampus lessons available only to specific students, you can do so using Joomla's built-in Access Control List (ACL) system.
In this example, your students register as standard Joomla users. You then manually assign each student access only to the lessons they should be able to view.
The process consists of six steps:
- Make sure the built-in Registered Joomla User Group is the default group for new users.
- Create a Joomla User Group for each lesson.
- Create a Joomla Access Level for each lesson.
- Assign the correct Access Level to each lesson.
- Assign each student to the appropriate User Group.
- Test the final result.
Let's go through each step.
Step #1. Make sure the built-in "Registered" Joomla User Group is the default group for new users
- In your Joomla administrator area, go to Users > Manage:

- On the Users page, click Options in the upper-right corner:
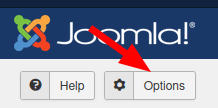
- Locate the New User Registration Group setting and make sure it is set to Registered:
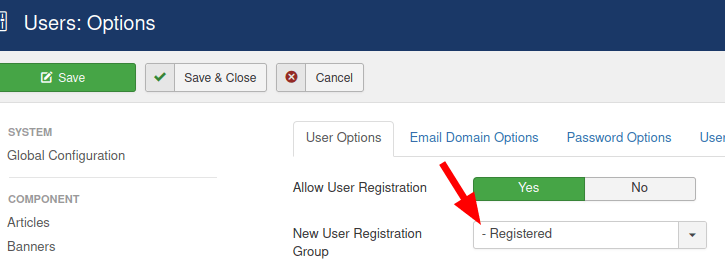
Once this setting is confirmed, continue to the next step.
Step #2. Create a Joomla User Group for each lesson
- Create a separate Joomla User Group for each OSCampus lesson that requires restricted access. If you need help creating User Groups, see this tutorial.
- For this example, I created two User Groups: Lesson 1 and Lesson 2. Both use Registered as their parent group:
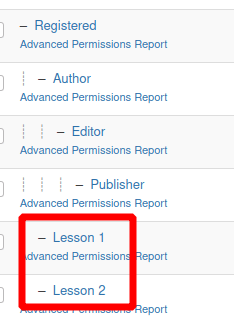
Step #3. Create a Joomla Access Level for each lesson
- Create a separate Joomla Access Level for each lesson. If you need assistance, see this tutorial.
- Assign each Access Level to its corresponding User Group. For example, assign the Lesson 1 Access Level to the Lesson 1 User Group.
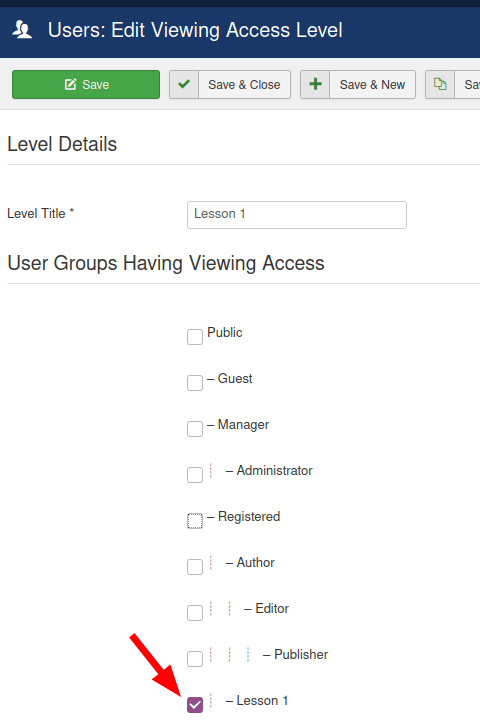
- Click Save & Close.
Note: Do not include the Registered User Group in your newly created Access Levels. Otherwise, every registered user will be able to access those lessons.
Next, assign the appropriate Access Level to each OSCampus lesson.
Step #4. Assign the correct Access Level to each lesson
- Go to Components > OSCampus Pro.
- In the left sidebar, click Lessons:
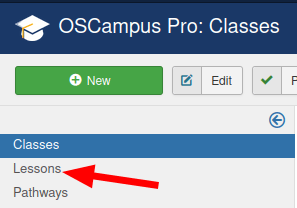
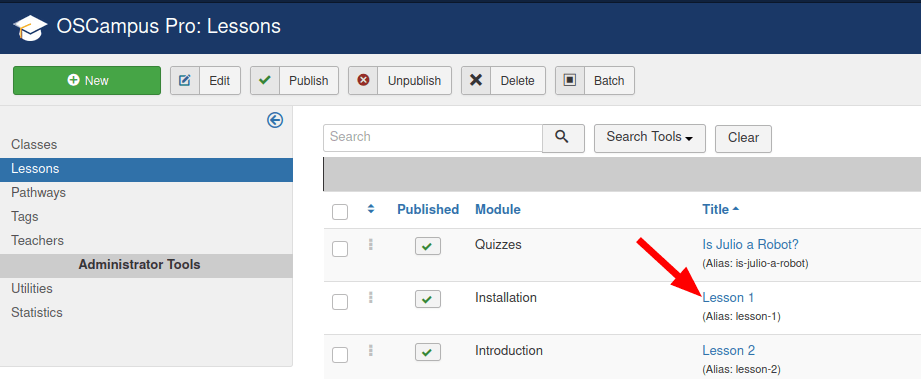
- Open the lesson you want to restrict. In this example, I will edit Lesson 1:
- Set the Access field to the Access Level you created for this lesson. In this example, I selected Lesson 1:
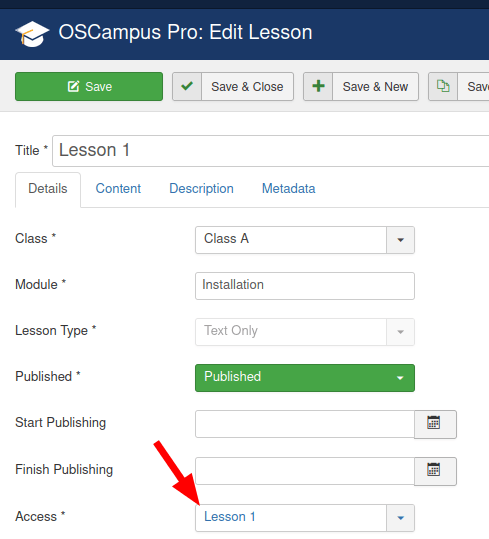
- Click Save.
- Repeat these steps for each lesson that you want to restrict.
- When you have finished, click Save & Close.
Your lessons are now protected. The final task is to assign students to the correct User Groups.
Step #5. Assign each student to the appropriate User Group
- Go to Users > Manage.
- Open the user account of the student you want to update. In this example, I will open the user named Lesson 1:
- Open the Assigned User Groups tab:
- Select the User Group that corresponds to the lesson the student should be able to access. In this example, I assigned the user Lesson 1 to the Lesson 1 User Group:
- Click Save & Close.
- Repeat these steps for each student as needed.
Step #6. Test the final result
- Log in to your site's frontend as one of your students.
- Navigate to your OSCampus training.
- Open the available lessons. The student will only be able to access the lessons assigned to their User Group.
That's it! You have successfully limited access to your OSCampus lessons based on Joomla User Groups and Access Levels.