Documentation for Joomla 6
What is a quiz in OSCampus Pro?
A quiz in OSCampus Pro is a lesson type:
You may want to create a few quizzes and spread them throughout your OSCampus course. Or you may as well want to create just one quiz and place it as the last lesson of your course:

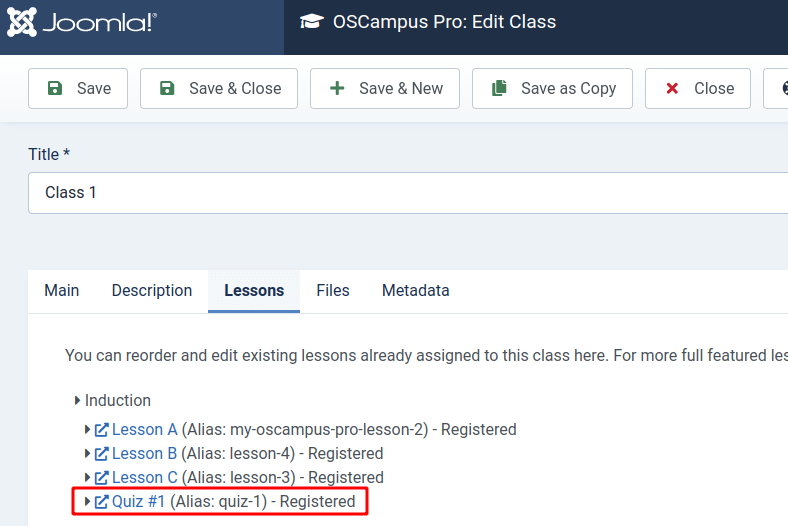
Once you created a quiz, you will see it listed under the "Lessons" tab of your course:
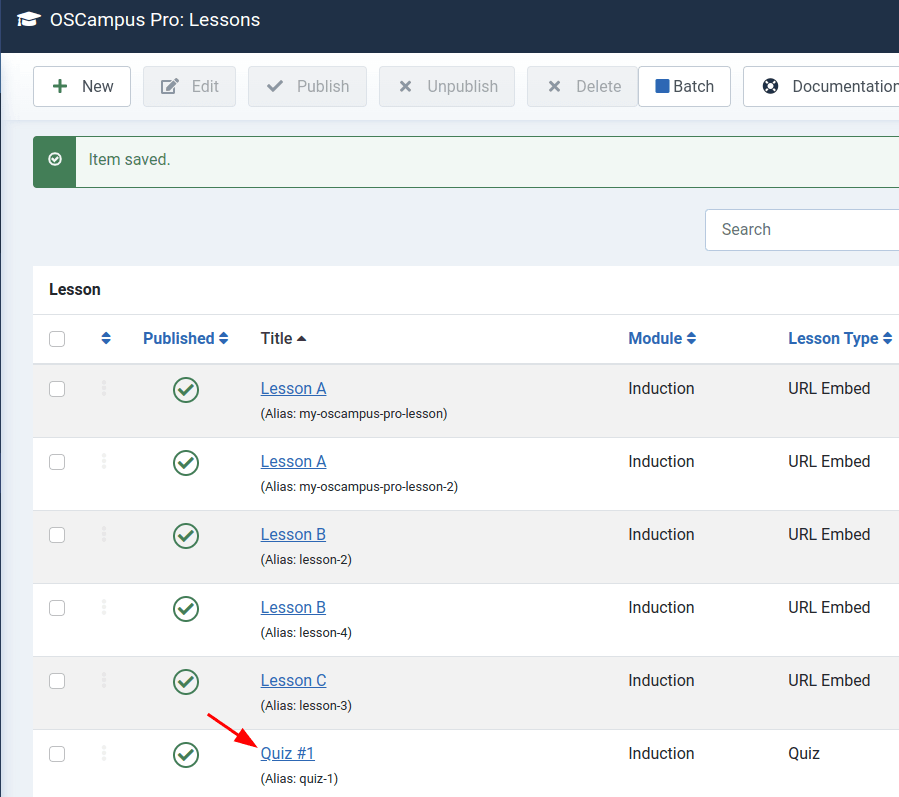
You will also find your quizzes listed on the list of all of your OSCampus lessons when you open the "OSCampus Pro: Lessons" page:
How to create a quiz in OSCampus
Let's take a look at how to create a quiz in OSCampus Pro.
Note: before creating an OSCampus Pro quiz, you must have at least one OSCampus Pro class already created.
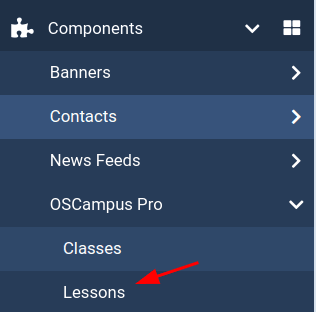
- In your Joomla 6 admin dashboard, go to Components > OSCampus Pro > Lessons:
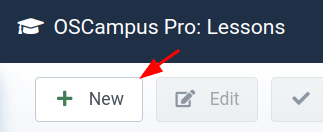
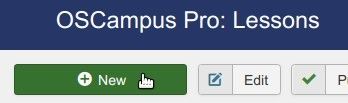
- You will see the "OSCampus Pro: Lessons" screen, as shown in the next image. Click New:
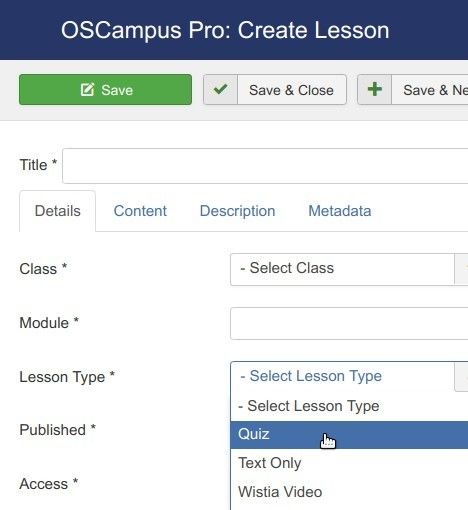
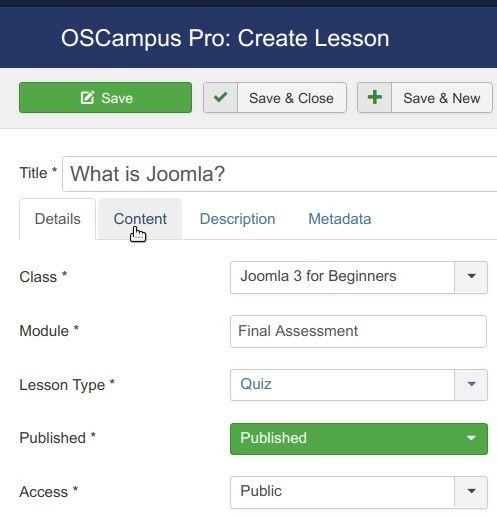
- This will bring you to the "OSCampus Pro: Create Lesson" screen. Create your quiz:
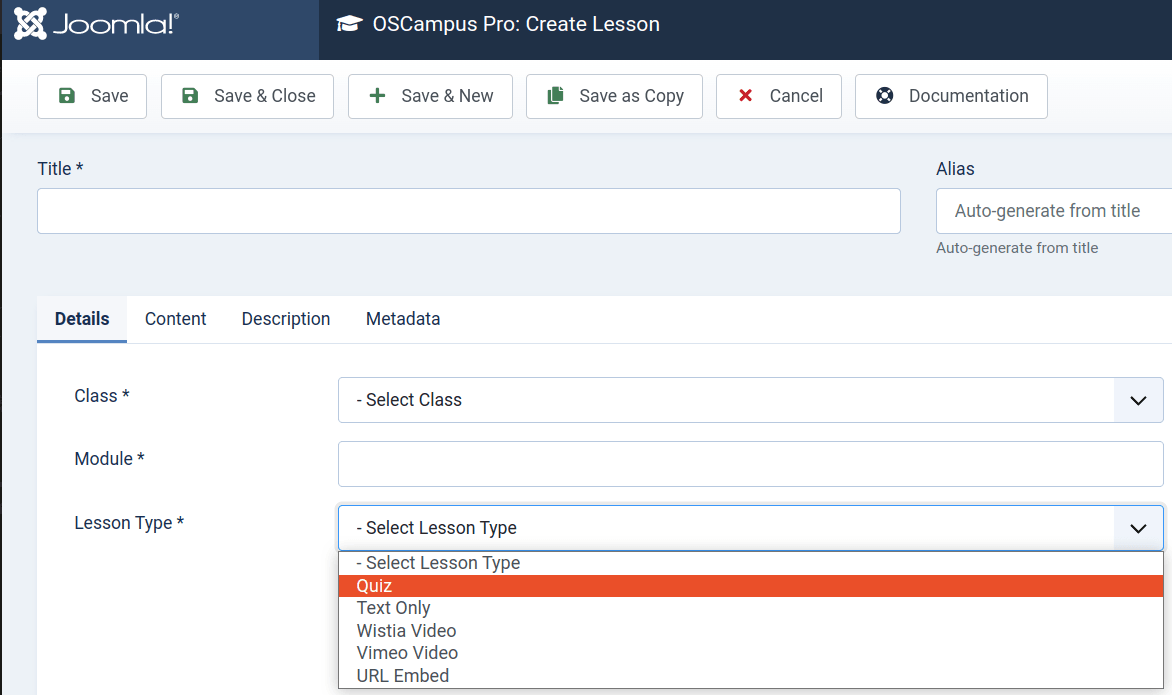
- Title: Enter here the title of your quiz. For my demonstration, I entered "What is Joomla?".
- Class: In this field, select your existing class to which the quiz will belong. For my demonstration, I selected "Joomla 3 for Beginners".
- Module: Enter the name of the module of your class to which the quiz will belong. For my demonstration, I typed in "Final Assessment".
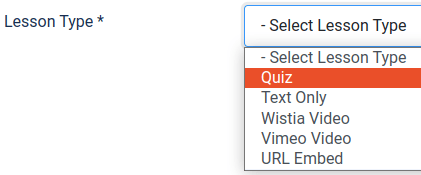
- Lesson Type: Select "Quiz".
- Published: Leave this setting in its default "Published" state to publish your quiz right away, or else set it to "Unpublished".
- Start Publishing: If you wish to launch your quiz on a certain date in the future, set that date here.
- Finish Publishing: If you wish to take your quiz offline on a certain date in the future, set that date here.
- Access: Select the required level of access to your quiz. For my demonstration, I selected "Public".
- Click "Save".
You are now ready to start creating your OSCampus Pro quiz.
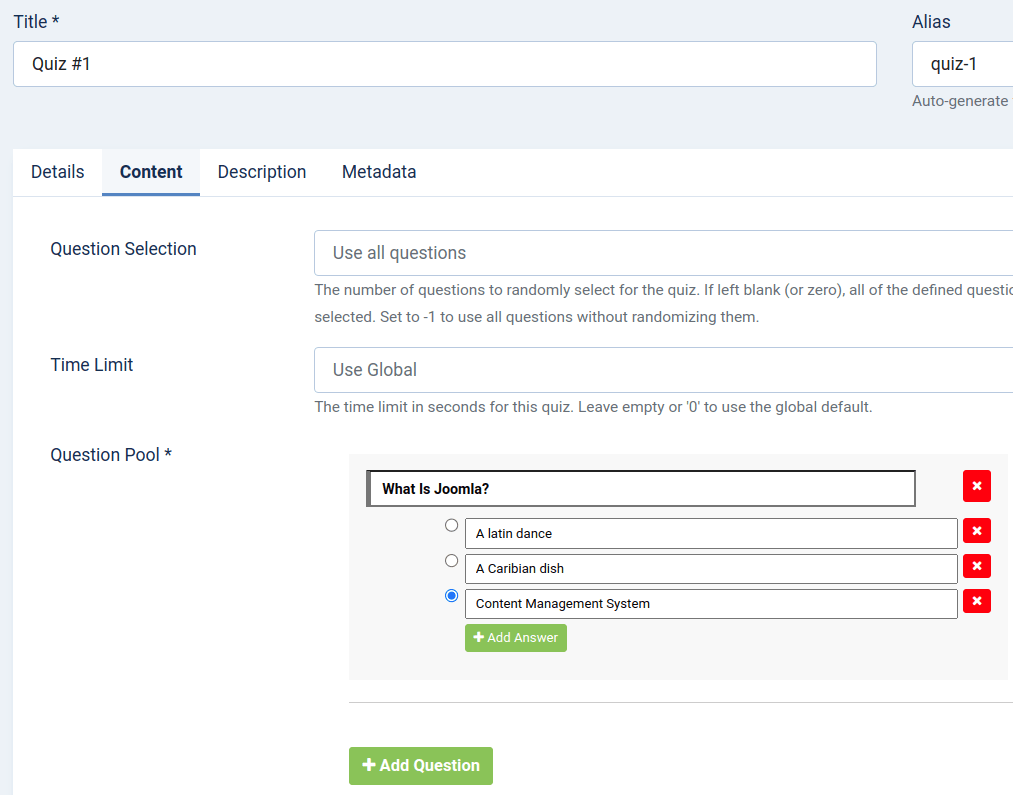
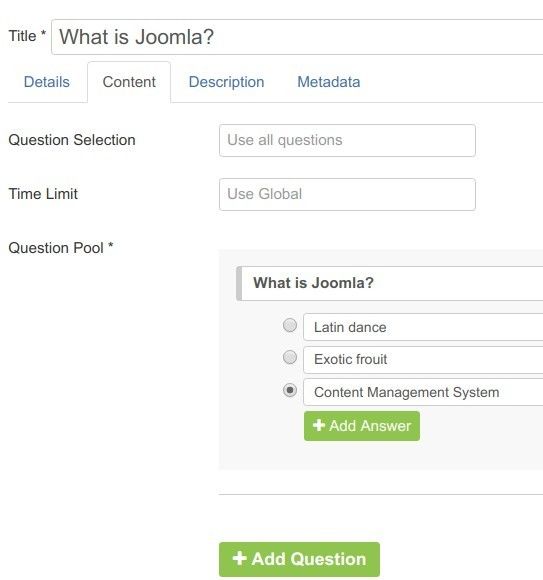
- Go to the "Content" tab.
- Enter your first question with its answers. Use the little red cross icon to delete an answer in case you need to.
- Once you created all the answers to a question, click on the radio button next to the right answer. This will help OSCampus to calculate the score for this quiz and display it to the quiz submitter.
- Continue using the "Add Question" and "Add Answer" to create more questions with answers.
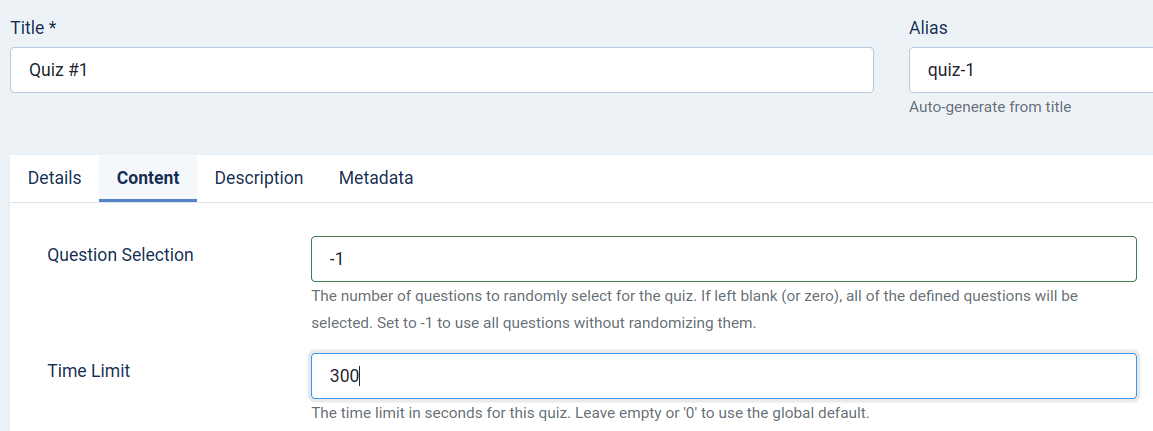
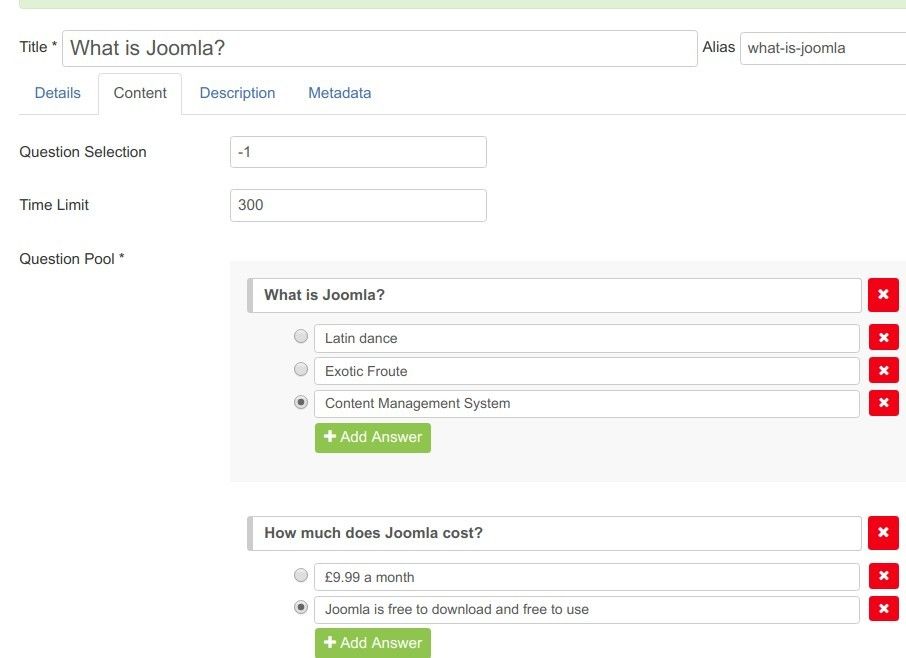
- Once you finished creating all the questions and answers, go to the "Question Selection" field. Enter here how many questions of this quiz you would like to be randomly displayed to the quiz taker. Or leave this field blank to display all of the questions. If you wish to use all questions without randomizing them, enter -1.
- Go to the "Time Limit" field. Enter here the quiz time limit (in seconds):
- Click "Save" or "Save & Close".
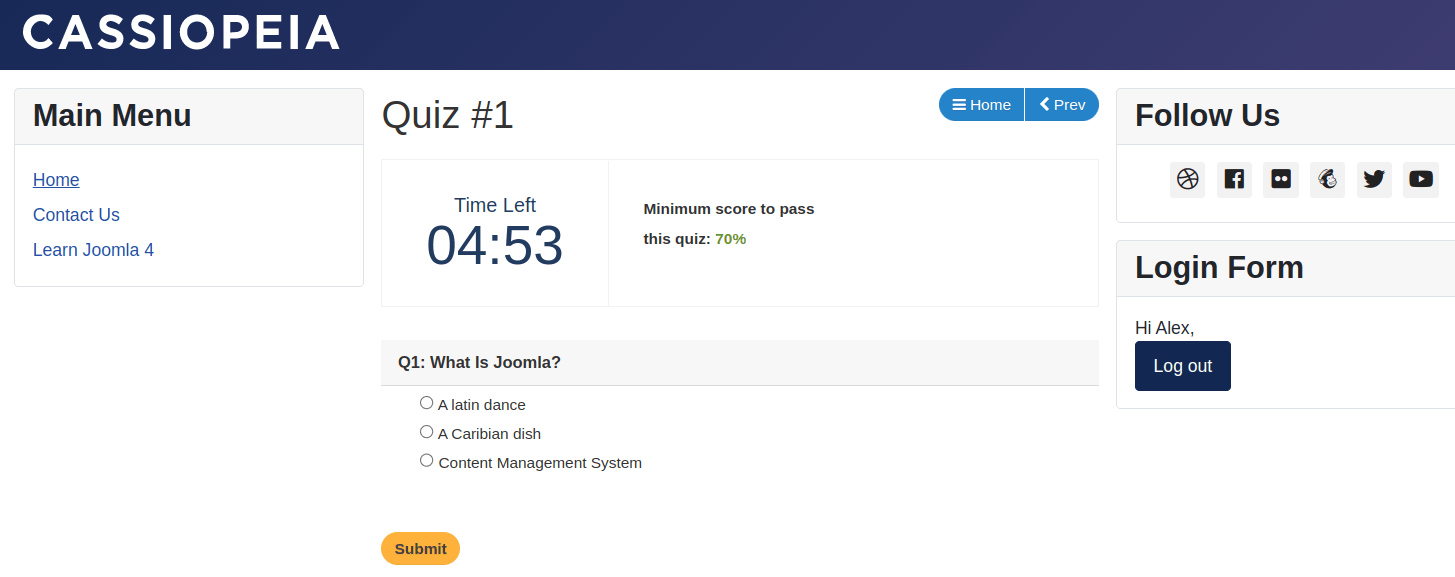
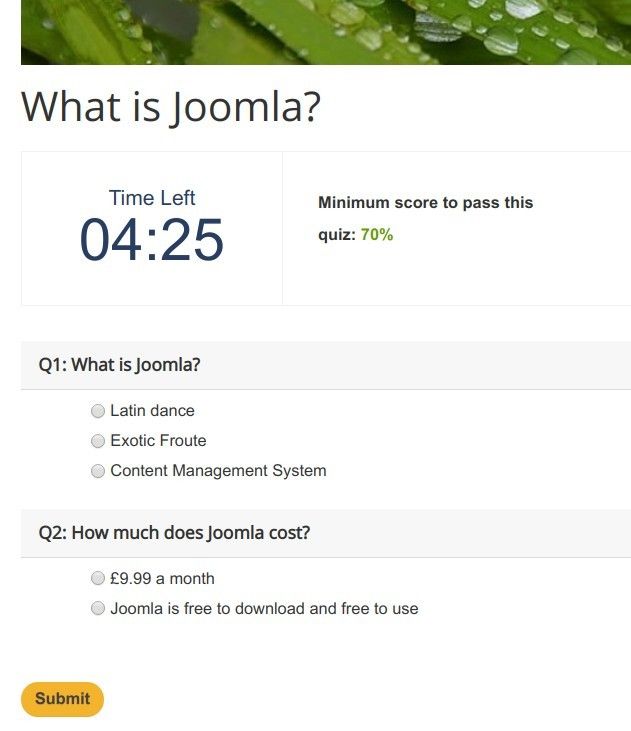
- Here is how this quiz page will look to its take at your Joomla site frontend:
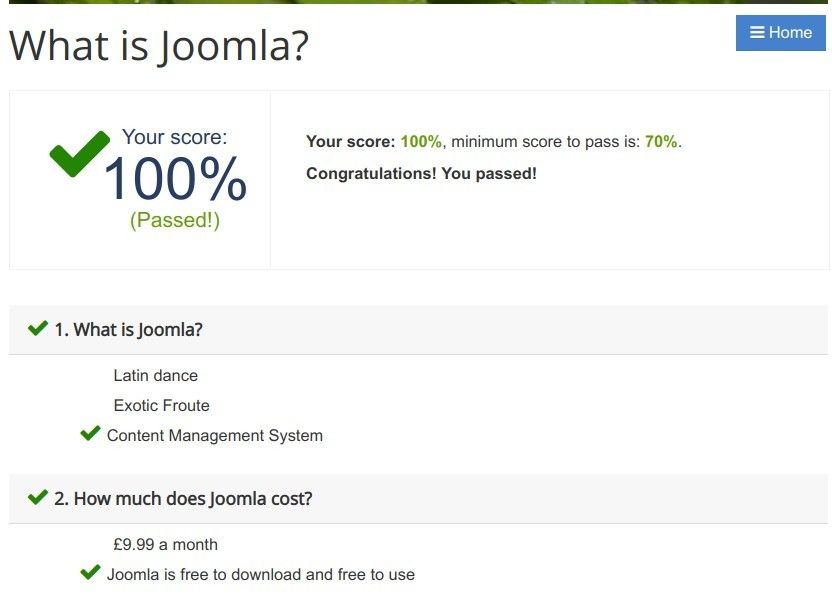
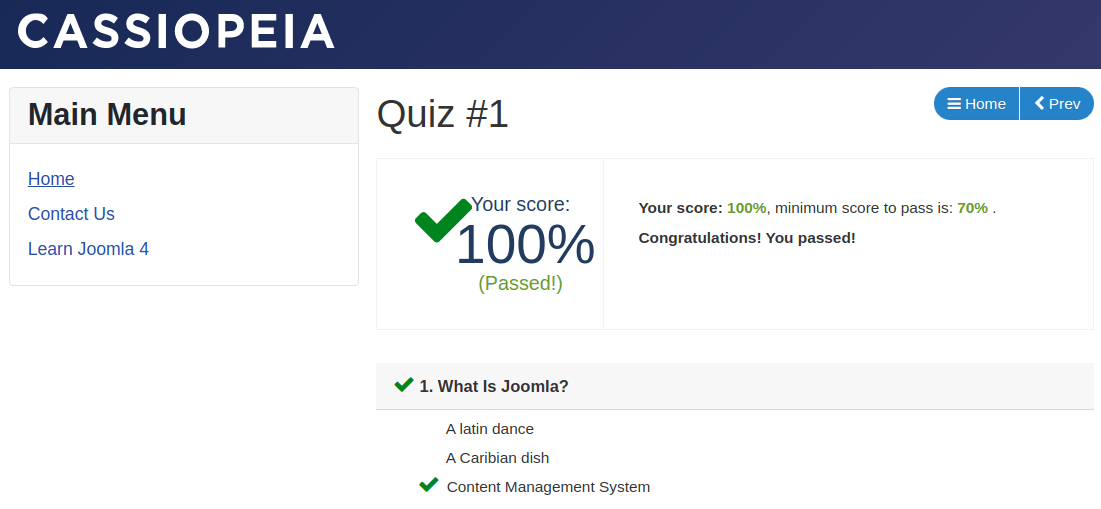
- Once the quiz taker answers all the questions correctly and clicks the yellow "Submit" buttn, they will see the "Congratulations! You passed!" page:
Documentation for Joomla 3
What is a quiz in OSCampus Pro?
A quiz in OSCampus Pro is a type of lessons:
You may want to create a few quizzes and spread them throughout your OSCampus course. Or you may as well want to create just one quiz and place it as the last lesson of your course:
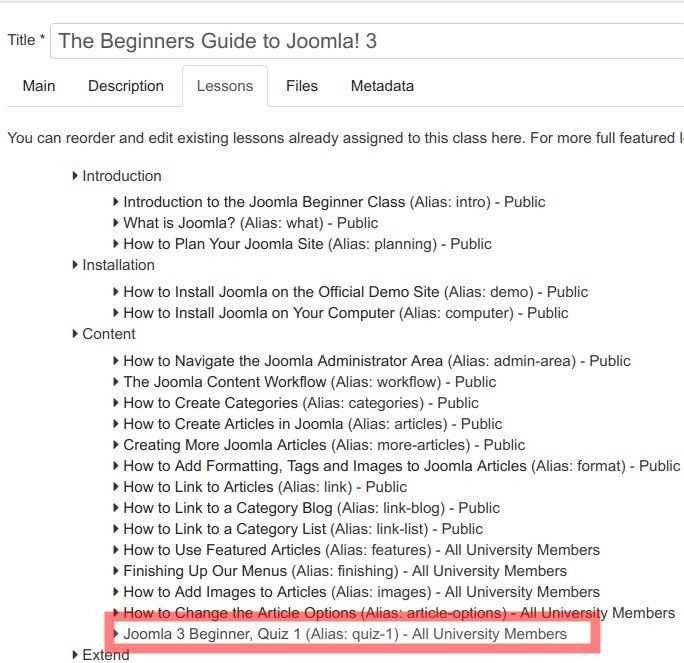
Once you created a quiz, you will see it listed under the "Lessons" tab of your course:
You will also find your quizzes listed on the list of all of your OSCampus lessons when you open the "OSCampus Pro: Lessons" page:

How to create a quiz in OSCampus
Let's take a look at how to create a quiz in OSCampus Pro.
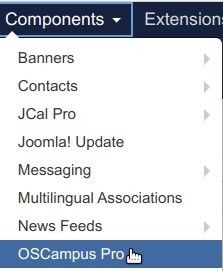
- In your Joomla control panel, go to "Components" > "OSCampus Pro":
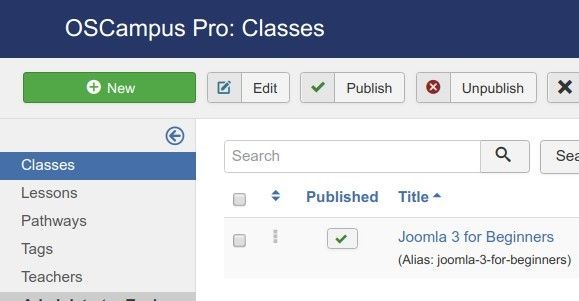
- You will arrive to the "OSCampus Pro: Classes" administrative screen:
- In OSCampus Pro, lessons are children of classes. This means that you have to create at least one class before OSCampus allows you to create lessons, including lessons by the "Quiz" type.
Once you created a class with its lessons, go ahead and create a quiz. Let's take a look at how to do this.
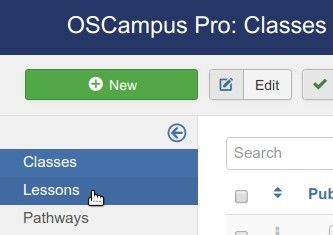
- In your OSCampus Pro administrator panel, go to "Lessons":
- You will be taken to the "OSCampus Pro: Lessons" screen. In the top left corner of the screen, click "New":
- This will bring you to the "OSCampus Pro: Create Lesson" screen. Create your quiz:
- Title: Enter here the title of your quiz. For my demonstration, I entered "What is Joomla?".
- Class: In this field, select your existing class the quiz will belong to. For my demonstration, I selected "Joomla 3 for Beginners".
- Module: Enter the name of the module of your class the quiz will belong to. For my demonstration, I typed in "Final Assessment".
- Lesson Type: Select "Quiz".
- Published: Leave this setting in its default "Published" state to publish your quiz right away, or else set it to "Unpublished".
- Access: Select the required level of access to your quiz. For my demonstration, I selected "Public".
- Click "Save".
- Click the "Content" tab:
- Enter your first question with its answers. Use the little red cross icon to delete an answer in case you need to.
- Once you created all the answers for a question, click on the radio button next to the right answer. This will help OSCampus to calculate the score for this quiz and display it to the quiz submitter.
- Continue using the "Add Question" and "Add Answer" to create more questions with answers.
- Once you finished creating all the questions and answers for your OSCampus quiz, find the "Question Selection" setting. Enter here how many questions of this quiz you would like to be randomly displayed to the quiz taker. Or leave this field blank to display all of the questions. If you wish to use all questions without randomizing them, enter -1:
- Enter the quiz time limit in seconds into the "Time Limit" field:
- Click "Save" or "Save & Close".
- Here is how this quiz page will look to its take at your Joomla site frontend:
- Once the quiz taker answers all the questions correctly, they will see the "Congratulations! You passed!" page: