Documentation for Joomla 3
To embed Facebook and Instagram posts in your Joomla content using the OSEmbed Pro Joomla extension, you need to connect your Joomla site to Facebook. This is a three-step process:
- Create a new Facebook App.
- Add basic settings mandatory for the app review.
- Upload documents required for your individual verification.
- Submit a request for the app testing and review.
- Connect your Joomla site to Facebook using OSEmbed Pro.
Let's take a look at these five steps in detail.
Step #1. Create a new Facebook App
- Login to your Facebook account.
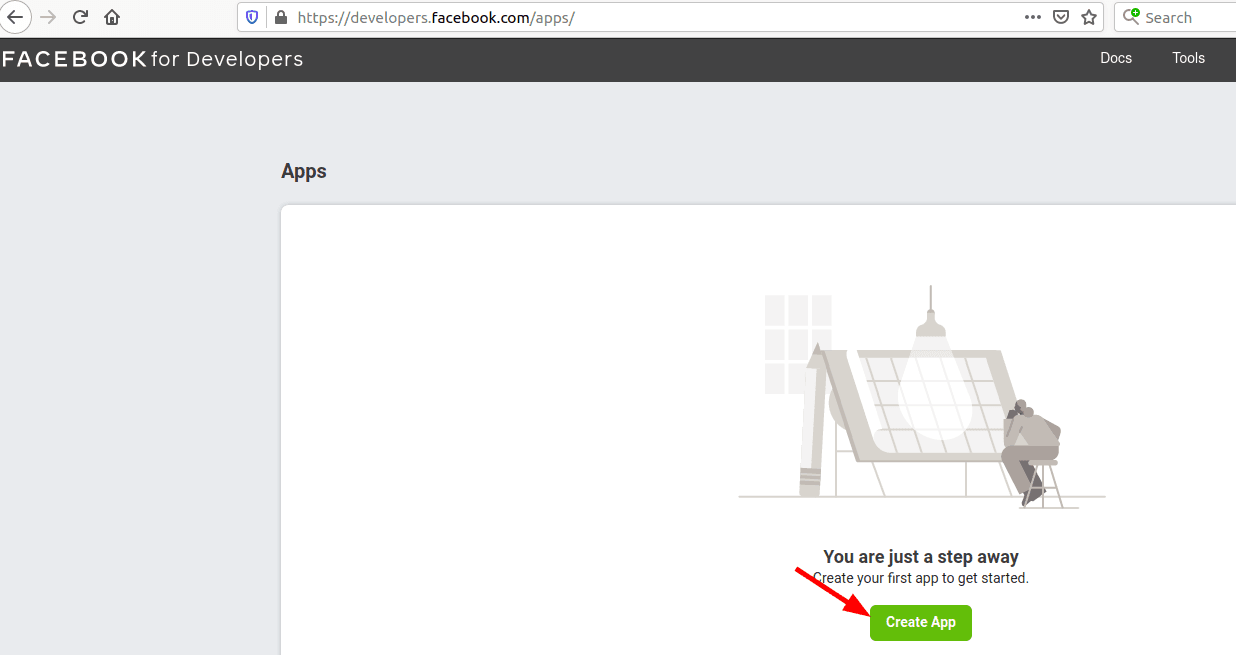
- Go to https://developers.facebook.com/apps.
- Click the "Create App" green button:
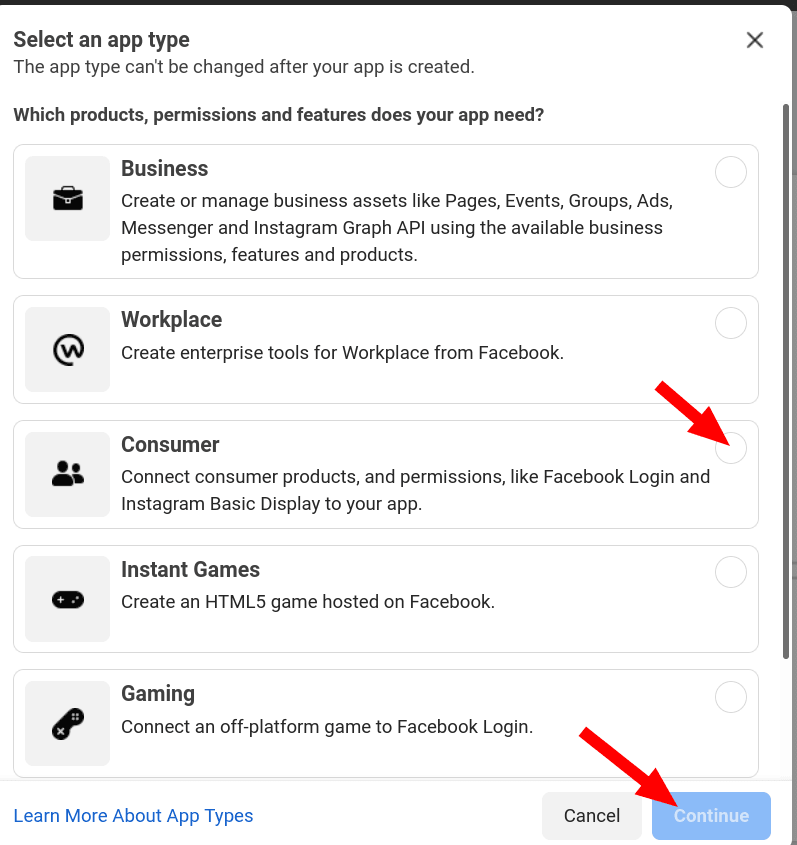
- You will see the "Select an app type" white modal box, as shown in the next image. Click "Consumer" and click "Continue":
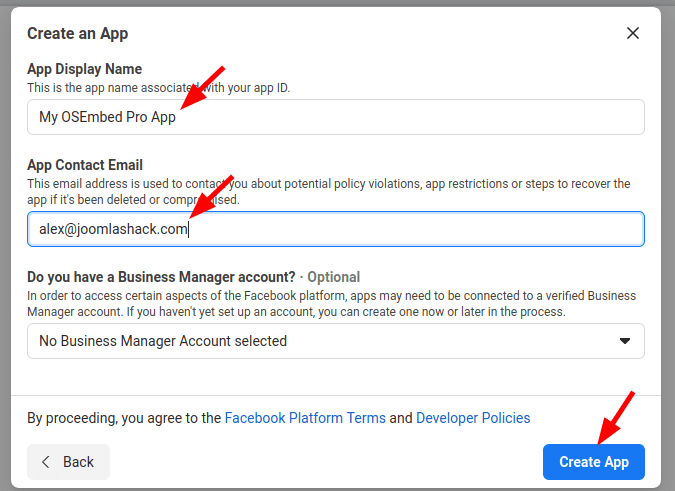
- You will see the "Create an App" box, as shown in the next image. Fill in the "App Display Name" and "App Contact Email" fields.
- Click "Create App":
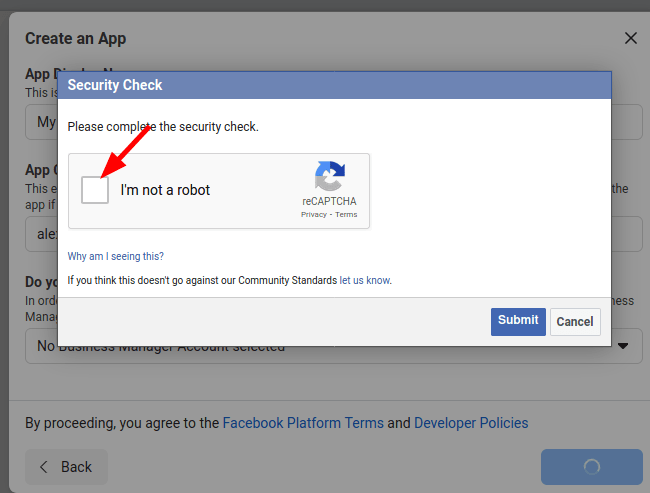
- You will see either the "Security Check" or "Please Re-enter Your Password" popups. Click the "I am not a robot" checkbox or re-enter your Facebook password. You may also be asked to complete some more Captcha screens.
- You will see your Facebook App created:
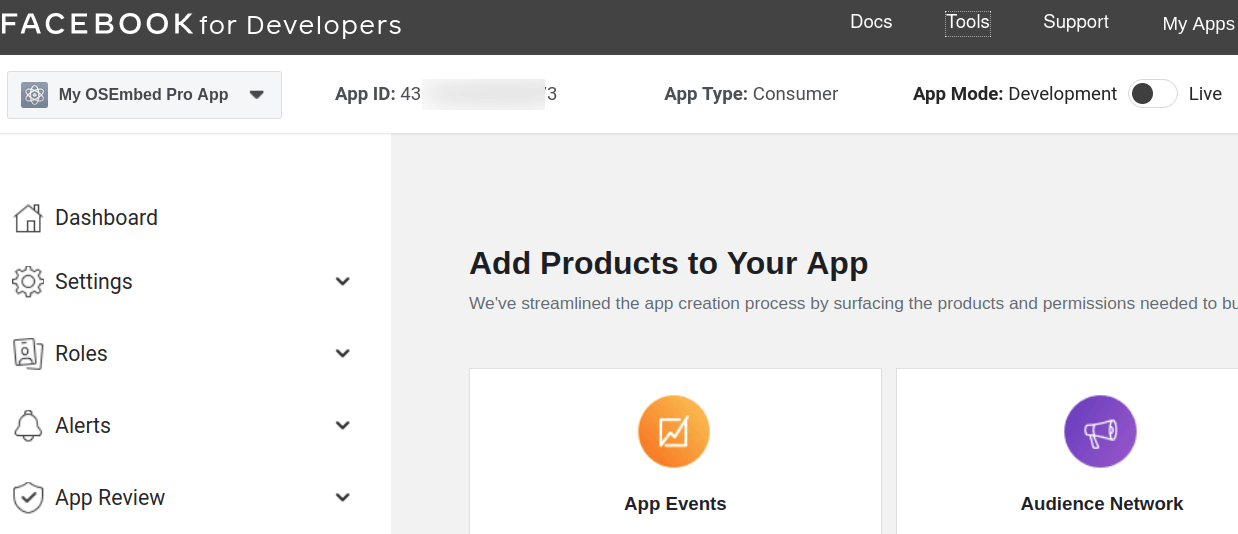
Well done. You are ready to move to the next step.
Step #2. Add basic settings mandatory for the app review
- Go to "Settings" > "Basic":
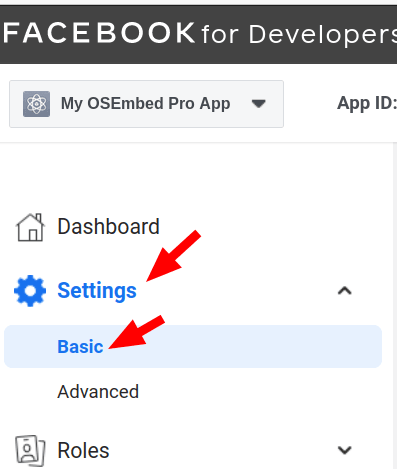
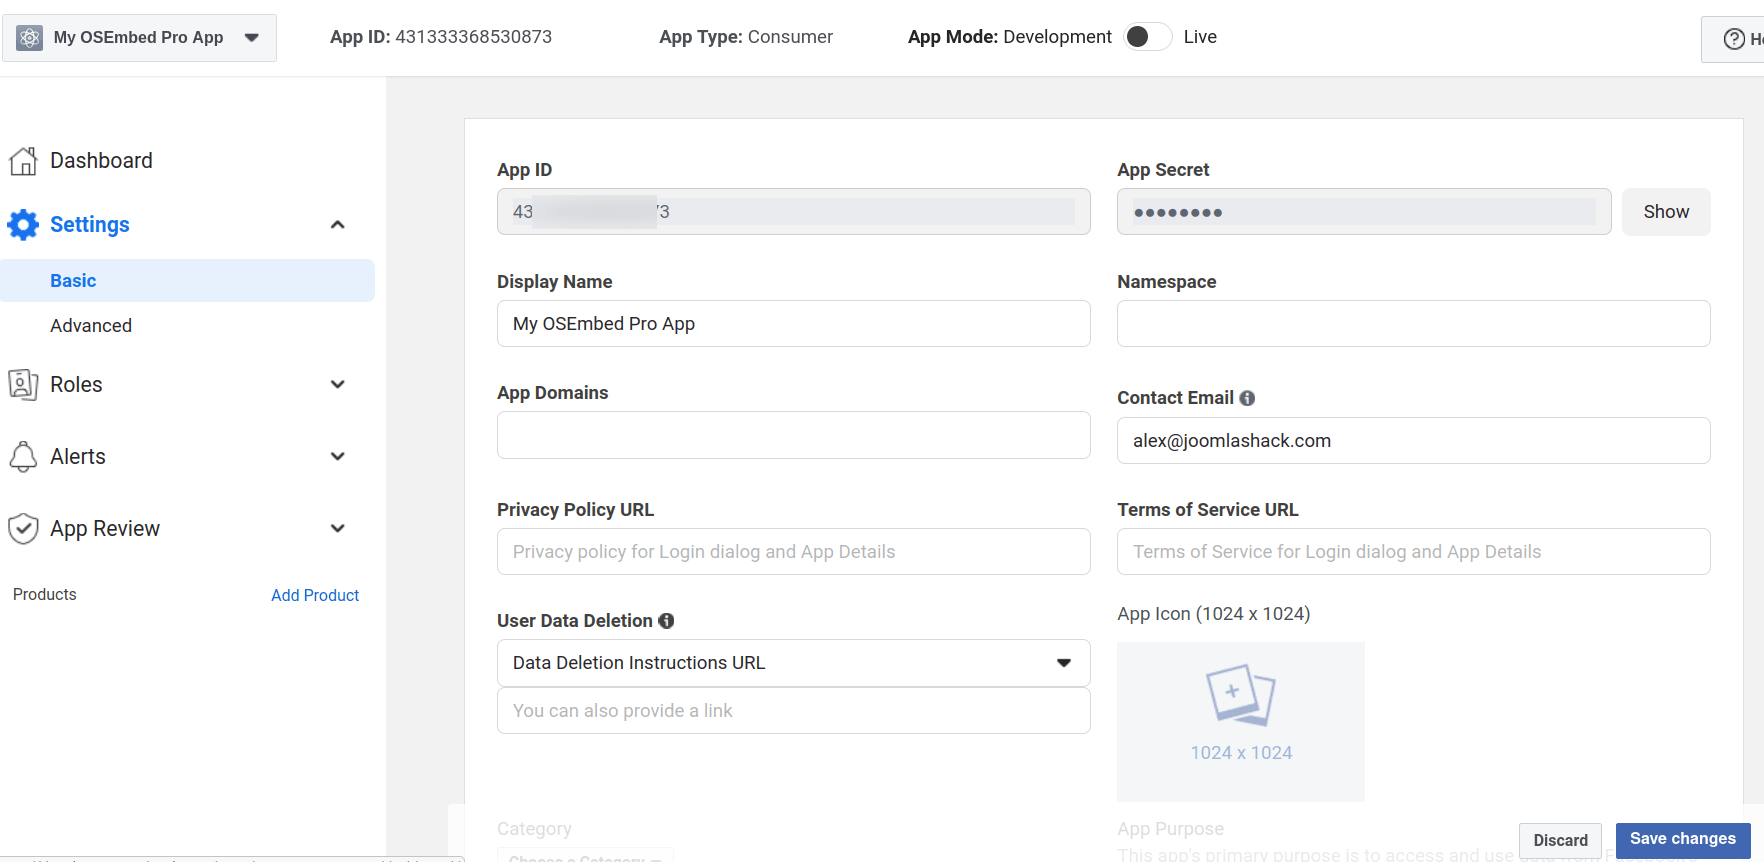
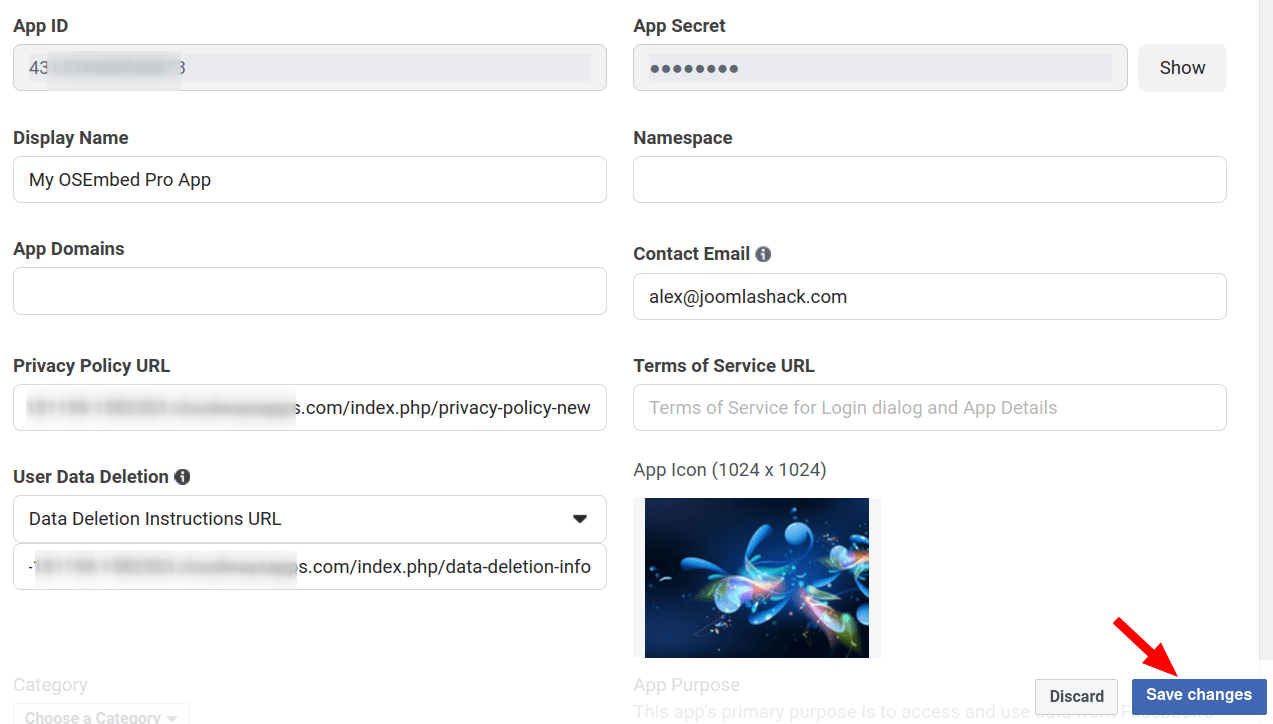
- You will see the screen with the basic details of your Facebook App as shown in the next image:
- In your Joomla site, create a dummy Joomla article with a title similar to "Privacy Policy".
- Create a hidden menu for this article and copy its URL.
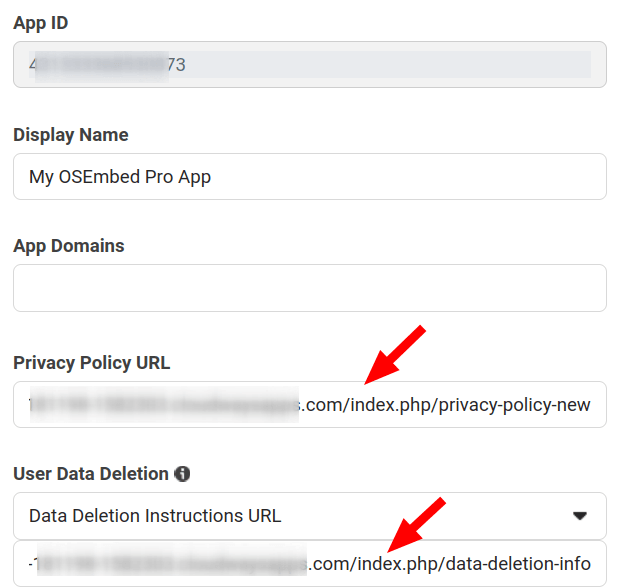
- Get back to the screen with the basic settings of your Facebook app. Enter the URL of your "Privacy Policy" article into the "Privacy Policy URL" field, as you can see in the next image:
- In your Joomla site, create a dummy Joomla article with a title similar to "Data Deletion Instructions".
- Create a hidden menu for this article and copy its URL.
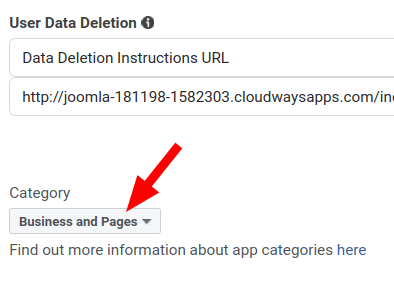
- Get back to the screen with the basic settings of your Facebook app. Enter the URL of your "Data Deletion Instructions" article into the "Data Deletion Instructions URL" field, as you have seen in the previous image.
- Click on the "App Icon" field and upload a dummy PNG or JPG image:
![]()
Note: The size of the image must be between 512 x 512 and 1024 x 1024 pixels. File size limit 5 MB.
- Click "Choose a Category" and select a relevant category:
- In the "App Purpose" section, click "Yourself or your own business":

- Click the blue "Save changes" button:
Well done. Your newly created Facebook App has all the mandatory data now. You are ready to move to the next step.
Step #3. Upload documents required for your individual verification
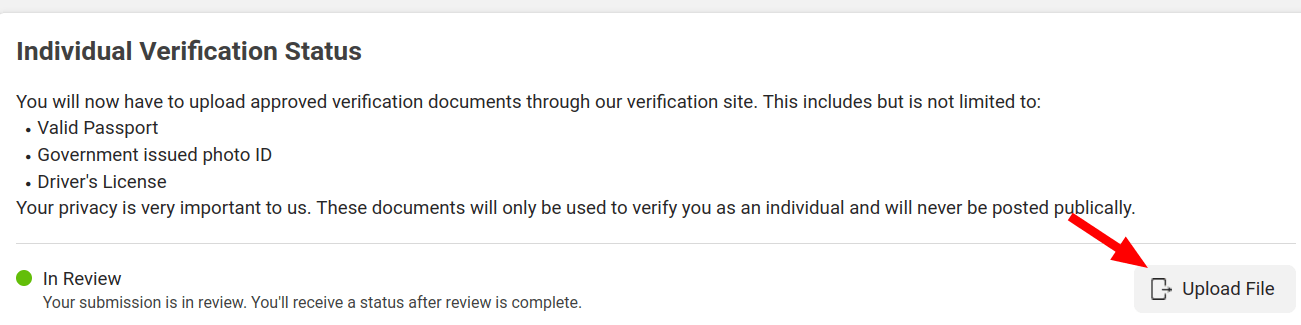
- Scroll down to the "Verification" section. Notice the "Individual Verification" heading and "In Review" green button, as shown in the next image. Click "Go To Verification":

On the next screen, you will need to upload approved verification documents. This includes but is not limited to:
- Valid Passport
- Government-issued photo ID
- Driver's License.
Note: See this page for the full list of the Government issued and non-Government issued verification documents accepted by Facebook.
- Click "Upload File":
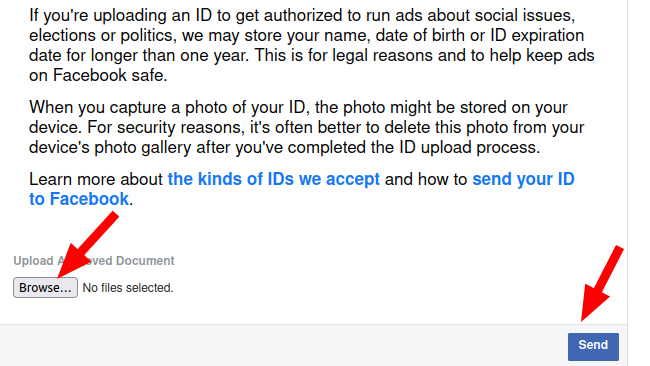
- You will see the "Confirm Your Identity" screen. Scroll down the page and click "Browse". Upload your verification document and click the "Send" button:
- After a few moments, you will see the "Form submitted successfully" box with some instructions:
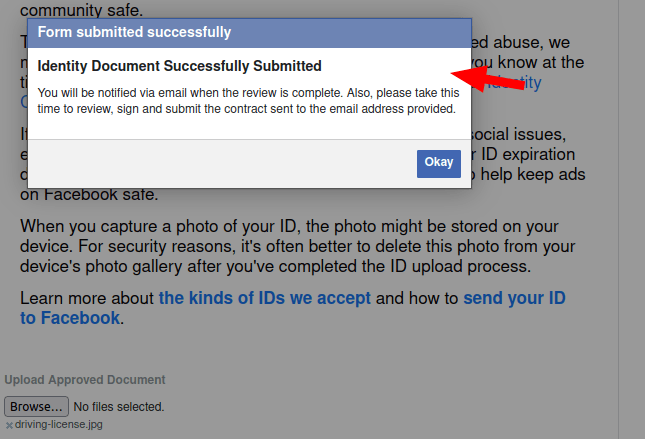
- Read the instructions and click "Okay".
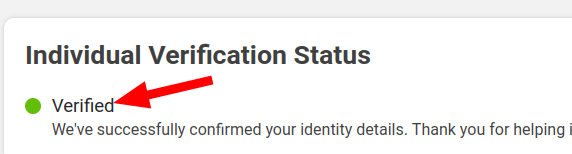
- You will return to the "Individual Verification" screen. You will see that the "Individual Verification Status" section now displays the "Verified" status:
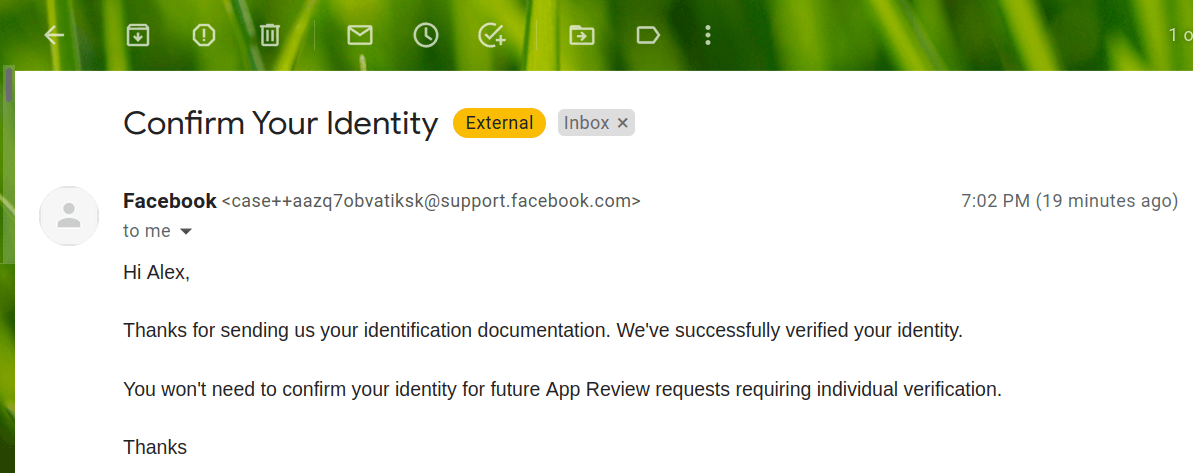
- Check your email. You should see a confirmation email from Facebook:
- Return to the "Facebook for Developers" screen and click "My Apps" at the top:

Excellent. At this point, you are ready to move to the next step and submit your Facebook App for testing and review.
Step #4. Submit a request for the app testing and review
- Click on the name of your Facebook App:

- Check the "Require Actions" box. Make sure it says "You don't have any required action items to display.":

- Click "App Review":

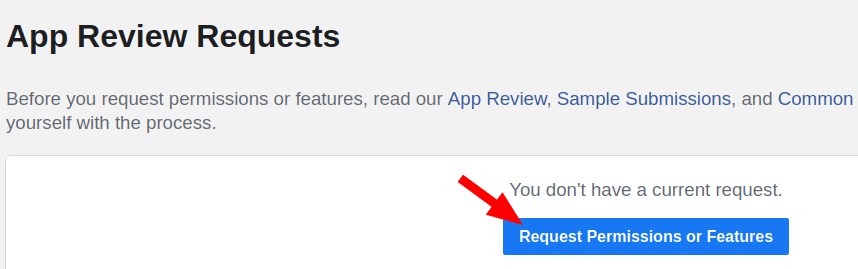
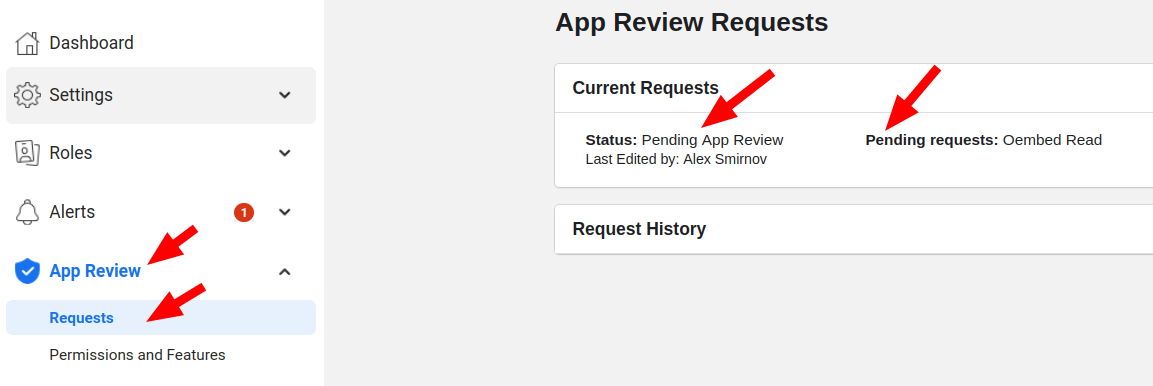
- You will be taken to the "App Review Requests" screen, as you can see in the next image. Click "Request Permissions or Features":
- This will open up the "How This App Requests Data" box with tips, see next image. Click on the cross icon to close this box:
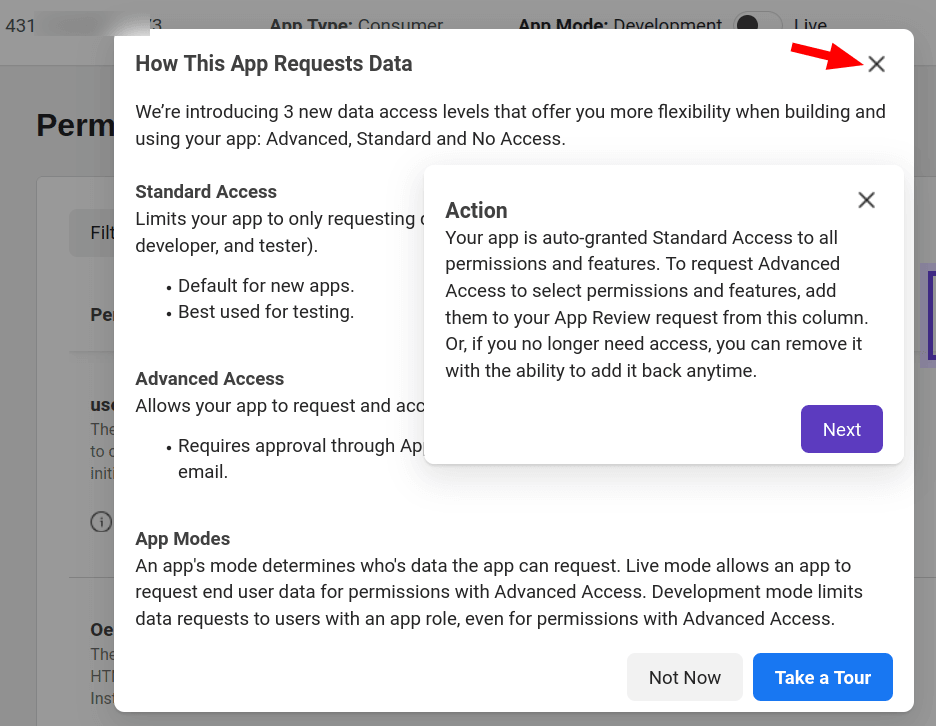
- Find the "Oembed Read" permission and click on the "Request Advanced Access" button:

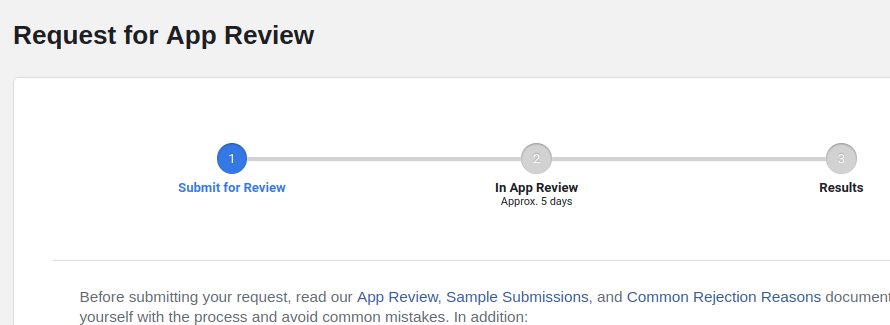
- This will bring you to the "Request for App Review" screen, as you can see on the next image:
- Scroll down to the "Complete App Settings" section:
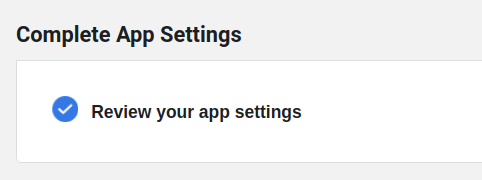
- If you followed instructions in Step #2, you won't see any basic settings listed here. Otherwise, go back to "Settings" > "Basic" and fill in the missing settings.
- Click anywhere on the "Compete App Verification" box:
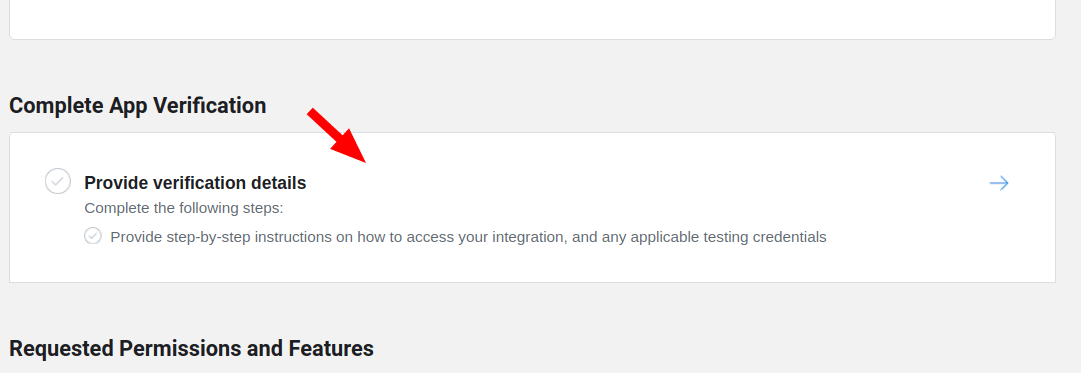
- You will see the "App Verification Details" popup box, as shown in the next image. Click "Add Platform":
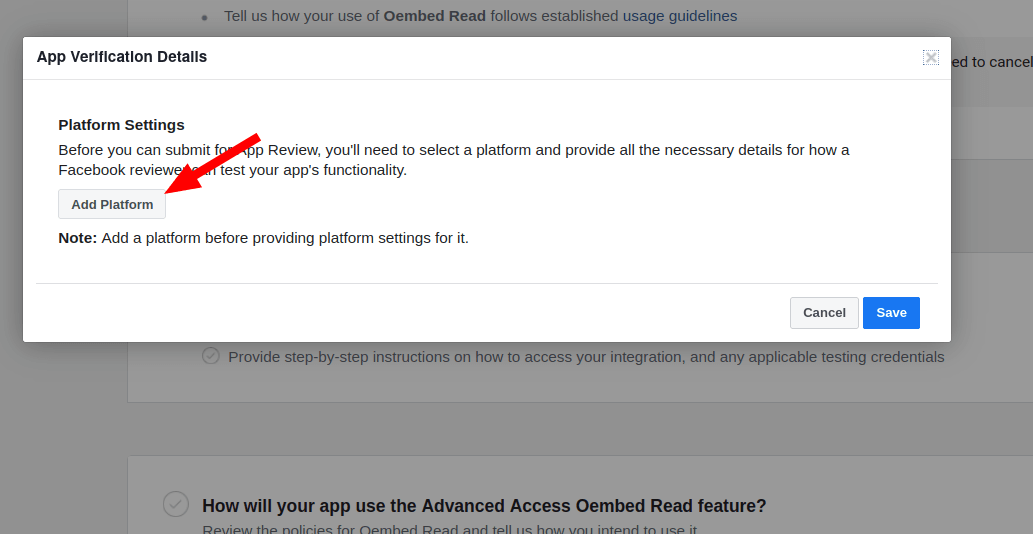
- You will see a new browser tab opened. Click the "+ Add Platform" button:

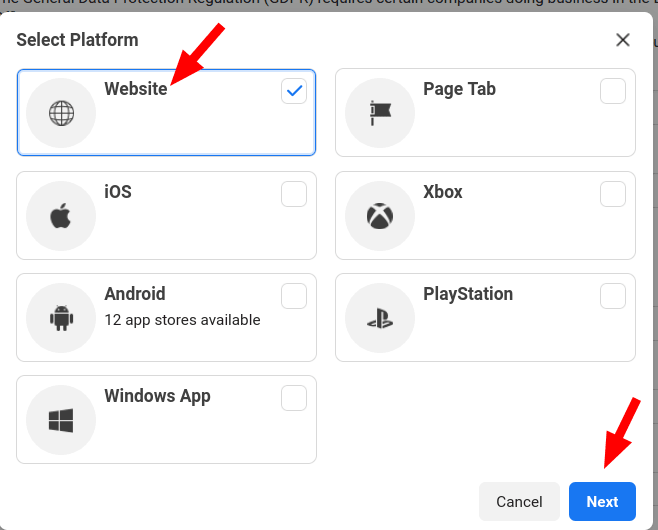
- This will open up the "Select Platform" box. Click "Website":
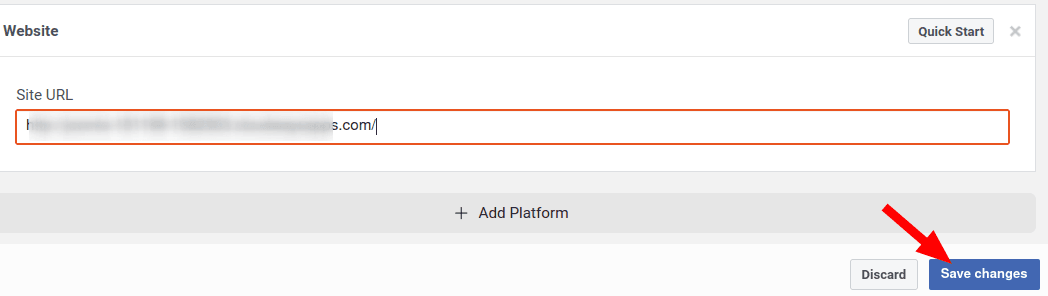
- You will see the "Website" box with the "Site URL" field appeared above the "Add Platform" button, as shown in the next image. Enter the URL of your Joomla/OSEmbed Pro site in the "Site URL" field and click "Save changes":
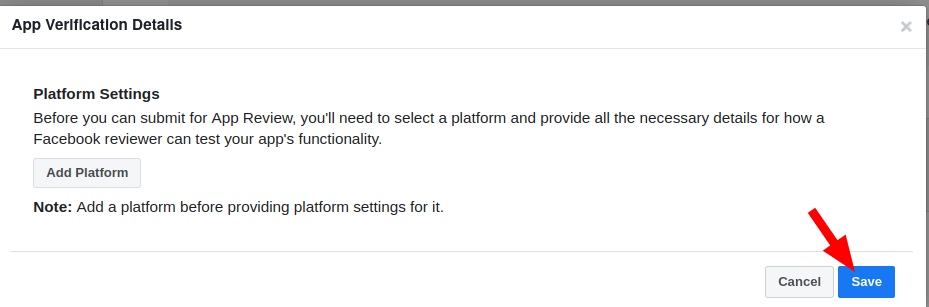
- Return back to the tab with the "App Verification Details" popup where a few seconds ago you clicked the "Add Platform" button and click the "Save" button:
- This will close the "App Verification Details" popup. Click once again anywhere on the "Complete App Verification" box:
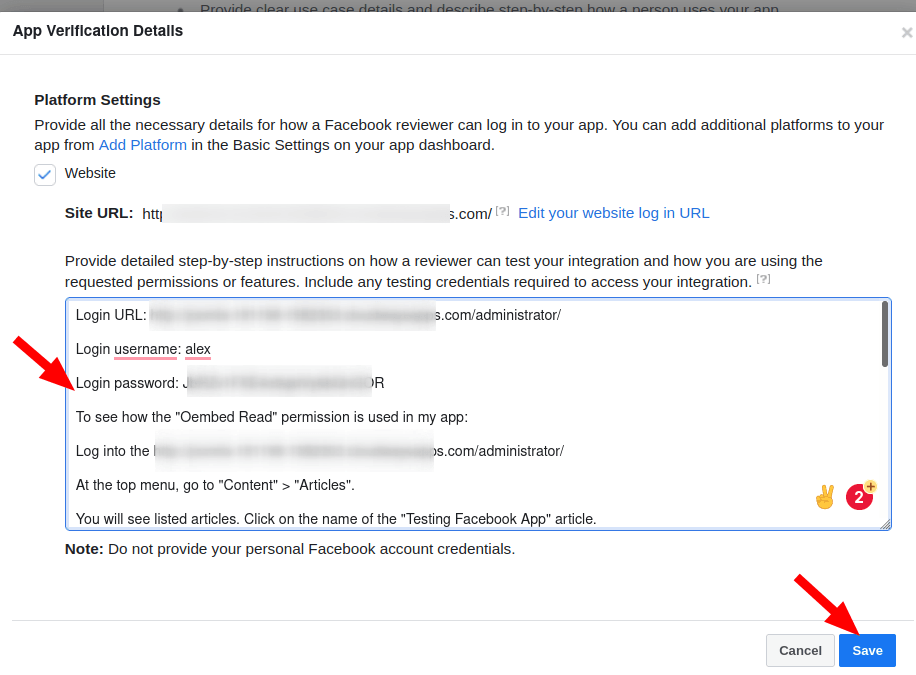
You will see the "App Verification Details" popup. At this point, you want to do your best to enable Facebook reviewers to test your Joomla/OSEmbed Pro/Facebook integration as if they were your site administrators.
- Provide detailed step-by-step instructions on how they can test your Facebook App integration on your Joomla/OSEmbed Pro site. Include any testing credentials required to access your Joomla site and its integration with this Facebook App.
You can use the following structure, which worked for us (make sure you replaced example.com with the domain name of your own Joomla/OSEmbed Pro site):
Login URL: https://example.com/administrator
Login username: <your-joomla-superuser-username>
Login password: <your-joomla-superuser-password>
To see how the "Oembed Read" permission is used in my app:
Log into the https://example.com/administrator
At the top menu, go to "Content" > "Articles".
You will see listed articles. Click on the name of the "<your-article-with-facebook-url-embedded>" article.
You will see my Joomla article with a Facebook post URL embedded.
Now go to <the-frontend-url-of-your-joomla-article-with-facebook-post-embedded>. You will see that instead of the Facebook post, this frontend page displays its URL.
Go back to the Joomla administrator panel.
At the top menu, go to "Extensions" > "Plugins".
This will open the "Plugins" screen listing the existing plugins. Find the "Content - OSEmbed Pro" plugin and click on its name.
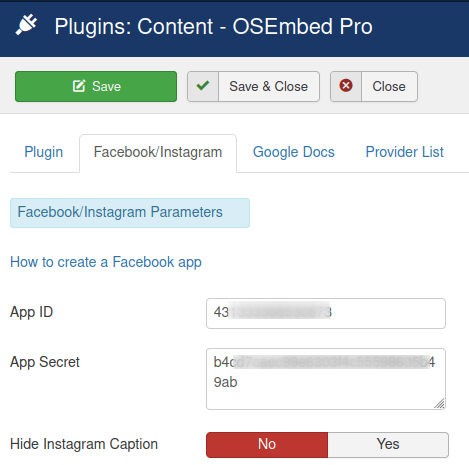
You will see the "Plugins: Content - OSEmbed Pro" screen with the plugin's settings. Click the "Facebook/Instagram" tab.
Enter the ID of this Facebook App you are testing in the "App ID" field.
Enter the App Secret of this Facebook App you are testing in the "App Secret" field.
At the top of the screen, click "Save".
Now go to <the-frontend-url-of-your-joomla-article-with-facebook-post-embedded>. Once this review is approved, this article will display the Facebook post.
- Enter these instructions and click "Save":
- You will see that the "Complete App Verification" section now has a checkmark. You will also notice that the "Submit for Review" at the bottom of the screen button is still grayed out. You need to submit to Facebook reviewers some more data.
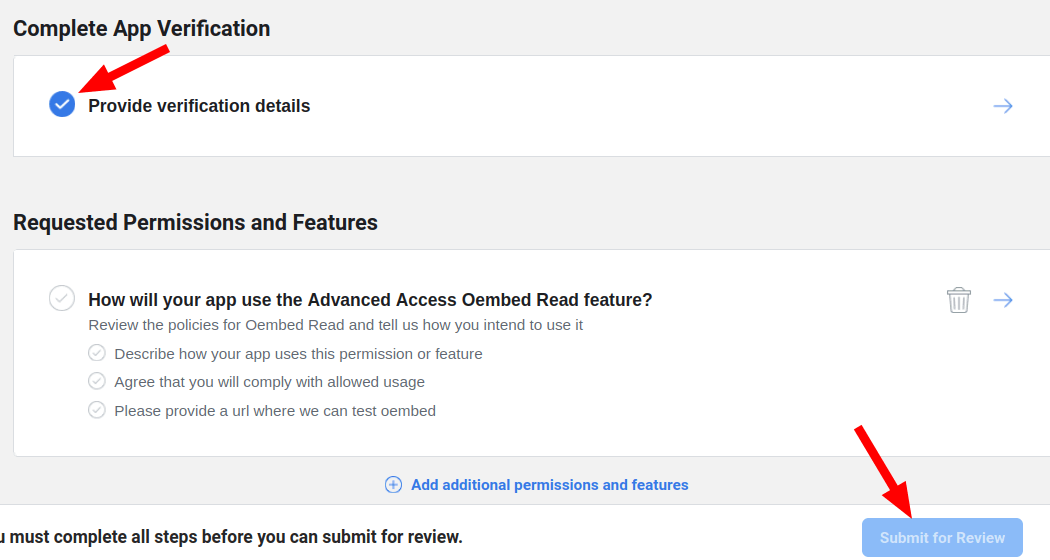
- Click anywhere on the "Requested Permissions and Features" box:
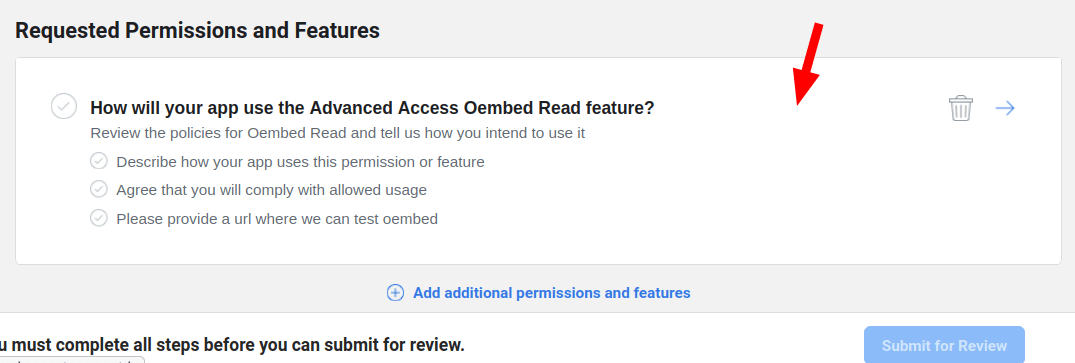
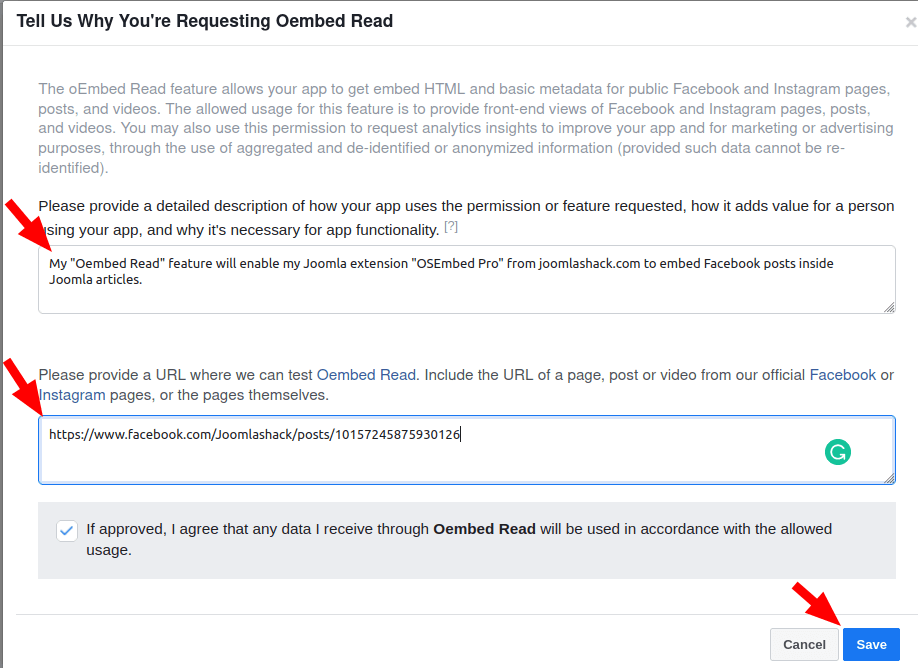
- You will see the "Tell Us Why You're Requesting Oembed Read" box, as shown in the next image:
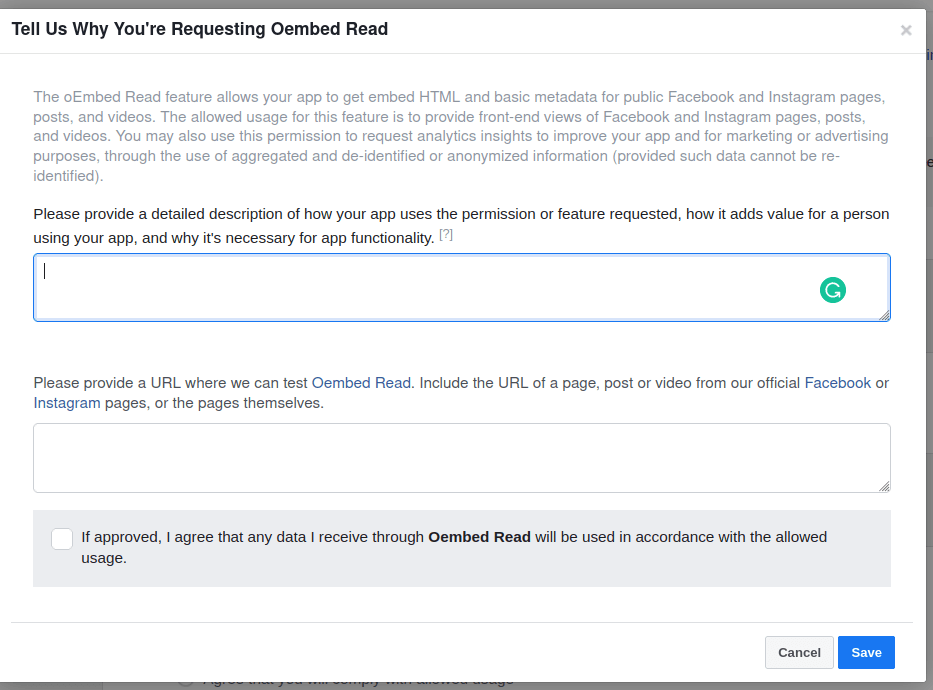
- As you can see, you have two fields to fill in and a check box to check. The first field gives you the following prompt:
Please provide a detailed description of how your app uses the permission or feature requested, how it adds value for a person using your app, and why it's necessary for app functionality.
- Enter in it something along the following lines, which worked for us:
My "Oembed Read" feature will enable my Joomla extension "OSEmbed Pro" from joomlashack.com to embed Facebook posts inside Joomla articles.
- In the second field, enter the URL of the Facebook post you embedded in your Joomla article that you previously created for yourself and Facebook testers/reviewers. Then click "Save":
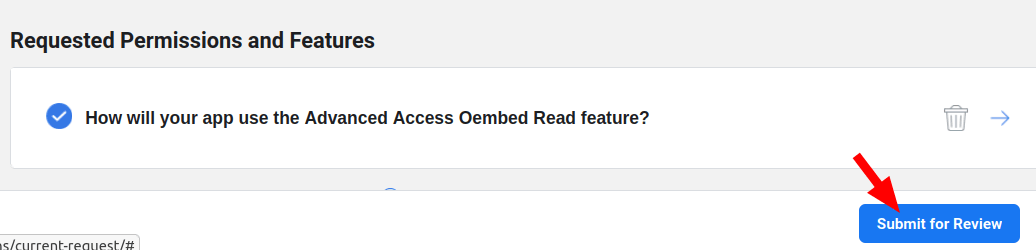
- You will see that the "Request Permissions and Features" box has been cleared and has a checkmark now, as shown in the next image. Click the "Submit for Review" button:
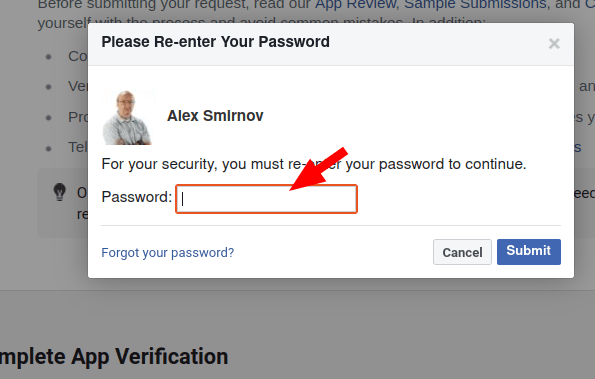
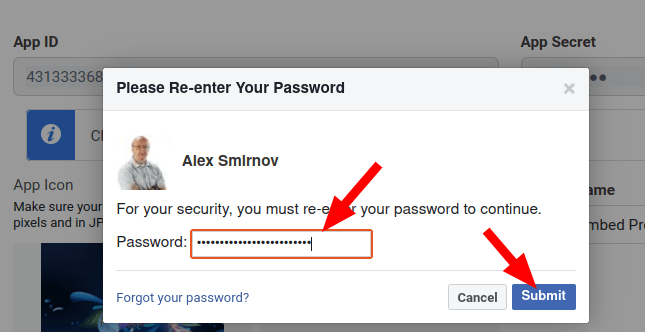
- You will see the "Please Re-enter Your Password" popup box, as shown in the next image. Enter your Facebook password and click "Submit":
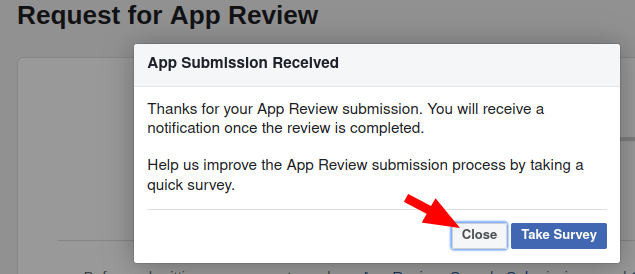
- This will bring up the "App Submission Received" popup box, as you can see in the next image. Click "Close" or "Take Survey" as you see fit:
- After a brief screen activity, you will see the "In App Review" step of the progress bar at the top changed from gray to blue:
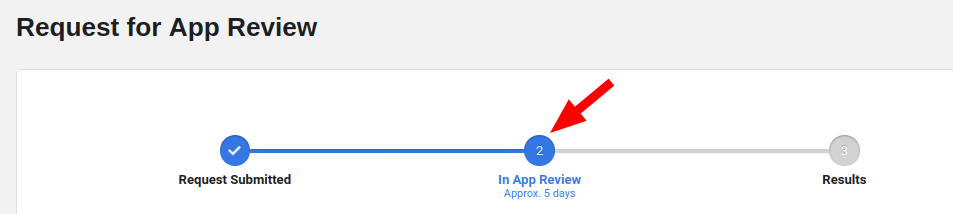
- As you can see, Facebook promises to review your request in five days. I submitted my review at 00:20 GMT. Facebook approved it for us in ten hours:
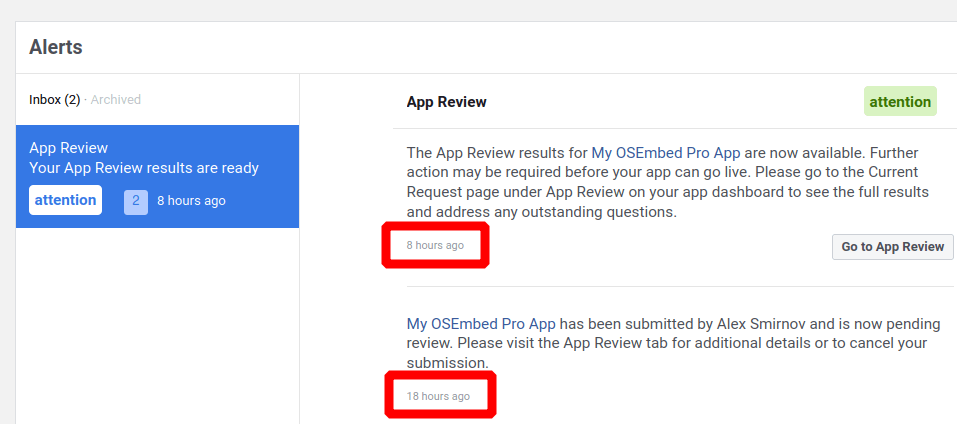
- To check if the status of your request changed from "Pending" to "Approved", go to "App Review" > "Requests":
Step #5. Connect your Joomla site to Facebook using OSEmbed Pro
Once Facebook approved your request for the Facebook App review, you are ready to connect your Joomla site to Facebook using OSEmbed Pro.
- In your Facebook Developer dashboard, go to "Settings" > "Basic".
- On the next screen, copy the number in the "App ID" field and click "Show":

- You will be asked to enter a password. Enter your password:
- Copy your Facebook App secret from the "Secret" field:

- In your Joomla administrator panel, go to your OSEmbed Pro plugin settings and paste the Facebook App ID and Facebook App Secret into their respective fields:
- Click "Save" or "Save & Close".
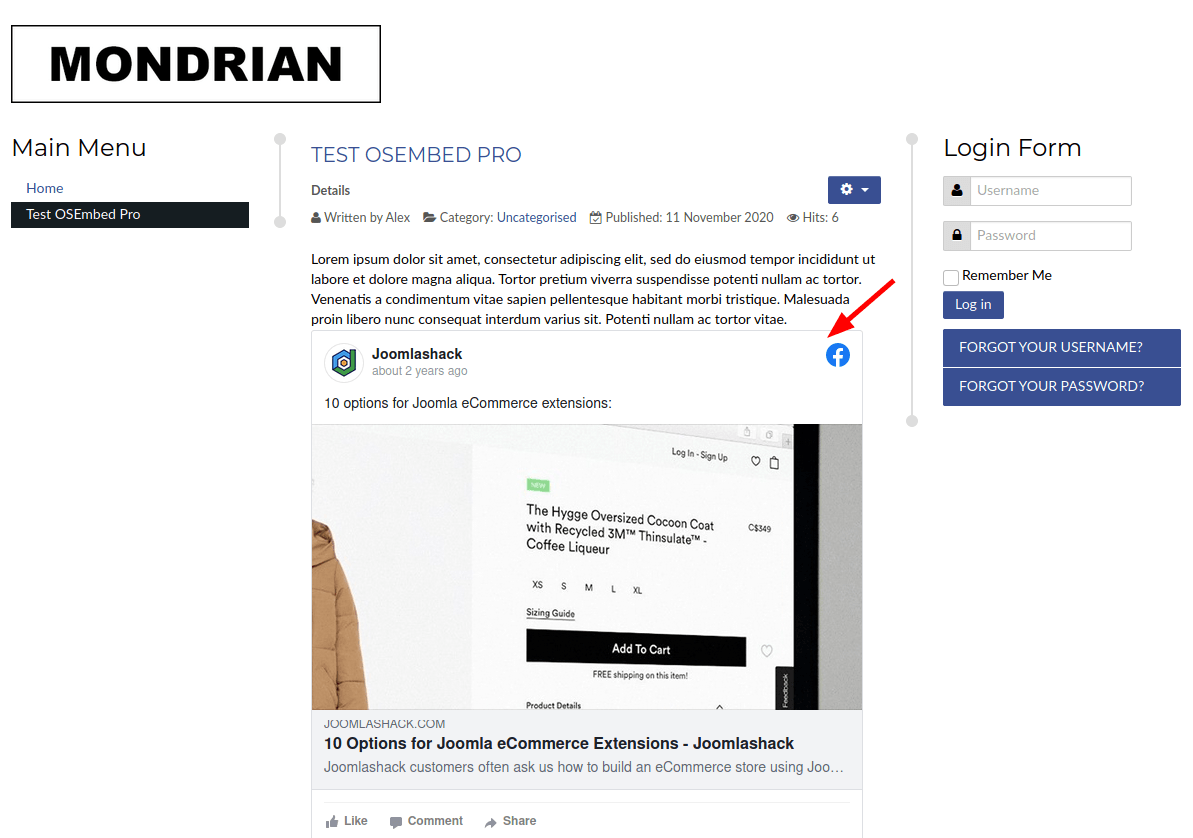
- Test embedding a Facebook post in your Joomla article. You should see the posts successfully embedded:
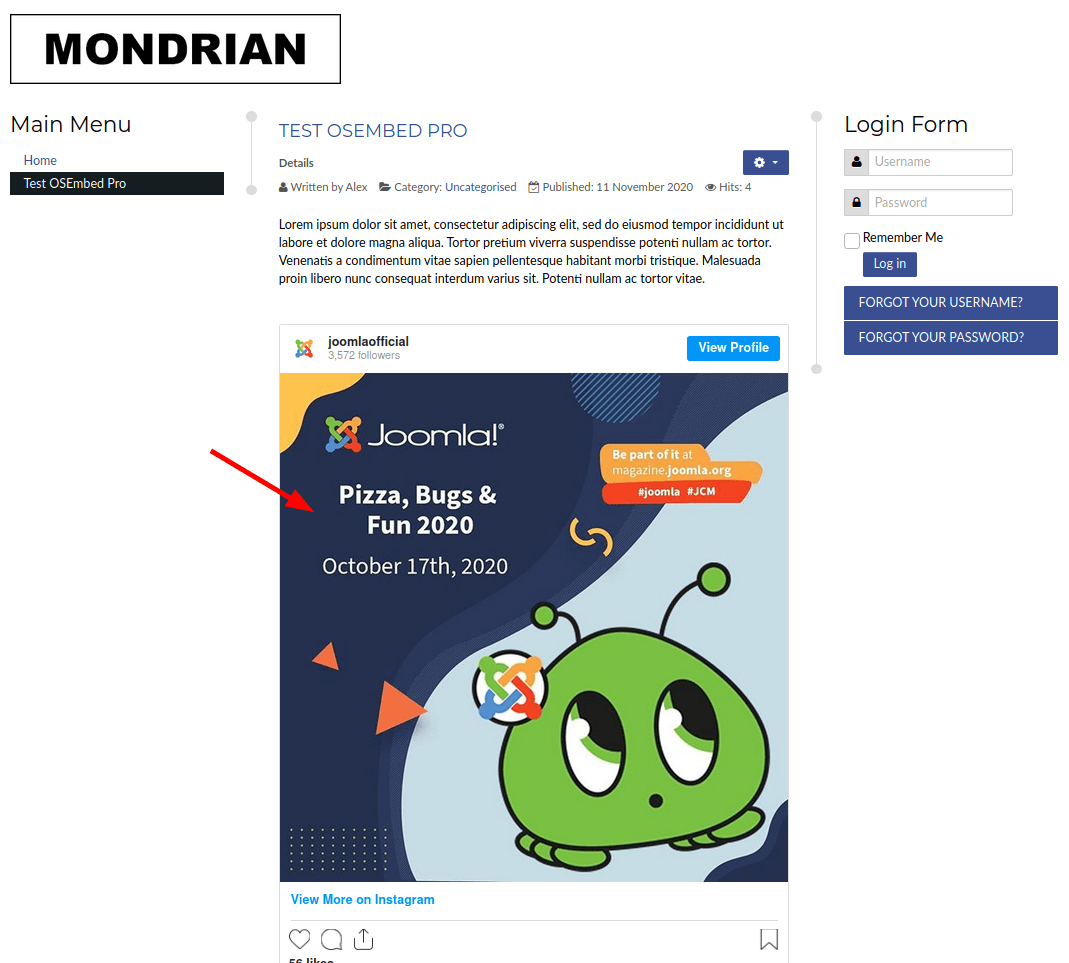
- Test embedding an Instagram post. You should see the Instagram post displayed at the frontend of your Joomla site as well:
Documentation for Joomla 5
To embed Facebook and Instagram posts in your Joomla content using the OSEmbed Pro Joomla extension, you need to connect your Joomla site to Facebook. This is a three-step process:
- Create a new Facebook App.
- Add basic settings mandatory for the app review.
- Upload documents required for your individual verification.
- Submit a request for the app testing and review.
- Connect your Joomla site to Facebook using OSEmbed Pro.
Let's take a look at these five steps in detail.
Step #1. Create a new Facebook App
- Login to your Facebook account.
- Go to https://developers.facebook.com/apps.
- Click the "Create App" green button:
- You will see the "Select an app type" white modal box, as shown in the next image. Click "Consumer" and click "Continue":
- You will see the "Create an App" box, as shown in the next image. Fill in the "App Display Name" and "App Contact Email" fields.
- Click "Create App":
- You will see either the "Security Check" or "Please Re-enter Your Password" popups. Click the "I am not a robot" checkbox or re-enter your Facebook password. You may also be asked to complete some more Captcha screens.
- You will see your Facebook App created:
Well done. You are ready to move to the next step.
Step #2. Add basic settings mandatory for the app review
- Go to "Settings" > "Basic":
- You will see the screen with the basic details of your Facebook App as shown in the next image:
- In your Joomla site, create a dummy Joomla article with a title similar to "Privacy Policy".
- Create a hidden menu for this article and copy its URL.
- Get back to the screen with the basic settings of your Facebook app. Enter the URL of your "Privacy Policy" article into the "Privacy Policy URL" field, as you can see in the next image:
- In your Joomla site, create a dummy Joomla article with a title similar to "Data Deletion Instructions".
- Create a hidden menu for this article and copy its URL.
- Get back to the screen with the basic settings of your Facebook app. Enter the URL of your "Data Deletion Instructions" article into the "Data Deletion Instructions URL" field, as you have seen in the previous image.
- Click on the "App Icon" field and upload a dummy PNG or JPG image:
![]()
Note: The size of the image must be between 512 x 512 and 1024 x 1024 pixels. File size limit 5 MB.
- Click "Choose a Category" and select a relevant category:
- In the "App Purpose" section, click "Yourself or your own business":
- Click the blue "Save changes" button:
Well done. Your newly created Facebook App has all the mandatory data now. You are ready to move to the next step.
Step #3. Upload documents required for your individual verification
- Scroll down to the "Verification" section. Notice the "Individual Verification" heading and "In Review" green button, as shown in the next image. Click "Go To Verification":
On the next screen, you will need to upload approved verification documents. This includes but is not limited to:
- Valid Passport
- Government-issued photo ID
- Driver's License.
Note: See this page for the full list of the Government issued and non-Government issued verification documents accepted by Facebook.
- Click "Upload File":
- You will see the "Confirm Your Identity" screen. Scroll down the page and click "Browse". Upload your verification document and click the "Send" button:
- After a few moments, you will see the "Form submitted successfully" box with some instructions:
- Read the instructions and click "Okay".
- You will return to the "Individual Verification" screen. You will see that the "Individual Verification Status" section now displays the "Verified" status:
- Check your email. You should see a confirmation email from Facebook:
- Return to the "Facebook for Developers" screen and click "My Apps" at the top:
Excellent. At this point, you are ready to move to the next step and submit your Facebook App for testing and review.
Step #4. Submit a request for the app testing and review
- Click on the name of your Facebook App:
- Check the "Require Actions" box. Make sure it says "You don't have any required action items to display.":
- Click "App Review":
- You will be taken to the "App Review Requests" screen, as you can see in the next image. Click "Request Permissions or Features":
- This will open up the "How This App Requests Data" box with tips, see next image. Click on the cross icon to close this box:
- Find the "Oembed Read" permission and click on the "Request Advanced Access" button:
- This will bring you to the "Request for App Review" screen, as you can see on the next image:
- Scroll down to the "Complete App Settings" section:
- If you followed instructions in Step #2, you won't see any basic settings listed here. Otherwise, go back to "Settings" > "Basic" and fill in the missing settings.
- Click anywhere on the "Compete App Verification" box:
- You will see the "App Verification Details" popup box, as shown in the next image. Click "Add Platform":
- You will see a new browser tab opened. Click the "+ Add Platform" button:
- This will open up the "Select Platform" box. Click "Website":
- You will see the "Website" box with the "Site URL" field appeared above the "Add Platform" button, as shown in the next image. Enter the URL of your Joomla/OSEmbed Pro site in the "Site URL" field and click "Save changes":
- Return back to the tab with the "App Verification Details" popup where a few seconds ago you clicked the "Add Platform" button and click the "Save" button:
- This will close the "App Verification Details" popup. Click once again anywhere on the "Complete App Verification" box:
You will see the "App Verification Details" popup. At this point, you want to do your best to enable Facebook reviewers to test your Joomla/OSEmbed Pro/Facebook integration as if they were your site administrators.
- Provide detailed step-by-step instructions on how they can test your Facebook App integration on your Joomla/OSEmbed Pro site. Include any testing credentials required to access your Joomla site and its integration with this Facebook App.
You can use the following structure, which worked for us (make sure you replaced example.com with the domain name of your own Joomla/OSEmbed Pro site):
Login URL: https://example.com/administrator
Login username: <your-joomla-superuser-username>
Login password: <your-joomla-superuser-password>
To see how the "Oembed Read" permission is used in my app:
Log into the https://example.com/administrator
At the top menu, go to "Content" > "Articles".
You will see listed articles. Click on the name of the "<your-article-with-facebook-url-embedded>" article.
You will see my Joomla article with a Facebook post URL embedded.
Now go to <the-frontend-url-of-your-joomla-article-with-facebook-post-embedded>. You will see that instead of the Facebook post, this frontend page displays its URL.
Go back to the Joomla administrator panel.
At the top menu, go to "Extensions" > "Plugins".
This will open the "Plugins" screen listing the existing plugins. Find the "Content - OSEmbed Pro" plugin and click on its name.
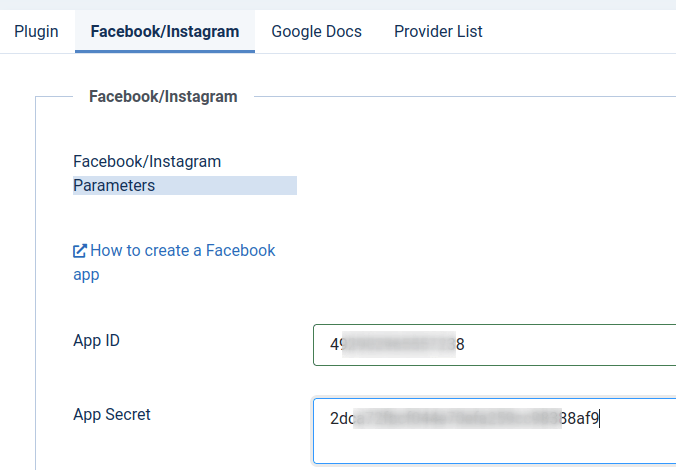
You will see the "Plugins: Content - OSEmbed Pro" screen with the plugin's settings. Click the "Facebook/Instagram" tab.
Enter the ID of this Facebook App you are testing in the "App ID" field.
Enter the App Secret of this Facebook App you are testing in the "App Secret" field.
At the top of the screen, click "Save".
Now go to <the-frontend-url-of-your-joomla-article-with-facebook-post-embedded>. Once this review is approved, this article will display the Facebook post.
- Enter these instructions and click "Save":
- You will see that the "Complete App Verification" section now has a checkmark. You will also notice that the "Submit for Review" at the bottom of the screen button is still grayed out. You need to submit to Facebook reviewers some more data.
- Click anywhere on the "Requested Permissions and Features" box:
- You will see the "Tell Us Why You're Requesting Oembed Read" box, as shown in the next image:
- As you can see, you have two fields to fill in and a check box to check. The first field gives you the following prompt:
Please provide a detailed description of how your app uses the permission or feature requested, how it adds value for a person using your app, and why it's necessary for app functionality.
- Enter in it something along the following lines, which worked for us:
My "Oembed Read" feature will enable my Joomla extension "OSEmbed Pro" from joomlashack.com to embed Facebook posts inside Joomla articles.
- In the second field, enter the URL of the Facebook post you embedded in your Joomla article that you previously created for yourself and Facebook testers/reviewers. Then click "Save":
- You will see that the "Request Permissions and Features" box has been cleared and has a checkmark now, as shown in the next image. Click the "Submit for Review" button:
- You will see the "Please Re-enter Your Password" popup box, as shown in the next image. Enter your Facebook password and click "Submit":
- This will bring up the "App Submission Received" popup box, as you can see in the next image. Click "Close" or "Take Survey" as you see fit:
- After a brief screen activity, you will see the "In App Review" step of the progress bar at the top changed from gray to blue:
- As you can see, Facebook promises to review your request in five days. I submitted my review at 00:20 GMT. Facebook approved it for us in ten hours:
- To check if the status of your request changed from "Pending" to "Approved", go to "App Review" > "Requests":
Step #5. Connect your Joomla site to Facebook using OSEmbed Pro
Once Facebook approved your request for the Facebook App review, you are ready to connect your Joomla site to Facebook using OSEmbed Pro.
- In your Facebook Developer dashboard, go to "Settings" > "Basic".
- On the next screen, copy the number in the "App ID" field and click "Show":
- You will be asked to enter a password. Enter your password:
- Copy your Facebook App secret from the "Secret" field:
- In your Joomla 5 administrator panel, go to your OSEmbed Pro plugin settings and paste the Facebook App ID and Facebook App Secret into their respective fields:
- Click "Save" or "Save & Close".
- Test embedding a Facebook post in your Joomla article. You should see the posts successfully embedded.