Documentation for Joomla 3
Once you connected your Shack Analytics Joomla extension to Google Tag Manager and Google Analytics, you can start tracking how users engage with your Joomla site.
In this document, you will learn how to track clicks on a button. For this demonstration, I selected a button of a form created with Shack Forms Joomla extension.
This is a three-step process.
- Create a tracking tag in Google Tag Manager
- Test the tracking tag
- Submit the tracking tag
Let's take a look at this process in more detail.
Step #1. Create a tracking tag in Google Tag Manager
- Log into your Google Tag Manager and your Google Analytics console.
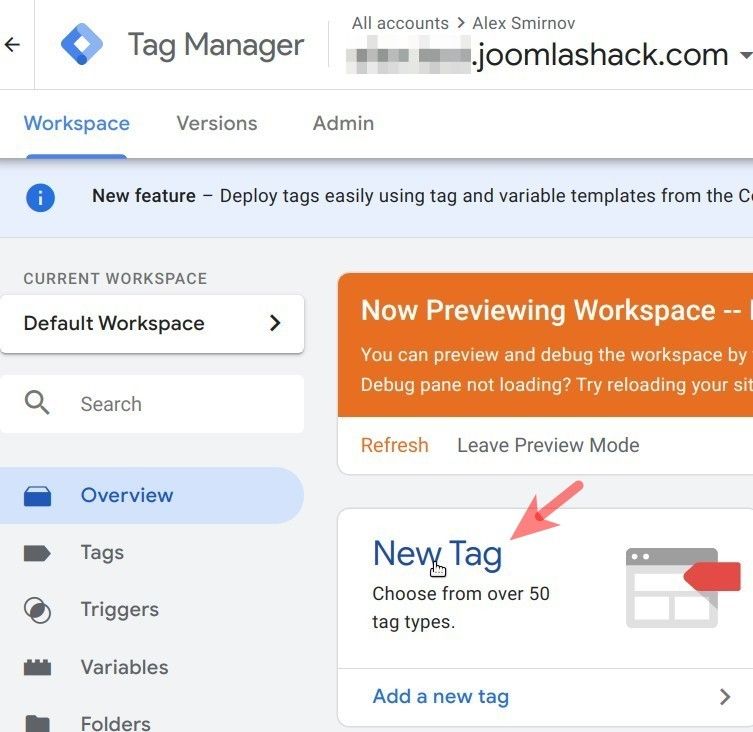
- Click "New Tag":
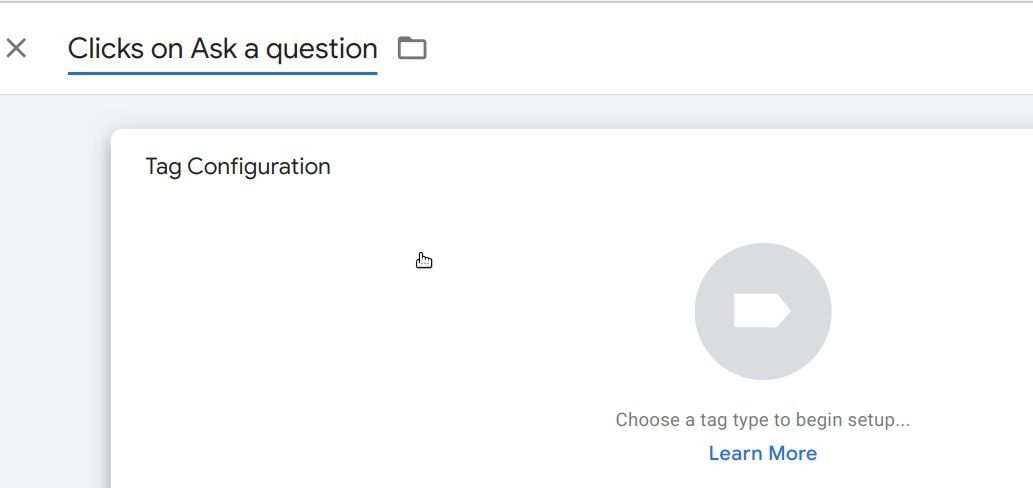
- Enter a title for your tracking tag and click anywhere on the "Tag Configuration" panel:
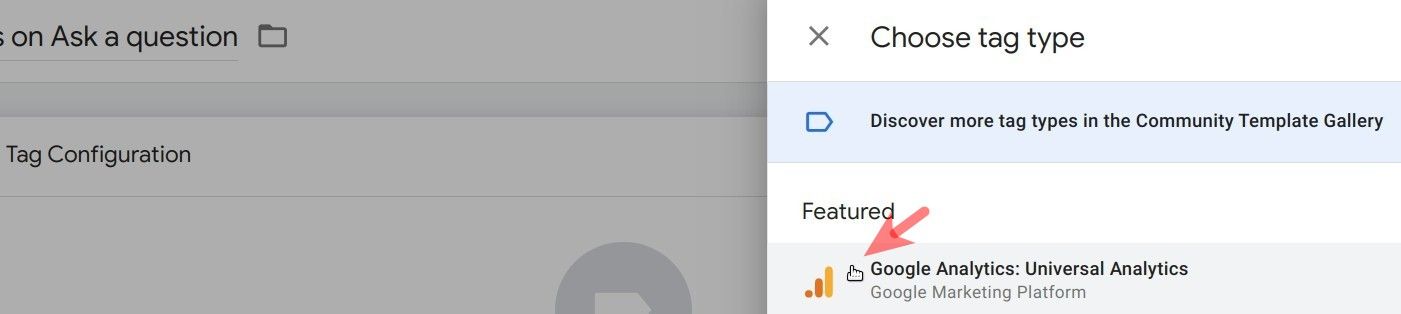
- You will see the "Choose tag type" panel on the right side of the screen. Click "Google Analytics: Universal Analytics":
This will bring up the "Tag Configuration" and "Triggering" panels.
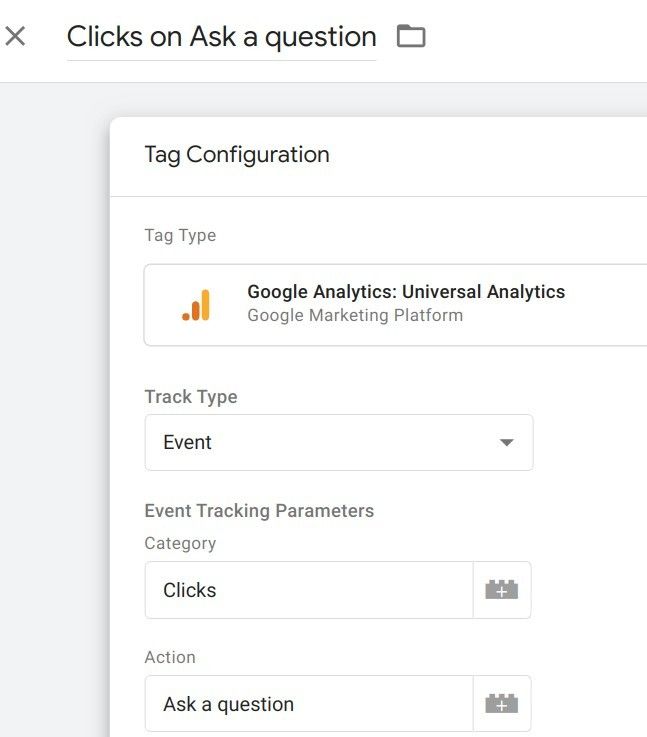
- In the "Track Type" field, select "Event".
- Enter something meaningful in the "Category" field. For this demonstration, I entered "Clicks".
- Enter something meaningful in the "Action" field. For my demonstration, I entered "Ask a question":
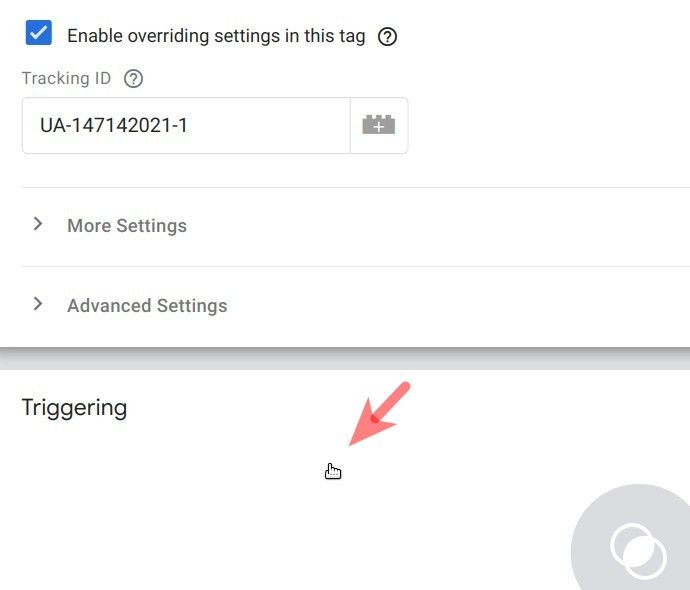
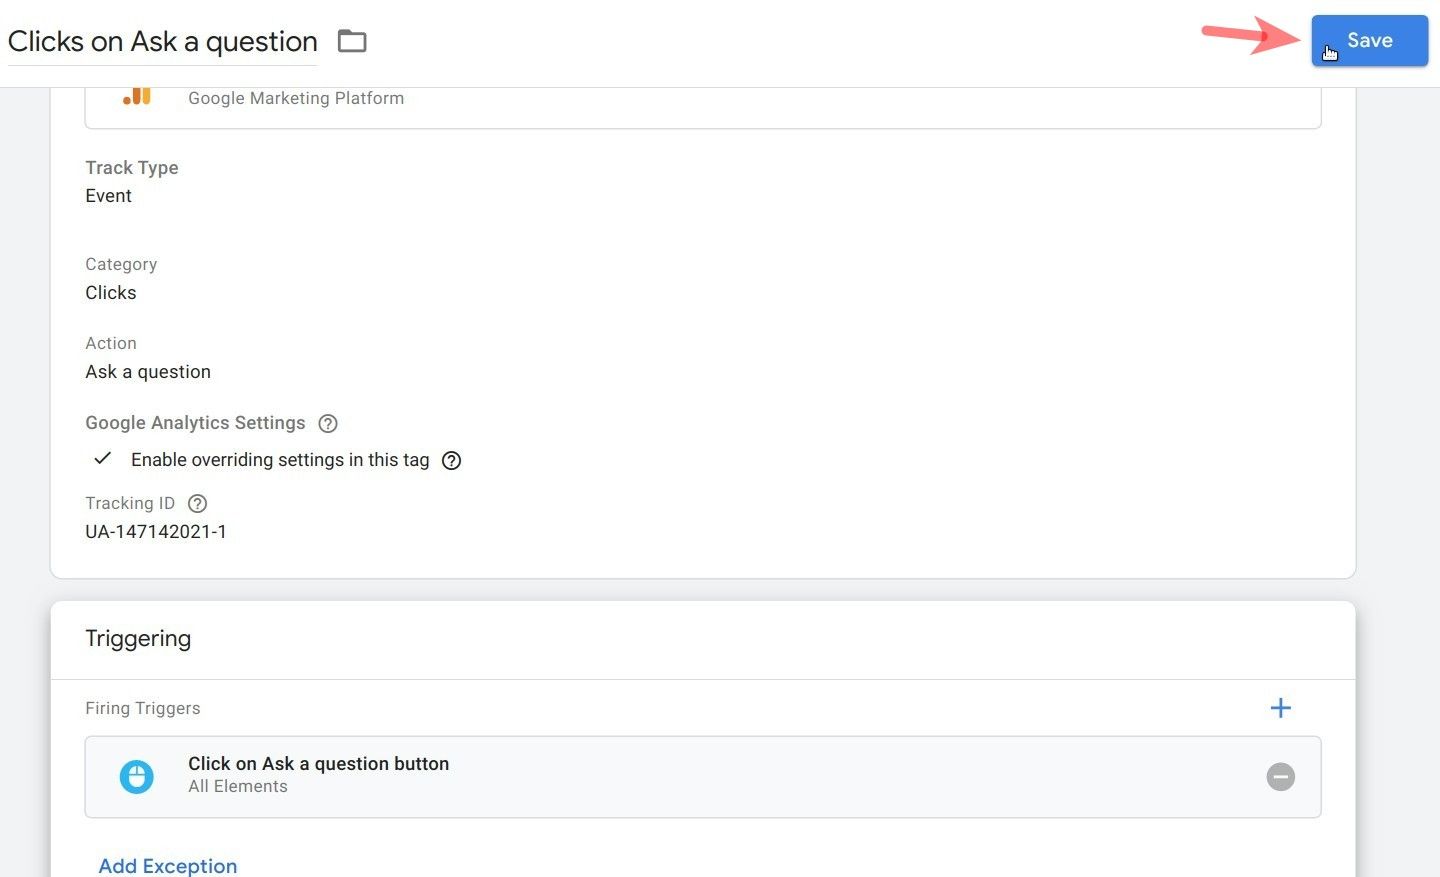
- Scroll slightly down the panel and tick the "Enable overriding settings in this tag" checkbox. Enter your Google Analytics Tracking ID into the "Tracking ID" field:
![]()
- Click anywhere on the "Triggering" panel:
- In the top right corner of the next screen, click the the "+" icon:
![]()
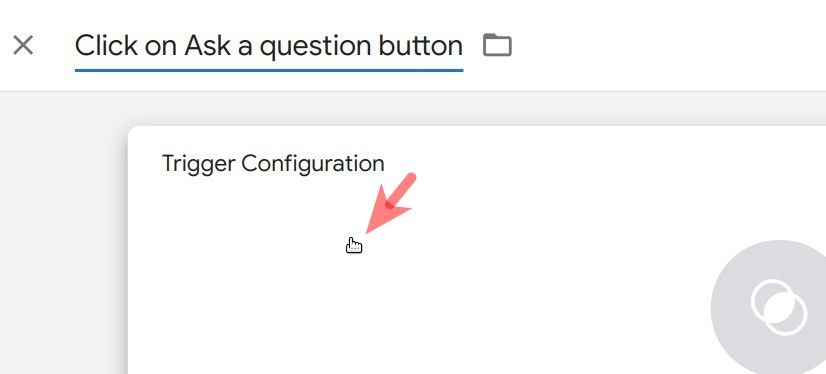
- On the next panel, enter a title instead of the "Untitled Trigger" and click anywhere within the "Trigger Configuration" panel:
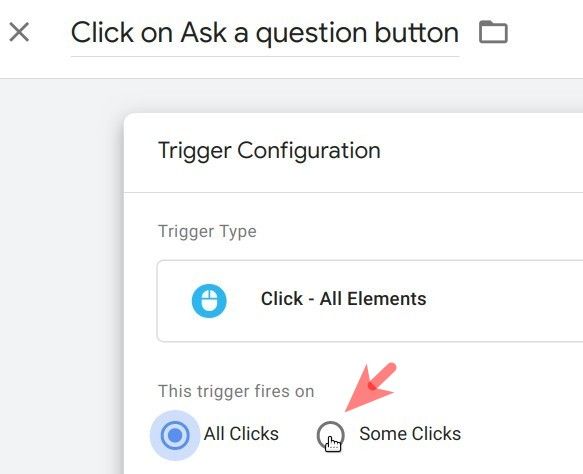
- This will bring up the "Choose trigger type" sliding panel on the right side of the screen. Find the "Click" group of trigger types and click "All Elements":

- This will bring up the "Trigger Configuration" panel. Click "Some Clicks":
- You will see three new boxes appear underneath. Click "Click Target" and then click "Build-in Variable":
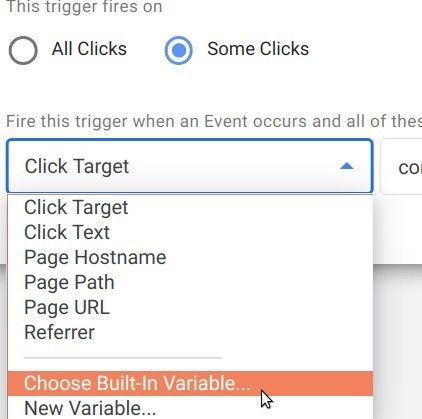
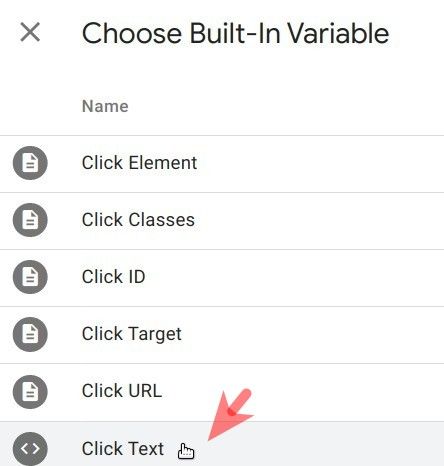
- You will see the "Choose Built-In Variable" panel sliding out on the right side of the screen. Click "Click Text":
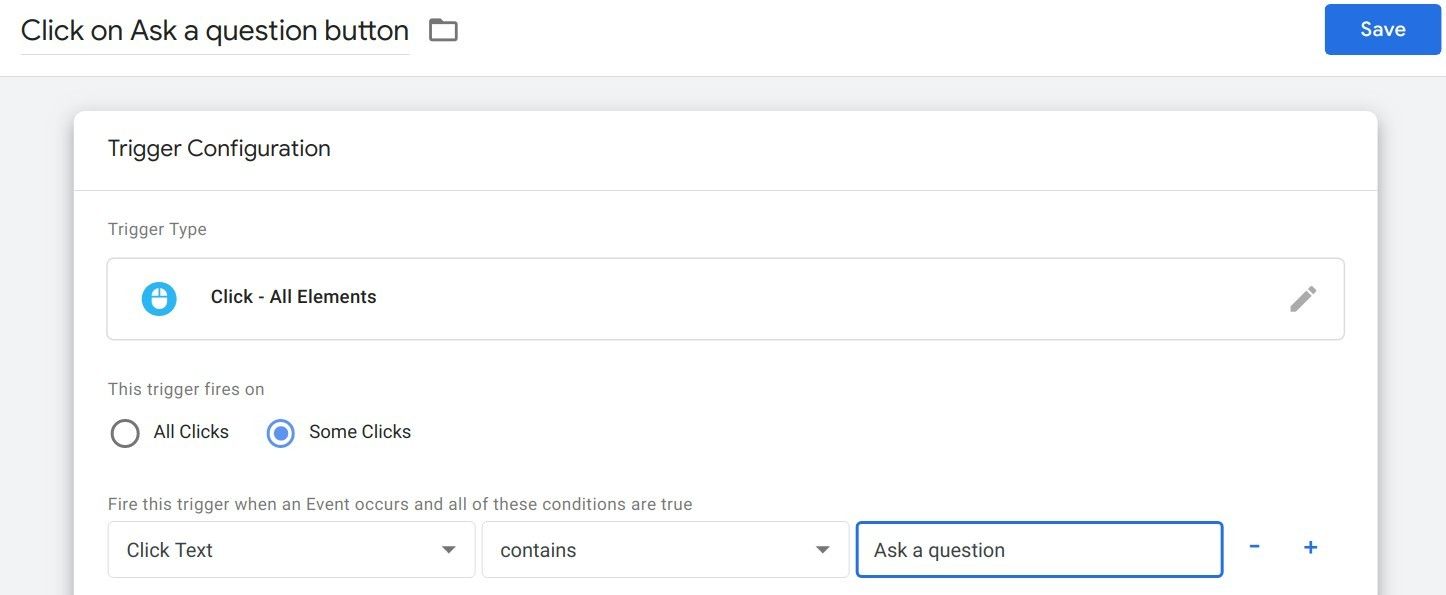
- You once again will see the "Trigger Configuration" panel. Make sure the field in the middle is set to "contains" and enter the text of the button to be tracked into the right field. For my demonstration, I entered "Ask a question":
- In the top right corner, click the blue "Save" button.
- On the next screen, click the same "Save" button:
Step #2. Test the tracking tag
- In the top right corner of your Google Tag Manager console, click the "Preview" button:

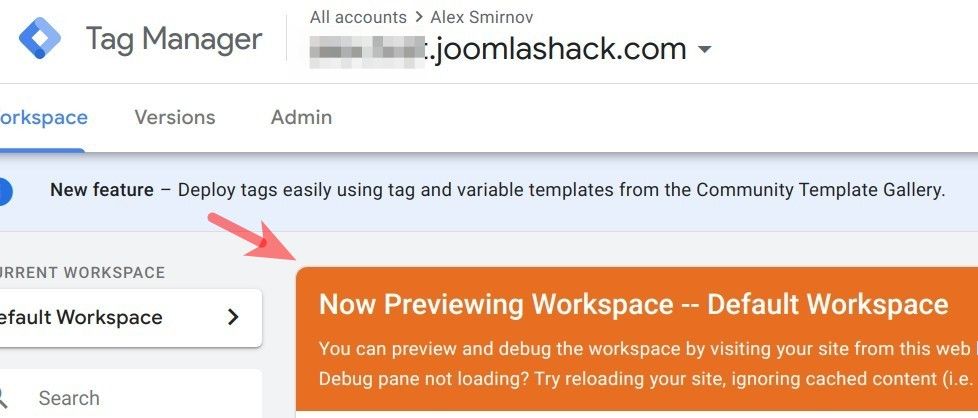
You will see the orange panel with the "Now Previewing Workspace" title:
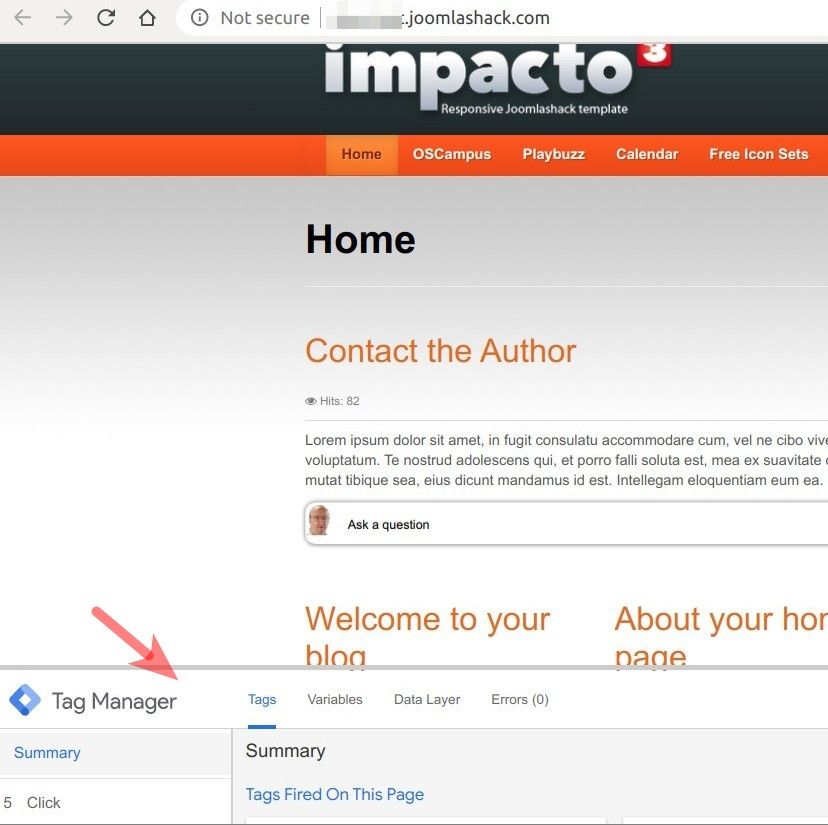
- Visit your Joomla site frontend and refresh the page with the button clicks on which you would like to track. You should see the Google Tag Manager preview panel underneath it:
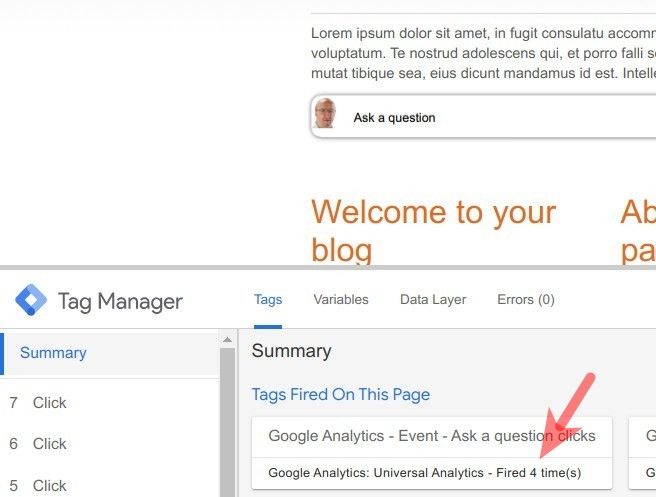
- Click your button. You should see that your click has been registered in the "Summary" > "Tags Fired On This Page":
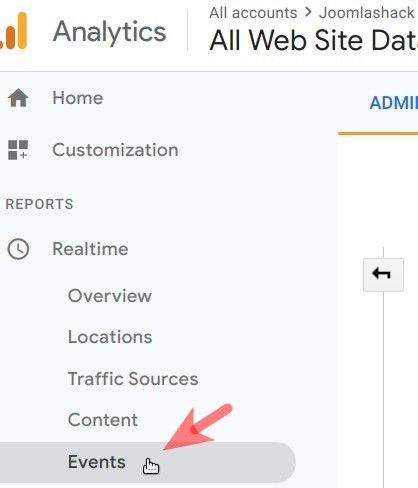
- Now go to your Google Analytics console > "Realtime" > "Events":
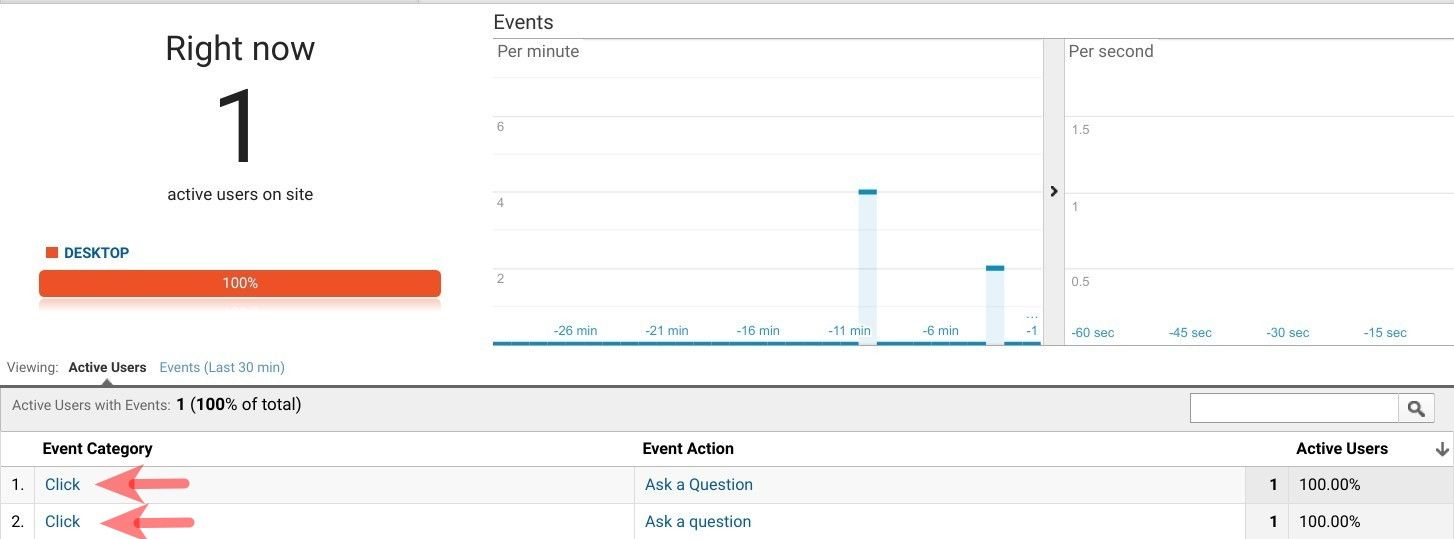
- You will that Google Analytics also tracked the events of the click on the button:
Step #3. Submit the tracking tag
So far so good! Everything we've set so far was in the "Preview" mode. Let's move from this testing mode to the live mode.
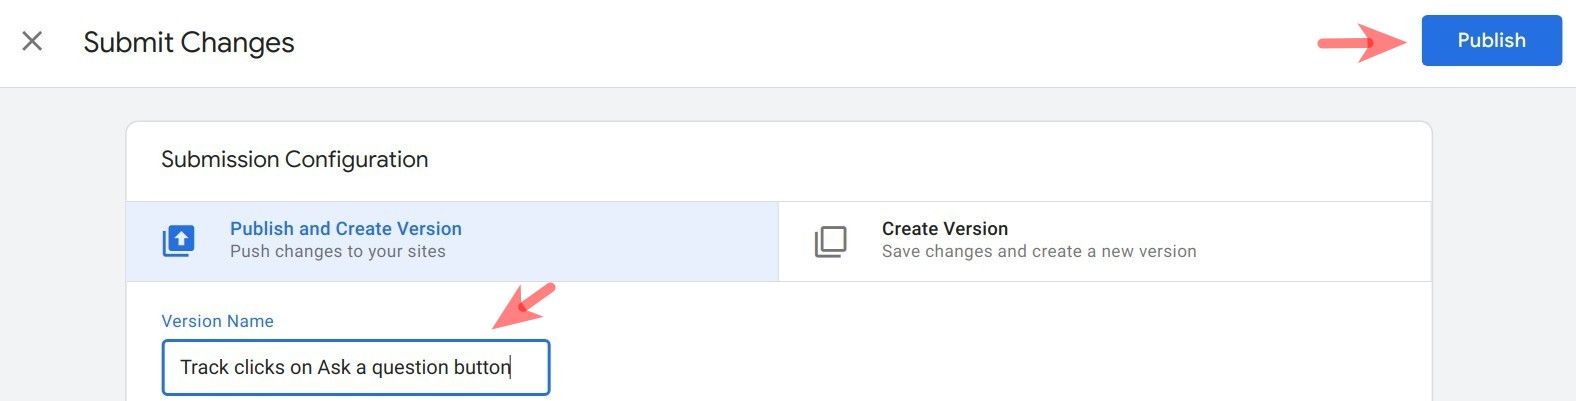
- In your Google Tag Manager console, in the top right corner, click "Submit":

- You will see the "Submit Changes" box. Add a descriptive name into the "Version Name" box and click "Submit":
- You will see your version under the "Version" tab of your Google Tag Manager:

Documentation for Joomla 5
Once you connected your Shack Analytics Joomla 5 extension to Google Tag Manager and Google Analytics, you can start tracking how users engage with your Joomla site.
In this document, you will learn how to track clicks on a button. For this demonstration, I selected a button of a form created with the Shack Forms Joomla extension.
This is a three-step process.
- Create a tracking tag in Google Tag Manager
- Test the tracking tag
- Submit the tracking tag
Let's take a look at this process in more detail.
Step #1. Create a tracking tag in Google Tag Manager
- Log into your Google Tag Manager and your Google Analytics console.
- Click "New Tag":
- Enter a title for your tracking tag and click anywhere on the "Tag Configuration" panel:
- You will see the "Choose tag type" panel on the right side of the screen. Click "Google Analytics: Universal Analytics":
This will bring up the "Tag Configuration" and "Triggering" panels.
- In the "Track Type" field, select "Event".
- Enter something meaningful in the "Category" field. For this demonstration, I entered "Clicks".
- Enter something meaningful in the "Action" field. For my demonstration, I entered "Ask a question":
- Scroll slightly down the panel and tick the "Enable overriding settings in this tag" checkbox. Enter your Google Analytics Tracking ID into the "Tracking ID" field:
![]()
- Click anywhere on the "Triggering" panel:
- In the top right corner of the next screen, click the the "+" icon:
![]()
- On the next panel, enter a title instead of the "Untitled Trigger" and click anywhere within the "Trigger Configuration" panel:
- This will bring up the "Choose trigger type" sliding panel on the right side of the screen. Find the "Click" group of trigger types and click "All Elements":
- This will bring up the "Trigger Configuration" panel. Click "Some Clicks":
- You will see three new boxes appear underneath. Click "Click Target" and then click "Build-in Variable":
- You will see the "Choose Built-In Variable" panel sliding out on the right side of the screen. Click "Click Text":
- You once again will see the "Trigger Configuration" panel. Make sure the field in the middle is set to "contains" and enter the text of the button to be tracked into the right field. For my demonstration, I entered "Ask a question":
- In the top right corner, click the blue "Save" button.
- On the next screen, click the same "Save" button:
Step #2. Test the tracking tag
- In the top right corner of your Google Tag Manager console, click the "Preview" button:
You will see the orange panel with the "Now Previewing Workspace" title:
- Visit your Joomla 5 site frontend and refresh the page with the button clicks on which you would like to track. You should see the Google Tag Manager preview panel underneath it.
- Click your button. You should see that your click has been registered in the "Summary" > "Tags Fired On This Page":
- Now go to your Google Analytics console > "Realtime" > "Events":
- You will that Google Analytics also tracked the events of the click on the button:
Step #3. Submit the tracking tag
So far so good! Everything we've set so far was in the "Preview" mode. Let's move from this testing mode to the live mode.
- In your Google Tag Manager console, in the top right corner, click "Submit":
- You will see the "Submit Changes" box. Add a descriptive name into the "Version Name" box and click "Submit":
- You will see your version under the "Version" tab of your Google Tag Manager: