Documentaton for Joomla 6
- In your Joomla 6 administrator dashboard, go to Components > Shack Analytics Pro > Tracking Tags:
![]()
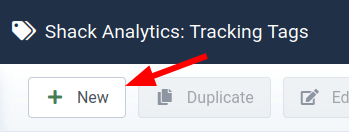
- This will bring you to the Shack Analytics: Tracking Tags screen, as you can see in the next image. In the top left corner, click New:
- You will see the Shack Analytics: New Tracking Tag tag creation page:
![]()
- Enter a title for your tag.
- Enter your tracking code to be added to the header or footer of your site into the respective box.
- Under the Article Assignment tab, select if you wish to display unpublished articles on this page.
- Under the Menu Assignment tab, select if you wish to display unpublished menu items on this page.
- Click Save or Save & Close.
Once you have created your tracking tags, you are ready to start adding them to your Joomla site.
Documentaton for Joomla 3
Step #1. Create a tracking tag
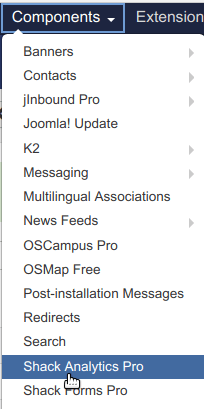
You create a tracking tag on the Shack Analytics: Tracking Tags page. You will be taken to this page by default when you go to Components > Shack Analytics Pro:
- Click the New button in the top left corner:

- You will see the Shack Analytics: New Tracking Tag tag creation page.
![]()
- Enter a title for your tag.
- Enter your tracking code to be added to the header or footer of your site into the respective box.
- Under the Article Assignment tab, select if you wish to display unpublished articles on this page.
- Under the Menu Assignment tab, select if you wish to display unpublished menu items on this page.
- Click Save or Save & Close.
Step #2. Add a tracking tag
Once you create a tracking tag, add it to your Joomla site. You have the following three options to do this:
- Add a tracking tag globally to the whole website.
- Add a tracking tag to a required menu item.
- Add a tracking tag to a required Joomla article.
Here is how to use these options.
Option #1. Add a tracking tag globally to the whole website
- Go to Components > Shack Analytics Pro in the top navigation menu in your Joomla admin panel.
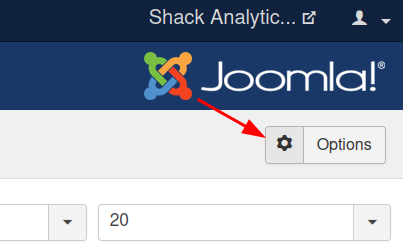
- This will bring you to the Shack Analytics: Tracking Tags screen. Click the Options button in the top right corner:
- You will be taken to the Shack Analytics: Configuration screen. Select the required tracking tag in the Global Tracking Tag field:
![]()
- Click Save or Save & Close.
Option #2. Add a tracking tag to a required menu item
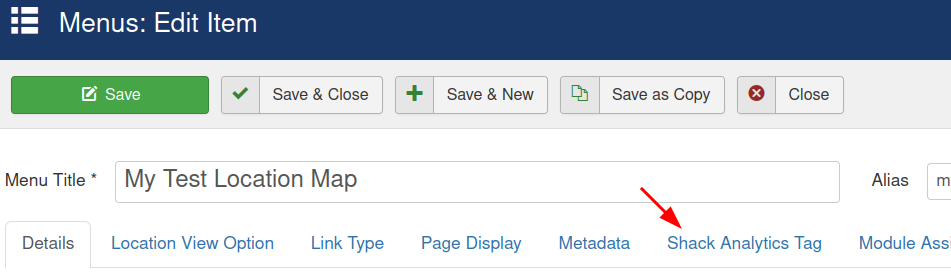
- Open the required menu item for editing.
- Click the Shack Analytics Tag tab:
- Select the required tracking tag in the Tracking Tag field:
![]()
- Click Save or Save & Close.
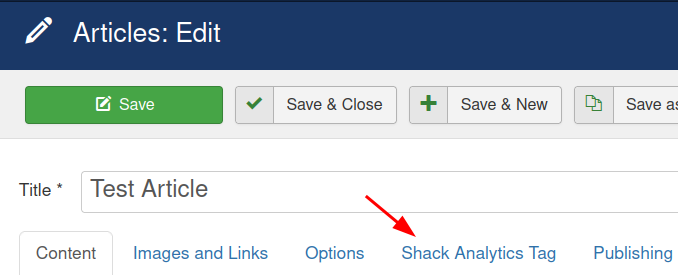
Option #3. Add a tracking tag to a required Joomla article
- Open the required Joomla article for editing.
- You will see the Article: Edit screen. Click the Shack Analytics Tag tab:
- Select the required Shack Analytics Pro tracking tag in the Tracking Tag field:
![]()
- Click Save or Save & Close.