You can integrate Shack Forms with Mailchimp to build an email list. But Shack Forms allows you to add more than just the subscriber's email address, name and a phone number to the Mailchimp database of your email list subscribers.
You can add in it any piece of data as you see fit. And the more data you have for each of your email list subscribers, the more tailored and targeted your email marketing campaigns you send to them could become.
Both your Shack Forms and Mailchimp keep those pieces of data as fields. Adding new Shack Forms fields to your Mailchimp email list is a three-step process:
- Connect your Shack Forms module to Mailchimp
- Add a new field in your Shack Form
- Create a field with the same alias in Mailchimp.
As the end result, you will see this new Shack Form field as a column in the Mailchimp list of your subscribers:
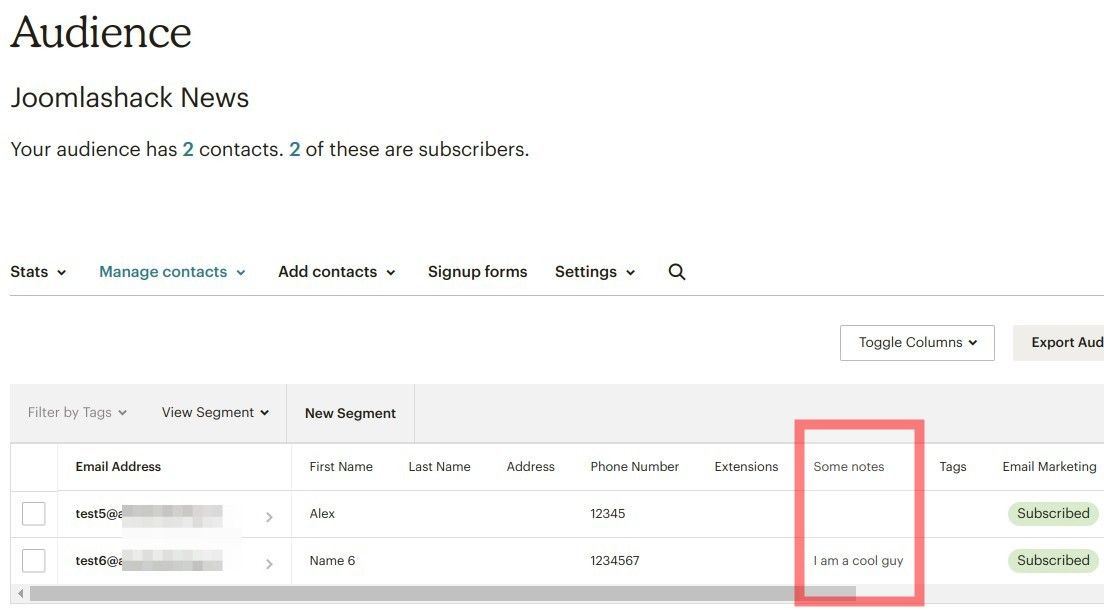
In the image of my Mailchimp test list of subscribers above, you can see the "Some notes" column. It obediently displays the data collected by the corresponding field of my Shack Form.
Let's take a look at how to achieve this in more detail. Your new field can be a text field, or a radio button, or a checkbox.
For our demonstration, we will create the same "Some notes" text field you've seen on the image above.
Step #1. Connect your Shack Forms module to Mailchimp
- See this tutorial on detailed step-by-step instructions.
Step #2. Create a new Shack Forms field
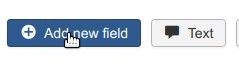
- In your Joomla administrator panel, open up your Shack Forms module.
- Click "Add new field":
- Create a new field with the following details:
- Field label: Your notes
- Alias name: notes. Important: copy this alias as you will need it in the next step.
- Field type: Text
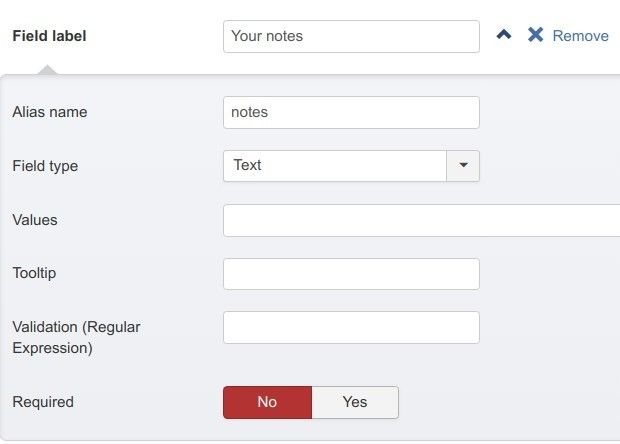
- Click "Save" or "Save & Close".
Good job! Now let's create a twin of this field in our Mailchimp audience.
Step #3. Create a corresponding Mailchimp field
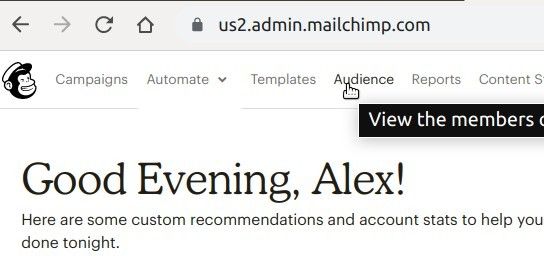
- Log into your Mailchimp account.
- At the top of the screen, click "Audience":
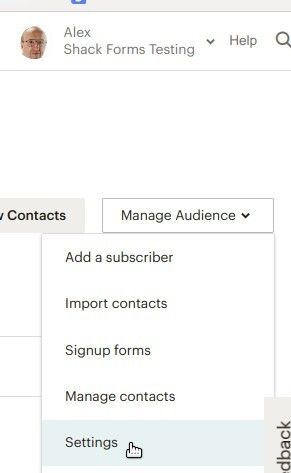
- On the right side of the screen, click "Manage Audience" > "Settings":
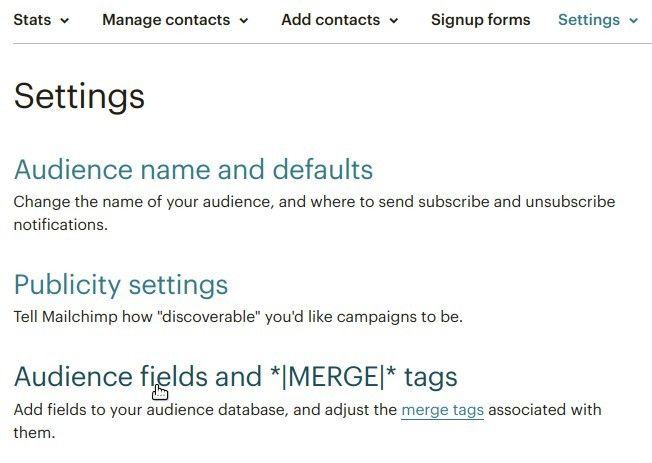
- You will see the "Settings" tab screen. Click "Audience fields and *[MERGE]* tags":
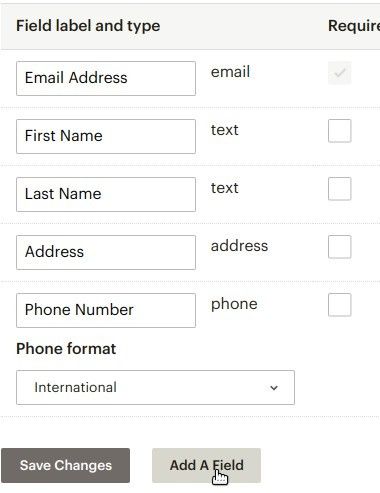
- You will be taken to the list of your default Mailchimp fields. Here you can manage them. In the bottom left corner of the screen, click "Add A Field":
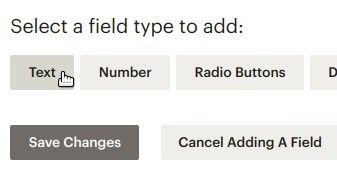
- You will see a new row of various field types appeared underneath. Click "Text":
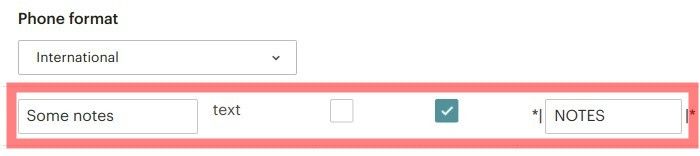
- You will see a new box appeared with "Untitled" inside and "text" next to it:

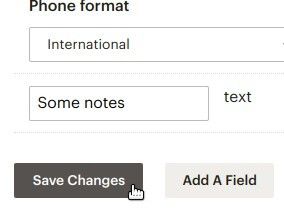
- Enter "Some notes" instead of the "Untitled" and "notes" instead of the "MERGE5":
- In the bottom left corner, click "Save Changes":
Now visit the frontend of your site and submit your Shack Form with some test data. Then visit your Mailchimp audience list. You will see the new column "Some notes". It will also contain the data your test form submitter entered into the form's "Your notes" field.