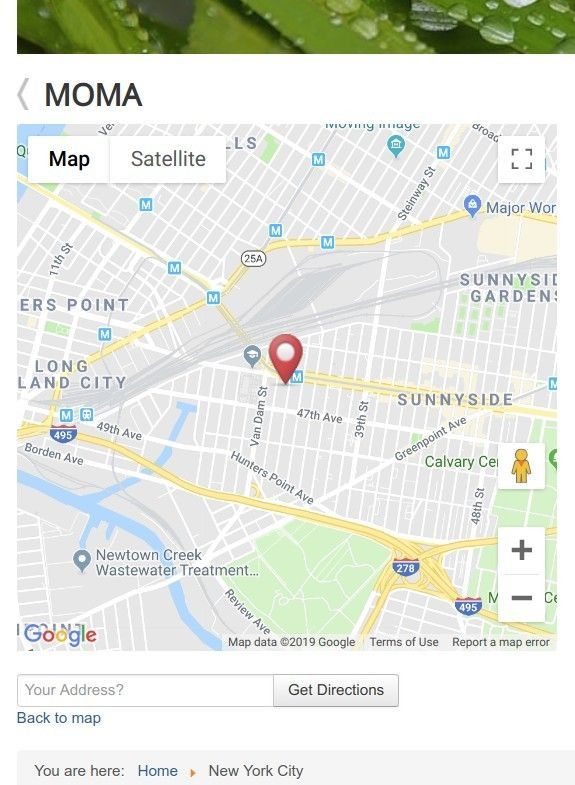
By default, your Shack Location pages will display the following:
- The Google map of the location
- The "Get Directions" search box of the location.
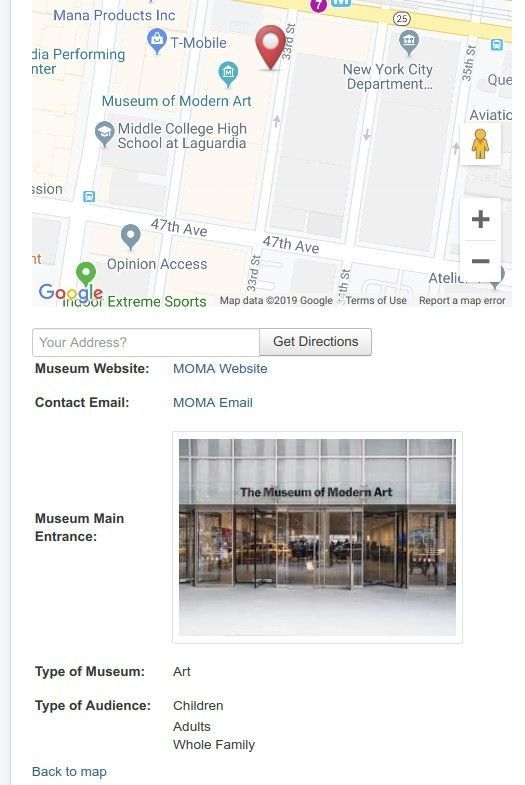
Take a look, for example, at the page of the location of the Museum of Modern Art (MOMA) in New York City:
What if you would like to display some more useful information for your MOMA location viewers?
For example, you would like to display the following useful information about the MOMA:
- URL of MOMA website
- MOMA contact email address
- Image of MOMA main entrance
- Type of museum
- Type of audience.
You can achieve this with Shack Locations custom fields. You create the required custom fields. You then fill them in with the required information. This information then gets displayed on your location's page.
Video Guide to Custom Fields
Text and Image Guide to Custom Fields
Text and Image Guide to Custom Fields
I'm going to show you how to customize your location page with custom fields.
For this tutorial, we will add to our MOMA location page the following custom fields:
- "Link", to display the URL of MOMA website
- "Email", to display the MOMA contact email address
- "Image", to display the image of MOMA main entrance
- "Select List", to display the type of museum
- "Multi Select", to display the types of audience.
Let's get started.
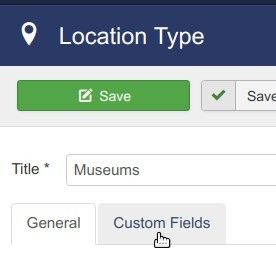
- In your Shack Locations control panel, go to "Location Types":
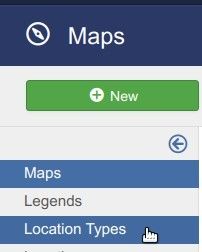
- You will be taken to the "Location Types" screen. Click on the title of your location type. For my demonstration, I clicked "Museums":
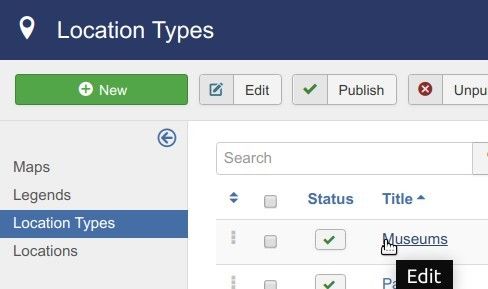
- Click the "Custom Fields" tab:
Excellent! Now let's create, one by one, the required custom fields for our MOMA location type.
- Click the "Link" button:
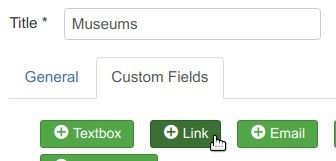
- Enter "Museum Website" in the "Name" and "Label" fields and click "Email":
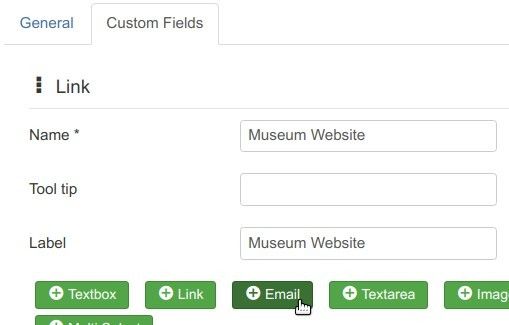
- Enter "Contact Email" in the "Name" and "Label" fields and click "Image":
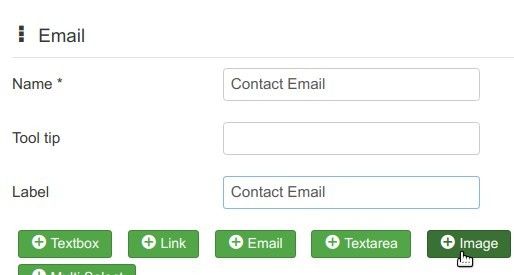
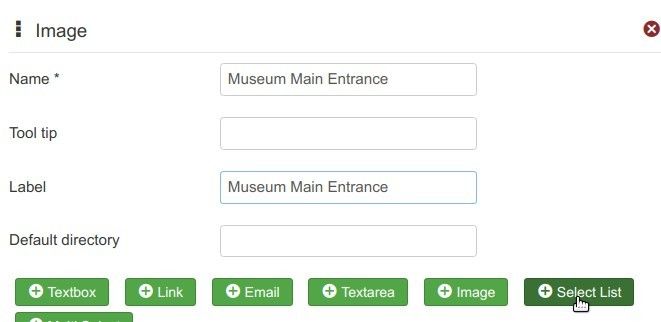
- Enter "Museum Main Entrance" in the "Name" and "Label" fields and click "Select List":
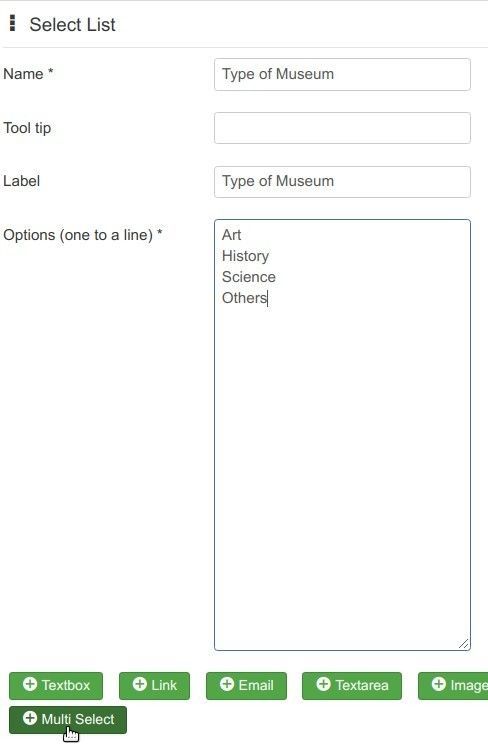
- Enter "Type of Museum" in the "Name" and "Label" fields.
- In the "Options" field, enter, each on its own line:
- "Art"
- "History"
- "Science"
- "Others".
- Click "Multi Select":
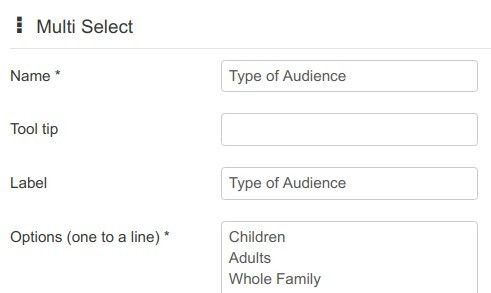
- Enter "Type of Audience" in the "Name" and "Label" fields.
- In the "Options" field, enter, each on its own line:
- "Children"
- "Adults"
- "Whole Family":
Now is a good time to save these custom fields. Click "Save & Close".
Good job! You now have the required custom fields. But they are empty. Let's fill them in with the information you would like those fields to display in our MOMA location page.
- Go to "Locations" > MOMA and click the "Custom Fields" tab:

- Fill in all the custom fields:
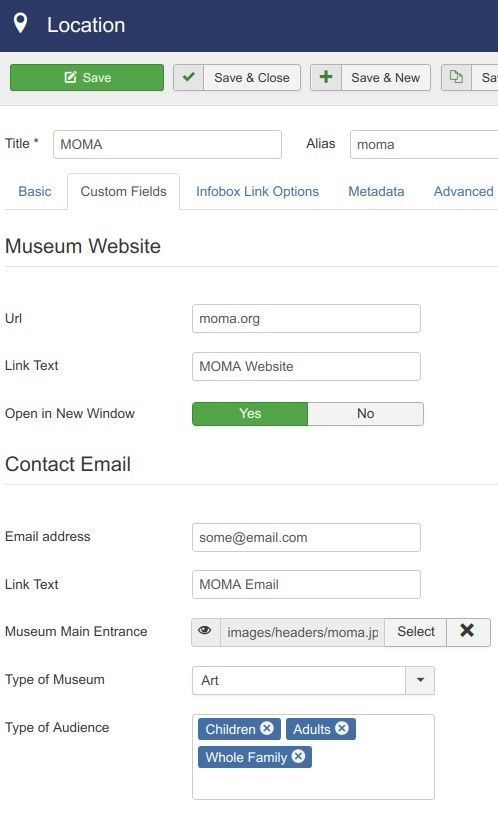
- Click "Save" or "Save & Close".
Excellent! When you check the MOMA location page again, you will see the custom fields at work: