You've installed Joomla!, installed all of the components, modules, and mambots you need, and you've created your content and menus. Now you want to create a custom look for your Joomla! site, but you don't know how to create a template. This article will step through the creation of a very basic template in Joomla! Hopefully, by the end of this article, you will have a basic understanding of what goes into a Joomla! template. (Note: This information only applies to Joomla! 1.0.X. It does not apply to version 1.5.)
Template File Structure
A basic Joomla! template will have the following file structure:
- /templatename
- /css
- /template_css.css
- /index.html (blank file)
- /images
- /index.html (blank file)
- /... (all of your template images)
- /index.php
- /templateDetails.xml
- /template_thumbnail.png
- /css
/templatename
Your template will reside in a folder with the same name as your template.
/css
The CSS folder contains your template CSS file, "template_css.css", and any other CSS file you feel is necessary for your template.
/images
The images folder should contain all (if any) of your template images. The images could be stored anywhere, but storing them in the images folder keeps a consistent structure for your template.
/index.php
The index is the file that Joomla! looks for when rendering your template. I will discuss this in more detail later.
/templateDetails.xml
The templateDetails xml file contains details about your template, which Joomla! uses to install your template from your installation ZIP file. I will discuss this in more detail later.
/index.html - blank files
The blank "index.html" files are there to prevent direct access to the default Apache index page.
Step 1: Design
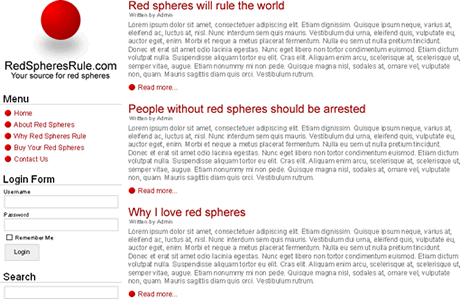
The first thing you should do when creating a template is to design the layout, grid, graphics, typography, etc. for your site. I like to use Macromedia Fireworks to design my site before I write any code. Here is what my design looks like:

Step 2: HTML Markup
Now that you have designed the look of your template, it is time to write some XHTML markup in your 'index.php' file. Because this is a simple 2-column design with no headers and no footers, I am only using 2 DIV elemenets for my site's layout. Here is the XHTML markup:
RedSpheresRule.com
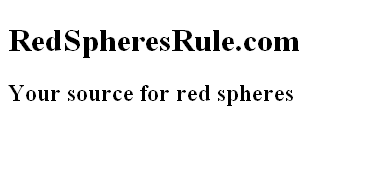
Notice that I have put comments as placeholders for where I will load the modules and the mainBody for the template. Because we have not written any of the CSS code, this is what the resulting html page would look like:

Step 3: CSS
This is where we start to see the design elements really take shape. At the end of this step, we will have our basic framework in place. Here is the CSS code:
* {
  margin: 0;
  padding: 0;
}
body {
  background-color: #fff;
  color: #666;
  font-family: Arial, Helvetica, sans-serif;
  font-size: 12px;
}
a, a:link, a:visited {
  color: #900;
  text-decoration: none;
}
a:hover {
  text-decoration: underline;
  color: #000;
}
h1#sitetitle {
  padding: 100px 0 0;
  background: #fff url('../images/logo.png') center top no-repeat;
  font-size: 20px;
  font-weight: bold;
  text-align: center;
  color: #000;
}
h1#sitetitle a, h1#sitetitle a:link, h1#sitetitle a:visited {
  text-decoration: none;
  color: #000;
}
h1#sitetitle a:hover {
  text-decoration: none;
  color: #000;
}
h2#siteslogan {
  font-size: 14px;
  font-weight: bold;
  margin: 0 0 10px;
  text-align: center;
  color: #000;
}
#sidebar {
  width: 215px;
  margin: 10px 0 10px 10px;
  float: left;
  color: #000;
}
#mainbar {
  margin: 10px 10px 10px 235px;
}
/*
Joomla Elements Will be added in Step 4: Joomlafy
*/
