In the "previous tutorial", you learned how to make your Joomla articles look more exciting and more interesting. But what if your content needs more than a title and text?
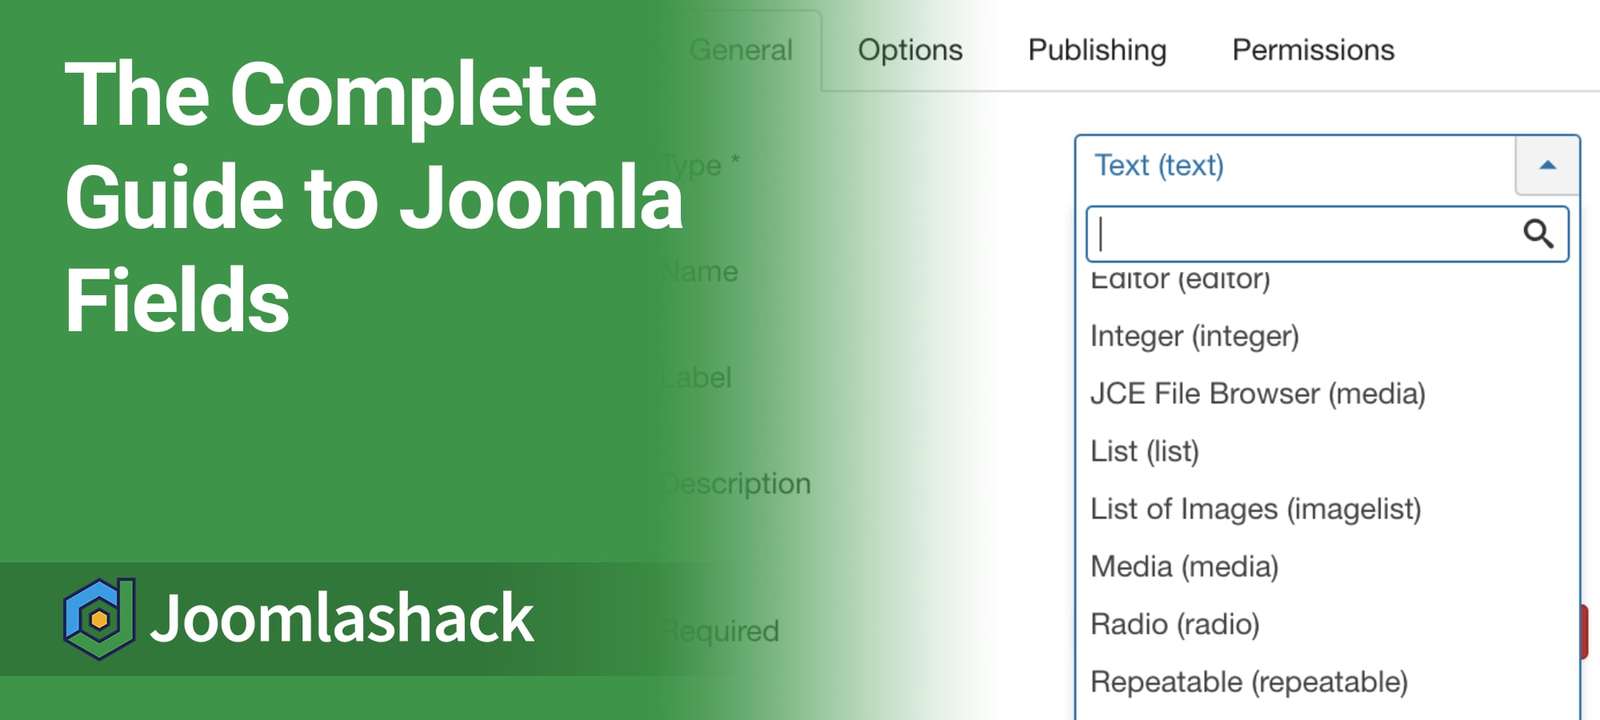
This tutorial explains how you can add interesting and useful data to your Joomla articles with custom fields. Joomla provides custom fields which you can use to show dates, numbers, images, URLs and much more.
At the end of this tutorial, you'll be able to do the following:
- Understand the different types of Joomla fields.
- Display the fields on your Joomla articles.
Introducing Fields
Often you write content that is very straightforward. Simple content doesn't need more than a title, plus some main text. However, you may have some content that must be more detailed.
For example, imagine you want to list businesses on your Joomla site. Each business requires a title and text, plus also a phone number, logo, address, and website link.
Or imagine that you want to display your company's products. Each product needs a price, photos, weight, and SKU number.
Fields enable you to create rich and detailed content in Joomla. Let's see how fields work. You're going to use the same CASh workflow that we've recommended throughout our blog.
This example is taken from the Joomla 3 Explained book where you build a website for a city called "Joomlaville".
Step #1. Categorize
With Fields, the organization you use is called Field Groups, rather than Categories.
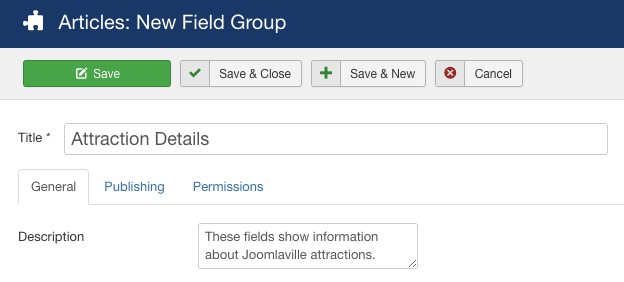
- Go to "Content", then "Field Groups".
- Click "New".
- Title: Attraction Details
- Description: These fields show information about Joomlaville attractions.
- Click "Save & Close".
Step #2. Add
Now let's create fields for the attractions. The first field will be a date field, showing when the attraction first opened.
- Go to "Content", "Fields", and click "New".
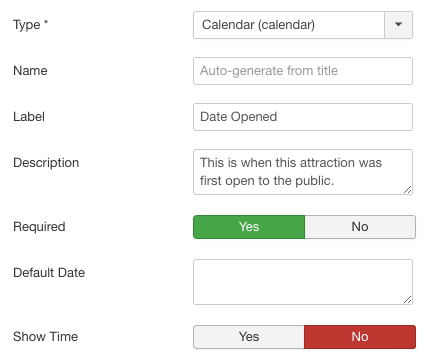
- Title: Date Opened
- Field: Calendar
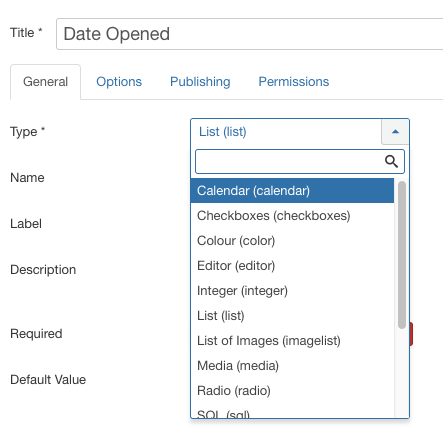
- Description: This is when this attraction was first open to the public.
- Required: Yes.
You also need to categorize this field correctly. On the right-hand side, choose these options:
- Field Group: Attraction Details
- Category: Attractions
- Click "Save & Close" to complete the field.
The next field will be a list of amenities available for visitors to the attraction.
- Go to "Content", "Fields", and click "New".
- Title: Amenities
- Field: List
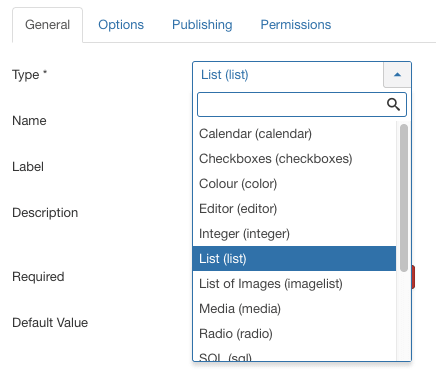
- Description: These are the resources available to visitors.
- Required: Yes
- Multiple: Yes
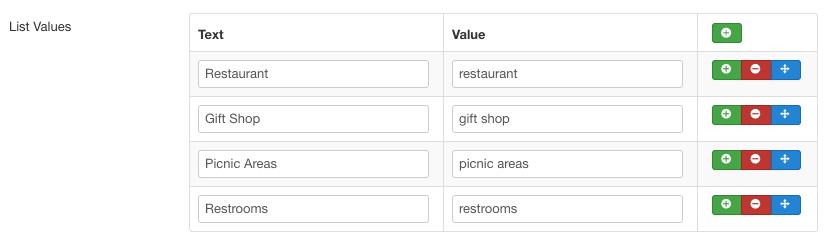
At the bottom of the screen, you'll see a "List Values" area:

- Click the green + icon and enter "Restaurant" into the Text field. This is what visitors will see.
- Also, fill in the "Value" field. This is the name Joomla will use to store the data so it doesn't have to be user-friendly.

- Repeat this process for "Gift Shop", "Picnic Areas", and "Restrooms".
- Field Group: Attraction Details
- Category: Attractions
- Click "Save & Close".
You've successfully added two fields. Let's see how you use them to show information to your website's visitors.
Step #3. Show
In this step, you'll enter data for one of your attractions:
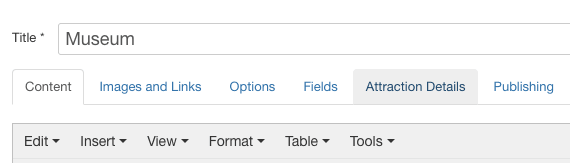
- Go to "Content", then "Articles".
- Open the "Museum" article.
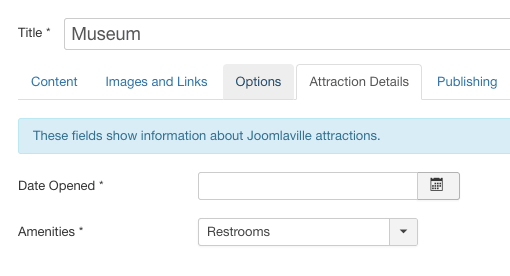
- Click the "Attraction Details" tab:
You should now see both of your fields as in the image below. If you don't see both fields, retrace your steps and make sure you have chosen the correct Field Group and Category for both fields.
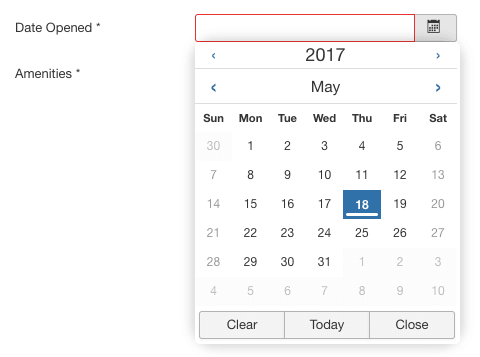
- Click "Date Opened" and choose a date:
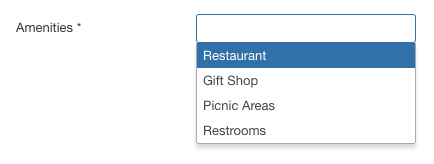
- Click "Amenities" and choose several of the options:
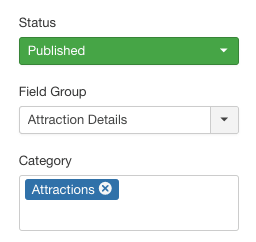
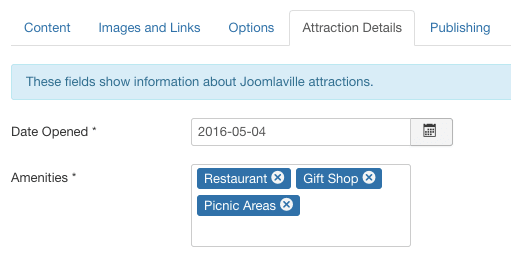
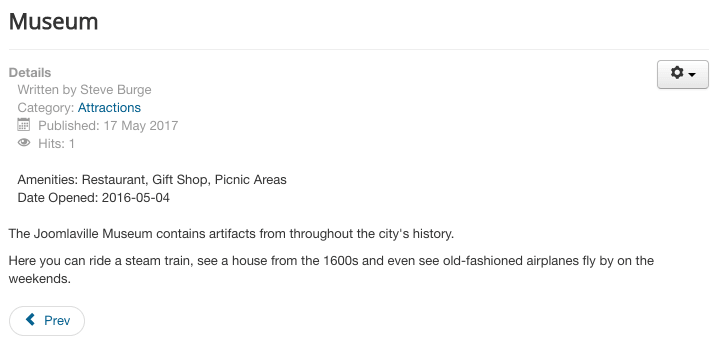
- When you're finished, your fields will look like this:
- Save this article and visit the front of your site. Click the "Attractions" tab and visit the Museum article. You'll see the fields on display:
More Field Examples
Now that you've seen one example of fields, let's see some more advanced examples. The first example will be a logo for your attractions.
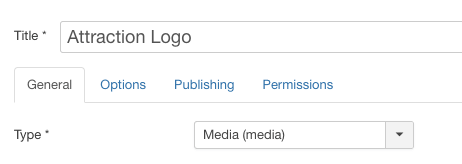
- Go to "Content", "Fields", and click "New".
- Title: Attraction Logo
- Type: Media
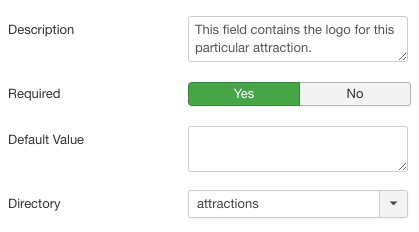
- Description: This field contains the logo for this particular attraction.
- Required: Yes
- Directory: attractions
- Field Group: Attraction Details
- Category: Attractions
- Click "Save & Close".
Let's try that again, but this time you'll show a series of photos from the attraction:
- Title: Attraction Photos
- Type: List of images
- Description: This field contains several photos for the attraction.
- Required: Yes
- Directory: attractions
- Multiple: Yes
- Field Group: Attraction Details
- Category: Attractions
- Click "Save & Close".
Let's add the photos. You can download sample photos from https://ostraining.com/books/j3e/chapter7/.
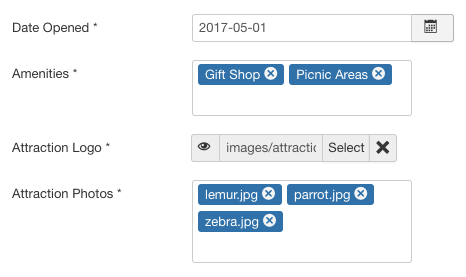
- Go to "Content", "Articles", and open "Zoo".
- Add details for the Date Opened and Amenities fields.
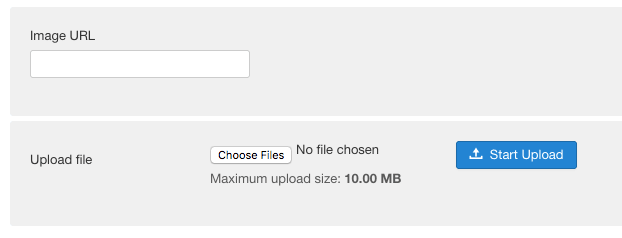
- Click "Select" next to the Attraction Logo field.
- In the pop-up, click "Choose Files" and upload all the sample images you downloaded:
- After uploading, you'll see all four images have been added to the attractions folder:
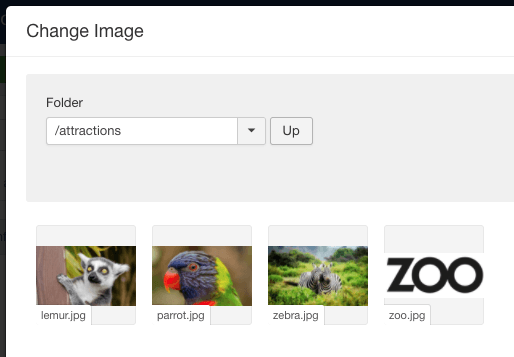
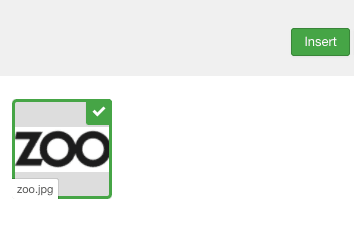
- Select the Zoo image and click "Insert".
- Next, you can add the three animal images to the "Attraction Photos" field. However, you may need to click "Save" for your new images to show. Here is how your screen will look after choosing the three images:
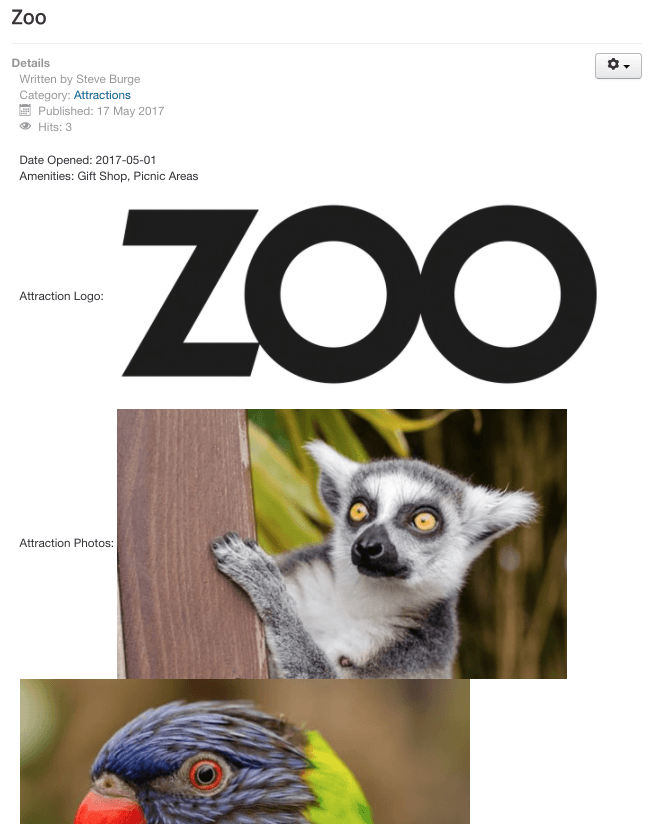
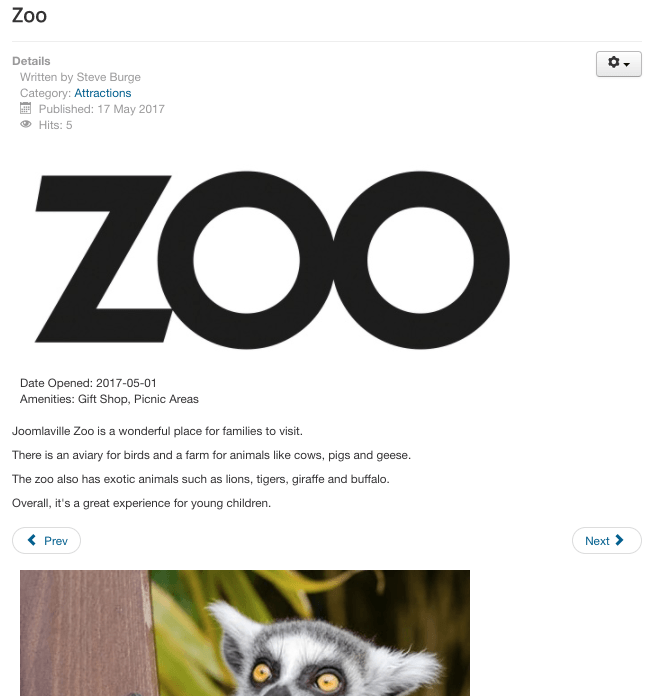
Save the Zoo article, and visit the front of your site. Your Zoo article will look like the screenshot below:
Great! Your fields are working. You've seen how many of Joomla's fields work. If you want a detailed explanation for all 15 fields, visit https://joomlashack.com/blog/tutorials/fields-joomla/.
However, it is time to do some cleaning up. The article display does not look as good as it should. The fields are not perfectly aligned, and there's too much clutter on the page.
Cleaning Up Our Display
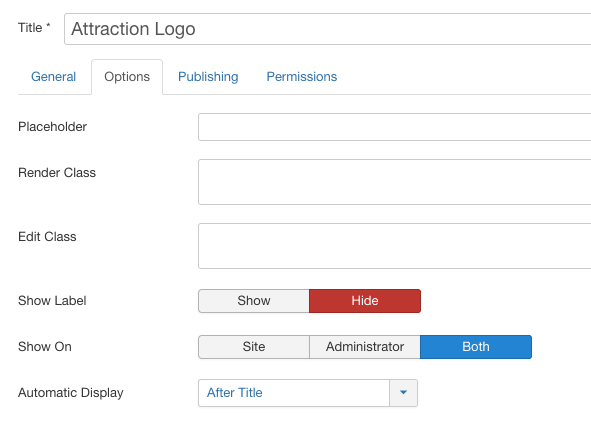
First, let's make your fields look better. You don't need "Attraction Logo" or "Attraction Photos" to display on the page.
- Go to "Content", "Fields" and edit the "Attraction Logo" field.
- Click the "Options" tab.
- Set "Show Label" to "Hide".
- Set "Automatic Display" to "Before Title".
- Save this field and open the "Attraction Photos" field.
- Click "Options" again.
- Set "Show Label" to "Hide".
- Set "Automatic Display" to "After Display".
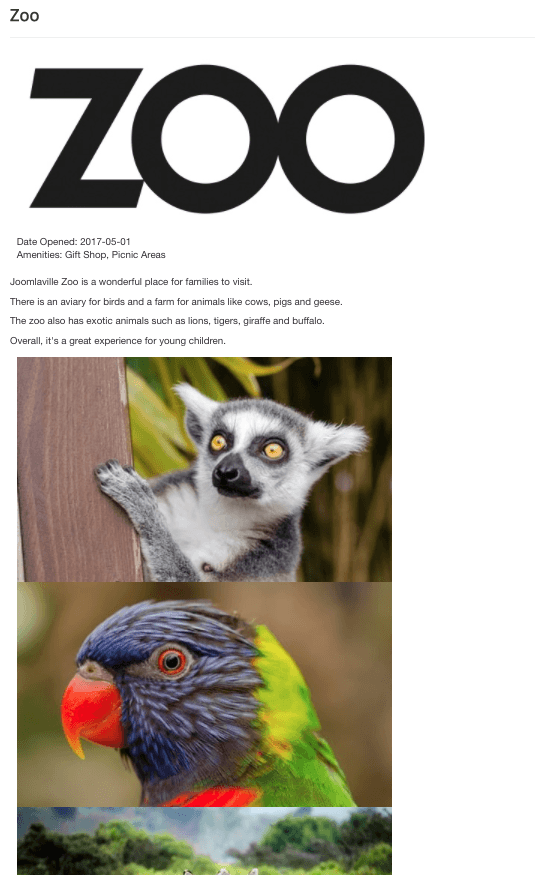
If you save this field and visit the front of your site, you'll see that your Zoo article looks considerably cleaner:
However, there is more data that you can remove. For example, the Published date and the number of hits are not really important.
There are three levels you can target for turning off these features:
- The whole site
- The Attractions category
- The Zoo article
In this example, you're going to turn off these features for the whole site. In the next tutorial, you'll look at how to make these choices for categories and articles.
- If you are anywhere under the "Content" menu, click the "Options" button in the top-right:
This page has a large number of configuration options for your content. On the first tab called "Articles", you'll see the options you need. Make these changes:
- Show Category: Hide
- Show Author: Hide
- Show Publish Date: Hide
- Show Navigation: Hide
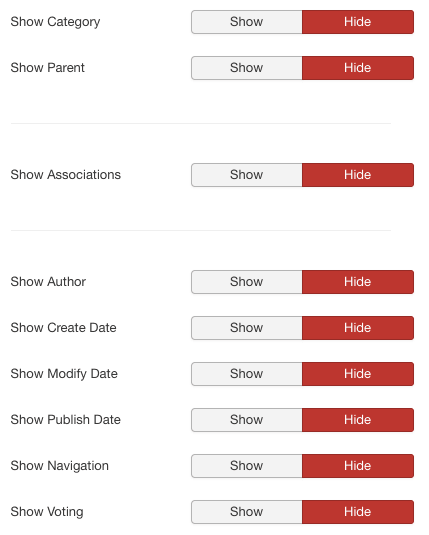
And then further down the page, make these changes too:
- Show Icons: Hide
- Show Print: Hide
- Show Email: Hide
- Show Hits: Hide
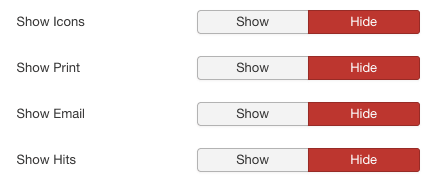
- Click "Save" and visit your Zoo article on the front of the site. The content should now be clean and stylish:
What’s Next?
You’ve added great articles to your site, but there’s a problem. As you add more and more articles, it becomes harder to find them all.
You need some better navigation so that people can easily find all of your wonderful articles.
In Joomla, navigation is created with menus. So that’s what you’re going to do next. In the next tutorial, you'll get a better understanding of menus and menu links so you can create really good navigation on your site.
Additional Reading
- How to Make Your Joomla Content Look More Interesting and Exciting
- How to Create Dummy Content in Joomla Articles with OSContent
- The Absolute Beginners Guide to Joomla's Menus
- How to Add Extra Features to Your Joomla Site
Would you like to learn more about how to create great website with Joomla? Join the Joomlashack Everything Club and instantly download the "Joomla 3 Explained" bestselling book by Steve Burge.