
File uploads are a common requirement for contact forms, support requests, and client submissions. In Shack Forms Pro, uploads are handled through a dedicated Upload tab that centralizes all upload-related settings in one place.
This blog post walks you through each option in the Upload tab, explains why it exists, and shows how it helps you create reliable, user-friendly forms without guesswork.
Show upload
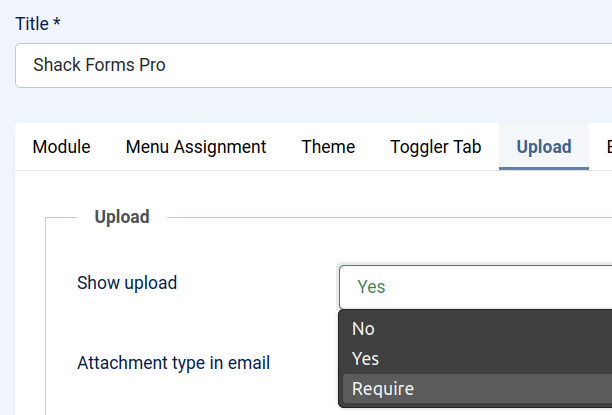
This setting controls whether file uploads are available on your form at all. When enabled, Shack Forms Pro automatically adds a file upload input to the frontend, without requiring you to create or manage a separate field. This keeps form configuration simple and avoids accidental duplication of upload inputs.
For Joomla users, this approach reduces complexity and ensures uploads are always handled consistently. If your form doesn’t require files, leaving this option disabled keeps the interface clean and focused.
Attachment type in email
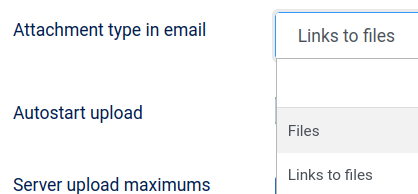
This option determines how uploaded files are delivered in form notification emails. You can choose between attaching files directly to emails or sending links that point to the uploaded files on the server. Each method has practical advantages depending on file size and email provider limitations.
Using links can help prevent delivery issues with large files, while attachments may be more convenient for small documents. This flexibility allows you to adapt the form behavior to real-world email constraints.
Autostart upload
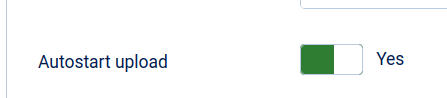
Autostart upload improves the user experience by beginning the upload process as soon as a file is selected. This provides immediate feedback if a file is too large or uses an unsupported extension. Users don’t have to wait until they submit the entire form to discover a problem.
For forms that accept larger files or multiple uploads, this setting helps reduce frustration and failed submissions. It also makes the form feel more responsive and modern.
Server upload maximums
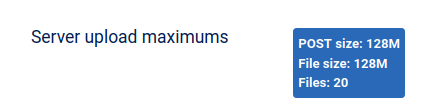
This read-only section displays the upload limits imposed by your server’s PHP configuration. It includes maximum POST size, maximum file size, and the maximum number of files allowed per request. These values represent hard limits that no Joomla extension can exceed.
Seeing these limits directly in the module settings helps Joomla users understand why certain uploads fail. It also makes troubleshooting easier by clearly separating server constraints from form configuration.
File size limit (MB)

This setting allows you to define the maximum size for each uploaded file, expressed in megabytes. It gives you control over how much data users can submit, helping to protect server resources and storage space. Setting reasonable limits also improves upload reliability.
Keeping this value aligned with your server limits avoids confusion and failed uploads. It’s a simple but important way to balance flexibility with performance.
Files limit

The files limit controls how many files a user can upload in a single form submission. This helps prevent accidental overloads, such as users attaching dozens of files at once. It also keeps email notifications and file storage manageable.
For most use cases, a small, well-defined limit improves clarity and sets expectations. Users know exactly how many files they are allowed to submit.
Allowed file extensions

This setting defines which file types are permitted, using a comma-separated list of extensions. It acts as a key security measure by blocking unwanted or potentially dangerous file types. Only files with explicitly allowed extensions will be accepted.
From a usability standpoint, this also helps guide users toward the correct file formats. Clear extension rules reduce errors and support requests.
Show limits in tooltip

When enabled, this option displays upload limits directly to users via a tooltip. Information such as file size limits, file count, and allowed extensions becomes visible before submission. This transparency helps users succeed on the first attempt.
Showing limits up front reduces trial-and-error and improves overall form completion rates. It’s especially useful for public-facing forms.
Upload tooltip

The upload tooltip allows you to add custom guidance text next to the upload input. This is an opportunity to explain what kind of files you expect and why they’re needed. Clear instructions help users feel confident and informed.
Well-written tooltips reduce confusion and ensure you receive the files you actually need. They are a small detail that makes a big difference in usability.
Upload label

The upload label controls the text shown next to the file upload input. A clear, descriptive label helps users understand the purpose of the upload at a glance. This is particularly important for accessibility and clarity.
Custom labels also allow you to match the tone of your site and the intent of the form. Simple wording often works best.
Upload path

This setting defines where uploaded files are stored on your Joomla site. By default, Shack Forms Pro creates a dedicated folder for each module instance, keeping uploads organized and isolated. This structure helps prevent file conflicts and improves security.
Knowing where files are stored also makes backups and file management easier. As long as the folder is writable, uploads will work reliably.
Final thoughts
The Upload tab in Shack Forms Pro provides a clear, centralized way to manage file uploads without unnecessary complexity. Each setting exists to improve reliability, security, and user experience. When configured thoughtfully, uploads become a seamless part of your form workflow.
Understanding these options helps Joomla users avoid common pitfalls and build forms that simply work. With the right limits and guidance in place, file uploads become predictable and stress-free.
What's Next?
Save $1,000's when you sign up for Joomlashack's Everything Club.
You will get your hands on our extensive range of over 20 extensions, plus legendary support!