
One of our customers recently asked us how to add custom fields to the JCal Pro event registration form. By default, visitors can only enter their name and email address.
If you want to collect more information, such as a phone number, company name, or meal preference, you'll need to create your own registration form.
In this blog post, you'll learn how to create custom registration fields, build your own registration form, assign it to an event category, and enable registrations for your events.
When someone registers for an event in JCal Pro, they normally see a very simple form.
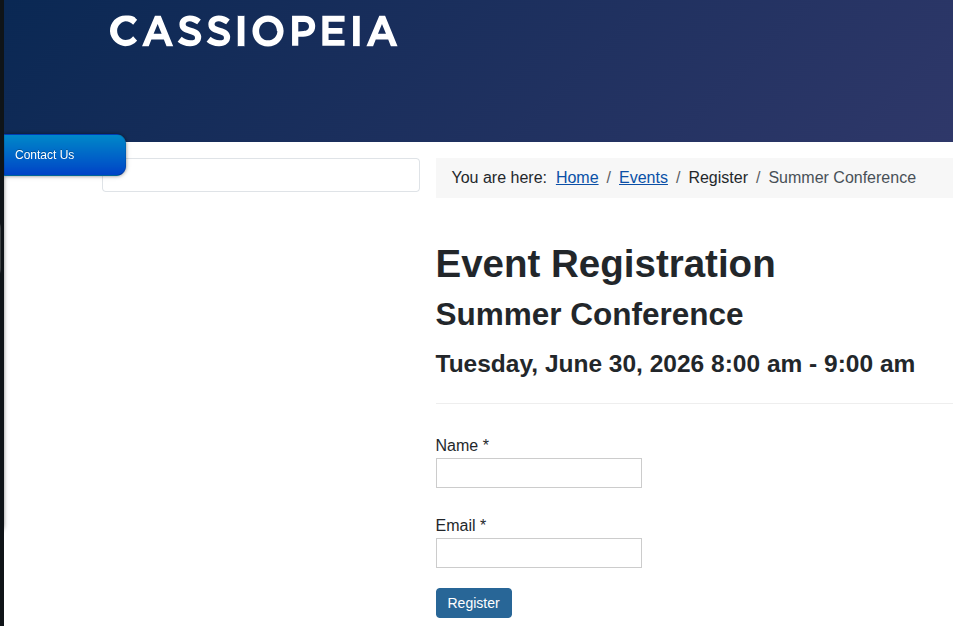
By default, the form only asks for two pieces of information: the visitor's name and email address.
That works well for many events. But what if you need to collect additional details? You might want attendees to enter their company name, phone number, dietary requirements, T-shirt size, or any other information before they register.
Fortunately, JCal Pro makes this possible. You can create your own registration form and add as many custom fields as you need.
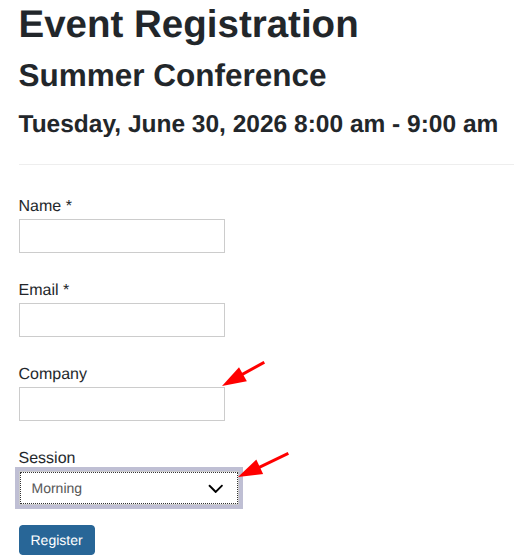
The setup only takes a few steps. Once you've completed it, your registration form can look like this.
Enable Event Registrations in JCal Pro
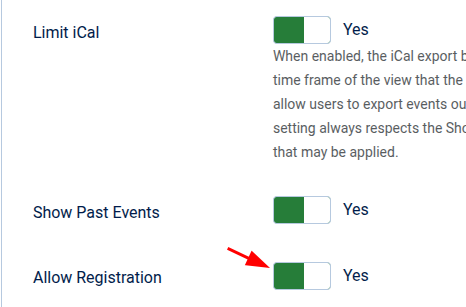
The first step is to enable the registration feature. It's turned off by default in JCal Pro.
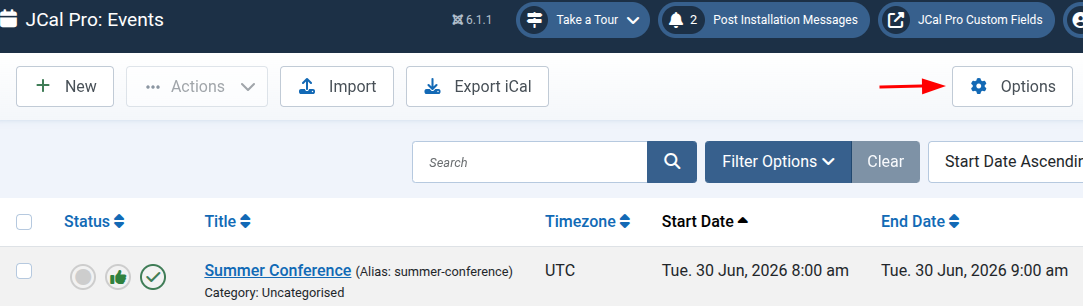
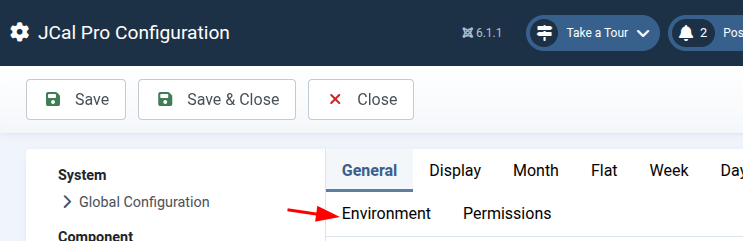
Open the Options page from the JCal Pro dashboard.
Next, switch to the Environment tab.
Scroll down until you find the Allow Registration setting. Change it to Yes and save your changes.
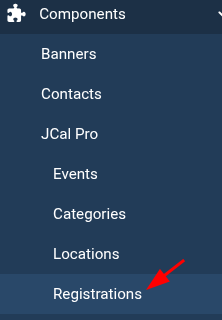
Before moving on, check one more setting. Open Components > JCal Pro > Registrations.
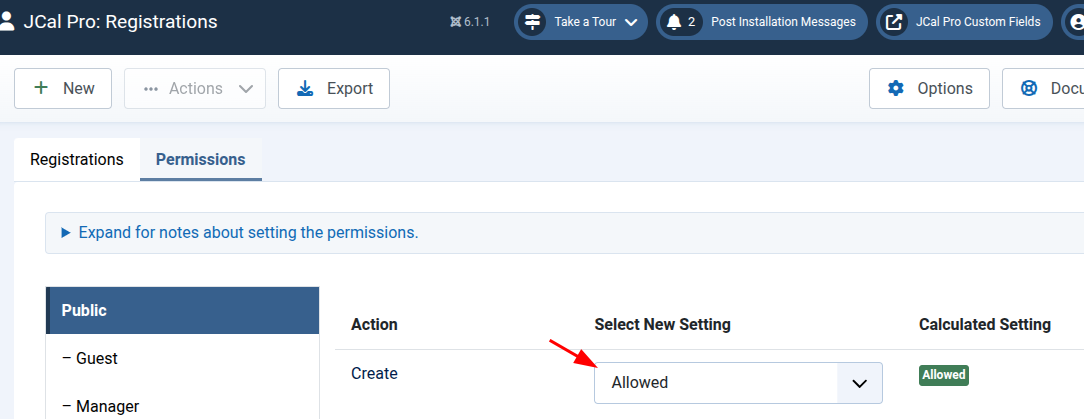
Open the Permissions tab. Make sure the Create permission is set to Allowed. If you change the permission, refresh the page to confirm the new setting.
Your site is now ready to accept event registrations.
Create Your Custom Registration Fields
Now it's time to decide what information you want to collect from your attendees.
Go to Components > JCal Pro > Fields.
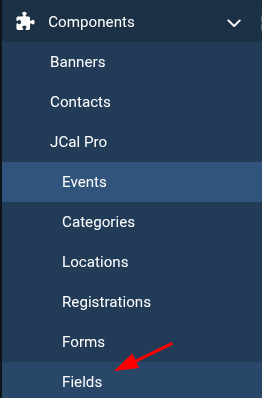
Create a new field.

Give your field a descriptive title. Choose the field type that best suits the information you want to collect. The important setting is Form Type. Set it to Registration Form.
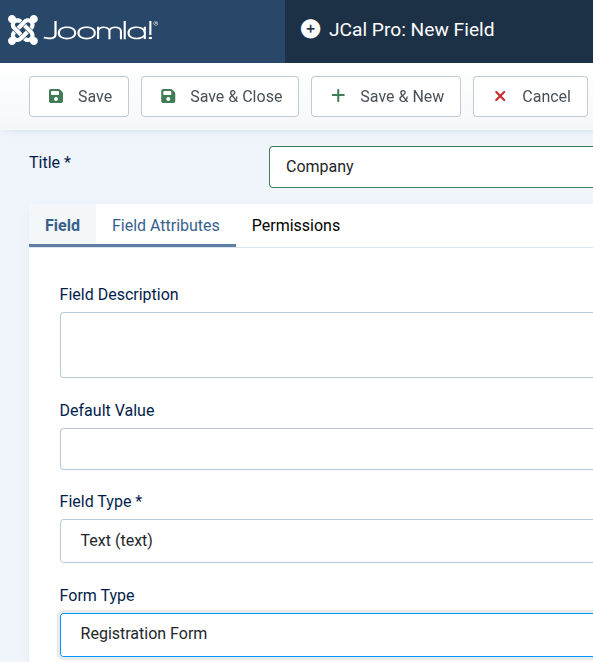
This tells JCal Pro that the field belongs on an event registration form.
Next, open the Permissions tab. Allow the Public user group to create and edit data. Otherwise, visitors won't be able to submit values for your custom field.
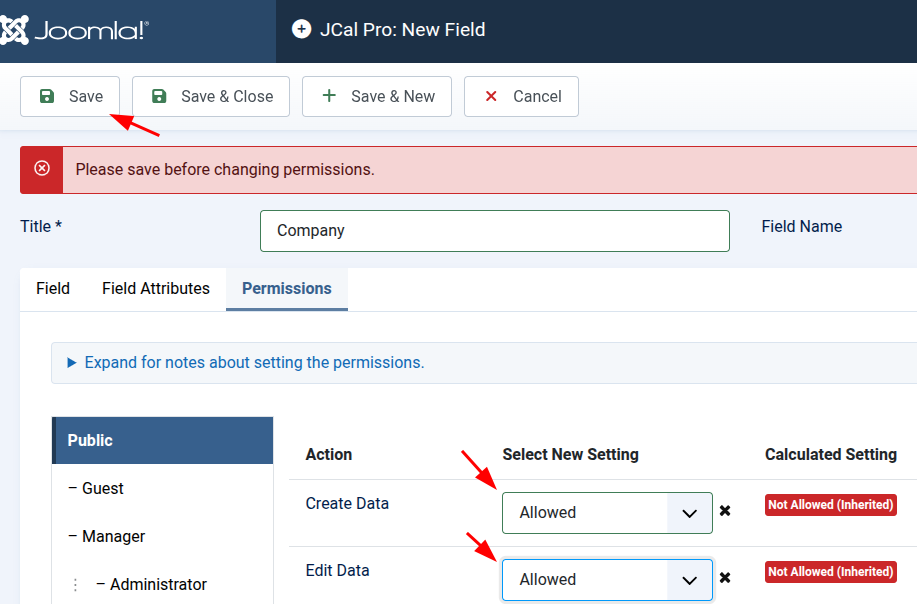
Publish the field and save it. You can repeat the same process for every custom field you want to add.
Create Your Custom Registration Form
Your custom fields are ready. The next step is to combine them into a registration form.
Open Components > JCal Pro > Forms.
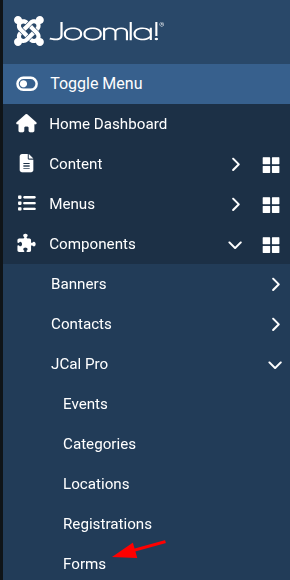
Create a new form and give it a meaningful title. Set the Form Type to Registration Form. Then select the custom fields you want to display.
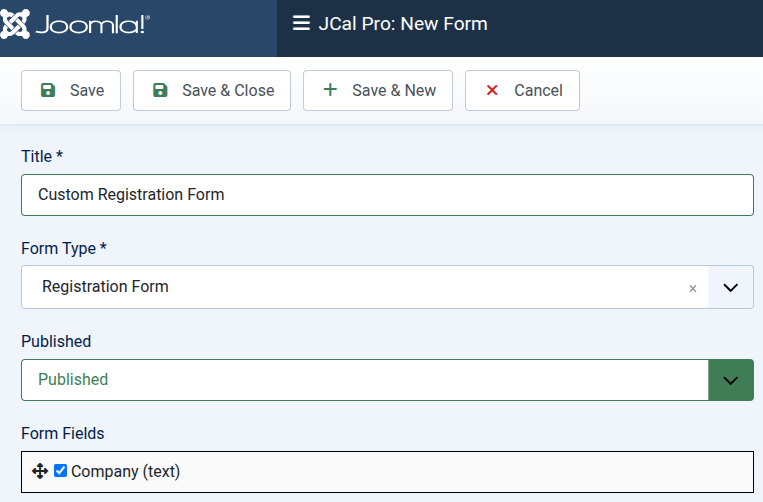
Publish the form and save it. Your custom registration form is now ready to use.
Assign the Form to an Event Category
This step is easy to miss if you're new to JCal Pro.
Instead of assigning a registration form to every event, you assign it to an event category. Every event in that category can then use the same registration form.
Open the category that will contain your events and switch to the JCal Pro tab.
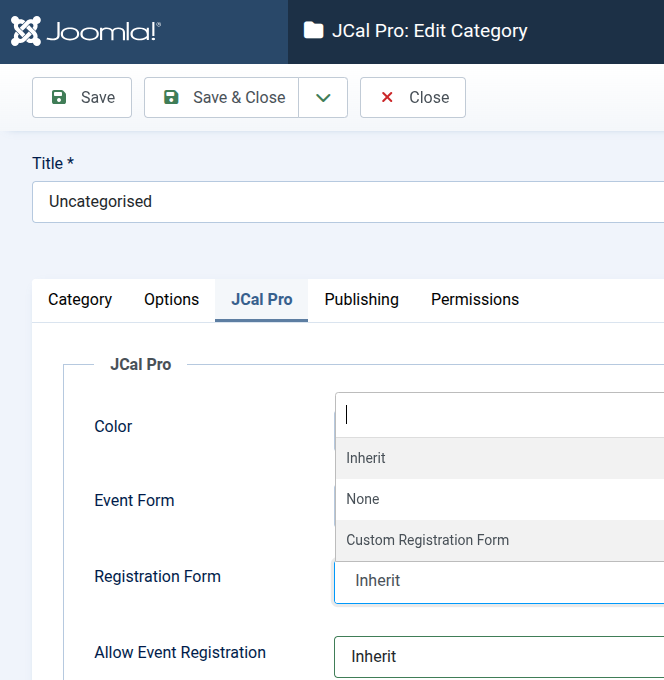
Select your custom registration form in the Registration Form setting. Then change Allow Event Registration to Yes.
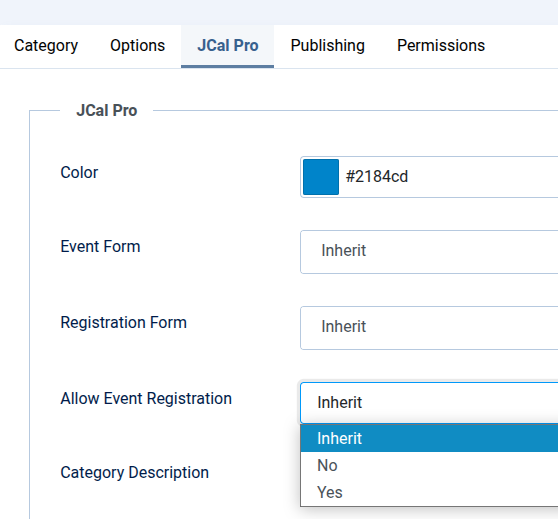
Your category is now configured to use your custom registration form.
Enable Registration for Your Events
One thing surprised us while testing this workflow. New events are created with registrations disabled by default, even if the category allows event registrations.
That means every event has its own registration switch.
Open your event and switch to the Registration tab.
Change the Registration setting from No to Yes.
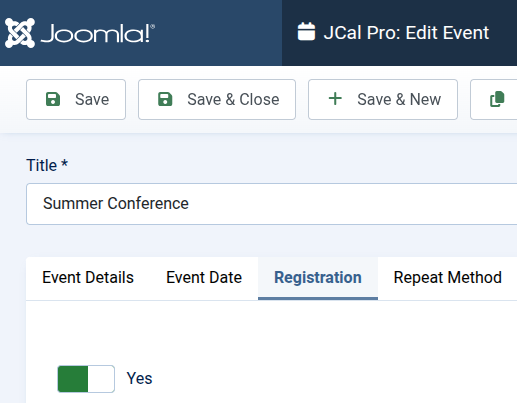
Save the event. Your visitors will now see your custom registration form when they register.
Wrapping Up
The default JCal Pro registration form is perfect when you only need a visitor's name and email address. But many events require more information.
Custom registration fields give you that flexibility. You can collect exactly the details you need from every attendee.
Once you've completed the setup, you can reuse the same registration form for future events. That saves time and keeps your event registrations consistent across your site.
What's Next?
Save $1,000's when you sign up for Joomlashack's Everything Club.
You will get your hands on our extensive range of over 20 extensions, plus legendary support!