Documentation for Joomla 6
The OSDonate PayPal donations collecting module is a stylish and flexible Joomla module with the pre-set and configurable PayPal Donate button. Try OSDonate on your own site and you'll see how easy it is to collect PayPal donations.
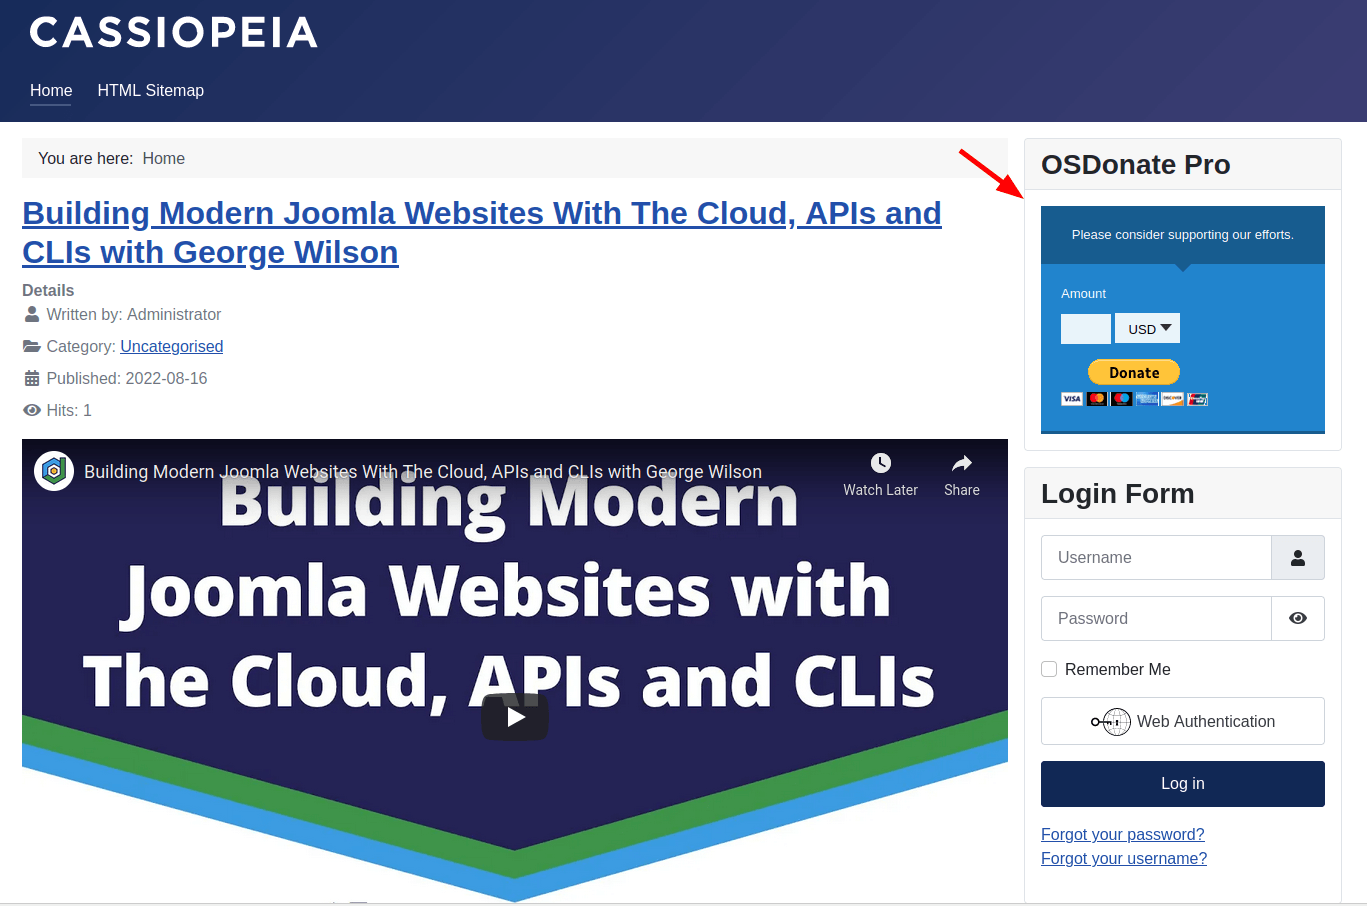
The OSDonate module is packed with features, simple to use, and can even attract more attention by hovering in a fixed position on the page! It's a great choice for anyone who would like their Joomla 6 PayPal donation button to be a focal point of their Joomla site.
Here is how to get started with OSDonate.
Step #1. Download and install
- Download OSDonate from this page.
- Install it. Please, visit this page if you need help with the module installation.
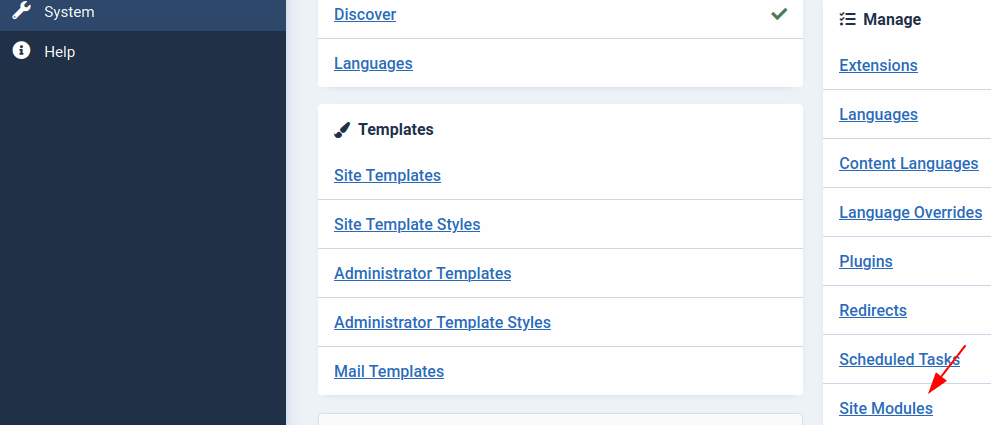
Step #2. Access the module
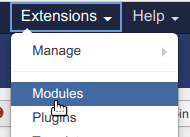
- In your Joomla administrator dashboard, go to System > Manage > Modules:
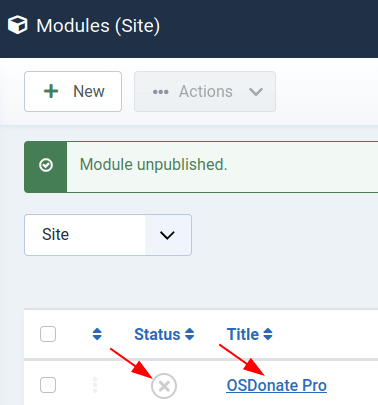
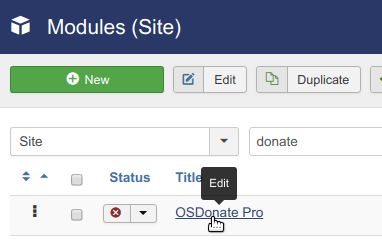
- You will see the "Modules: Site" screen, as shown in the next image. Either click the "New" button to create an OSDonate Pro module from scratch or open up an existing one for editing. For this tutorial, I will open up the existing module created by my OSDonate Pro installation, preceding it by clicking on the little cross icon to enable it:
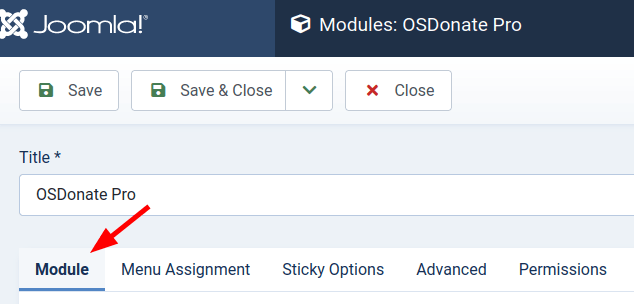
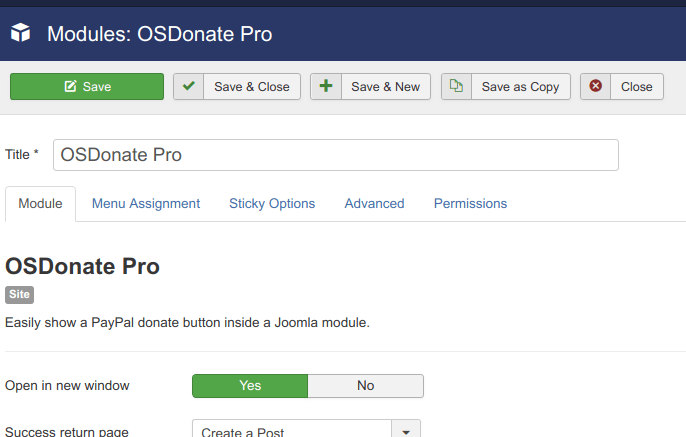
- You will arrive at the module's editing page, where you can start configuring its settings to your preferences.
Let's take a look at what settings are available and what features they offer to your Joomla site.
Step #3. Configure the module basic settings
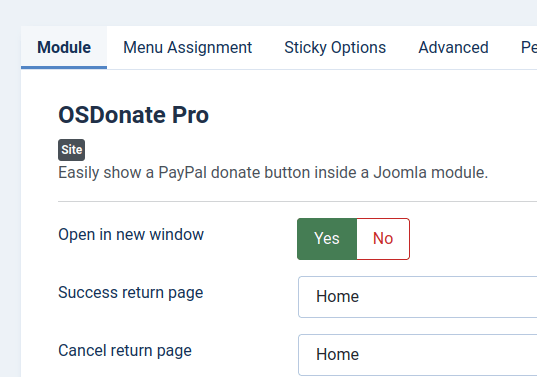
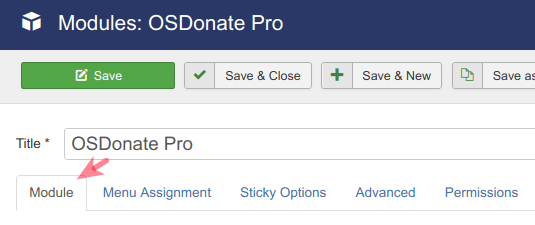
By default, you will find the OSDonate Pro basic settings on the Module tab:
- For a quick start, configure the following three parameters to your requirements:
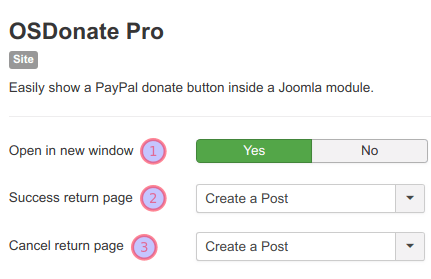
- Open in new window: When the PayPal button is clicked, do you want the PayPal Donate page to open in a new window? The default setting is Yes.
- Successful return page: After the user has donated at PayPal, to which page do you want the user to return? The default setting is Home.
- Cancel return page: If the user cancels at the PayPal Donate page, to which page do you want the user to return? The default setting is Home.
- Open in new window: When the PayPal button is clicked, do you want the PayPal Donate page to open in a new window?
- Success return page: After the user has donated at PayPal, to which page do you want the user to return?
- Cancel return page: If the user cancels at the PayPal Donate page, to which page do you want the user to return?
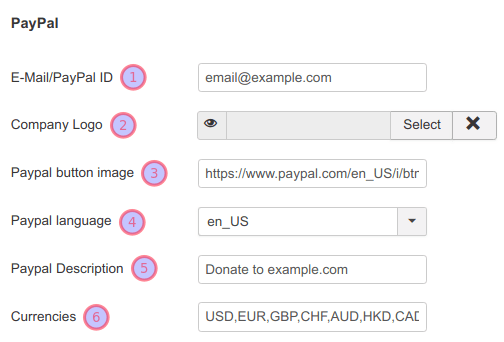
- Configure the next six parameters in the PayPal group of settings:
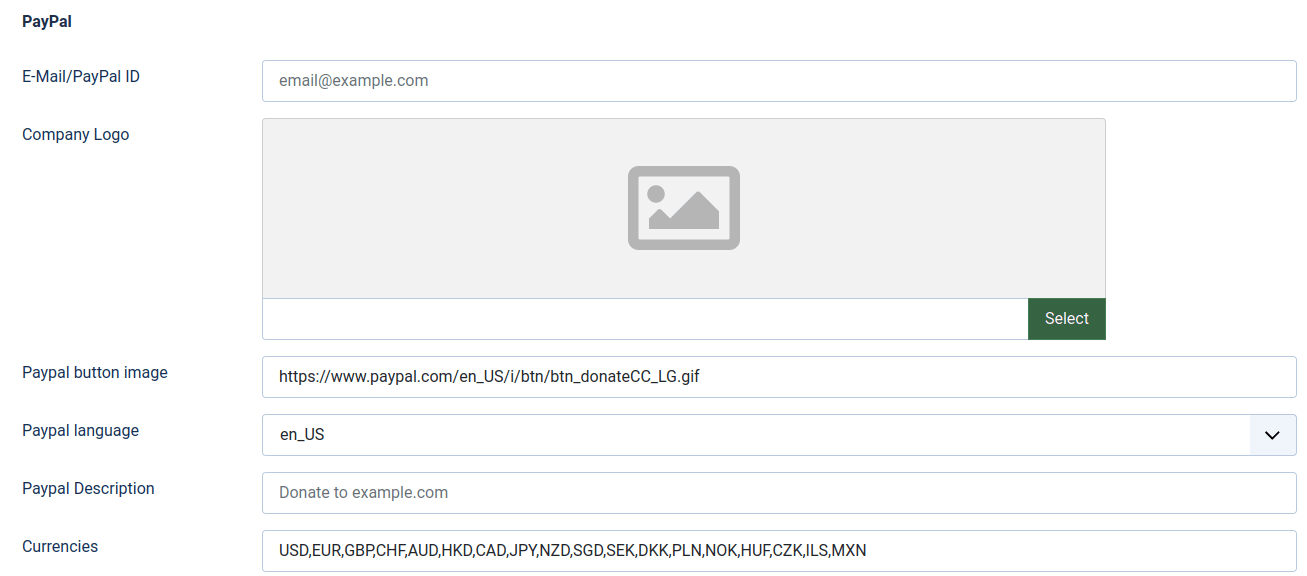
- E-Mail/PayPal ID: Enter yours.
- Company Logo: Your own company/business logo selected here will appear on the PayPal Donate module. To be able to select your logo image, please upload it first via Content > Media.
- PayPal button image: You can leave this as the default. It's the URL to the PayPal Donate image that the user should click on to go to the PayPal Donate form.
- PayPal language: Select the language in which the Paypal form should appear.
- PayPal Description: You can display a custom description in the PayPal Form to the user.
- Currencies: Which currencies do you want to allow the user to select? Separate with a comma(,). The first currency will be the default. Check with PayPal to make sure the currency is available.
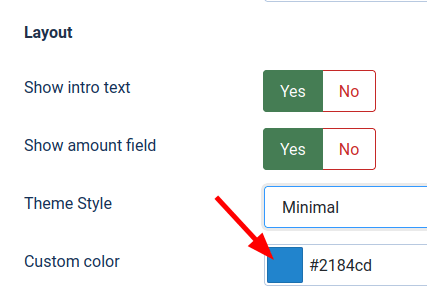
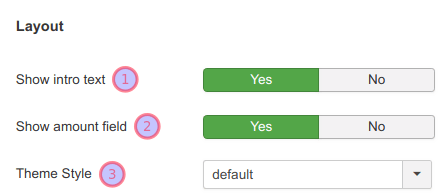
- Configure the next three parameters under the Layout group of settings:

- Show intro text: Do you want to show an into text?
- Show amount field: Do you want to show the amount?
- Theme style: choose a different design for the donation form (only in Pro version)
If in the Theme Style field you selected a style other than the default, you will also have an option to select a custom colour:
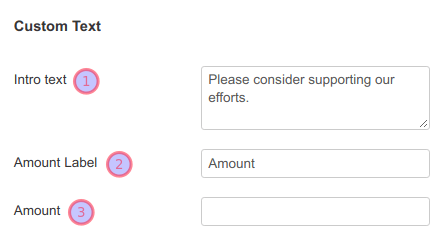
- Configure the next three parameters in the Custom Text group of settings:
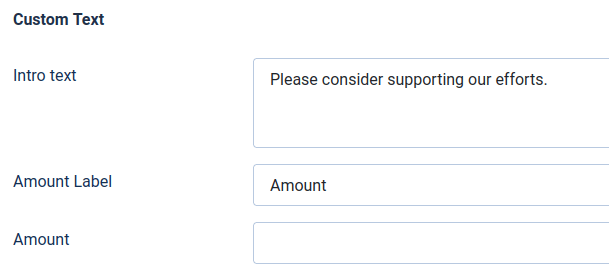
- Intro text: Type your intro text here.
- Amount Label: Pre-fill the amount if desired. You can leave it blank if desired.
- Amount: Pre-fill the amount if desired. You can leave it blank to keep the field empty.
Step #4. Enable the Sticky Options
If you wish, you can set your OSDonate module to be fixed in one of the following positions when someone would scroll down the page:
- To the top left corner of your site
- To the top right corner of your site
- To the bottom left corner of your site
- To the bottom right corner of your site
- With a specified horizontal or/and vertical offset distance.
Here is how to do this.
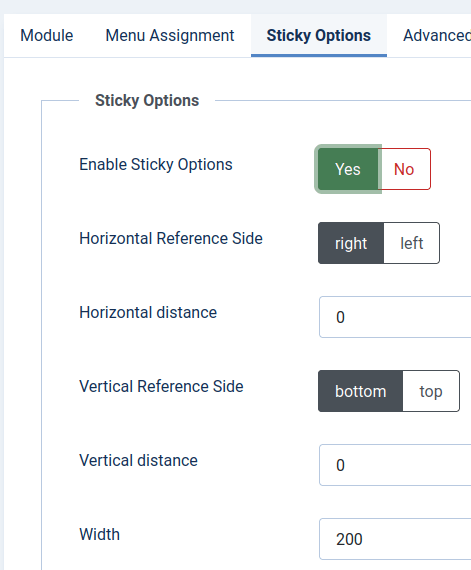
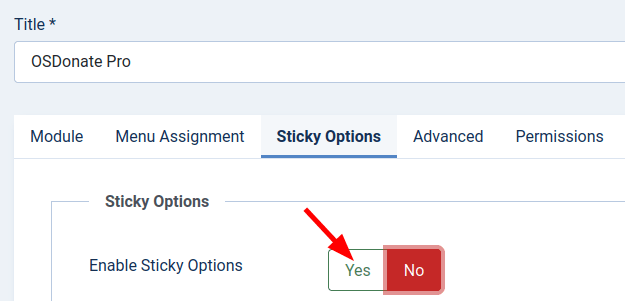
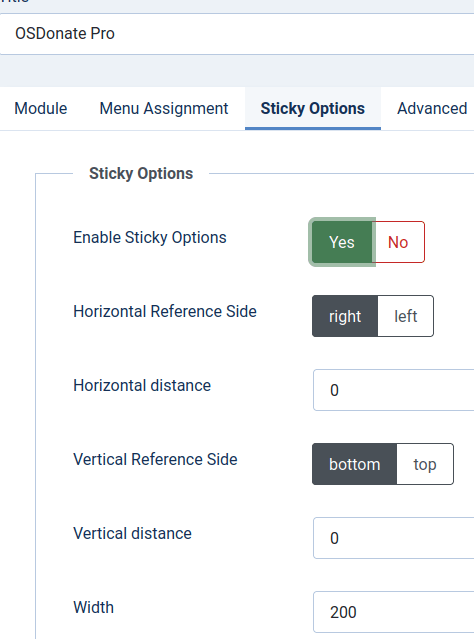
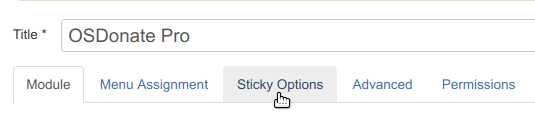
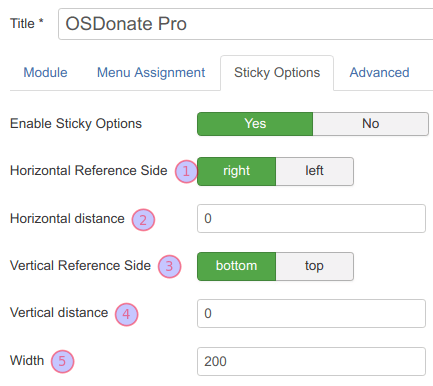
- Go to the Sticky Options tab as shown in the next image. You will see the following parameters available:
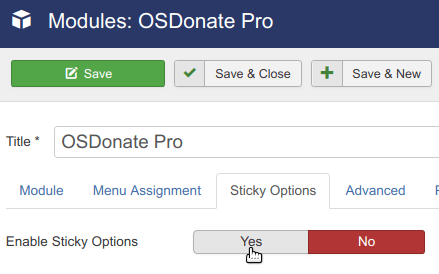
- Click Yes for the Enable Sticky Options parameter:
- You will see the five following options appear:
- Horizontal Reference Side: Do you want it to be closer to the right or left?
- Horizontal distance: How far in pixels? (*no need to add the px, just use digits)
- Vertical Reference Side: Do you want it to be closer to the top or bottom?
- Vertical distance: How far in pixels? (*no need to add the px, just use digits)
- Width: If the default is too narrow you can make it wider.
Step #5. Publish your module
Excellent! You set the OSDonate-specific module parameters. Now it's a good time to finish by setting a few more parameters of your OSDonate Pro module inherited from the Joomla core.
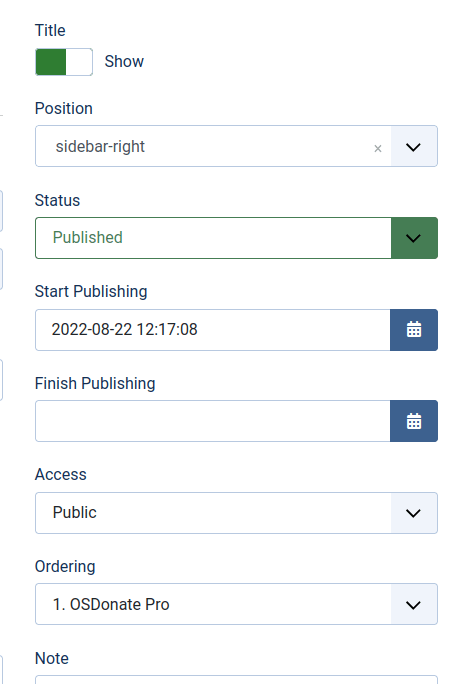
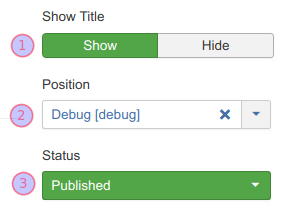
- Show Title: Generally set to No.
- Position: Usually the debug position is the best practice if you set the sticky options. Note: Some templates do not have the debug position. You can follow the How to Add a Debug Position tutorial to add it if needed. If you're not using the sticky option, simply select the position provided by your template.
- Status: Published.
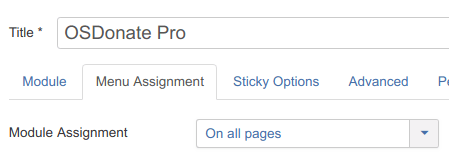
- Click the Menu Assignment tab and specify on which pages you would like your module to appear.
- Click Save or Save & Close and you're done!
Now preview it on your site front end and adjust the module setting to your liking if needed!
Documentation for Joomla 3
OSDonate is a stylish and flexible Joomla module with the pre-set and configurable PayPal Donate button. Try OSDonate on your own site and you'll see how easy it is to collect donations.
OSDonate is packed with features, is simple to use, and can even attract more attention by hovering in a fixed position on the page! It's a great choice for anyone who would like their Joomla donation button to be a focal point of their Joomla site.
Here is how to get started with OSDonate.
Step #1. Download and install
- Download OSDonate from this page.
- Install it. Please, visit this page if you need help with the module installation.
Step #2. Access the module
- In your Joomla control panel, go to Extensions > Modules:
- Click OSDonate Pro:
- You will arrive at the module's editing page, where you can start configuring its settings to your preferences:
Let's take a look at what settings are available and what features they offer to your Joomla site.
Step #3. Configure the module basic settings
By default, you will find the OSDonate Pro basic settings under the Module tab:
- Configure the following three parameters:
- Open in new window: When the PayPal button is clicked, do you want the PayPal Donate page to open in a new window?
- Success return page: After the user has donated at PayPal, to which page do you want the user to return?
- Cancel return page: If the user cancels at the PayPal Donate page, to which page do you want the user to return?
- Configure the next six parameters in the PayPal group of settings:
- E-Mail/PayPal ID: Enter yours.
- Company Logo: Your own company/business logo selected here will appear on the PayPal Donate module. To be able to select your logo image, please upload it first via Content > Media.
- PayPal button image: You can leave this as the default. It's the URL to the PayPal Donate image that the user should click on to go to the PayPal Donate form.
- PayPal language: Select the language in which the Paypal form should appear.
- PayPal Description: You can display a custom description in the PayPal Form to the user.
- Currencies: Which currencies do you want to allow the user to select? Separate with a comma(,). The first currency will be the default. Check with PayPal to make sure the currency is available.
- Configure the next three parameters under the Layout group of settings:
- Show intro text: Do you want to show an into text?
- Show amount field: Do you want to show the amount?
- Theme style: choose a different design for the donation form (only in Pro version)
- Configure the next three parameters in the Custom Text group of settings:
- Intro text: Type your intro text here.
- Amount Label: Pre-fill the amount if desired. You can leave it blank if desired.
- Amount: Pre-fill the amount if desired. You can leave it blank to keep the field empty.
Step #4. Enable the Sticky Options
If you wish, you can set your OSDonate module to be fixed:
- To the top left corner of your site.
- To the top right corner of your site.
- To the bottom left corner of your site.
- To the bottom right corner of your site.
- With a specified horizontal or/and vertical offset distance.
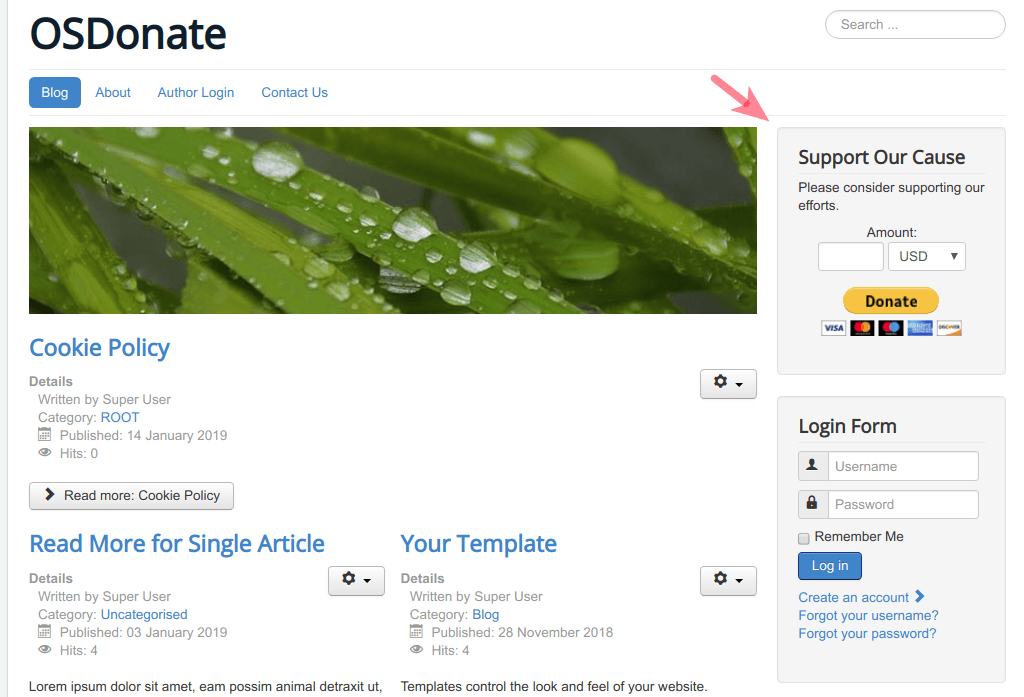
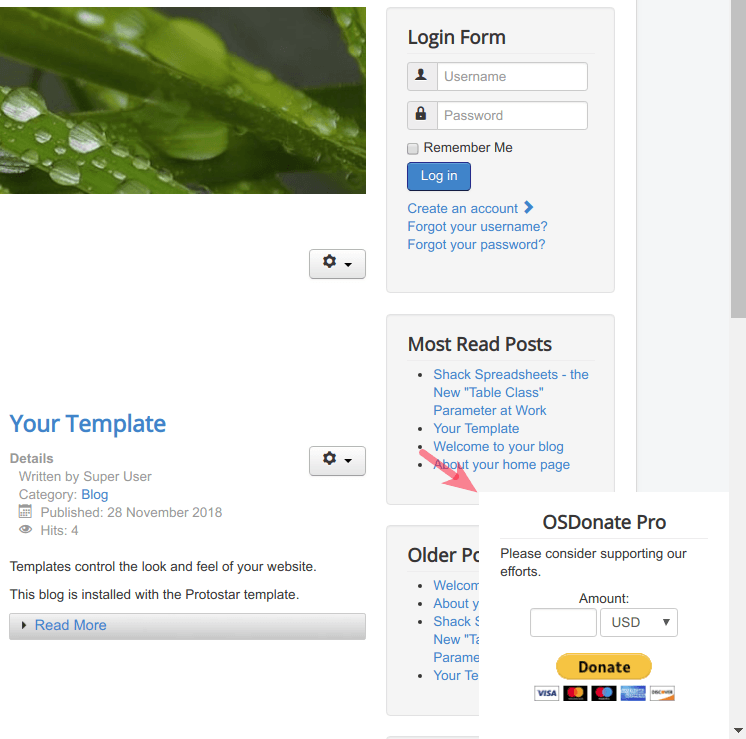
Here is how the OSDonate module will look fixed to the bottom right corner of the site:
- Click the Sticky Options tab:
- Click Yes for the Enable Sticky Options parameter:
You will see the five following options appear:
- Horizontal Reference Side: Do you want it to be closer to the right or left?
- Horizontal distance: How far in pixels? (*no need to add the px, just use digits)
- Vertical Reference Side: Do you want it to be closer to the top or bottom?
- Vertical distance: How far in pixels? (*no need to add the px, just use digits)
- Width: If the default is too narrow you can make it wider.
Step #5. Publish your module
Excellent! You set the OSDonate-specific module parameters. Now it's a good time to set the parameters your OSDonate module inherited from Joomla core.
- Show Title: Generally set to No.
- Position: Usually the debug position is the best practice if you set the sticky options. Note: Some templates do not have the debug position. You can follow the How to Add a Debug Position tutorial to add it if needed. If you're not using the sticky option, simply select the position provided by your template.
- Status: Published.
- Click the Menu Assignment tab and specify on which pages you would like your module to appear:
- Click Save or Save & Close and you're done!
- Now preview it on your site front end and adjust the module setting to your liking if needed!