Documentation for Joomla 6
Note: the custom fields for download forms are available only in OSDownloads Pro.
By default, the OSDownloads Pro download form will only collect an email address.
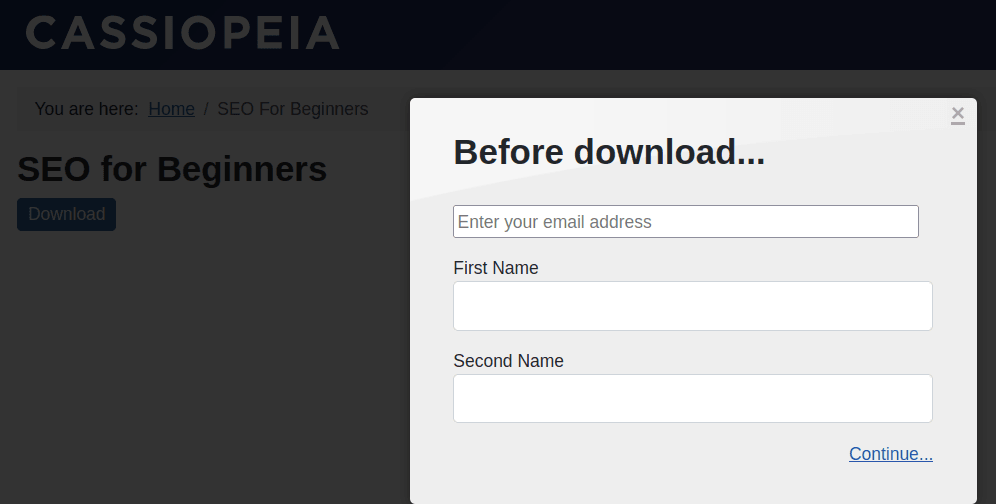
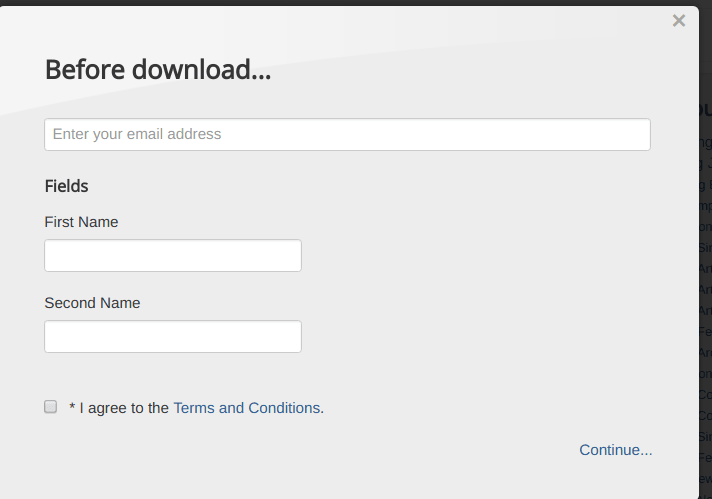
In this tutorial, we'll show you how to add more fields to the OSDownloads Pro download form. You'll see how to add First Name and Second Name fields, as in the image below.
Step #1. Create your file
- In your Joomla control panel, go to Components > OSDownloads Pro > Files.
- Create the file you wish to offer in exchange for user data. If you are a beginner to OSDownloads Pro and don't know how to create a file for downloads, please see our Getting Started with OSDownloads guide.
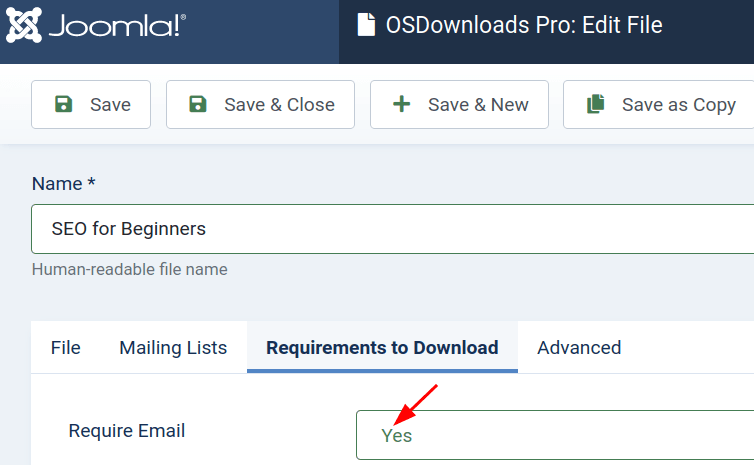
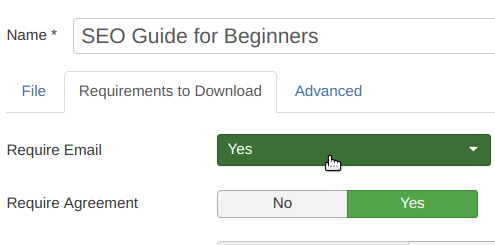
IMPORTANT: Make sure you set the Require Email setting in the Requirements to Download tab to Yes. Otherwise, your download fields won't get displayed.
Step #2. Create fields
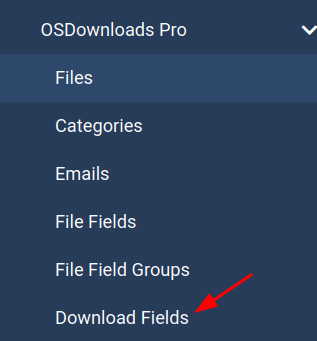
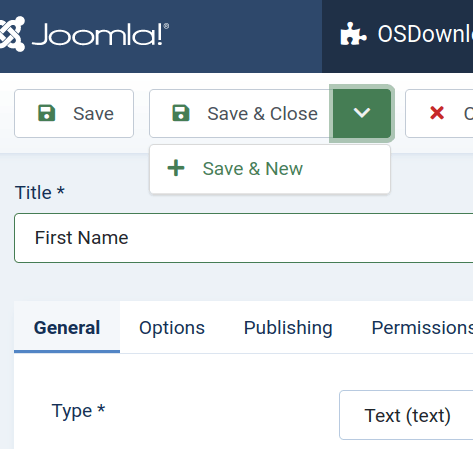
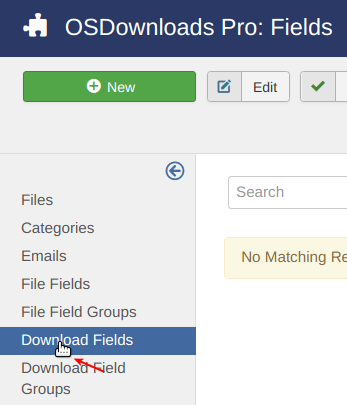
- In the OSDownloads Pro control panel, click Download Fields.
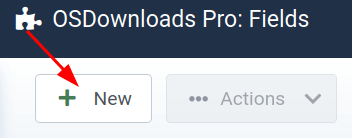
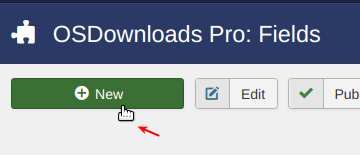
- Click New.
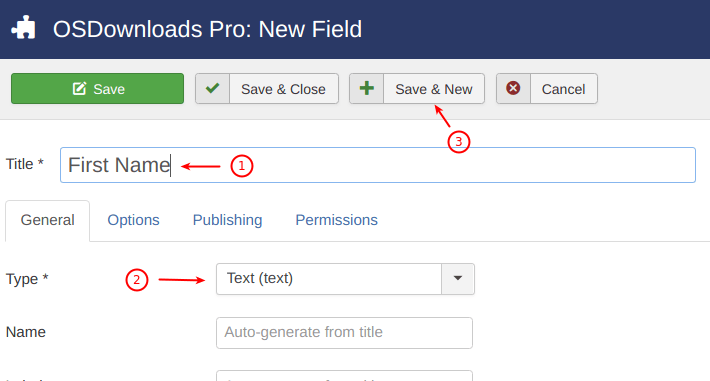
- Enter "First Name" as your custom field title into the Title field.
- Select data type from the Type field.
- Click Save & New.
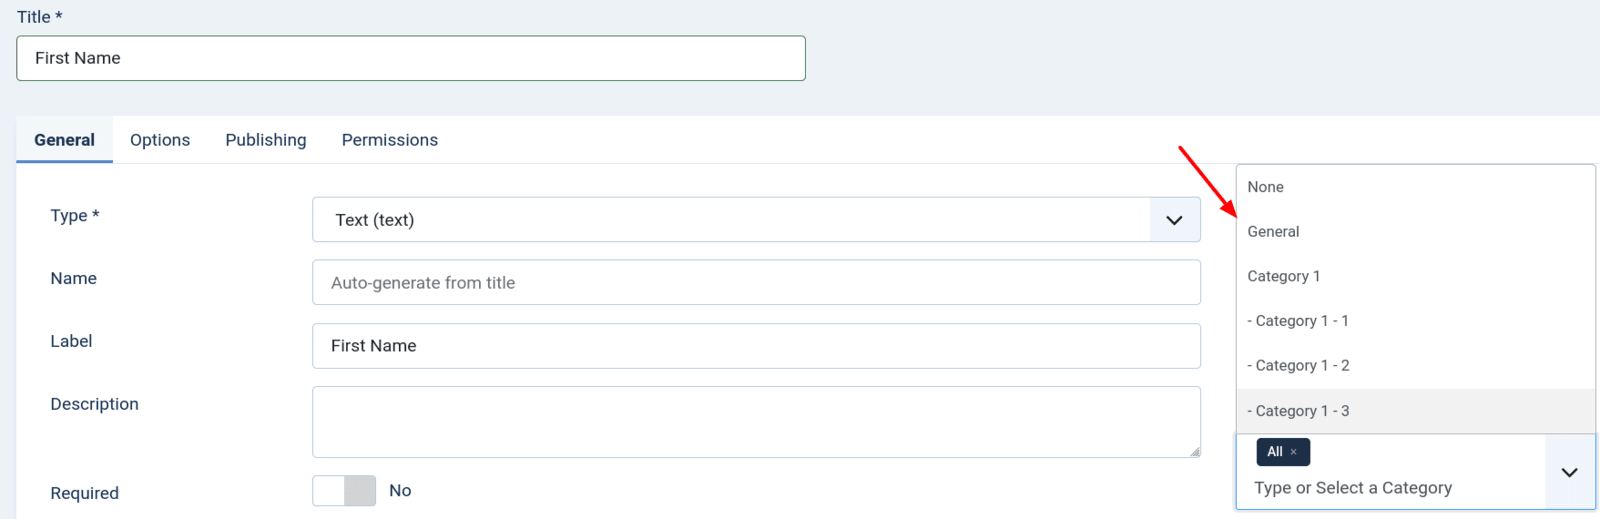
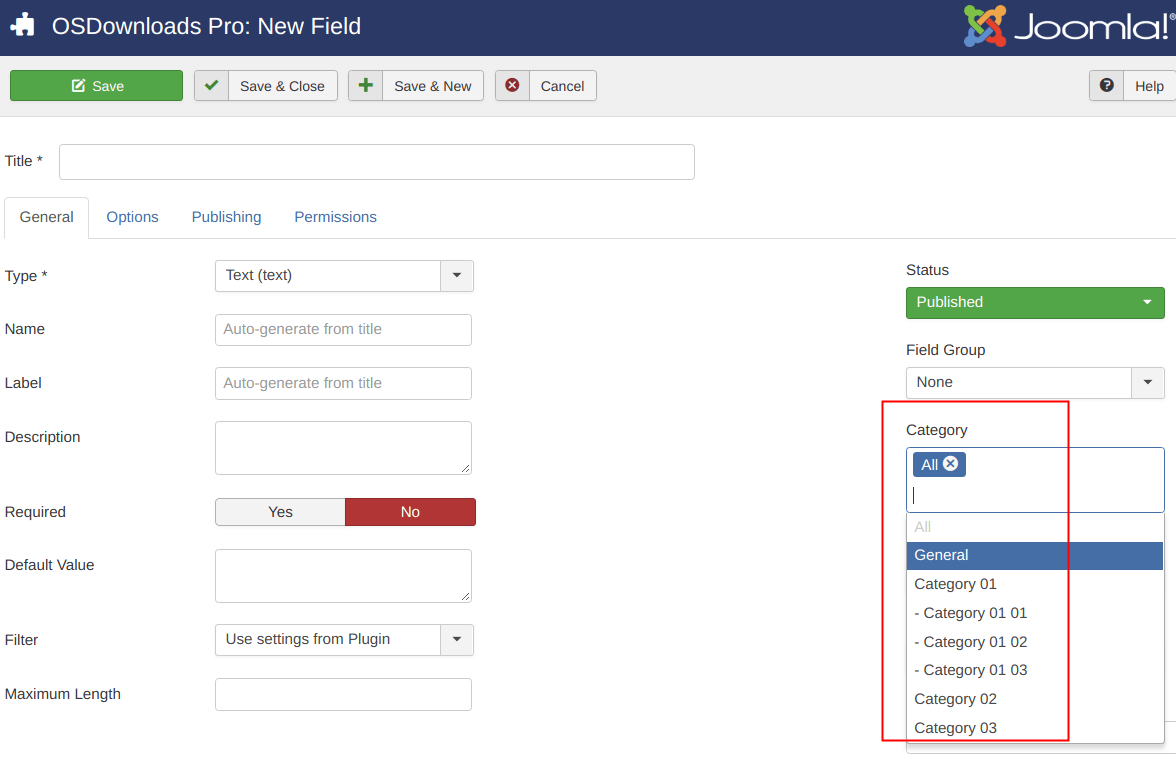
Pro tip: Please keep in mind that by default, a new field will be assigned to ALL your file categories. Leave it as is, if that's okay with you. Otherwise, use the Category field to assign your new custom field to specific categories only:
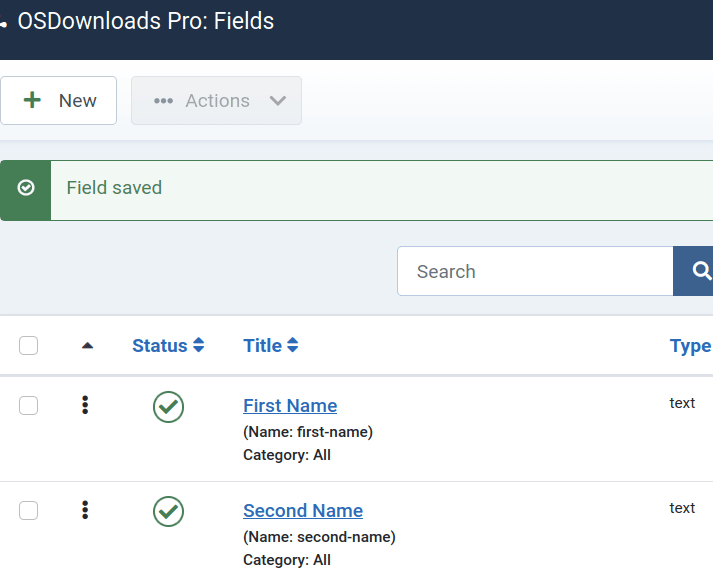
- Repeat these steps to create the Second Name field.
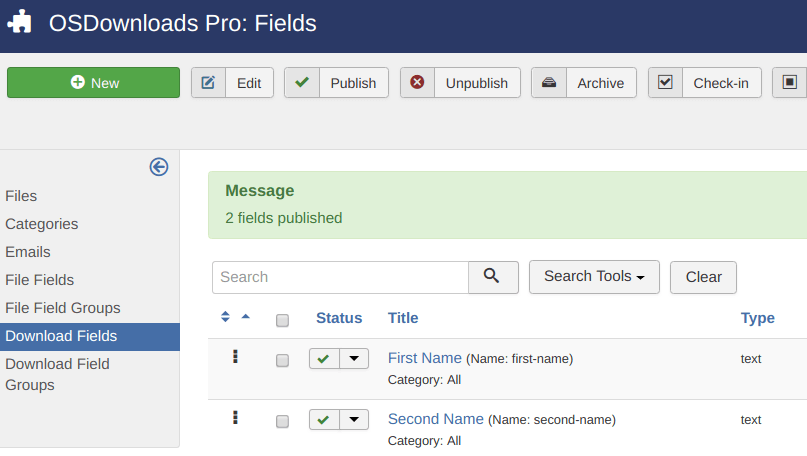
- You should now see both of the newly created custom fields listed in your Download Fields page.
Step #3. Configure the Permissions
- In the OSDownloads Pro control panel, click Options.

- Click the Permissions tab.

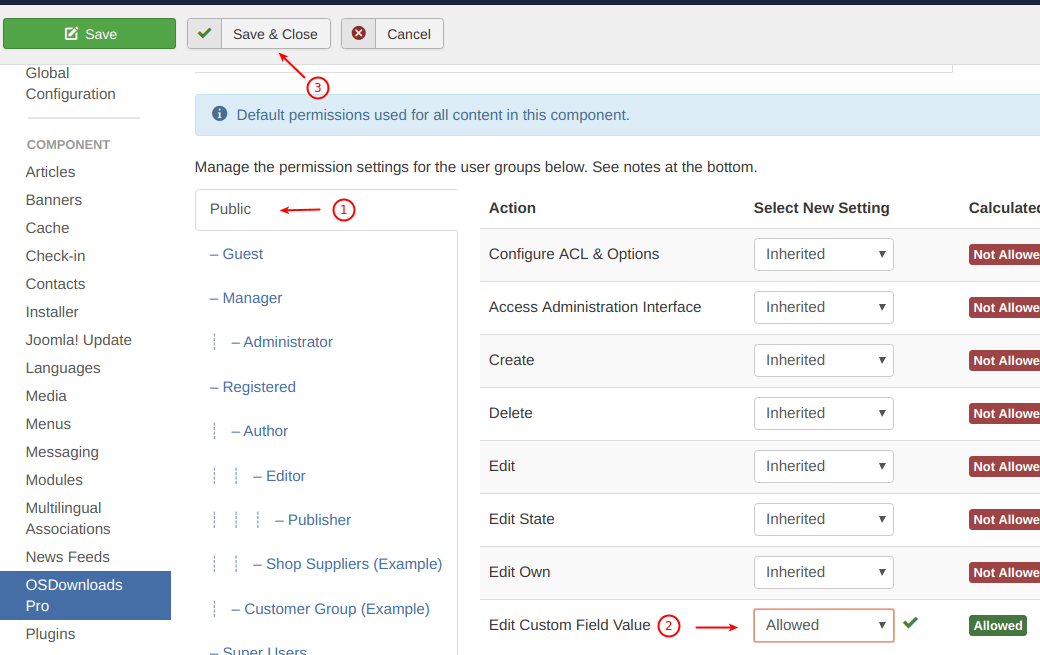
- Make sure your permissions get displayed under the Public tab.
- Scroll down the page and set the Edit Custom Field Value to Allowed.
- Click Save & Close.

- Now visit the file download page on your site's front end.
- Click the Download button.
- You should see both custom fields now nicely displayed and ready to collect data from your visitors.
Documentation for Joomla 3
Note: the custom fields for download forms are available only in OSDownloads Pro.
By default, the OSDownloads Pro download form will only collect an email address.
In this tutorial, we'll show you how to add more fields to the OSDownloads Pro download form. You'll see how to add First Name and Second Name fields, as in the image below.
Step #1. Create your file
- In your Joomla control panel, go to Components > OSDownloads Pro > Files.
- Create the file you wish to offer in exchange for user data. If you are a beginner to OSDownloads Pro and don't know how to create a file for downloads, please see our Getting Started with OSDownloads guide.
- IMPORTANT: Make sure you set the Require Email setting in the Requirements to Download tab to Yes. Otherwise, your download fields won't get displayed.
Step #2. Create fields
- In the OSDownloads Pro control panel, click Download Fields.
- Click New.
- Enter "First Name" as your custom field title into the Title field.
- Select data type from the Type field.
- Click Save & New.
Pro tip: please keep in mind that by default a new field will be assigned to ALL your file categories. Leave it as is, if that's okay with you. Otherwise, use the Category field to assign your new custom field to specific categories only:
- Repeat these steps to create the Second Name field.
- You should now see both of the newly created custom fields listed in your Download Fields page.
Step #3. Configure the Permissions
- In the OSDownloads Pro control panel, click Options.

- Click the Permissions tab.

- Make sure your permissions get displayed under the Public tab.
- Scroll down the page and set the Edit Custom Field Value to Allowed.
- Click Save & Close.
- Now visit the file download page on your site's frontend.
- Click the Download button.
- You should see both custom fields now nicely displayed and ready to collect data from your visitors.