 Many Joomla users have faced the question of how to automatically create images of a standard size.
The SmartResizer plug-in is a great solution.
SmartResizer not only takes care of images in your articles, but can also create thumbnails for different layouts such as blogs.
The Example for This Tutorial
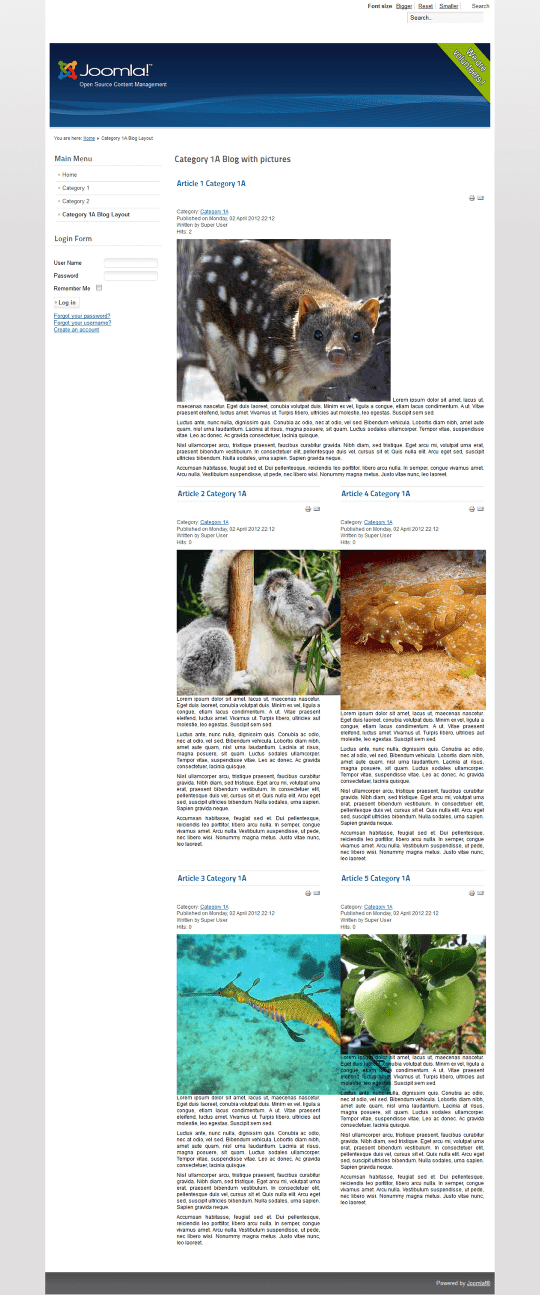
In the example below I've created a blog layout with no styling.
The original pictures here are between 800px and 300px wide. We're using the default category blog layout. As you can see, nothing fits and images overlap. It's a mess.
We'll add the plugin, then show you step-by-step how to improve the layout with automatic thumbnails.
Step 1: Install SmartResize
- Download the plugin from the JED.
- Open your Joomla Administrator area and go to Extensions > Extension Manager.
- Upload the package file to install the plugin.
- Go to Extensions > Plugin Manager and find the plugin.
- The plugin must be enabled. Be sure there is a green check circle under Status. If the image is red, click it and it will turn green.
- Click the SmartResizer name to open the configuration controls.
Step 2. Configure the Basic Options
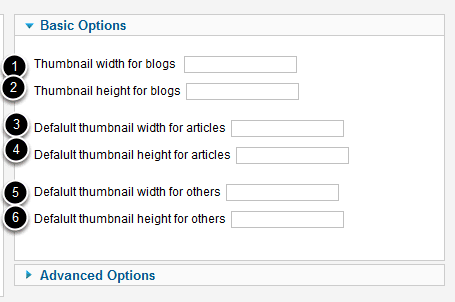
- Thumbnail width for blogs - thumbnail width for pictures in a category blog, section blog and front page.
- Thumbnail height for blogs - thumbnail height for pictures in a category blog, section blog and front page.
- Default thumbnail width for articles - default thumbnail width for pictures inside articles.
- Default thumbnail height for articles - default thumbnail height for pictures inside articles.
- Default thumbnail width for others - This is the default generated thumbnail width in px for images in other components (not com_content)
- Default thumbnail height for others - This is the default generated thumbnail height in px for images in other components (not com_content)
If you fill in values only for the width, the height will be automatically calculated. If you put in values for both width and height, the image will get cropped.
Parameters 1 and 2 set fixed dimensions for the thumbnails to be displayed in category blog, section blog and in the front page. Parameters 3 and 4 set default thumbnail dimensions for the article view. Each picture can be assigned its own thumbnail dimensions inside its article by defining properties height and width in IMG tag in the editor. If neither height nor width are given, the thumbnail size will be determined by default parameters 3 and 4.
I set all the widths to 200px and left the height blank.
Step 3: Category Thumbnails Automatically Generated
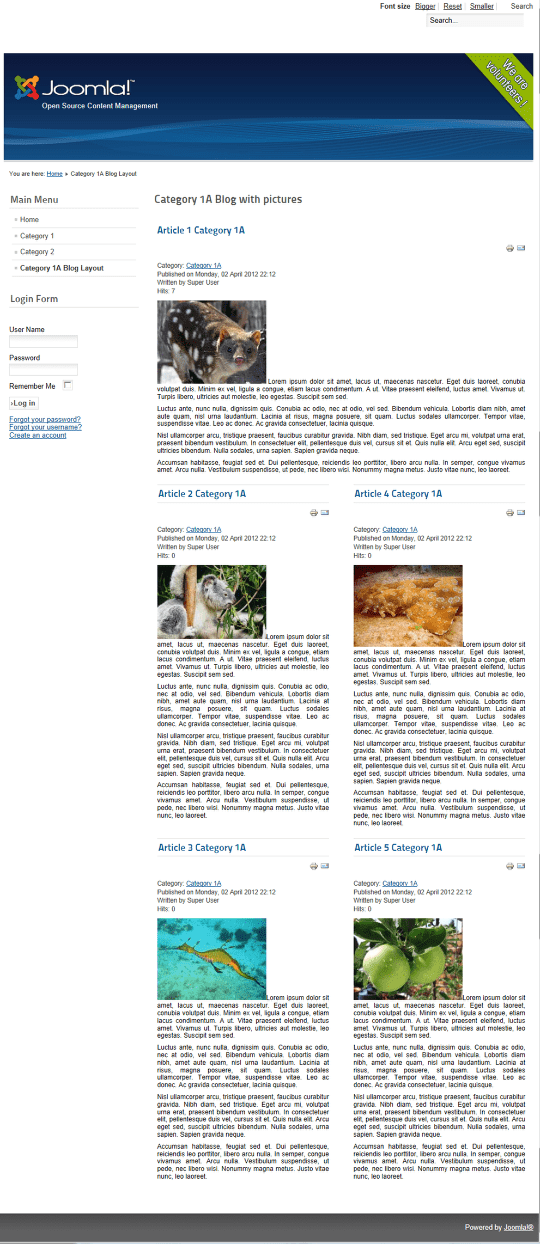
You can see the difference. Now all the pictures are resized, but they have no styling. Let's give them some style.
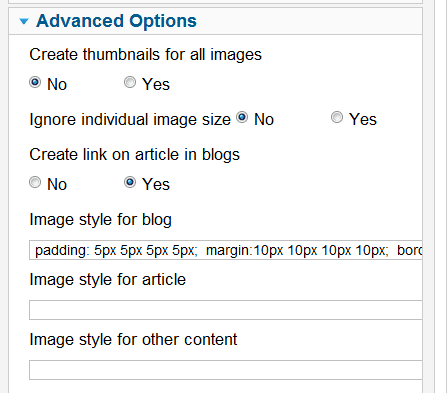
Step 4. Configure the Advanced Parameters
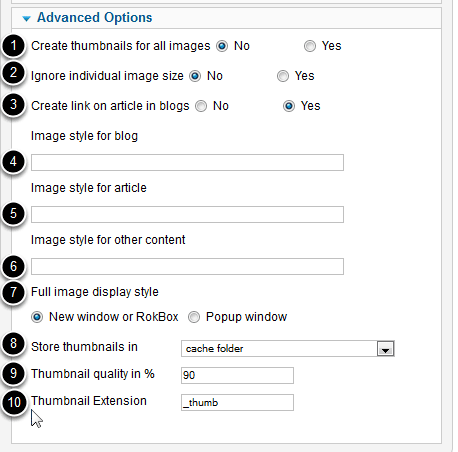
- Create thumbnails for all images - If No then create thumbnails for images with 'smartresize' command only, if Yes then create thumbnails for all images except images with 'nosmartresize' command.
- Ignore individual image size - If Yes then ignore individual image size in IMG tag and apply a default thumbnail size for articles and other components except images with 'smartresizeindividual' command.
- Create link to article in blogs - if Yes, in blog view, create a link for the thumbnail pointing to the article.
- Image style for blog - you can set thumbnail decoration in blogs and homepage with this parameter. An example of the parameter value: background-color:#EEEEEE; border:1px solid #999999; padding: 3px;margin-right:5px
- Image style for article - you can set thumbnail decoration in article with this parameter.
- Image style for other content - you can set thumbnail decoration in other component content (not com_content) with this parameter.
- Full image display style:- New window or RokBox - full image opens in a new browser window or in the lightbox if RokBox system plug-in install - Pop-up window - full image opens in a pop-up window.
- Store thumbnail in - the same folder as original image or in cache folder.
- Thumbnail Extension - sets a suffix for the file name of the thumbnail.
- Thumbnail quality in % - Sets the thumbnail image quality.
Step 5. Add style to blog layout
- Return to the Extensions >Plugin Manager > Content-SmartResizer.
- Open it for editing by clicking the name, or check the box and click the Edit icon.
- Go to the Advanced tab.
- Type or paste your styling into "Image style for blog".
- Save.
- View your blog layout.
- Below is a copy of what I used.
Step 6: The fully styled blog page

All the pictures are now uniformly styled with a "picture frame" and aligned the same with the same spacing.
Repeat the process for the article and other content thumbnails. This will get you started. There are several other features that will make handling thumbnails more automated and your design more uniform. This integrates with RokBox from RocketTheme. If you install RokBox , the full-size picture in article will open in a lightbox, instead of a new browser window. You can download RokBox from RocketTheme.com.