Not everybody needs the ultimate shopping cart. Small businesses with simple products don't need all the options, but they still need a quick way to handle products.
We're going to take two plugins, and combine them with Joomla's core articles to create a great, easy to manage shopping cart.
1. Install Content Templater and SimpleCaddy
You can download Content Templater here.
You can download SimpleCaddy here.
We already have tutorials on these two extensions.
See these tutorials for installation and configuration tips. After these are installed properly, we are going to use them together to increase the power of Joomla.
2. Create a product page template in Content Templater
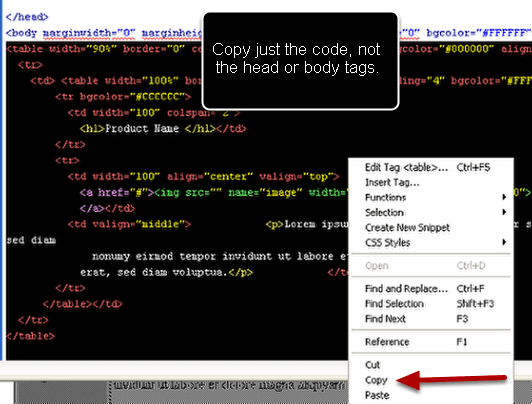
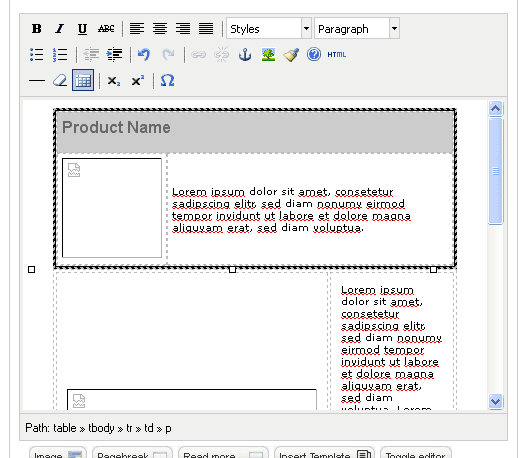
First fully design your product layout. This could be as short as a picture and a paragraph or an entire page. Fill the template with placeholder images and placeholder text. I like to do this in Dreamweaver then paste it into Joomla to avoid timeouts and to automatically have an off line copy.
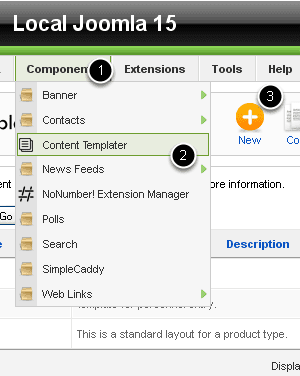
3. Open Content Templater and create a new template
Go to Components > Content Templater > New and open the editor. After filling in the product code and description of the template, move down to the editor window, click Toggle Code bottom of the window and paste the code you copied from Dreamweaver if you did it that way.
Or start from scratch and create your design in the editor.
4. Paste it into the editor window using the text mode
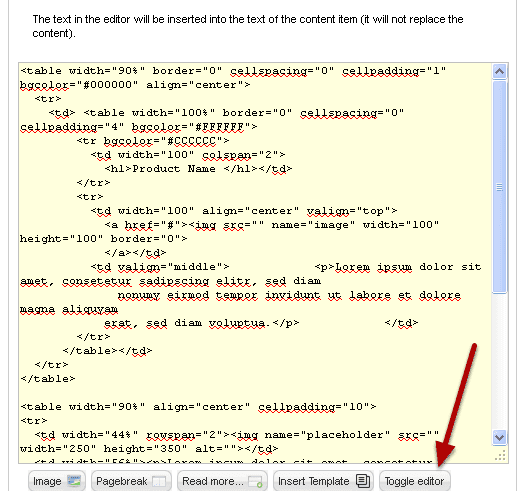
Depending on what editor you have installed you may or may not see a Toggle Editor button. It may be say HTML or give some other indication that you can enter text. It may be on the toolbar instead of at the bottom.
5. Switch back to the layout view
You'll see your entire layout in the editing window, and you can now make some additions or changes if you need to.
6. Add a Read More link after the intro paragraph
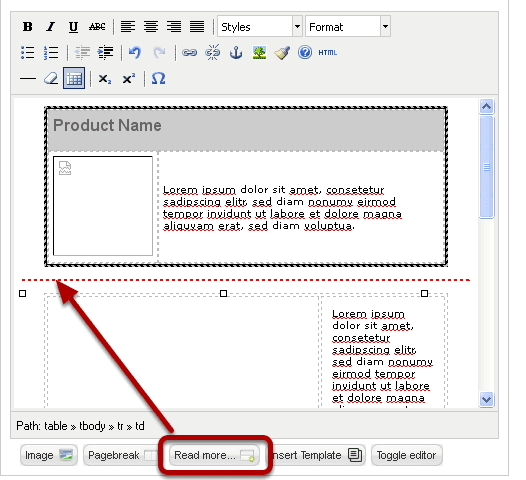
Insert the cursor below the introduction and click Read more... to insert the link.
7. Add the SimpleCaddy code
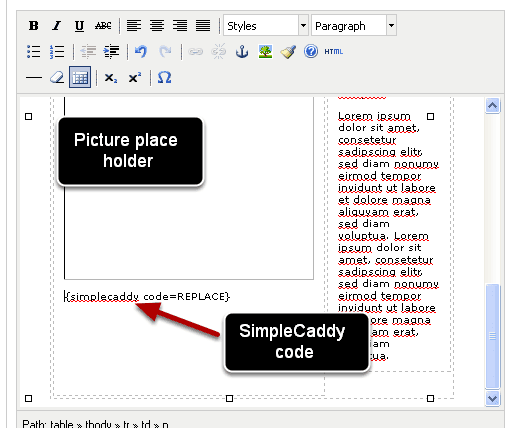
If you didn't already do it, or you're not using Dreamweaver or other editor, type in the short code for the SimpleCaddy information. See the SimpleCaddy tutorial for complete instructions.
Put a placeholder text after the equal sign. You will be replacing the word "REPLACE" before you publish.
8. Before saving set the Auto Load default
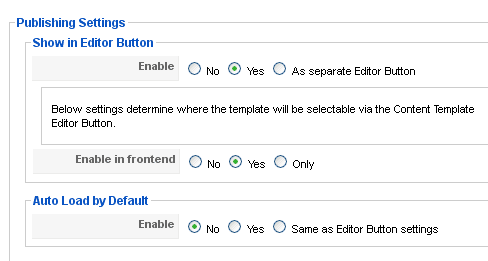
If you have a lot of pages with identical layouts to make, set Auto Load to enabled (green check mark). Then every time you start a new article the template will be automatically loaded. If you disable it (red x), you can insert it manually from a button at the bottom of the article editing window.
9. Save and exit, double check the auto load
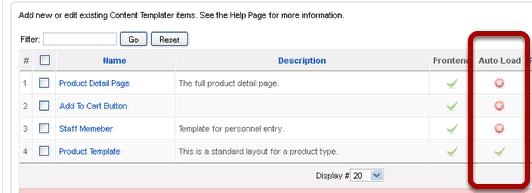
You have to click the template name and reopen the editing window to change the Auto Load status.
10. Create sections and categories for your articles if you haven't already done that.
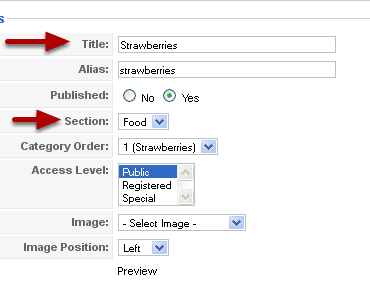
Before you create articles, be sure you have your sections and categories for your products already entered. If you don't, do it now. Go to the Article Manager and create pages like usual. I am going to create two categories under Food. Strawberries and Cherries.
You also need to create product categories in SimpleCaddy. That is a separate operation. The categories you create for this step will be normal article sections and categories.
11. Insert the template into the article editing window.
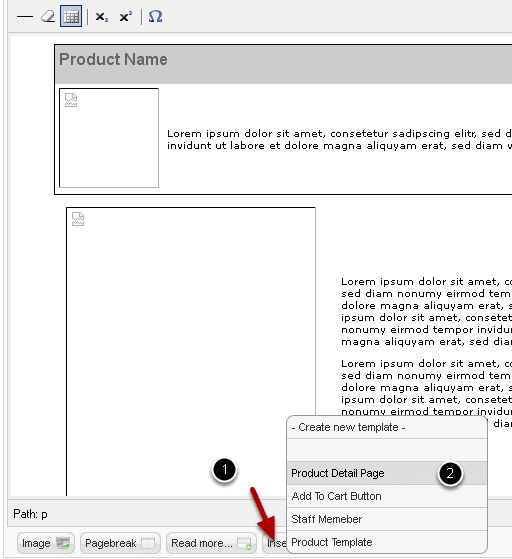
If you picked Auto Load as the default for this template, it will already be visible in the editor window. If not, then click the Insert template button and choose the one you want to insert.
12. Replace your pictures and add short codes.
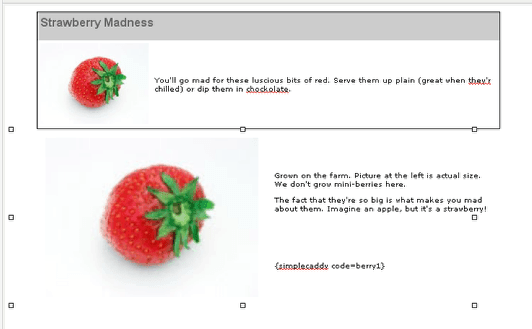
Replace your placeholders with real pictures and replace "REPLACE" in your SimpleCaddy code with the code for this product. Full instructions for downloading and installing SimpleCaddy can be found in our SimpleCaddy tutorial.
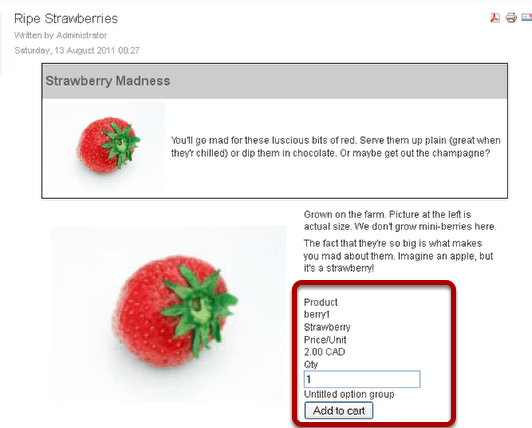
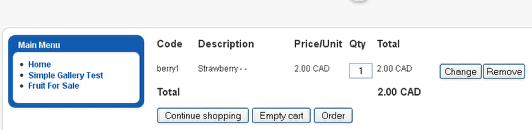
Here's what you'll get. Notice the Add to cart button generated by the simple caddy code. Now just do this same thing for all your products. Make a separate detail page for every product using the template. After that you can make a product index page by creating the proper menu item.
13. Create a menu item to your shopping items
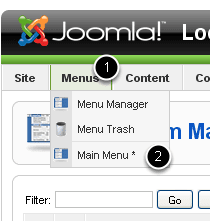
Go to Menus > Main Menu and click New to create a new menu item.
14. Create a Menu Item that is a Section Blog Layout
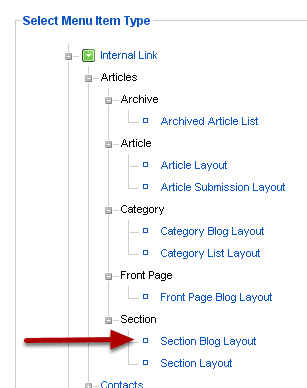
We're going to make an index page that lists all the items. It's going to be automatically generated by the blog layout. So Joomla does the work for you. You could use other layouts. you just need to experiment to get what you want.
16. Give it a menu item title and publish it
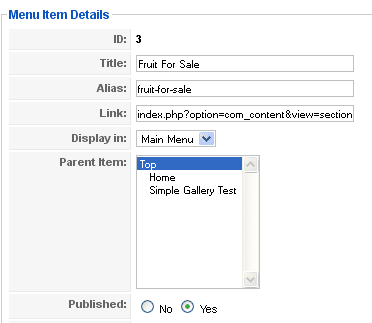
The title in the Menu Item Details is what will actually show up on your menu.
14. Set the Basic Parameters
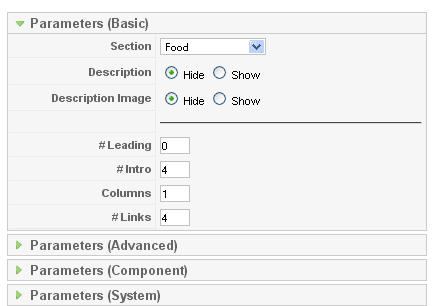
Set Leading to 0 and change the number of Intro's to show the number of products you show on the page. For this layout, I chose to show it in one column, but you could try other numbers of columns.
15. Choose the Component Parameters
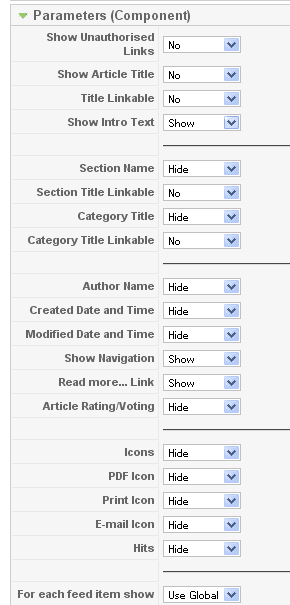
These are the choices I made for this example. What you choose will depend on what you're showing and what template you are using. There are many configuration and CSS changes that could enhance this layout.
What I've tried to do is show you how you can use the native power of Joomla, plus the simplest of add-ons, to create powerful automation for a shopping site.
The result - an automatically generated product page
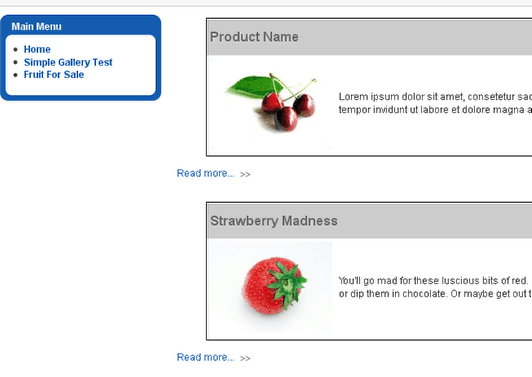
Simple but effective. Using Read more... we automatically create the link to the detail page. We have tutorials that will show you how to change the Read more... label and our coding tutorials will show you how to manipulate the css to make an impressive design.
Clicking Read more... takes you to the shopping page with the Add to cart button
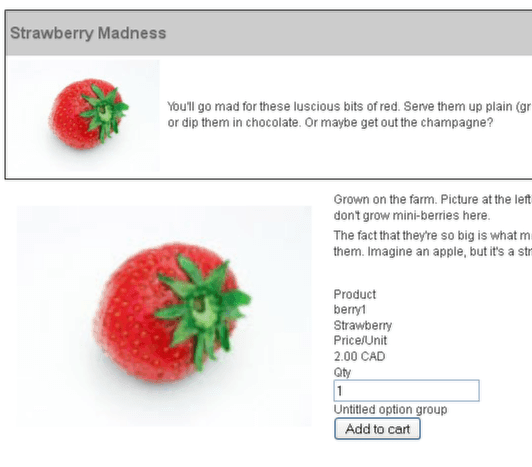
The Add to cart button takes you through checkout page and processes the payments through PayPal.