 SobiPro is a great Joomla extension. It allows you to create completely custom displays for the information you need.
Let's take an example. You buy, sell or make guitars and you need to build a catalog to show them. You're going to have someone type in your product list with all sorts of information that is specific to your guitars. A basic Joomla article simply has a title and a body, with no special fields for the price, the manufacturer or other information that is vital for your customers.
SobiPro is called a Content Construction Kit (CCK) because it allows you to construct the content that you want. It allows you to create a custom display for the information you need. We've also written documentation for K2 which is another Joomla CCK.
So in this tutorial we are going to build a guitar catalog and you'll see the power of SobiPro.
Workflow - Prepare your categories and entry fields
Before you start it will be a good idea to work out the profile of your product and what attributes describe it. Determine what details you need to create your content type. Here's what you need to do:
- Create Categories
- Create Fields
- Add Data
- Publish
We'll be working from this list which describes everything needed to make each entry unique.
- Manufacturer
- Model Name
- Serial Number
- Type
- Pickup
- Short Description
- Long Description
- Company logo
- Picture 1
- Picture 2
- Picture 3
Decide what type of field you will need to describe each. Do you want a text field for manufacturers? Or a drop down showing only specific ones to choose from? Instead of a Manufacturer field, you may want the manufacturer to be a category. It takes some experience to know whether a piece of information should be a category or a field. This will be come clearer as we build our catalog.
I've decided to give each manufacturer it's own category. You may do it differently. You can accomplish about anything you want with this, but the ultimate goal is to make data entry foolproof, and search and display easy for the site visitor. If you've never done this before, do a simple version and check it out before you try a large project.
Step 1. Download SobiPro
SobiPro was originally built as a directory product, but has evolved something more. There is a commercial version but the non-commercial version is fully functional, and is loaded with some very good examples. Many people are familiar with Sobi2, which has been around for quite some time and is still a viable option. SobiPro is a complete rewrite with many new features, with nested categories.
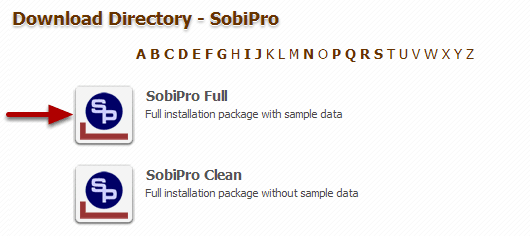
You can download SobiPro from https://sobipro.sigsiu.net/download/sobipro
(You can find other CCK's in the JED https://extensions.joomla.org/search?q=content+construction
Download the Full edition. It's the same as the "Clean" addition, except it comes with sample data and is free to download. You need to pay to join the Sobi Club to download the "Clean" edition.
Step 2. Do a standard install in Joomla
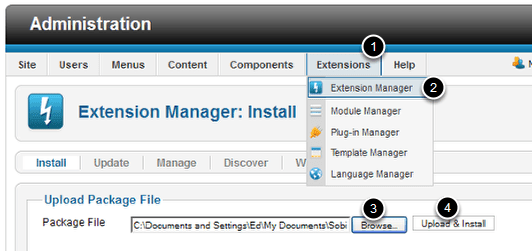
Go to Extensions > Extension Manager and Browse for the file you downloaded then click Upload & Install.
The same download works for both Joomla 1.5 and 1.7
Step 3. Go to the control panel and add a new section
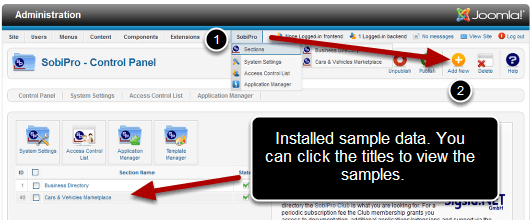
Go to SobiPro.
The plugin adds a new button to the toolbar specifically for this extension. This is different than other extensions that add items to the Components menu. When you click on Sobi Pro you will see list of installed samples. You can open these and refer back to them if you need to see examples.
Click Add New to create a new section.
Step 4. Name and Description and Parameters
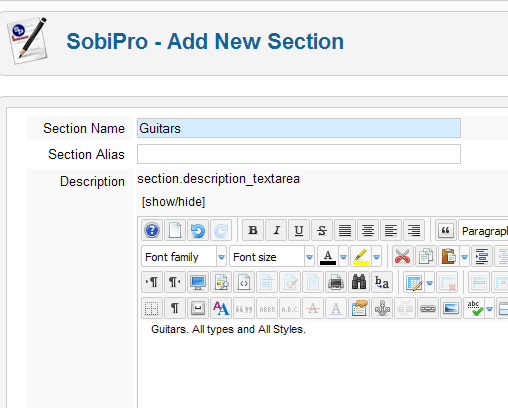
Name the Section and give it a description if you choose.
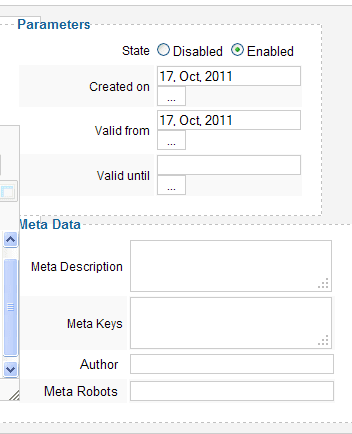
There aren't a lot of parameters to set. If you're not ready to publish, be sure to disable so the public won't be able to view the section until you have it ready.
Save your work using the Save icon at the top right of the page in the toolbar, as usual.
Step 5. Return to the Control Panel and add categories
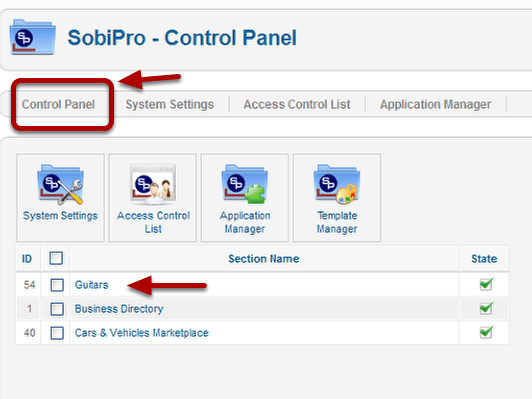
Click the Control Panel tab to go back to the control panel and you will see your new section, "Guitars".
Click the section name to start adding categories. You'll be taken to the Section: Guitars page.
Navigation Tip: Or you can get there from the SobiPro menu. Go to SobiPro > Sections > Guitars
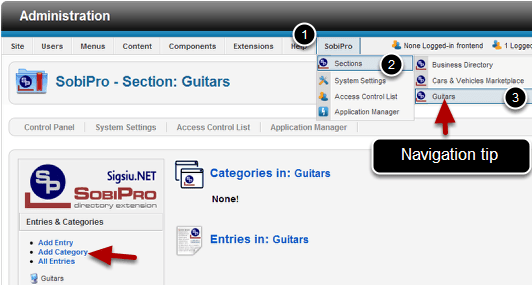
On the Section: Guitars page.
Click Add Category.
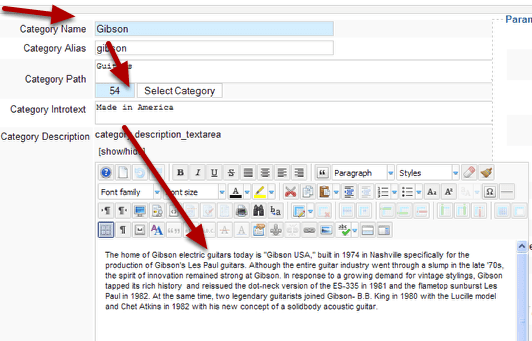
Give it a name, intro text (optional) and a description (optional) plus any other parameters you deem essential.
If you want you could create subcategories by repeating this process and selecting the correct parent category.

This is what your side menu will look like. Go back to the control panel. To add more categories on the same level, click Add Category and repeat the steps.
Step 6. Create the additional categories
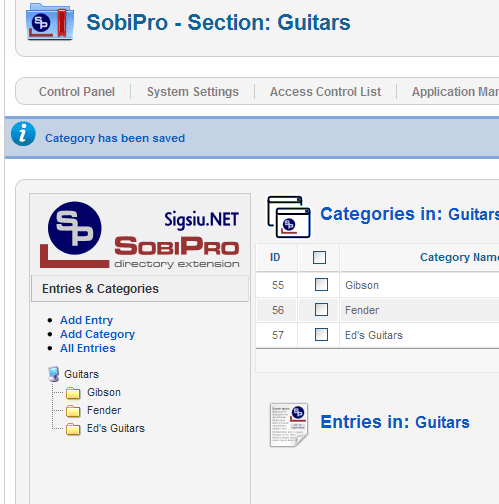
When you are done, your Guitars section should look similar to the above, with three categories and the section under "Entries in: Guitars" is blank. You can't really create any entries yet, because there is no way to enter entries. You will need to create the fields for your data base next.
Now we want to enter the model name or number to describe what kind of Gibson or fender this is. There are several ways you could do this. You could create sub categories, one for each model of guitar you have. Or you could have a selection list like a drop down list or radio buttons. This may seem simple, but it has a big impact on the end product.
What you do with the fields will determine what the output looks like, how easy it is to search, what kind of menu items you can create and the overall user experience. On a small site this isn't very critical, but if you expect to have thousands of items, or want to be able to scale it up later, some forethought will serve you well.
For this demonstration, we are going to make this a simple text field. Let's say we have used guitars and we make some of our own. We don't know what we're going to have in stock, so we want to be able to change this field as the task demands. A text field will work well.
Step 7. Add fields
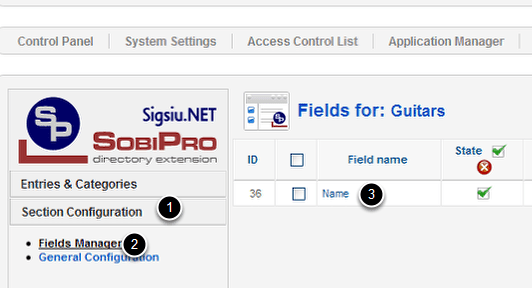
Click Section Configuration > Fields Manager
Click on "Name" (Directly on the word, or select the check box and the edit button at the top right.)
The left side module in SobiPro is an accordion module. If you click the name of the heading you will see the choices for that menu item. There is a default field that Sobi added for you called Name. change this to Model Name, and we can reuse it.
Step 8. Modify the Name field
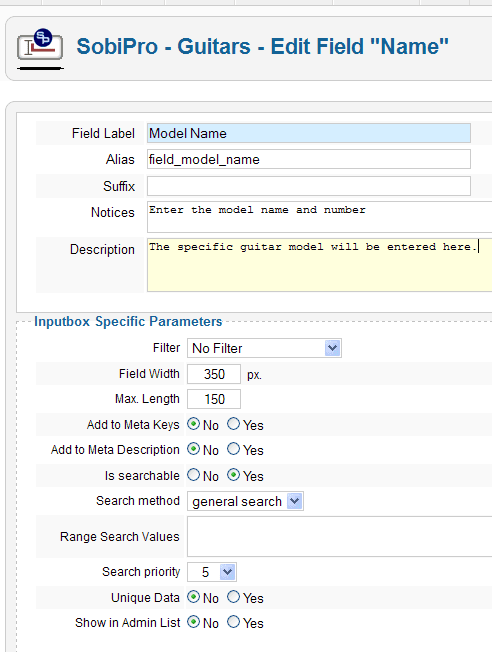
- Filter - This allows you to set an Input Filter so Users can only enter specific types of information into the box. See SobiPro Input Filters for more information.
- Field Width - Used to set the width of the Input Box in the Add Entry Form.
- Max Length - The number of characters allowed to be entered into the field.
- Add to Meta Keys - No or Yes. Adds the content to the Keyword Meta data displayed in the Head tag of your site.
- Add to Meta Description - No or Yes. Adds the content to the Description Meta data displayed in the Head tag of your site.
- Is Searchable - No or Yes. If set to no, the content of this field will not be found when using the SobiPro Search.
- Search Method - Set the way you want this content to be found through the SobiPro Search page.
- General Search - Includes this field when user's search from the main SobiPro Search box.
- Select List - Creates an Extended Search Field with data in a Select List.
- Range Search - Allows users to search through a specific range of numbers in the extended search view for this field.
- Range Search Values - enter comma separated numbers to search from/to. Example: 100,200,300,400,500,600,700,10 000,11 000,12 000,
- Search Priority - Select the importance of this field in SobiPro search results on a scale of 1 to 10, with 1 being most important.
- Unique Data - No or Yes. Require the user to enter unique data into this field. Example, if the user creates a listing title that is the same as one already entered in the database, an error will require the user to enter a new title in the field.
- Show in Admin List - No or Yes. This setting will add a column to the Admin Entries List in the Administrator Category View. For example, if you added the field 'Cities' to Show in Admin List, you could then sort the entries in the back-end by City.
Step 9. Additional Field Parameters
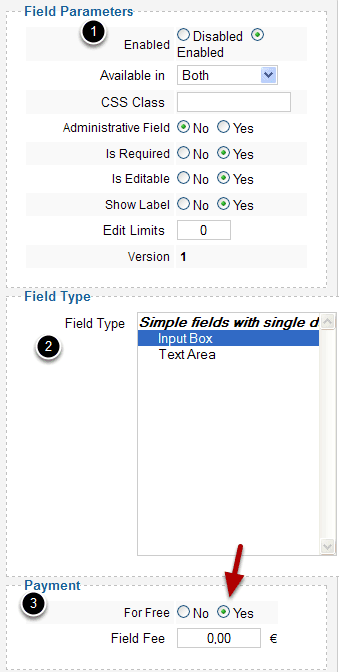
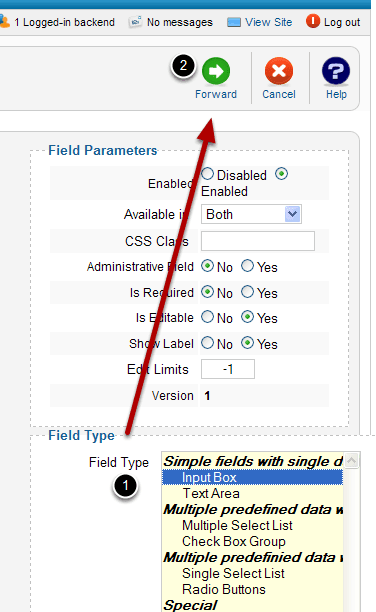
1. Field Parameters
- Enabled - Disabled or Enabled. Whether the field is published or not.
- Available in - Whether the field will display in vCard View, Detail View or Both.
- CSS Class - Allows you to add a CSS class that will be added to the output in the template.
- Administrative Field - No or Yes. Makes this field visible to Administrators Only.
- Is Required - No or Yes. Let's you choose whether to make the Field required when a user's Adds an Entry.
- Is Editable - No or Yes. Sets the field to allow data to be entered only upon initial entry, or if the field can be entered any time the entry is edited.
- Show Label - No or Yes. Sets the Label to visible in the Front-End templates. In the Add Entry Form, the Label is always visible.
- Edit Limits - Allows you to set the number of times a User can Edit their entry. Set to 0 by default, means a user can edit the entry an unlimited amount of times.
- Version - Shows the number of times the Field Parameters have been edited from the back end.
2. Field type
- Field Type - The Input Box field type was selected during the Add New Field screen, but can be edited to make this into a Text Area instead of an Input box. If you want to modify the Field Type to something different than a Text Area or Input Box, you will need to create a new field.
3. Payment
- For Free - No or Yes. Allows you to charge for the field or keep it free when Users add an entry.
- No = they pay.
- Yes = it's free.
- Field Fee - The amount you charge for Users to enter data into this field if the field is set to For Free (No).

When you are done you will see the list. Now just enter the rest of fields and setting the parameters for each.
Step 10. Add the serial number field and make it unique
Click Add New, Fill in the FIeld Label and Alias and other parameters as you did before, but this time
- Choose the Field Type - Input Box
- Click the Forward button at the top
This time the Field type has not been chosen by default. So you will have to choose the field type from the box on the right. The forward button will take you to the screen where you can fill in the rest of the details.
Step 11 Make the field unique, administrative and searchable
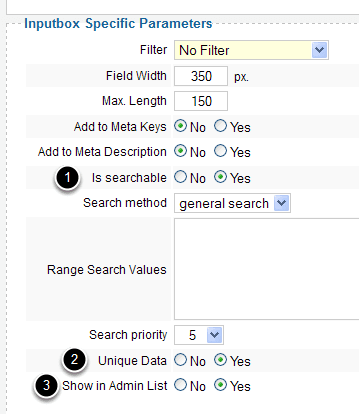
- Is searchable - Yes
- Unique Date - Yes
- Show in Admin List - Yes
- Save
Step 12. Add Type field - a multiple selection list
Go back to SobiPro > Sections > Guitars > Field Manger > Add New to add a new field.
Give the field name "Type" and fill in the basic parameters as before.
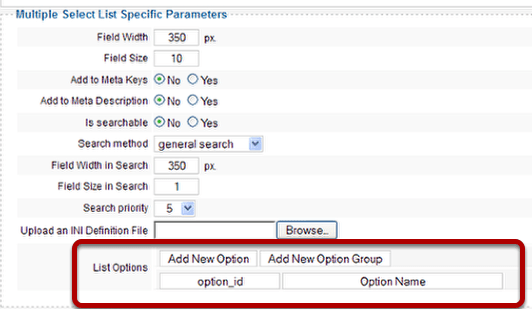
Choose "Multiple Select List" in the Field Type box on the right side.
Click the Forward button
You will see a new section with some different choices. and a place to enter the options.
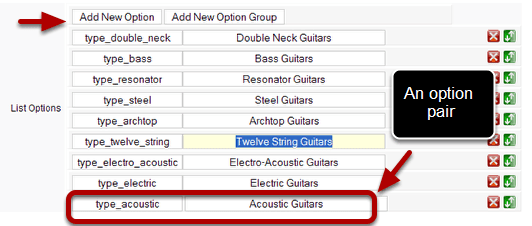
Make it a selection list with these selections:
- Acoustic guitars
- Electric guitars
- Electro-acoustic guitars
- Twelve-string guitars
- Archtop guitars
- Steel guitars
- Resonator guitars
- Bass guitars
- Double-neck guitars
Add options to the Type field.
Type the option id in the left column and the Option Name in the right column.
Click Add New Option and add another set. Keep adding till you're done.
When you create options they always come as pairs - one to go in the database, and one to show on the site. The left column is for the data base and has no punctuation or spaces. The right column is easy to read, and will be available to the administrator and possibly the public if you choose.
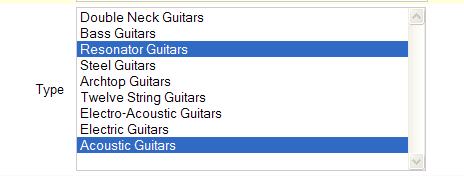
We created a multiple selection list with our choices. By holding CTRL and clicking we can make multiple selections. You could have also chosen Checkbox Group as the Type and you would see check boxes here instead of a list.
Why a multiple selection list?
Most manufacturers make several types of guitar. The broadest categories are Acoustic and Electric. We're going to keep it simple in this tutorial, but this is where planning is important. Electric guitars all have sound pickups. Acoustic guitars in the past didn't have pickups. Now you can get acoustic guitars with electronics installed. So would that be another type, as we decided by creating the Electro-acoustic type, or should our list look like this?
- Acoustic guitars
- Electric guitars
- With Pickups
- Without Pickups
In which case you would apply multiple fields to the same entry so you could create several types: Acoustic-With Pickups, Acoustic-Without Pickups, by choosing multiples from the list. You could accomplish it either way, but this is where good planning and some testing comes into play. Creating too many choices could make adding and finding information too cumbersome and confusing. Too few choices might make it hard to classify.
Step 13. Create a Pickups field - a single select field
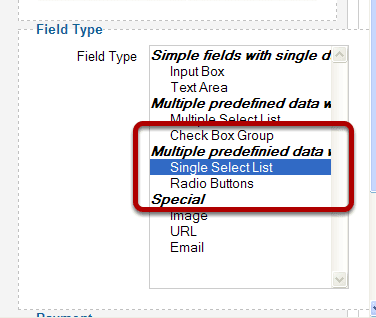
Same process, except this time choose Radio Buttons or a single Single Select List. A single select list will be a drop down that only allows you to make a single choice. Radio buttons are similar, but you check the button rather than select from a list.
Each guitar can have only one kind of pickup in it. Choosing Radio Buttons means the person entering has to make a discrete choice.
Step 14. Add options to Pickups
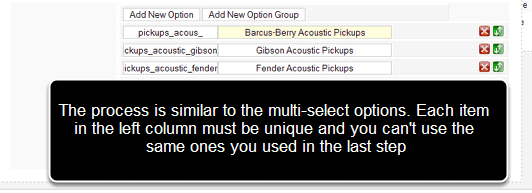
add these options as radio buttons. You'll have to create option pairs again. The same as the multiple option field. But the administrator will only get to choose one to enter. The set up is the same as the multiple option field, but the end result is slightly different.
- Barcus Berry Acoustic Pickups
- Gibson Acoustic Pickups
- Fender Acoustic Pickups
- Humbucker Electric Pickups
- Gibson Electric Pickups
- Fender Electric Pickups

Radio buttons on the form.
Step 15. Create a short description or "Teaser" paragraph
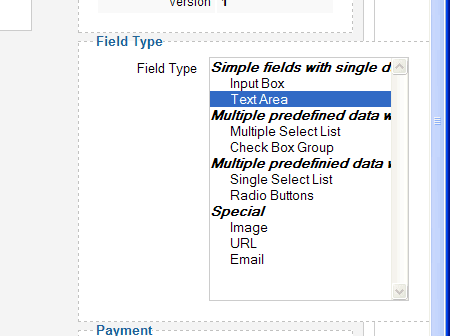
Add a new field and choose Text Area as the Field Type. Name it "Short Description".
You should name this field "Short Description" if you are using the default template. That way the field will show in the position assigned to that field in the default template. To see examples of each of the field types used in the default template go to the Business Directory section and the fields manager and see how the fields are set up there. There is also a Cars section you can look at for other field types to use as models.
The template uses code to pull the data using the Field Alias. So if a field you create has the same alias as one of the sample fields, it will appear in the same place in the template. If you have created a custom template you could name the fields anything you want, but since we're using a default template we want to try to use the names that are already in use.

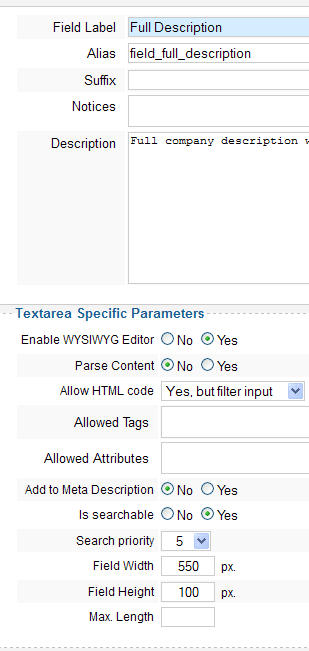
As expected, you get a new set of parameters to choose from. We want to keep this simple so you don't need to allow WYSYWYG and don't need to allow HTML. The example in the Business template is set up as above.
If you know what you are doing you can allow various tags or attributes, or copy the ones.
Limit the length of copy that can be entered to 300 characters, or whatever you feel is adequate. You can put any number you want in the Max. Length field.
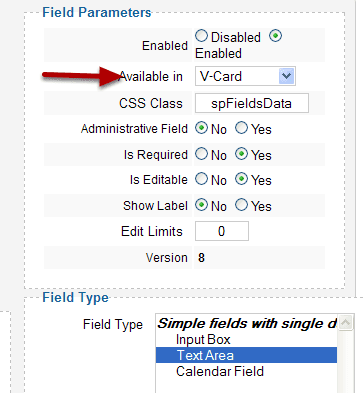
Set the short description to only be available in the V-Card (which is what Sobi calls the intro paragraph template.) Adding the CSS class will invoke the styling for the entry.
Step 16. Create the full description field
This time make different parameter choices. This is a copy of the settings in the Business category example.
Below are the settings for the other parameters.
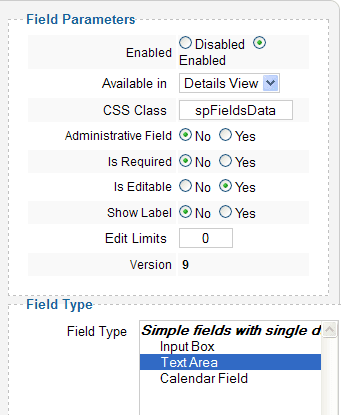
This is set so that it only shows in the Details View and the CSS class has been applied.
Step 17. Create the image fields
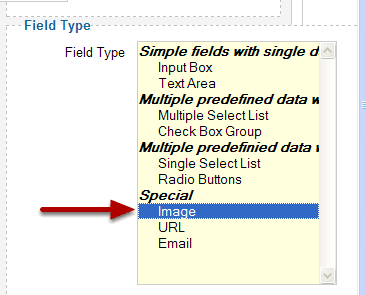
We've allowed for a logo and three pictures. You can can create more if you like. Create more fields and choose Image as the Field Type.
Step 18. Set the image parameters
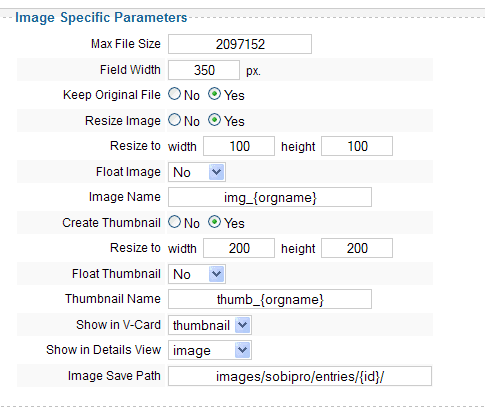
Tip: for the logo field resize the image to be small. 100x100 is ok. Final image sizes will depend on your design choices and your template.
- Max File Size - Enter a number in bytes that will restrict how large the image file size may be for each upload. Default: 1048576 is equal to 1048KB, or approximately 1MB.
- Field Width - How wide you want the upload box to be in the Add Entry Form.
- Keep Original File - Yes or No. Allows you to delete the original image file automatically after upload. This is good if your server is limited on disk space.
- Resize Image - No or Yes. Allows you to resize all uploaded images to the specific width and height below.
- Resize To - Width and Height you want the uploaded image resized to.
- Float Image - No - Right - Left. This will add a CSS style of float:left or float:right to the image in the default template output.
- Image Name Allows you to generate the file naming structure for image uploads. Default for image is img_{orgname} which will rename yourimage.jpg to img_yourimage.jpg
- Create Thumbnail - No or Yes. If set to yes, another copy of the image will be created based on the size and name you set below.
- Resize To - Width and Height you want the thumbnail image resized to.
- Float Thumbnail - No - Right - Left. This will add a CSS style of float:left or float:right to the thumbnail image in the default template output.
- Thumbnail Name Allows you to generate the file naming structure for the thumbnail. Default for image is thumb_{orgname} which will rename yourimage.jpg to thumb_yourimage.jpg
- Show in V-Card - Thumbnail - Image - Original. Select which version you want to show in the Category View V-Card.
- Show in Details View - Thumbnail - Image - Original. Select which version you want to show in the Details View.
- Image Save Path - Lets you choose where the uploaded and resized images will reside on your server. Default value is images/sobipro/entries/{id}/ which will create a new folder with the entry ID as the name of the folder with all the images from that entry inside it.
Step 19. Return to the Guitars Section Fields Manager and check your list
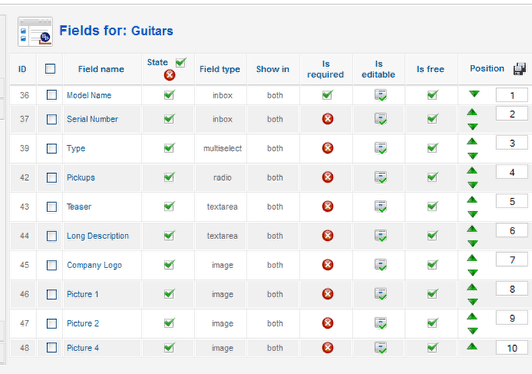
After you save your changes you will be returned to the Fields Manager, and you can see all the fields you just created, plus some of their parameters.
Step 20. Add an entry

In the left column, click the Entries & Categories header and then click Add Entry
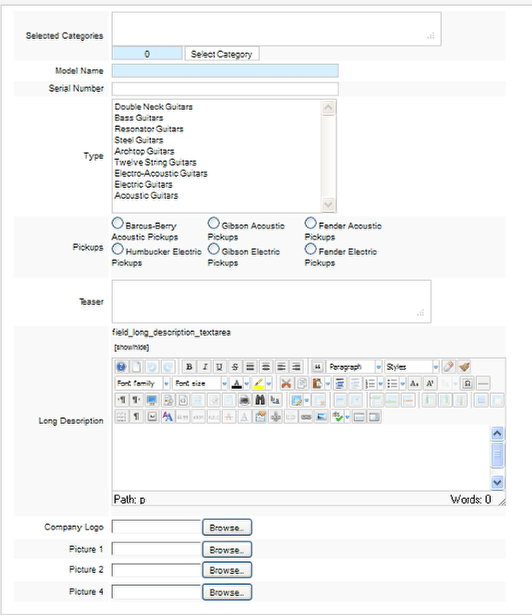
Here's what your entry form looks like. Now all you need to do is fill in some entries. Create some test entries so you'll be able to see the results on your site.
Step 20. Create a menu item to link to the list and show your catalog
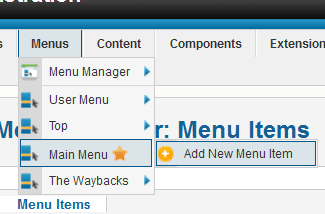
Go to Menus > Main Menu > Add New Menu Item and add a menu item.
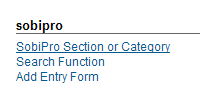
Choose SobiPro Section or Category
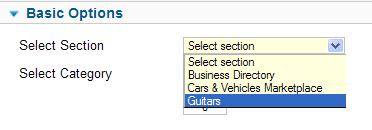
Choose Guitars and set other menu parameters, then save.
Step 21. Preview your site.

Go to your Home page and click on the menu item you created. You'll see a category page similar to this, depending on what choices you made and what template you are using. Drill down to the category Ed's Guitars. (or wherever you put your test entries.)
Sample of a listing in the catalog
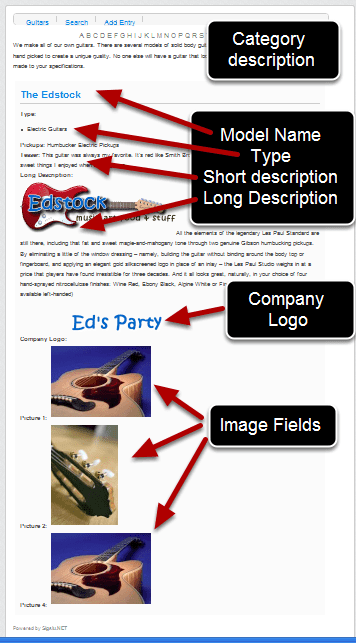
This is the result if you use the default template with no modification. Not very pretty, but then it's the free default layout. This could look a lot better, but you'd need instructions on the smarty template system that's used by SobiPro.
The workflow, the categories, fields and organiztion are essential skills for any type of extension that produces lists and allows extra fields and options.